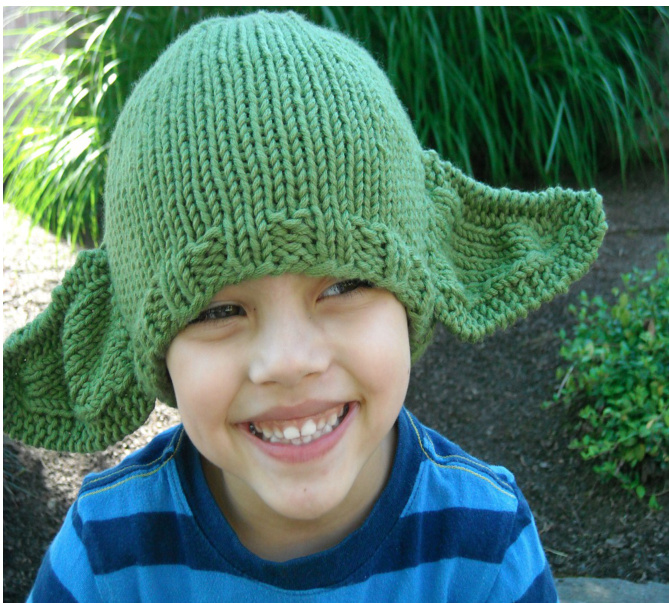
Force You Shall Feel Yoda Inspired Hat
Materials:
1 Skein Chunky Weight (I used Berroco Comfort Chunky) Size 9 Circular Needles Size 9 DPNs Size J crochet hook - if desired (for attaching ears) OR a large yarn needle
Instructions:
\*\*To fit an (approximate) 5-8yo\*\* Cast on 60sts and join to work in the round Work 5 rounds in 2x2 ribbing (Should measure about an inch) Change to Stockinette (stocking if you're from the other side of the pond) Stitch- work until hat measures about 5 inches - or length desired Decrease rounds (Change to DPNs when necessary): K8, K2tog 一K next round 一K7, K2tog 一K next round 一K6, K2togK next round K5, K2tog 一K next round 一K4, K2togK next round 一K3, K2tog 一K2, K2tog 一K1, K2tog -K2tog Break yarn, leaving a tail, weave through remaining sts, weave in ends.
Ears:
\*\*Note - the first and last 3 sts of each row will be knit to create garter stitch border\* CO 15sts - leave a long tail for attaching the ears to the hat later - trust me, it's easier to already have the yarn there. R1: Knit across all sts R2: K3, P9, K3 Continue these rows until the ears reach about 1.5" in length
Ear Decreases:
- You may use whichever decrease method you prefer, k2tog, ssk, whatever :) All decreases will be made on the RS. This is more of a guide, than actual pattern at this point. PLEASE read the 3rd section before beginning. Decrease Row 1 - K10, K2tog or SSK, K3 Next row, K3, P8, K3 Continue making decreases every two or three rows - make sure that they are always on the BOTTOM of the ear - so, for one ear, you will do the decreases on the last two stitches before the border, the other ear you will do the decreases on the first two stockinette stitches directly after the border. Otherwise, you'll end up with two of the same ears.. which, in the grand scheme of things, isn't that big of a deal - Yoda has weird ears, so... Continue in this pattern, adjusting with an extra decrease in a row if you feel like they are getting too long, until you wind up with your border stitches - 6sts remain. You can either do a couple decrease rows to make the ears more pointy, or leave them more blunt - there are several different Yoda incarnations, so it just depends on how true to Jedi canon you want to be. Bind off using your favorite method.
Setting the Ears:
- I tend to set my ears a bit toward the back, most people have a greater distance from front of ear to front of ear than from back of the ear to the other back of the ear. - I usually use the center back and just count a few ribbed sections on either side. Ears may be stitched or joined using a crochet hook if you prefer. Voila! You're done... if it isn't perfect... well, have you SEEN Yoda's head? It's all wrinkly and mottled! Your favorite Star Wars fan will be delighted that you made the effort - especially if it is a kiddo! These ears are NOT designed to stand straight out. There are other patterns you could find for that. These are intended to be more floppy - as they are in the original episodes. If desired, you could always weave a green pipe cleaner in the back of the ear - as long as the recipient knows to remove it whenwashed. If you have any questions, feel free to contact me via Twitter (@Kusalaknits), Etsy, Facebook, or good old fashioned e-mail at Kusalaknitworks@gmail.com. By all means, please feel free to make for friends, family, charity groups. If you would like to sell products made from this pattern, please contact me prior to listing. This pattern is not to be resold. This pattern is original, any similarity to existing patterns is coincidental and unintentional, and I do not claim any affiliation with LucasFilm, LucasArts, Skywalker Ranch, or Industrial Light and Magic.


