Amigurumi Oddish crochet pattern
by Rebekah Frank Ravelry: franklybeka E-mail: franklybeka@gmail.com
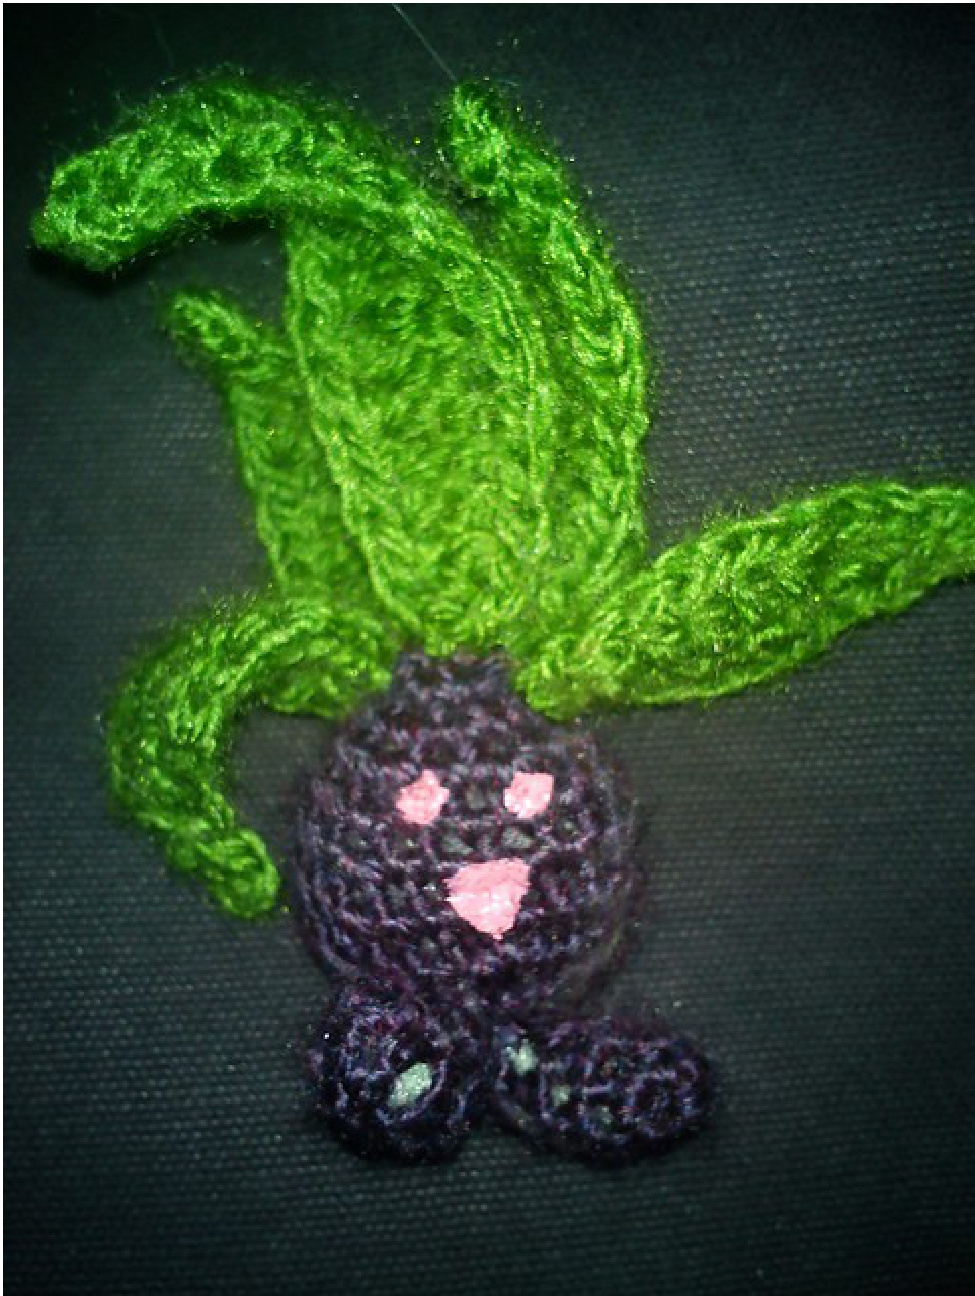
Photo: Rebekah Frank Originally I didn't want to put this on Ravelry, what with Oddish being a pokemon, and therefore not my intellectual property. But what the hey, it's free, and I'm not claiming the character as my own. So if Game Freak has a problem with it they can let me know, and I'll take it down. I made about a dozen tiny oddish as a birthday gift for a friend's daughter. I used Bernat satin plum heather andVanna's Choice kelly green yarn, stuffing from an old pillow, and Scribbles shiny delicate rose fabric paint. This pattern is fairly easy, but there are some tricksy bits. I would call it intermediate, or a welcome challenge to an accomplished beginner. The finished size of the oddish depends on the size of hook used, but mine were about 5" from feet to tip of tallest leaf. Instructions are written for one Oddish. MATERIALS: 3.5 oz each green and purple worsted weight yarn makes about 12 oddishes Size F crochet hook Stitch marker Stuffing Fabric paint Tapestry/yarn needle and if making more than one, lots of patience. Gauge is not all that important. You want nice tight stitches to keep the stuffing in, but not too tight or the toys become stiff and difficult to work. Feel free to use larger or smaller hooks to make larger or smaller oddishes. Maybe even split the ply of your yarn to make tiny oddishes. NOTES: Unless specified, do not join at the end of the round.
INSTRUCTIONS:
Body: (make one) The body is worked from the top to the base. With purple begin with a magic circle (or a ch2, work in 2nd ch from hook) and work 6sc for first round. Place stitch marker in last st to mark the end of the round. Rnd2: 2sc in each st around. (12sc) Rnd3: sc in each st around. Rnd4: \*sc in next st, 2sc in next st; repeat from \* around. (18sc) Rnd5: repeat Rnd3. Rnd6: \*sc in each of next 2 sts, 2sc in next st; repeat from \* around. (24sc) Rnd7: \*sc in each of next 2 sts, sc next 2 sts tog; repeat from \* around. (18sc) Rnd8: \*sc in next st, sc next 2 sts tog; repeat from \* around. Stuff lightly. (12sc) Rnd9: \*sc next 2 sts tog; repeat from \* around. Finish off, leaving a long tail (8-12 inches). Finish stuffing and weave tail through the stitches and pull tight to close. Feet: (make two) with purple begin with a magic circle and work 3sc for first round. Rnd2: 2sc in each st around. (6sc) Rnd3-5: sc in each st around. At end of last round finish off leaving a long tail (8-12 inches). Stuff and weave tail through sts and pull tight to close. Small leaf: (make two) with green, start with a long tail (8-12 inches), ch 11. Row1: sl st in 2nd ch from hook, sl st in next ch, sc in next ch, hdc in each of next 2 ch, dc in each of next 4 ch, ch2, sl st in next ch, ch2, turn to work along opposite side of the foundation chain. Row2: skip the first ch (the one you just sl st into) dc in each of the next 4 ch, hdc in each of the next 2 ch, sc in next ch, sl st in each of the next 2 ch. Finish off. Weave this end in. [edium leaf: (make two) with green, start with a long tail (8-12 inches), ch 13 Row1: sl st in 2nd ch from hook, sl st in next ch, sc in next ch, hdc in each of next 2 ch, dc in each of next 3 ch, trbl in next ch, dc in next ch, hdc in next ch, ch2, sl st in next ch, ch2, turn to work along opposite side of the foundation chain. Row2: skip the first ch (the one you just sl st into) hdc in next ch, dc in next ch, trbl in next ch, dc in each of the next 3 ch, hdc in each of the next 2 ch, sc in next ch, sl st in each of the next 2 ch. Finish off. Weave this end in. Large leaf: (make one) with green, start with a long tail (8-12 inches), ch 16. Row1: sl st in 2nd ch from hook, sl st in next ch, sc in next ch, hdc in each of next 2 ch, dc in each of next 3 ch, trbl in each of next 3 ch, dc in each of next 2 ch, hdc in next ch, ch2, sl st in next ch, ch2, turn to work along opposite side of the foundation chain. Row2: skip the first ch (the one you just sl st into) hdc in next ch, dc in each of next 2 ch, trbl in each of next 3 ch, dc in each of the next 3 ch, hdc in each of the next 2 ch, sc in next ch, sl st in each of the next 2 ch. Finish off. Weave this end in.
FINISHING:
Attach feet to base of body using your long tails. The feet can be attached in many different positions; sitting, standing, tippy-toe, etc. Tuck all purple ends away. Attach the leaves to the top of the head in the following arrangement. The large leaf is centered with the feet and slightly forward. Between rounds 1 and 2 is good. The small leaves are in line with the large leaf, and one on either side. The medium leaves go behind the large and small leaves. They should be set so as to poke up in the gap between the other leaves. If you are having trouble picturing the leaf placement look at my crummy picture. I had already gifted them and didn't get a better picture before they went out =( You can also look up pictures of oddish on the interwebs (or follow this magical link). Once the leaves are attached tuck in the remaining tails. Use the fabric paint to add faces to your miniature oddish. Once the paint is dry have fun with your new pocket-sized pocket-monster. Alternatively you can use thread or other yarn to embroider faces. 2013 Rebekah Frank. All rights reserved. No part of this document may be reproduced or transmitted in any form or by any means, electronic, mechanical, photocopying, recording, or otherwise, without prior written permission of Rebekah Frank. Note: Only the document and the character are protected by copyright. Feel free to gift, donate, or keep for personal use any object the instructions in this document would allow you to produce. Just don't profit from it; that could get me into legal trouble.


