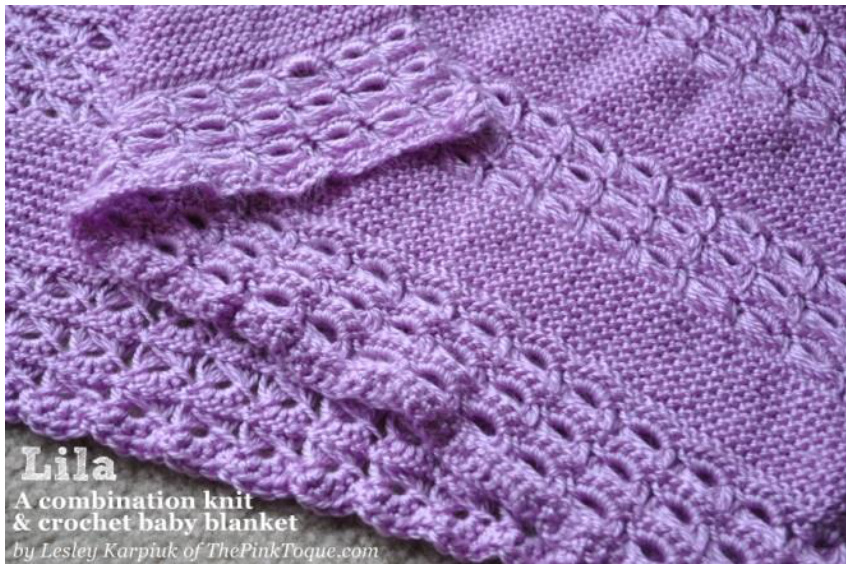
Lila: A Combination Knit & Crochet Baby Blanket
@ January 2014 by Lesley A. Karpiuk http://ThePinkToque.com
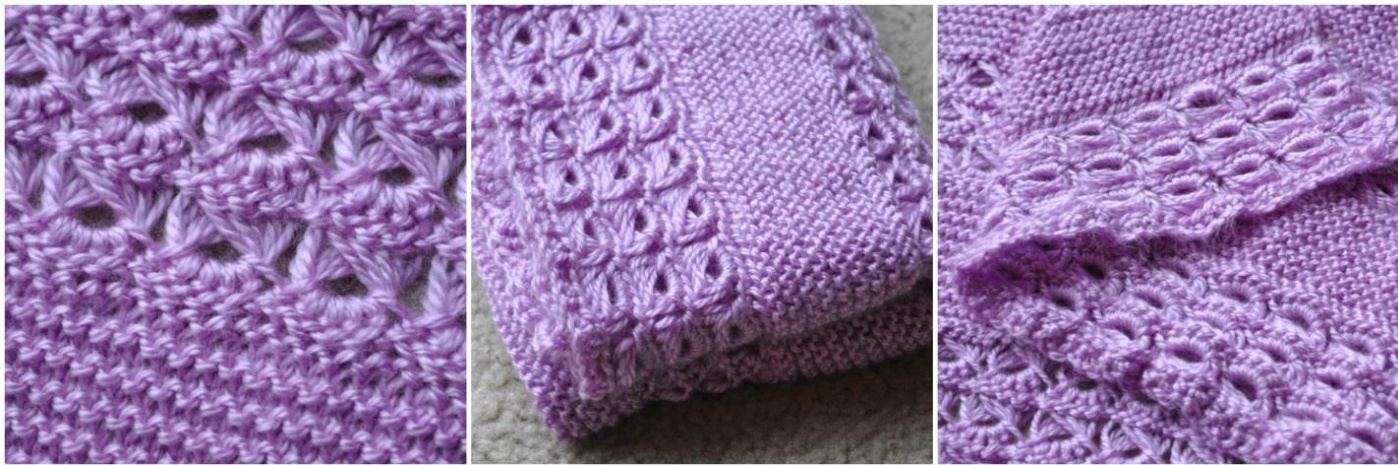
Description
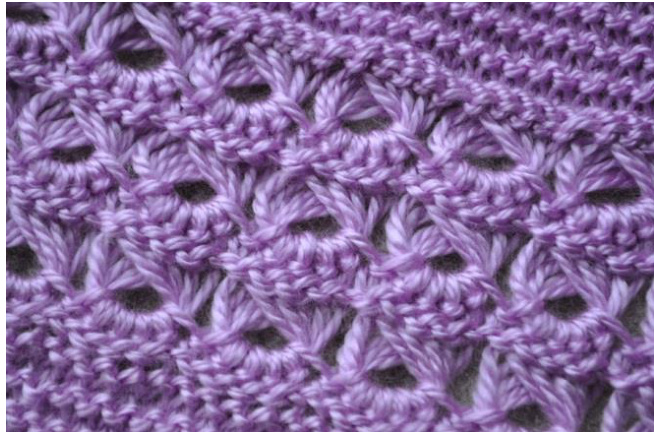
This blanket's pattern is a combination of knit AND crochet, and consists of alternating "panels" of broomstick lace (crochet) and garter stitch (knit), so you need to be able to do both techniques. You'll start with crochet, do a panel of broomstick, then switch to knitting needles to do a panel of garter stitch. You'll repeat alternating panels until the blanket is as long as you'd like, ending on a broomstick lace panel.
Note
This pattern isn't going to go into great detail on how to do broomstick lace crochet. However, here are the two resourcesI used: Video tutorial (4 mins) and Written tutorial The video starts where you will be at step 2 in my directions below,
ready to pull up loops onto your "broomstick." In the video demonstration, the author has chained 20 (broomstick is worked in multiples of 5) but your blanket is going to be 1o0 stitches across, so you'll follow the process all the way across the blanket. This is also helpful in the event you want to make your blanket wider than the pattern - just be sure to increase the width in multiples of 5.
Materials
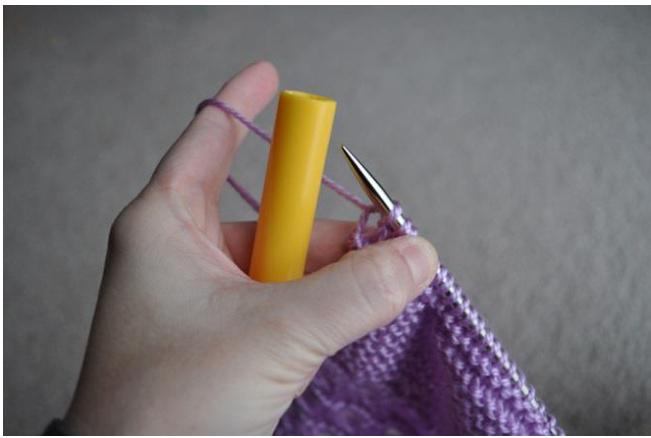
·SizeJ crochet hook Worsted weight yarn (I used Hobby Lobby Yarn Secret in Lilac, 2 skeins) Size 8 knitting needles on 32" cable (You'll knit back and forth like on straights) Size 35 or 50 knitting needle, or broomstick (I literally took the plastic broomstick off of my toddler's play broom and used that!). referred to as broomstick from here on out
Directions
1. With your J crochet hook, chain 101. Turn, sc in 2nd chain from hook and sc in each st across (1o0 sc) 2. Broomstick lace in groups of 5 (20 groups) across 3. Do 2 more rows of broomstick lace, for a total of 3 rows End of broomstick lace panel. Approximately 2.5" tall 4. Now get knitting needles ready. Pretend you're about to do broomstick lace again, going across the tops of the stitches and pulling up loops like you would if you were going to do another row of broomstick, but pull up the loops onto the knitting needle now instead of the broomstick to transfer project to knitting needles.
5. Knit back and forth (garter stitch) for 19 rows, or approximately 2.5 inches. The number of rows you knit is just an approximation, depending on how tightly you knit and your gauge. It doesn't really matter how many rows as long as you end on an odd row number, and your goal is to make the garter stitch panel the same height as the broomstick lace panel, so knit until the panel sizes match and end on an odd row, ready to start on an even row when you switch back to broomstick.
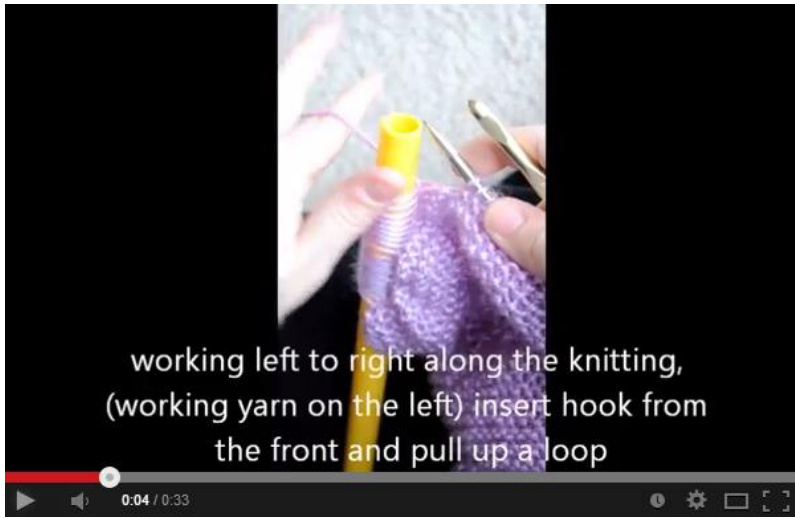
6. Grab your J crochet hook. Turn your work so that your knitting is held on the right, broomstick held on the left, and the tail of your working yarn is on the left side of your knitting, closest to the broomstick. You're going to transfer your knitting to the broomstick now. Use your J crochet hook in each loop on the needles, inserting the hook from the front of your work into each sc on the needle working left to right, and pulling up a loop from your working yarn and transferring work back to the broomstick. This was tricky because the loops on the needles were fairly tight; I found myself using my fingers to help pull some slack one stitch at a time to fit my crochet hook in and pull up a loop. Once all stitches are transferred, you're ready to do broomstick lace again. Click 7. Repeat process, doing three rows of broomstick lace and then switching to knitting for 19 rows in garter stitch until the blanket measures the length you want. End after a third row of broomstick lace, and then the final row goes like this: 8. Ch 1, turn your work, and sc in each st across. Fasten off and weaveinends. I did 5 repeats, (6 lace panels, 5 garter panels) and my finished dimensions were 20" x 30" unblocked. Blocking will help make the panels consistent and really make the lace panels pop!
Please Note
This work is licensed under the Creative Commons Attribution-Noncommercial-No Derivative Works 3.0 United States and Canada Licenses. To view a copy of these licenses, visit US CC Copyright and Canada CC Copyright or send a letter to Creative Commons, 171 Second Street, Suite 300, San Francisco, California, 94105, USA. Please do not resell, redistribute, copy, publish, transmit or upload the pattern in any way. Feel free to make blankets for personal or commercial use, but credit or a link back to the pattern and Lesley Karpiuk of ThePinkToque.com is appreciated! Find me on Twitter: @ThePinkToque I @geeksoap I @thekarpiuks


