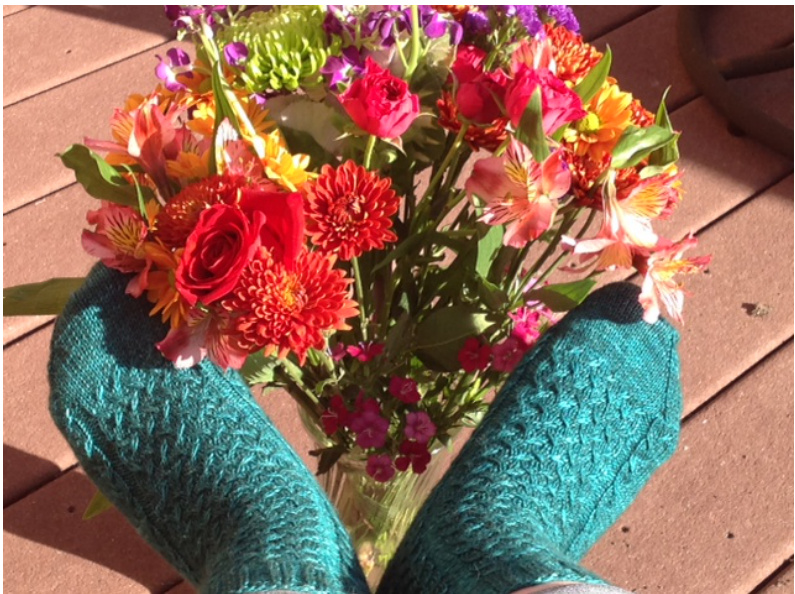
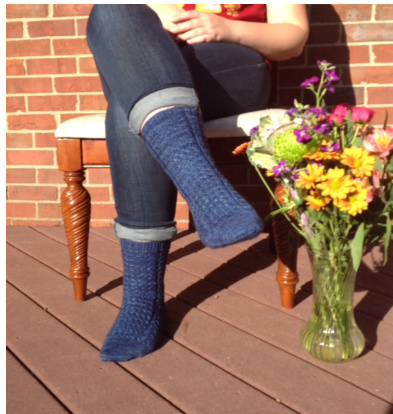
Little Birds by Jill Bickers
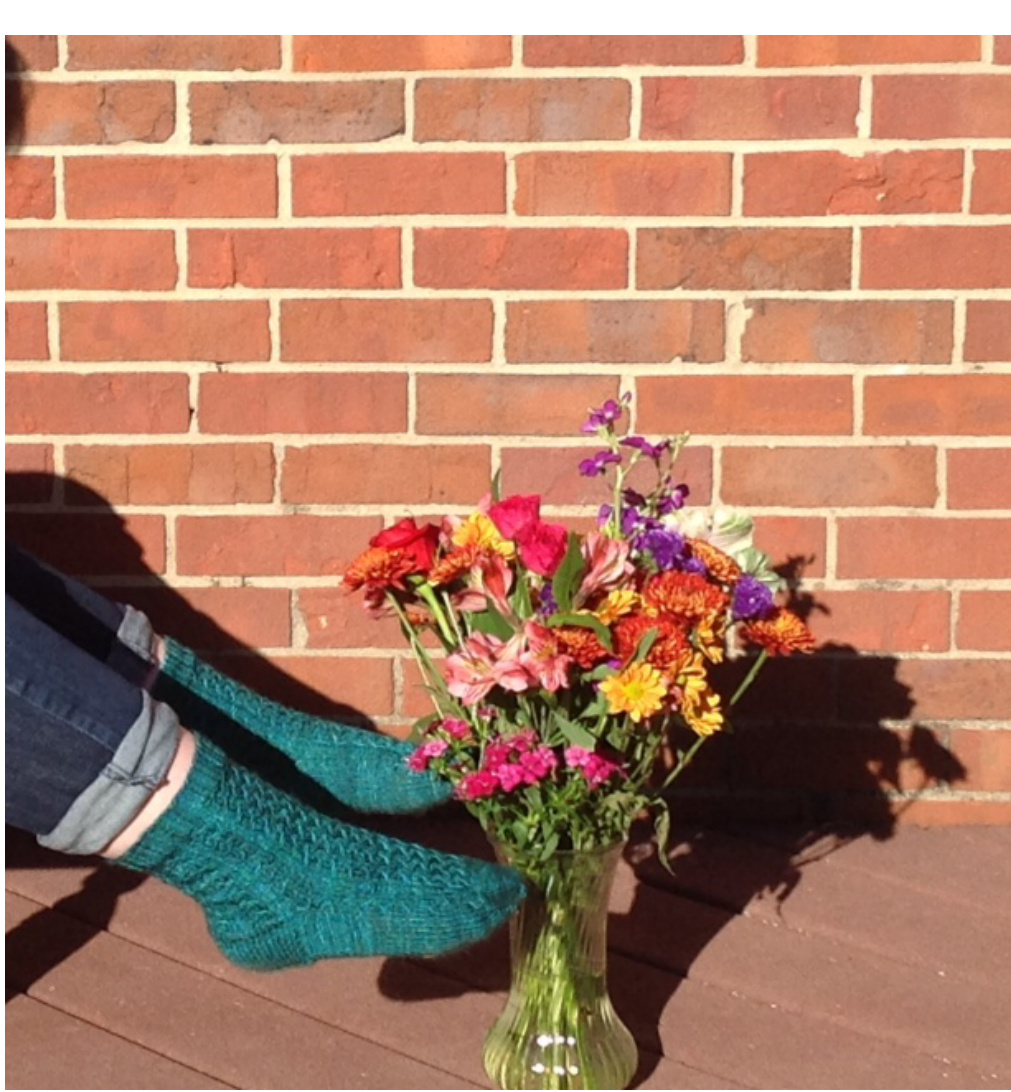
The inspiration for these socks came from a lovely sweater I recently purchased. I loved the pattern stitch and wanted to incorporate it into a sock design. Beautiful as the stitch pattern is, I thought it would be prettier and more wearable if it included a rib design. I chose, therefore, to design a rib that would incorporate the pattern stitch. I loved the pattern I came up with, but had no idea what to name it. My husband said that it reminded him of Little Birds, and he is right! So, Little Birds it is! After I knit my protoype socks, I wrote the pattern as a Mystery Sock for the Sock Club at Knitwits Contemporary Yarn Shop in Crescent Springs, Kentucky. It has been knit several times, in several sizes. I am happy now to share this design with you! This is a very easy pattern, but to make it even easier for you I have written the directions for each size separately, in separate files. You should be able to access and download all three sizes. If you can't, please let me know. Copyright Jill Bickers, 2014
Materials:
1 skein of Sock Yarn, 400-425 yards. It looks fabulous in both semisolids and highly variegated yarns. In a semisolid, the pattern stitching stands out dramatically. In a variegated, you lose some of the pattern definition—- but it does a great job in breaking up pooling. Needles to achieve a gauge of about 8 stitches per inch. Stitch Markers. You will need at least 3. A cable needle may be helpful, though you may choose to execute the pattern stitch without a cable needle. See Glossary for more information on how to do this. Gauge: Approximately 8 stitches per inch.
Size Small
Note: These instructions are written assuming that you are using doublepoints, but there is no reason you can't use the Magic Loop, two circulars, or one small circular.
Cuff
st on 63 stitches. Join your work, placing a marker to note the beginning of the roun Cuff Rib: \*p1 k2 p1 k2 p1. Repeat from \* to the end of the round Repeat the Cuff Rib for 15 rounds or until the sock measures about 1 1 inches.
Transition Round:
5 p1) 5x, PM p1 k2Tog k15 SSK p1 PM (p1 k5 P1). Sock now has 61 Stitches arour
Copyright Jill Bickers, 2014 Leg
Rounds 1 and 2:
(P1 k2 S1 1, k2 p1) 5 times, SM p1\* (k2 sl1 k1). Repeat from \* an additional 3 times, k1 p1 SM p1 k2 S1 1 k2 p1.
Round 3:
(P1 1/2RC k2 p1) 5 times, SM p1 \*1/2RC k1. Repeat from \* an additional 3 times, k1 p1 SM p1 1/2RC k2 p1.
Round 4:
(p1 k5 p1) 5 times, SM p1 k17 p1 SM p1 k5 p1 (P1 k2 Sl 1, k2 p1) 5 times, SM p1\* (k2 sl1 k1). Repeat from \* an additional 3 times,k1 p1 SM (p1 k2 S1 1 k2 p1)
Round 7:
(P1, K2, 1/2 LC,p1) 5 times, SM p1 k1 \*k1, 1/2LC. Repeat from \* an additional 3 times, p1 SM p1 k2 1/2LC p1.
Round 8:
(p1 k5 p1) 5 times, SM p1 k17 p1 SM p1 k5 p1 Repeat Rounds 1-8 until leg is desired length. End leg one stitch before the end of either Round 4 or 8. This last stitch will become the first stitch of the heel flap.
The Heel
The Heel Flap is worked over the next 30 stitches. The remaining 31 stitches comprise the instep stitches and are held on stitch holders or a spare needle.
Heel Flap Set Up Rows
Row 1: sl 1 k to the end Row 2: sl 1 p to the end
Heel Flap
Eye of Partridge Stitch Row 1: \*sl 1,k1. Repeat from \* to the end of the row. Row 2: sl 1, purl to the end of the row. Row 3: sl 1 \*sl 1,k1. Repeat from \* to the last stitch, k1. Row 4: sl 1, purl to the end of the row. Work Rows 1-4 of the Eye of Partridge Stitch 7 times. Counting the Heel Flap Set Up Rows and the Eye of Partridge Stitch Rows, you have worked a totalof30rows. Copyright Jill Bickers,2014
Heel Turn:
Row 1: k 17, ssk, k1 turn Row 2: sl 1, purl 5 , p2tog, p1 turn. Row 3: sl 1, knit to one stitch before the gap created in the previous round, ssk k1. Turn your workaround. Row 4: sl1, purl to one stitch before the gap created in the previous round, p2tog p1. Turn your work around. Repeat Rows 3 and 4 until all heel stitches have been worked. 18 stitches remain.
Gusset and Foot
Knit across the heel stitches. With an empty needle, pick up 16 stitches along the edge of the heel flap (1 for every selvedge stitch, plus one extra). Work across the instep stitches in Instep Pattern (see Instep Pattern Box), beginning with whatever round you left off on. If you left off having worked Round 4, begin on Round 5; if you left off having worked Round 8, begin again with Round 1.
Instep Pattern, Size S
Rounds 1 and 2:
k2 S1 1 k2 p1 SM p1\* k2 sl1 k1. Repeat from \* an additional 3 times, k1 p1 SM p1 k2 S1 1 k2.
Round 3:
1/2RC k2 p1 SM p1 \*1/2RC k1. Repeat from \* an additional 3 times, k1 p1 SM p1 1/2RC k2.
Round 4:
k5 p1, SM p1 k17 p1 SM p1 k5
Round 5 and 6:
k2 Sl 1, k2 p1 SM p1\* (k2 sl1 k1). Repeat from \* an additional 3 times,k1 p1 SM p1 k2 S1 1 k2.
Round 7:
K2, 1/2 LC, p1 SM p1 k1 \*k1, 1/2LC. Repeat from \* an additional 3 times,pl SM p1 k2 1/2LC.
Round 8:
K5 p1 SM p1 k17 p1 SM p1 K5 Copyright Jill Bickers, 2014. With an empty needle, pick up 16 stitches along the other side of the heel flap. Using the same needle you just picked up your gusset stitches on, knit across the first 9 stitches of the heel. Slip the remaining heel stitches on to the needle which holds the gusset stitches from the other side. You are now ready to work the gusset decreases, beginning with Needle 1. Needle 1 has 25 stitches on it, Needle 2 has 31, and Needle 3 has 25.
Gusset Decrease Section:
Round 1: Needle 1: k to the last three stitches, k2tog, k1 Needle 2: work instep pattern Needle 3: kl, ssk, k to the end. Round 2: Needle 1: knit · Needle 2: work instep pattern Needle 3: knit Repeat rounds 1 and 2 until you are back down to your original 61 stitches. You will have 15 stitches on Needle 1, 31 stitches on Needle 2, and 15 stitches on needle 3. Continue to work the foot, leaving the stitches on Needles 1 and 3 in plain stockinette, while working the instep in pattern. When your sock has reached the base of your big toe, you are ready to start the toe. Having finished either Round 3 or 7 knit one round plain.
The Toe
Divide your stitches so that the first 15 stitches of the round are on needle 1, the next 31 stitches are on needle 2, and the last 15 stitches are on needle 3. Knit to the end of needle 1. On needle 2, k1 ssk and knit to the end of needle. Knit to the end of needle 3. You have 15 stitches on needle 1, 30 on needle 2, and 15 on needle 3. Round 1: On Needle 1 --k to the last three stitches--k2tog, and k1. On Needle 2—k1, ssk, k to the last three stitches--k2tog, and k1. On Needle 3-k1, ssk, k to the end of the needle. Round 2: Knit all stitches on all three needles. Alternate Rounds 1 and 2 until 24 stitches remain OR toe is desired length. Knit the stitches from Needle 1 onto Needle 3. Finish your toe with the Kitchener Stitch. Copyright Jill Bickers, 2014
GLOSSARY
k=knit p=purl Sl=Slip 1, purlwise PM=Place Marker SM=Slip Marker k2Tog=Knit two stitches together SSK=Slip 1 stitch knitwise, slip another stitch knitwise, and knit the two together. p2Tog=purl two stitches together 1/2RC= This is a three stitch cable. Counting from right to left, stitch 3 is crossed over stitches 1 and 2, resulting in a right slant. This can be done two ways, with and without a cableneedle. With a cable needle: slip stitches 1 and 2 to cable needle, hold in back, knit stitch 3, then knit stitches 1 and 2 from the cable needle. Without a cable needle: Insert your right needle into stitch 3 and knit it, leaving stitch 3 on the left needle. Insert your right needle into the stitch 1 and knit it, pulling it from the left needle to the right, as normal. Insert your right needle into stitch 2 and knit it, pulling both it and stitch 3 off the left needle. 1/2LC= This is a three stitch cable. 1 stitch is crossed over the two stitches that follow it, resulting in a left slant. This can be done with or without a cable needle. With a cable needle: slip 1 stitch to cable needle, hold in front, knit two stitches, then knit the stitch from the cable needle. Without a cable needle: Slip stitch 1 off of the left needle and let it hang. I use my thumb to secure the stitch in place while I knit the next two stitches. Because it has been slipped for two rounds, the loop is pretty big and easy to hold in place. Then knit stitches 2 and 3 onto the right needle and replace stitch 1 back on the left needle. Go ahead and knit it onto the right needle.
Copyright 2014 Jill Bickers


