There are 229 sts on the needle. It is time to knit the finishing pointed edge of the shawl.
Finishing border (pointed edge)
The border is knitted using the chart below. It is connected to the body of the shawl using the short rows technique. Turn work after the last stitch of every row of the chart as explained: -Knit the last stitch of the chart. - Turn your work. - Slip the first stitch from the left needle to the right one purlwise, yarn in front. - Bring the yarn to the back, knit across the row. Even rows - knit sts.
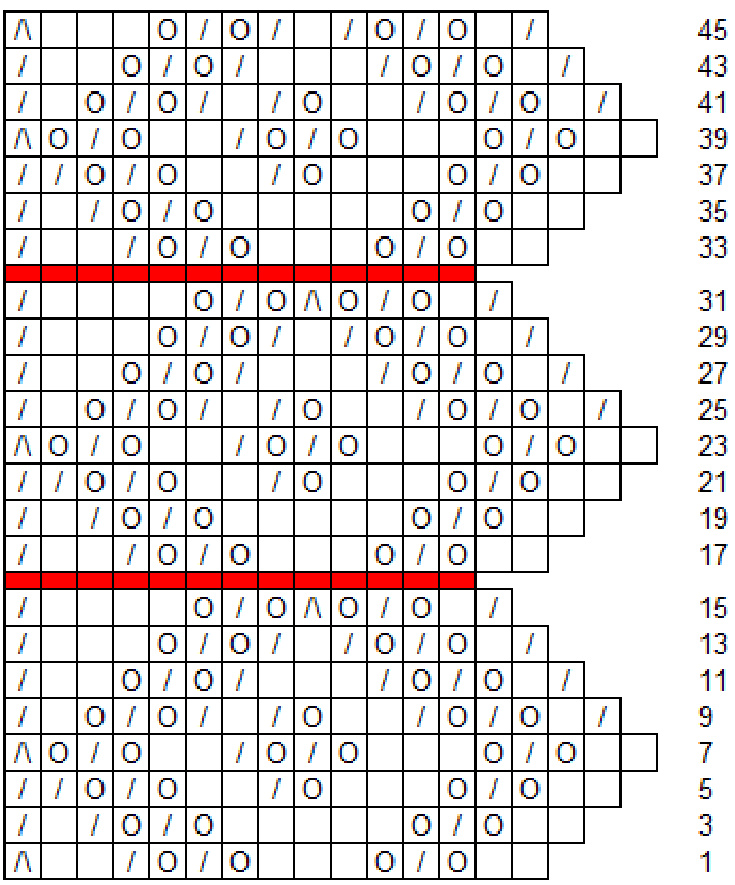
43210987654321 17154312110987654321 -Knit rows 1-15 of chart one time. -Repeat rows 17-31 between red lines 23 times. -Knit rows 33-45 of chart one time and finish by row 45 (no 46th row for the 25th point).
The first point of the border:
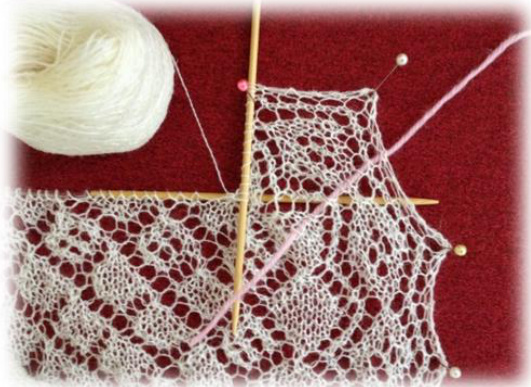
The picture is taken after the row 15 of the border chart. The pink life line is going through the first 15 sts of the row 402 of the shawl
Two points of the border:
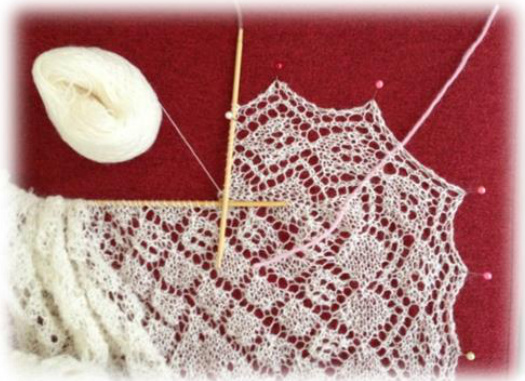
The picture is taken after the row 31 of the border chart After the 25th point is done (the row 45 of the border chart) there are 14 stitches on each needle. The working yarn is between them:
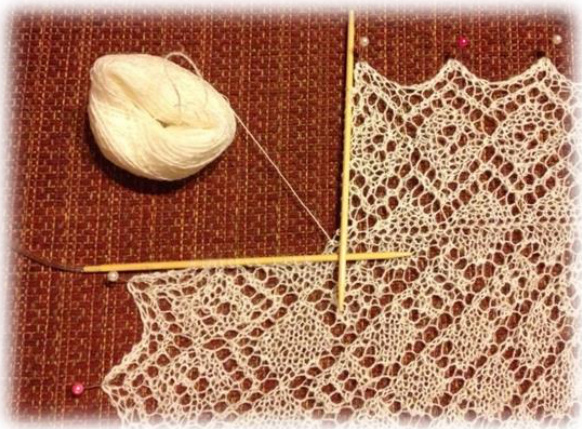
Connecting two edges
-K2TOG. -Turn your work. - With yarn in back, slip the first stitch from the left needle to the right one purlwise. Repeat these tree steps until 3 stitches are left. K3TOG.
Blocking the shawl
Cut the yarn (leaving enough yarn to finish & weave in the end), pull yarn through the last stitch and tighten it up. Weave in the ends and wet block the shawl. Make sure all the sides of the shawl have the same length. Let the shawl dry completely and then remove the blocking pins. The shawl and its pattern are not intended for commercial use. All the pictures and charts are YuliaAV copyright. Please, do not publish any part of this pattern or charts anywhere, including any internet websites, blogs or forums. If you have any questions feel free to e-mail them to yulia@yuliaav.com orPM onRavelry toYuliaAV and I will be happy to answer them as soon as I can. Happy knitting! Yulia


