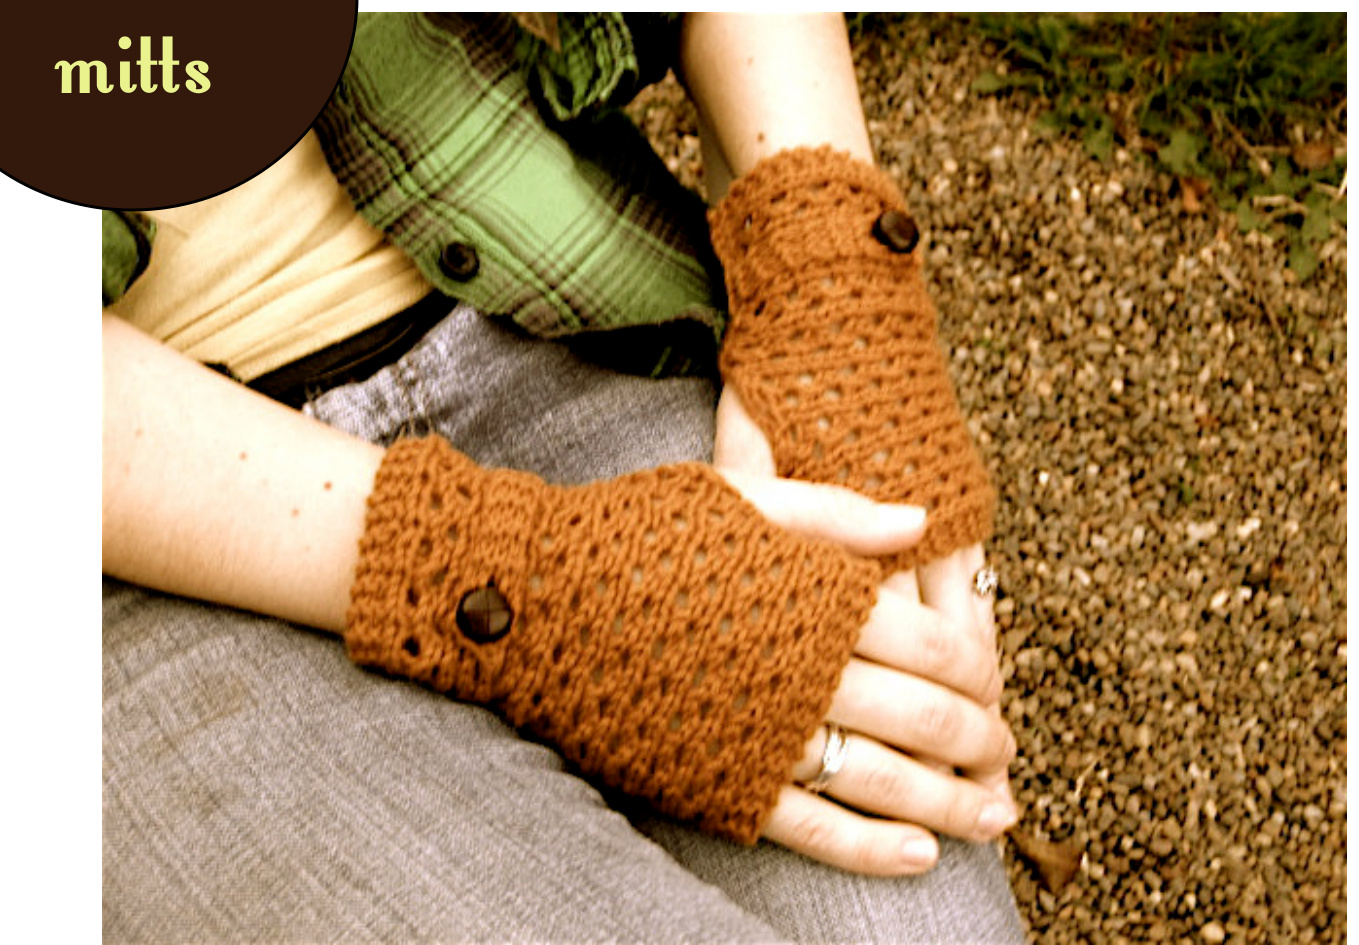
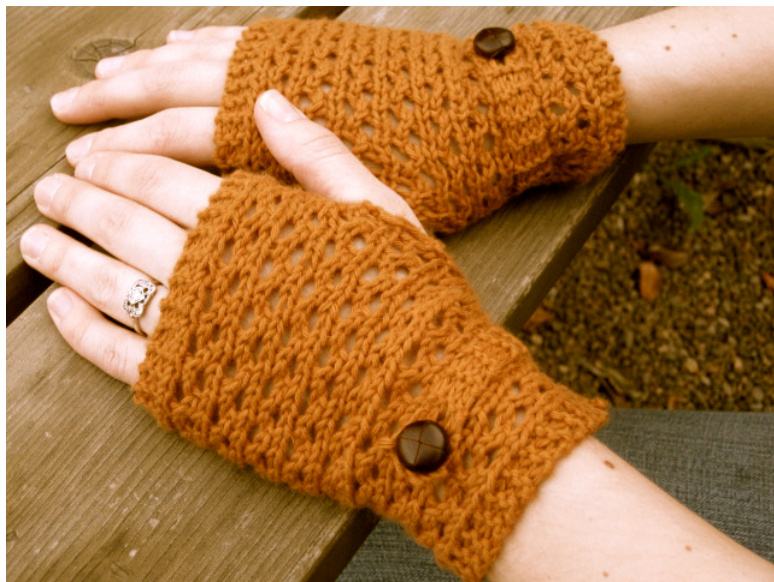
My friend Andrea looks amazing in handwarmers, particularly those with a vintage “grandpa” feel. These were inspired by my own grandpa and the wicker pattern on his porch chair. The lace pattern is very simple and easy to memorize, and would be great for those new to lace. These mitts are knit on straight needles, not in the round, so they are perfect for anyone with an aversion to double-pointed needles. Because of their construction, gauge is not essential and you can test the fit as you go, so substituting yarn is a snap. Airy,light and perfect for summer, these would make a great gift for any handwarmer lover.
abbreviations
yo - Bring yarn to the front of your needle. You will be carrying the yarn over the needle as you knit the next stitch k2tog - Knit two stitches together. This is just like making a regular knit stitch except you insert the needle into two stitches instead of one. WS - wrong side of work RS - right side of work
materials:
In addition to your yarn, you'll need 2 buttons. The leather “grandpa” style ones are highly recommended. You'll also need matching thread and a needle for sewing the buttons on.
useful information
yarn, needles, gauge:
One ball of Aimee by Louisa Harding Yarns. $90\%$ Cotton, $10\%$ Cashmere. Sandalwood. US 5 $(3.75\mathrm{mm})$ straight needles or size needed to get gauge, plus one needle three sizes larger for bind off Gauge: Approx 5 stitches per inch in lace pattern
substitution suggestions:
You can use one ball of any yarn you have on hand that is sport, DK or worsted weight. Gauge is not essential. Use an appropriate needle size for your yarn, plus you'll need one needle about three sizes larger than the needles you are using.
skills:
In this pattern you'll need to: knit, purl, decrease (k2tog), yarn over (yo), do a 3-needle bind off (optional)
Punchwork Lace Pattern
Row 1 (RS): K3, $\mathrm{}^{\ast}\mathrm{K}1$ , yo, k2tog\* repeat till you have four stitches left, K4 Row 2 (WS): K3, work as follows till last 3 stitches: purl all purl stitches, knit the yarn overs, K3 Row 3: K3, $\mathrm{}^{\ast}\mathrm{K}1$ , K2tog, yo\* repeat till you have four stitches left, K4 Row 4: K3, work as follows till last 3 stitches: purl all purl stitches, knit the yarn overs, K3
pattern overview
These mitts are knit flat on straight needles, and then partially seamed together with a hole for the thumb.The cast on edge will determine the length of your mitts. How much you knit will determine the width. The mitts are knit in a lace pattern with a 3 stitch garter border on each side. The straps and buttons are added at the end. If you are using a different yarn or gauge, or if want your mitts to be longer, you will need to adjust your cast on number for your desired length. To fit with the lace pattern, your cast on number will need to be a multiple of 3, plus 1 (so, 25, 28, 31, 34, etc).
pattern instructions
CO 31 stitches. (Make sure your cast on is loose. If you are a tight knitter, you might want cast on with a larger needle first, and then move to your regular needles.)
Knit 1 row (WS).
Starting with Row 1, work the Punchwork Lace Pattern. Keep repeating this pattern until piece is large enough to wrap around your hand (6-7 inches long), ending with a RS row. \*\* See pg 3 for notes on width
Knit 1 row (WS).
Now you will need to join your handwarmers together. The best way to do this is with a three needle bind off. $\ast\ast\mathrm{Sec}$ instructions on pg 3 if needed. Leaving the live stitches on one needle, take the second needle and pick up 31 stitches along the cast on edge. (The number of stitches you pick up should match the number of live stitches on your needle). Using your larger spare needle, use a three-needle bind off to bind off 9 stitches (both live and picked up stitches should be bound off together.) Create thumb hole: Bind off 8 stitches from the live needle only. Slip 8 picked up stitches off of the other needle. Using three-needle BO, bind off remaining 14 stitches together. Cast on for the second mitt and repeat all instructions. When doing your bind off for the second mitt, reverse the thumbhole (BO 14 together, BO 8 from live needle only, BO 9 stitches together). If you don't want to do the three needle bind off, you can also bind off like normal and then sew the two edges together. Leave a 1 to 2 inch gap in the seam towards the top of each mitt for the thumb hole.
finishinq instructions
Wrist Strap: Pick up 4 stitches along the inner wrist edge towards the bottom of each mitt. Knit in garter till strap is 2 inches long, or about halfway across the front of the mitt. Buttonhole Row: K2, yo, K2. Next Row: K2, K2tog, K1. Knit 2 rows. BO Attach button to each mitt at the outer edge. Weave in all ends. Get cozy on your favorite porch chair and enjoy!
notes on width
o get the right width, place the needle with the live titches on it parallel to your hand between your thumb nd pointer finger and wrap the knitting around your han t the base of your fingers. The cast on edge should be ble to meet up with the needle, and the mitt should feel omfortable around your hand. If you want your mitts to e particularly snug, you should have to stretch the nitting to get the two edges to meet.
pattern support?
:This really isn't as scary as it sounds. Instead of binding :off the live stitches on your needle like normal, you are igoing to take a second needle and pick up stitches along :the cast on edge, so you have two needles with the same :number of stitches on them. Then, holding those needle: 'together, you'll use a third needle to bind off the stitches :on both needles together. Ready? Lay out your knitting with RS facing, and the needle at the 'top. Take your other needle and pick up the stitches along your cast on edge, moving from left to right. The numbe1 lof stitches picked up should match your cast on number. You should have two needles with the same number of istitches on them, facing the same direction. :Bring the bottom needle up behind the top needle. Hold :the two together. The needle with the working yarn shoule :be in front. :Take your larger spare needle and knit through and bind :off both of the stitches together. Continue like this for all istitches that need a three needle bind off (go back to :pattern now for instructions).


