Ginkgo Biloba Leaf
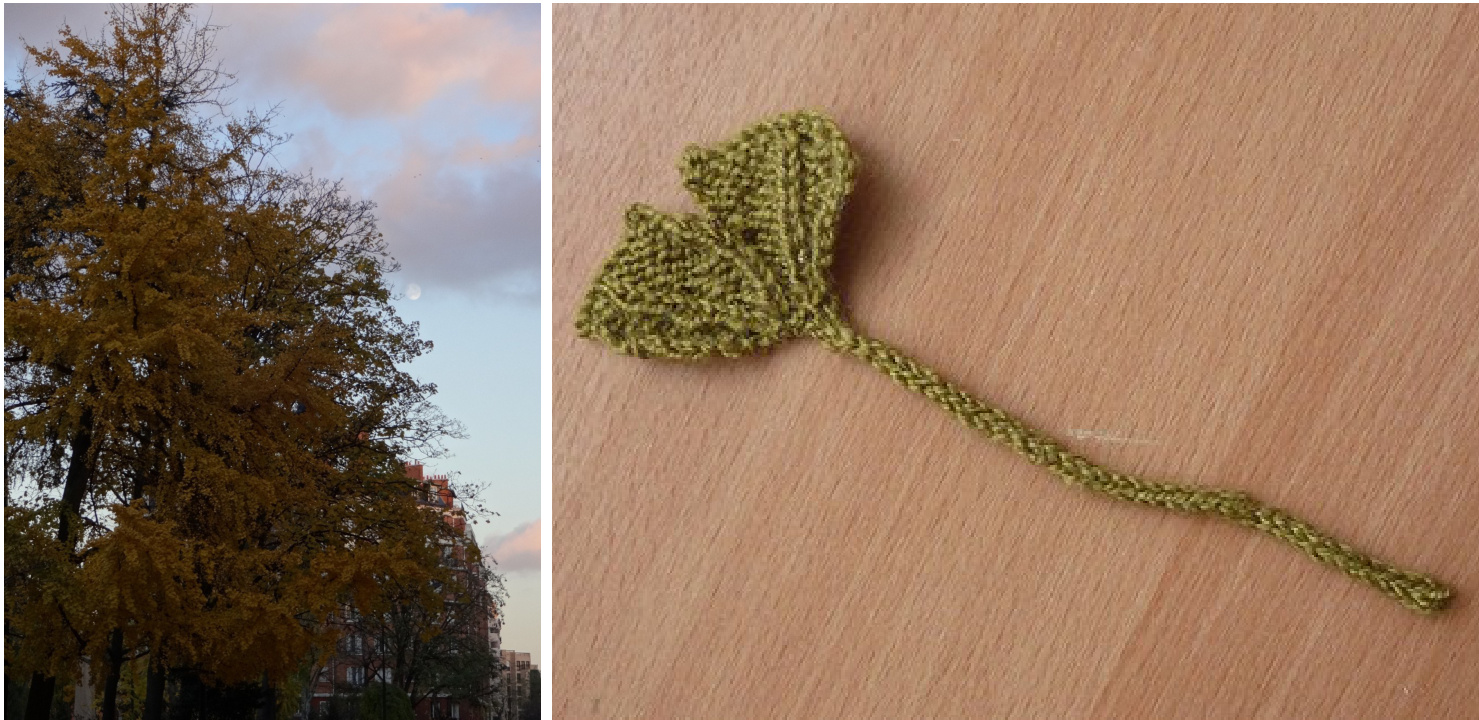
Design Elisabeth Hauser, elisala @ravelry This is a free pattern,please do not use for commercial purpose. I've always been fascinated by the Ginkgo Biloba : the fact that it exists since more than 270 millions of years, its growing peculiarities, its unusual and unique leaves, its resistance to Hiroshima... All of this, and more, inspired me to create this ginkgo leaf shaped item. I designed it first as a bookmark, but it's highly customizable : a bigger yarn, with a shorter stem, and you get a coaster ; several of them in different colors and you can make a garland ; a much longer stem can lead to a necklace ; etc. The shape itself can be changed, by making more or less increases, by forgetting the cut at the top of the leaf, you can create all kinds of leaves, thus reflecting the diversity you can find on each Ginkgo tree. You can find more info on the Ginkgo Biloba wikipedia page.
What i used :
· 3mm double-pointed needles (US 21/2) · a few grams of sport-weight yarn If you choose another yarn, adapt the size of the needles accordingly. I advise you to choose rather small needles, to get a better stitch definition and to have a leaf that holds its shape better.
Abbreviations
M1 : make 1 : lift the bar between stitches, from front to back and knit this stitch through the back loop.
Let's get started
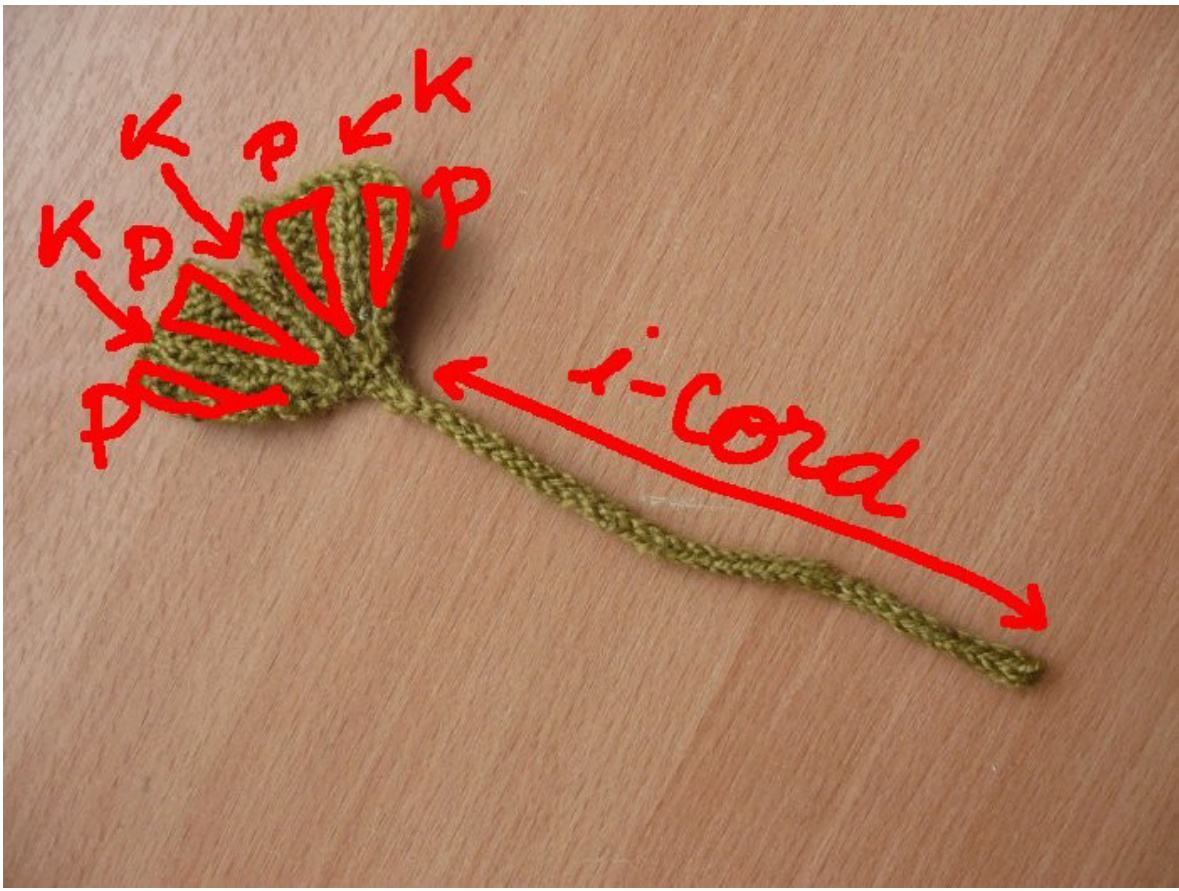
Thestem CO 3 sts, work in i-cord for the desired stem length. When the stem is the right length, slip the stitches as if to start another i-cord row.
The leaf
Row 1 (Rs) : lift the st beneath the st on the left needle, purl this stitch through the back loop, k3, lift the stitch beneath the st you just worked, purl this stitch through the back loop, (5 sts on the needles) Row 2 : kl, pl, Ml, pl, Ml, pl, kl. (7sts) Row 3 : pl, kl, pl, kl, pl, kl,pl. Row 4 : kl, Ml, pl, kl, pl, kl, pl, M1, kl. (9 sts) Row 5 : p2, kl, pl, kl, pl, kl, p2. Row 6 : k2, pl, kl, Ml, pl, Ml, kl, pl, k2. (11 sts) Row 7 : p2, kl, p2, kl, p2, kl, p2. Row 8 : k2, Ml, pl, k2, Ml, pl, M1, k2, pl, M1, k2. (15 sts) Row 9 : p3, kl, p3, kl, p3, kl, p3. Row 10 : k3, p1, M1, k3, pl, k3, Ml, p1, k3. (17 sts) Row 1l : p3, kl, p4, kl, p4, kl, p3. Row 12 : k3, pl, k4, p2tog, k3, pl, k3. Working only on the first 8 sts : Row 13 : p3, kl, p3, kl Row 14 : pl, k3, pl, k3 Repeat these 2 rows once more. Row 17 : BO all stitches, cut the yarn. Now get back to the 8 other sts, starting at the center of the leaf : Row 13 : p4, kl, p3 Row 14 : k3, p1, k4 Repeat these 2 rows once more. Row 17 : BO all stitches. Weave ends in, block if necessary or desired. Enjoy !
Construction overview
Leaf chart
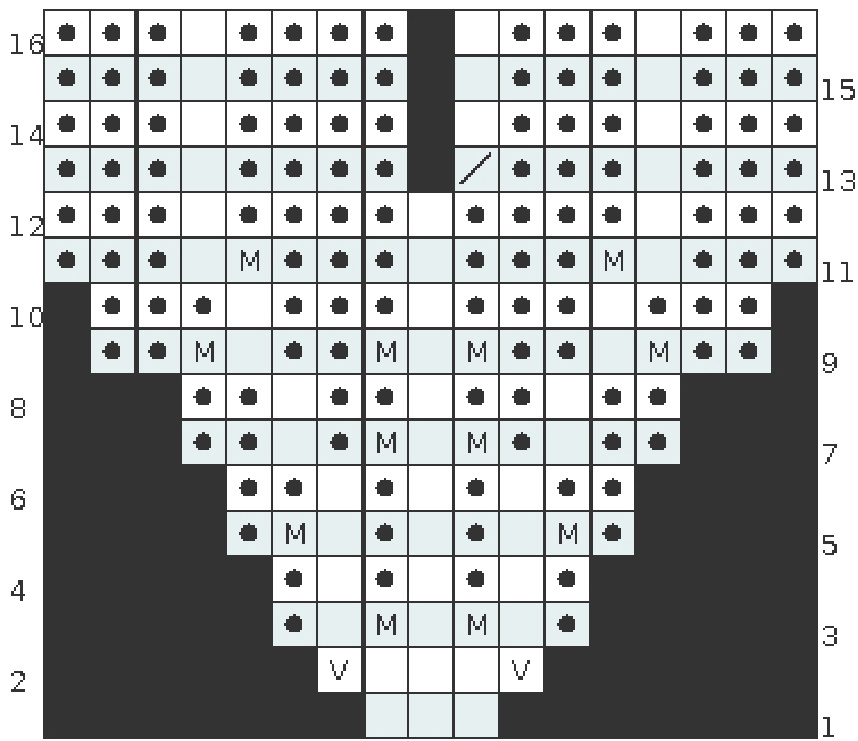
k on Rs, p on Ws p on Rs, k on WS MVmake 1 / inc 1 no stitch p2tog on WS


