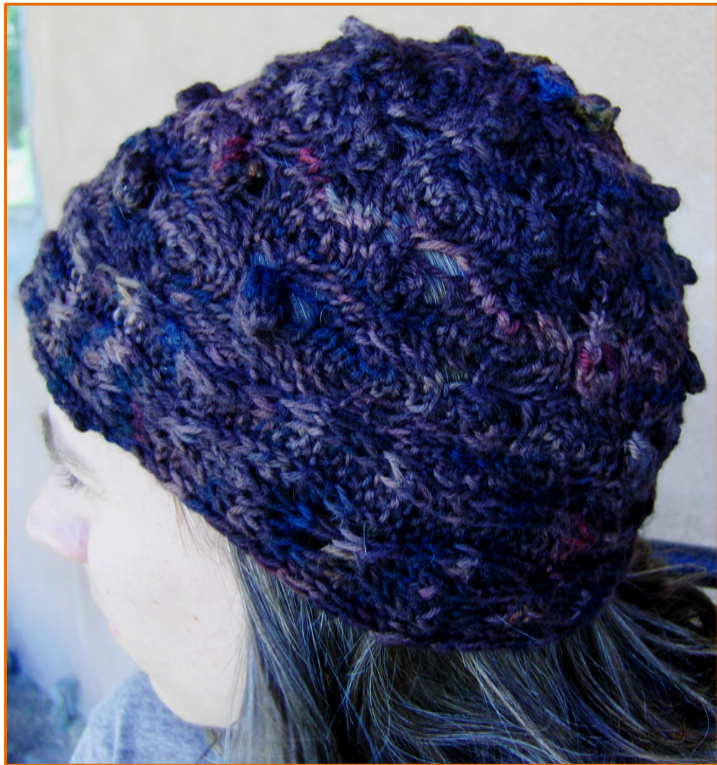
This cute, knobby winter hat is perfect for a crisp fall day! It goes like this: You first knit a long strip of a lace panel which serves as the brim of the hat. You then pick up stitches along the side of the panel and knit a cute, bobbley, lacey, leafy pattern up to the top of the hat, pull it together, and you have a cozyautumnbeanie. Yarn: Any dk-weight yarn, about 50 grams Gauge: 8 sts in stockinette measures 1.5 inches; 7 rows in stockinette measures 1 inch. 9 sts in Bobbled Lace Pattern (measured from center of decreases with bobble in center) measures 2 inches. One repeat of Bobbled Lace Pattern (16 rows) measures 2 inches. Notions: #5 dpns, or #5 16-inch round needles, darning needle Stitch Guide: k: knit p: purl sl1: slip 1 stitch yo: yarn over ssk: slip-slip-knit k2tog: knit two sts together psso: pass slipped stitch over next stitch sl1 kwise: slip one stitch knitwise PM:Placemarker MB: Make bobble (see hat directions for bobble directions) Lace Leaf Panel Pattern: panel of 13 sts Row 1 (RS): sl1, k1, p3, (k1, yo) twice, k1, p3, k2. Row 2: sl 1, p1, k3, p5, k3, p2 Row 3: sl 1, k1,p3, k2, yo, k1, yo, k2, p3, k2 Row 4: sl1, p1, k3, p7, k3, p2 Row 5: sl 1, k1, p3, ssk, k1, (yo,k1) twice, k2tog, p3, k2 Row 6: Repeat Row 4 Row 7: sl 1, k1, p3, ssk, k3, k2tog, p3, k2 Row 8: Repeat Row 2 Row 9: sl 1, k1, p3, ssk, k1, k2tog, p3, k2 Row 10: sl1, p1, k3, p3, k3, p2 Row 11: sl 1, k1, p3, yo, sl2 kwise - k1 - p2sso, yo, p3, k2 Row 12: Repeat Row 10 Repeat Rows 1 through 12. Bobbled Lace Pattern: 8st repeat Row 1, and all wS rows: Knit Row 2: $\ast_{\mathsf{k}2}$ , sl1-k2tog-psso, k2, yo, k1, yo; rep from \* Row 4: Repeat Row 2 Row 6: Repeat Row 2 Row 8: $\ast_{\mathsf{k}2}$ , MB, k2, ssk, yo, k1; rep from \* Row 10: $^{*}\mathsf{k}1$ , yo, k1, yo, k2, sl1-k2tog-psso; rep from \* Row 12: Repeat Row 10 Row 14: Repeat Row 10 Row 16: $^{*}\mathsf{k}1$ , ssk, yo, k2, MB, k2; rep from \*
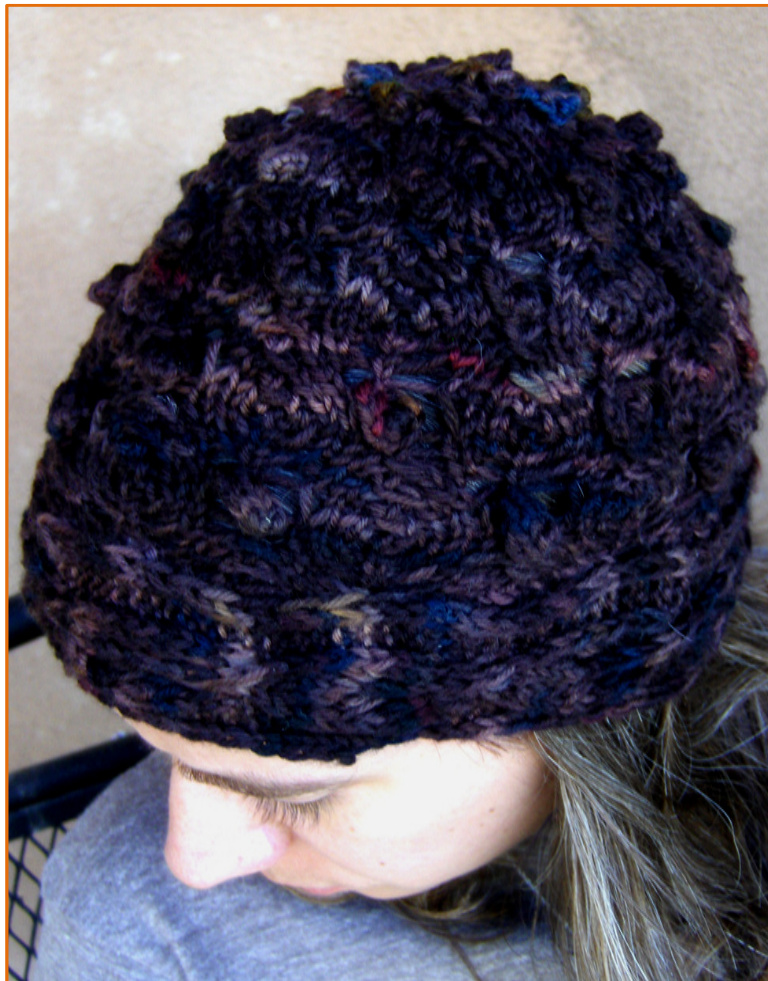
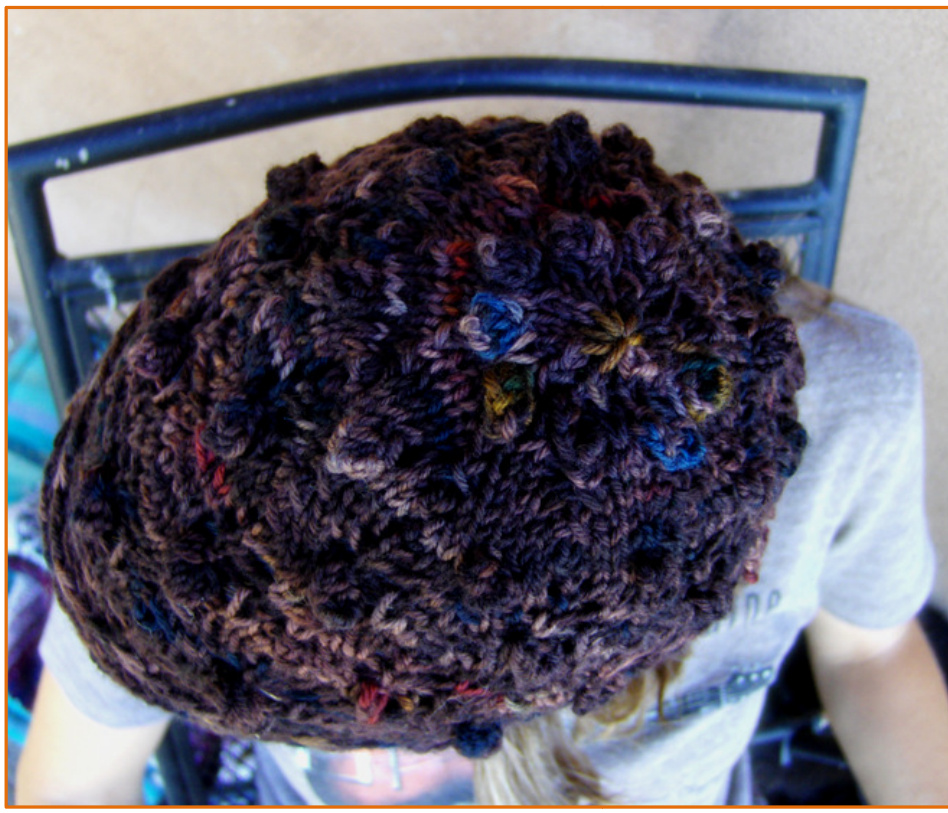
Directions for Hat: CO 13 sts using a provisional cast-on method. Knit in Lace Leaf Panel Pattern until panel reaches at least 22.5 in $(57\mathsf{c m})$ in length, or is long enough to wrap around your head completely. Finish with Row 12. Unravel the provisional CO at beginning of panel, exposing the live stitches. BO using 3- needle bind-off method, binding off the stitches from the beginning of the panel and the stitches from the end of the panel together. This forms a consecutive ring of the lace panel. This is the bottom of the beanie. Pick up 72sts from the top of the lace panel. PM at the place where you bound off the Lace Leaf Panel Pattern. Begin knitting in Bobbled Lace pattern. Bobbles in this pattern are larger at the bottom of the hat than at the top, so that the bobbles at the top of the hat are more subtle. Use the following directions for making your bobbles: For bobbles in first pattern repeat: (there are two rounds with bobbles in first pat rep) Knit pat to MB: k1, p1, k1, p1 into next st, turn work. P4, turn work. K4, Turn work. P4, turn work. S1-k3tog-psso. Continue in pat. For bobbles in the rest of pattern repeats, including the decreases to close the top of the hat: Knit pat to MB: k1, p1, k1 into next st, turn work. P3, turn work. K3, Turn work. P3, turn work. S1-k2tog-psso. Continue in pat. Knit until piece measures at least 6 inches from bottom of panel (left side of panel) to live sts. End after Row 16 of Bobbled Lace Pattern. Begin the decreases for the top of the hat as follows. Number of sts at end of round is given in parentheses at end of rows. Row 1 and odd-numbered rows: Knit (72) Row 2: $\ast_{\mathsf{k}2}$ , sl1-k2tog-psso, k3; rep from \* (54) Row 4: $\ast_{\mathsf{k}2}$ , sl1-k2tog-psso, k1; rep from \* (36) Row 6: $\ast_{\mathsf{k}2}$ , sl1-psso, rep from \* (27) Row 8: \*k2tog, MB \* (18) Row 10: \*k2tog, k2; rep from \* (12) Row 12:\*k2tog, k1; rep from \* (8) Cut working end of yarn a few inches from stitches, and use darning needle to thread through live stitches. Tighten end of yarn so that stitches are pulled together and top of hat is closed. Weave in loose ends, and try it on! Notes: For assistance with your Brownies Hat, or if you think you may have found an error, please contact the designer at mollwick@gmail.com, or on Ravelry, user molwick. This pattern is subject to copyright. You may not sell this pattern, or any items produced using this pattern. Thank you to Jill Wick for modeling this hat!