Cashmere Cowl No. 2: Lace Rib
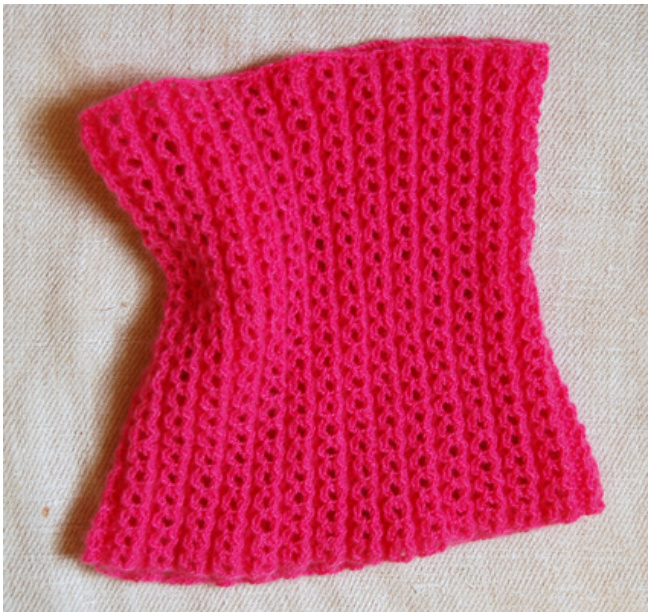
We're having a bit of a Cashmere Cowl craze at the shop lately, so I thought I'd create one for myself. I'm known for knitting almost everything in either stockinette stitch or garter stitch (l am often asked, “don't you get bored??" The answer is NO, I do not get bored, in fact I love it!), but I decided it was time for me to make a something a little more complicated. I chose this Lace Rib stitch for my cowl because it was simple enough to be methodical and easily remembered, but created a beautifully detailed fabric.-Joelle

Materials
1 skein of Jade Sapphire 2 ply Cashmere (l used one of their vibrant new colors “Pink Petunia"). One stitch marker US size 6 circular needles, 20" length (or size needed to give you the correct gauge)
Gauge
8 stitches per inch in rib pattern (not stretched)
Pattern
Cast on 180 Stitches, place marker. Join stitches for knitting in the round, taking extra care to make sure stitches aren't twisted around the needle. Round 1: \*k4, p2, repeat from \* to end of round. Round 2: \*k2tog, yo, yo, k2togtbl, p2, repeat from \* to end of round. Round 3: \*k1, k into back of first yo, k into front of second yo, k1, p2, repeat from \* to end of round. Round 4: \*yo, k2togtbl, k2tog, y0, p2, repeat from \* to end of round. Repeat these 4 rounds until you reach desired length (I made mine 12 inches long). Bind off loosely after round 4 in k4, p2 stitch pattern. All Purl Bee and Purl Soho patterns are copyrighted and intended for personal home use only. Items made from our patterns may not be sold or auctioned. Thank you for your understanding and cooperation!
Pattern Notes
Lace is made with a series of yarn overs paired with decreases, which lean to the left or right according to the pattern. When knitting lace, it is crucial to knit loosely. Simply put, do not pull on your yarn once the stitch has been completed and transfered to the right hand needle. Round 1: \*k4, p2, repeat from \* to end. This round gives the following three rounds some structure and stability. Round 2: \*k2tog, yo, yo, k2togtbl, p2, repeat from \* to end of round.
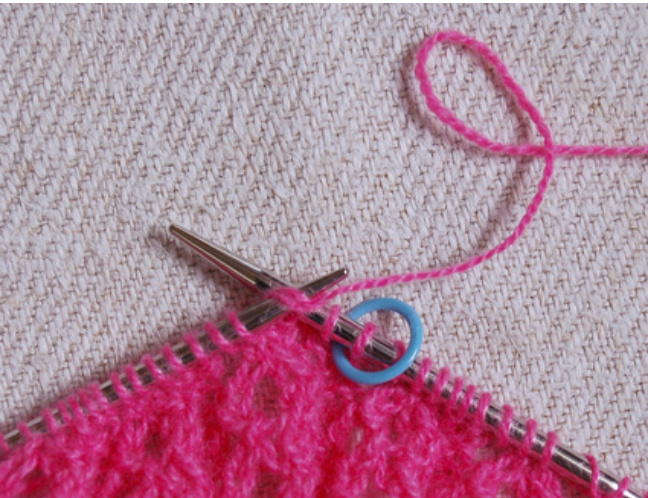
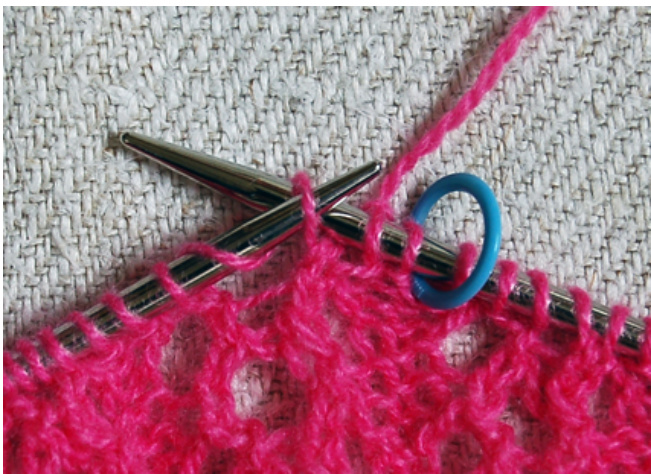
The photo above shows k2tog (knit 2 together). This will make the two stitches knit together lean to the right.
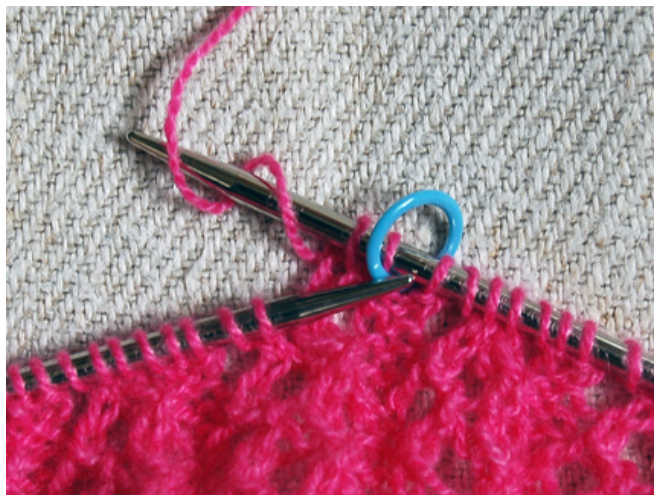
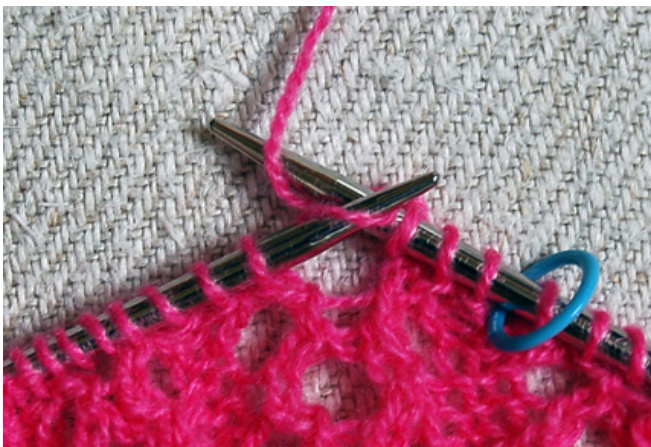
The photo above shows yo, yo (yarn over, twice) No this isn't a lesson in Brooklyn slang, or a toy from your childhood! Yo, yo means to yarn over twice, to do this, wrap the yarn around the needle two times, from back to front. The thing to remember is that you don't want to wrap the yarn tightly around the needle or else it will be nearly impossible to knit into on the next round, so be gentle!
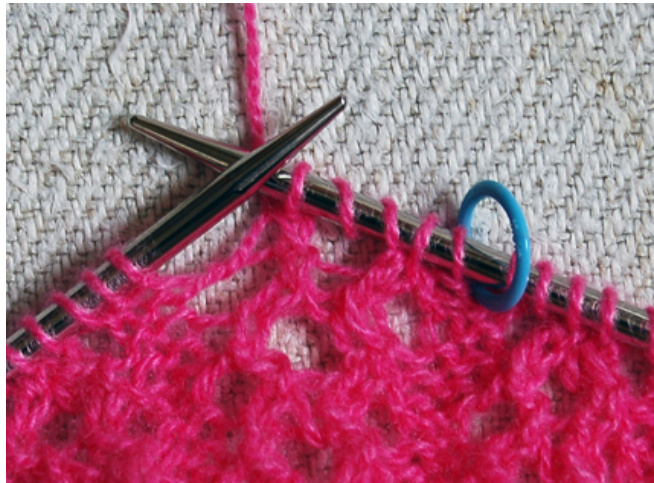
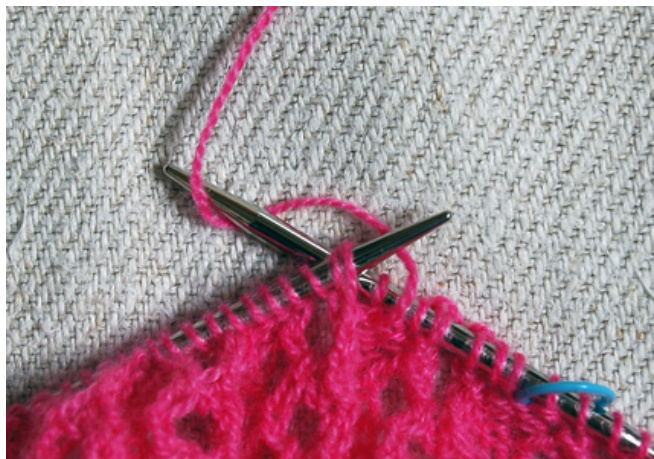
Next, k2togtbl (knit two together through the back loop). Knitting through the back loop will make your stitches lean to the left. What this means is that you are knitting into the back of the stitches on the needle, and gently wrapping the yarn around needle so that you don't pull your yarn over's too tight. The photo above shows how your stitches will look after you've k2togtbl. Next bring your yarn to the front as you normally would to purl the next two stitches. All Purl Bee and Purl Soho patterns are copyrighted and intended for personal home use only. Items made from our patterns may not be sold or auctioned. Thank you for your understanding and cooperation! The second and third stitches in this round may seem mysterious at first. Here are a few photos and a little bit of explanation to help you out:
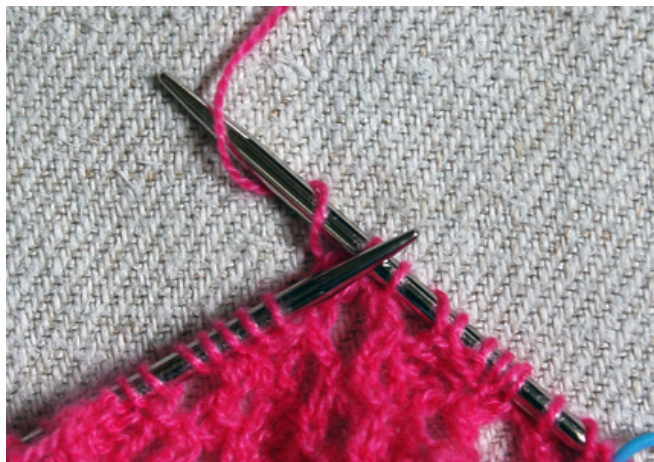
Round 3: \*k1, k into back of first yo, k into front of second yo, k1, p2, repeat from \* to end of round. K into back of first yo, translation, knit into the back of the first wrap of the yarn over from the previous round. This will make your stitch lean to the left.
K into front of second yo, translation, knit into the front of the second wrap of the yarn over from the previous round, this will make your stitch lean to the right. Round 4: \*yo, k2togtbl, k2tog, yo, p2, repeat from \* to end of round. Usually you can't start a row with a yarn over, but because this pattern is knit in the round you can! Nonetheless, yarn over's before and after purl stitches can sometimes be a cause for confusion. Here is a bit of clarification for you:
Yo, k2togtbl, this is an interesting situation. Because you are going from a purl to a yarn over, you don't actually wrap the yarn around the needle. Instead, what you do is simply leave the yarn in the front (from the purl stitch) and go directly into k2togtbl. Just make sure that when you make the next stitch that you wrap the yarn loosely. Remember, you need to make enough room for your needle on the next round when you knit into the yarn over.
K2tog, yo, p2, this next step is also an interesting situation. Becasue you have just knit 2 together your yarn is in back, the next stitch is a yarn over, so you need to bring your yarn to the front, but the following stitch is a purl, so you need to wrap the yarn around the needle again to accommodate for that, otherwise you won't be left with a yarn over. To put it another way, All Purl Bee and Purl Soho patterns are copyrighted and intended for personal home use only. Items made from our patterns may not be sold or auctioned. Thank you for your understanding and cooperation! when you go from a knit to a purl with a yarn over in between, wrap the yarn once for the yarn over, then bring it around again for the purl stitch. Once your cowl is long enough, be sure to bind off loosely in the k4, p2 pattern after you complete Round 4. This will ensure that the finished edge of your cowl is soft and stretchy enough to fit over someone's head. Weave in ends on the wrong side. Enjoy! - Joelle All Purl Bee and Purl Soho patterns are copyrighted and intended for personal home use only. Items made from our patterns may not be sold or auctioned. Thank you for your understanding and cooperation!


