Seamless Baby Hooded Pullover Maggie van Buiten
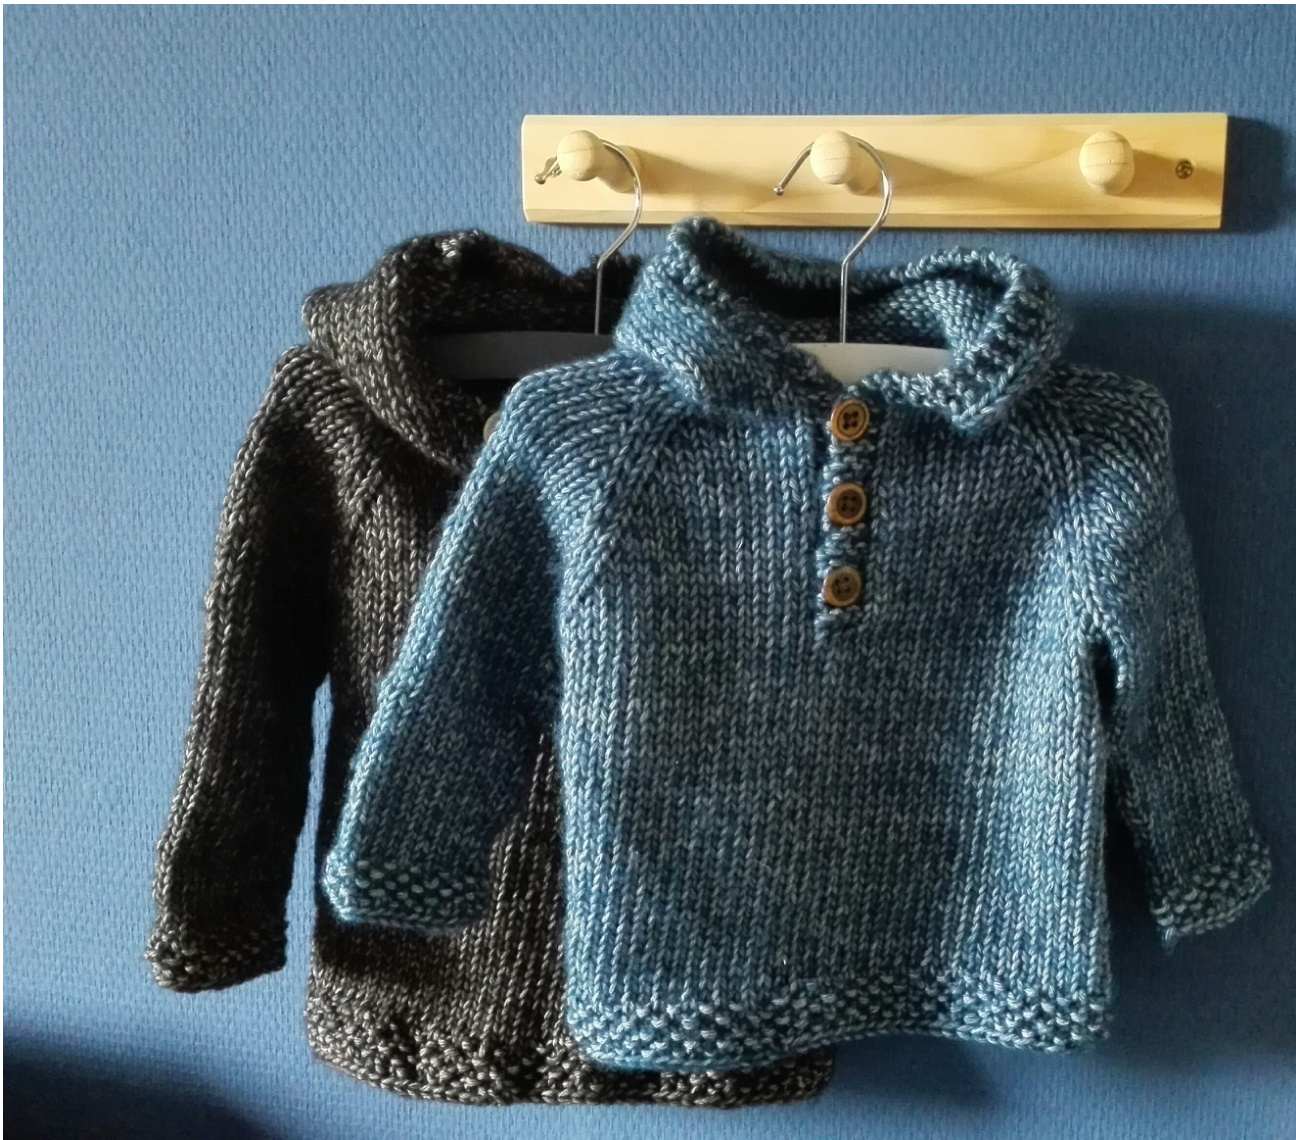
I couldn't find a free pattern for a hooded baby's pullover that wasn't full of seaming so I decided to take a shot at designing my own. This pattern uses multiple seamless construction techniques starting with a provisional cast on, a top down raglan neckline and sleeves, knitting in the round and kitchener stitch to finish the hood. Despite the diversity of techniques it's an easy pattern and a fast knit so I think it would be perfect for someone who would like to try their first seamless sweater. All measurements are in centimeters. ze: 4-8 months (EU 68-72) & 8-12 months (EU 74-80) Measurements: Midsection 47 cm (52 cm) Neck to bottom 28 cm (33 cm) Underarm 16 cm (18 cm) Yarn: Scheepjes Stone Washed XL, 3 (4) 50g / 75 m balls Needles: 5mm/ US 8 round needles and double point (or use Magic Loop) Gauge: 16 stitches and 20 rows in stockinet = 10 cm Extra: waste yarn, stitch markers, stitch holders, tapestry Needle, cable needle, buttons Abbriviations: K-knit P- purl PM - place marker SM- slip marker M1BL- make one using backward loop cast on M1- make one picking up yarn between stitches YO - yarn over K2tog - knit 2 together SSK- slip slip knit MCS- marked center stitch S1- slip 1 PSSO- pass slipped stitch over or the larger size follow directions in parenthesis mark Cast on 44 (52) stitches using a provisional cast on. Begin working raglan rows back and forth as follows: All raglan rows begin and end with K3 for a garter edge, unless it is a buttonhole row. Buttonholes are worked on rows 3, 11, 19, (25) and begin with K2tog, Y0. Row 1 : K3, K7 (8), PM, K5 (7), PM, K14 (16), PM, K5 (7), PM, K7 (8), K3 Row 2 and all even rows: K3, P until 3 stitches from end, K3 Row 3: K2tgr, YO \*K until 1 before marker, M1BL, K1, SM, K1, M1BL\* Repeat between \* 3 times. Knit until end of row Row 5: K3, \*K until 1 before marker, M1BL, K1, SM, K1, M1BL\* Repeat between \* 3 times. Knit until end of row Repeat Rows 2 and 5, through row 23 (26). REMEMBER TO WORK R0WS 11, 19, (25)AS R0W 3 F0R BUTT0NH0LES 8-12 months Row 27: Knit all stitches, no increase You should now have a total of 132 (148) stitches Row 24 (28): K3, purl until there are 3 stitches left, slip next stitch to the left needle and wrap the stitch. Place the wrapped stitch back on right needle and slip these 3 stitches onto a cable needle or stitch holder. They will be worked at the end of row 25 (29) as overlap stitches to close the button band and to join the body for knitting in the round. Turn work. Row 25 (29): K to first marker, slip the following 27 (31) stitches between the markers onto waste yarn or a stitch holder. These stitches will be picked up later to be worked as the arm. Joining the work under the held stitches, continue to knit the following 36 (40) stitches to the next marker. Again, slip the 27 (31) stitches between markers onto waste yarn or a stitch holder, to be worked later as the second arm. Join work under held stitches by continuing to knit until the last 3 stitches.
Closing button band and joining work:
Slip next stitch onto right needle. Place the rightmost stitch from the cable needle onto the left needle. Place the slipped stitch from the right needle back onto the left and knit the two together. Repeat for the following two stitches. This will close the buttonhole band with the holes on top and simultaneously join the work. Place Marker. This is now the beginning of the round. You should have 75 (83) stitches Continue to work in the round until it measures 16 (18) cm from the underarm. Work 5 rows (2cm) in Seed stitch\* and bind off. Weave in ends. \*Seed stitch Row 1 : \*K1, P1\* repeat to end of row ending with a K Row 2: \*P1, K1\* (P over K and K over P) repeat to end of row Repeat rows 1 & 2
Sleeves
Place the stitches from the holder or waste yarn onto a set of double pointed needles or a circular needle with a long enough cable to work in magic loop. I used the magic loop. Beginning under the arm work 14 cm of stockinet stitch in the round, working decrease rows\* at Rows 9, 18, (and 27, 35).
\*Decrease Rows decrease two stitches as follows:K1, K2tog, Knit until 3 stitches remain, SSK, K1
When the sleeve measures 14 (16) cm from under the arm continue to knit 5 rows in Seed stitch. Bind off and weave in ends.
Repeat on other sleeve
Hood
Pick up 44 (52) stitches of the provisional edge. If the waste yarn method was used to cast on remove the waste yarn and remember to turn any stitches that maybe twisted so that they are positioned correctly on the needle or while knitting Row 1 of the hood knit these twisted stitches through the back loop to turn them. The Hood is worked flat and seamed with the Kitchener stitch at the top. Just like the part of the body that was worked flat, every row begins and ends with a garter edge. However, to slant the hood away from the face the first three right side rows have decreases along the edges.
Row 1: Right Side SSK, K 1, K 20 (24), M1, PM on made stitch (will be used as center line MCS) K to last 2 stitches, K2tog(43 (51) stitches) Row 2 and all even rows: K3, P until last 3 stitches, K3 Row 3 & 5 : SSK, K to MCS, M1, K the MCS, M1, K to Last 2 stitches and K2tog, Row 7: K Row 9: K to 1 before MCS, M1, K the MCS, M1, K to end Repeat Rows 6-9 4 (5) times. Then continue in stockinet with garter edge (rows 6 & 7) until the hood measures 14 (15) cm ending with an even row. Begin Decrease rows as follows: Row 1: K to two before MCS, SSK, K the MCS, K2tog, K to end Row 3 : K Repeat rows 1-4 once. Row 9: K to 1 before MCS, Sl, K2tog (includes MCS), PSSO Row 11: Knit for smaller size, repeat row 9 for larger size Row 13: Seam hood shut with Kitchener stitch. The yarn will be on the front of the hood, so it will need to be first pulled through the back stitch as well so that Kitchener can be properly set up. There will also be one extra stitch, witch can easily be worked into the last Kitchener stitch by threading the yarn through the loop of the extra stitch and pulling the stitch through to the inside of the hood to tie off. Finishing: The only finishing required is weaving in ends, sewing the gaps under the arms shut, and sewing on buttons.


