Knitted fLLffy Dice
Lesiged by CoLtha'uinua Theodotua
Materials Needed
\* 75g Double Knitting (DK) weight yarn in Main Colour (MC) \* 10g Double Knitting (DK) weight yarn in Contrast Colour (CC) $\rightarrow$ any smooth wool or acrylic can be used. Mohair adds a nice, fuzzy touch, but I don't recommend using eyelash yarns, as they can form gaps making the toy hard to stuff. \* 10g fibrefill stuffing $\rightarrow$ scraps of fabric or yarn can be used instead.
Tools Needed
\* 3.25mm / US Size 3 straight knitting needles \* 8 small safety pins \* large-eyed sewing needle $^{*}3.25m m$ / US Size 3 Double-Pointed Needles OR 3.25mm crochet hook $\rightarrow$ depending on which method you use to create the hanging cord.
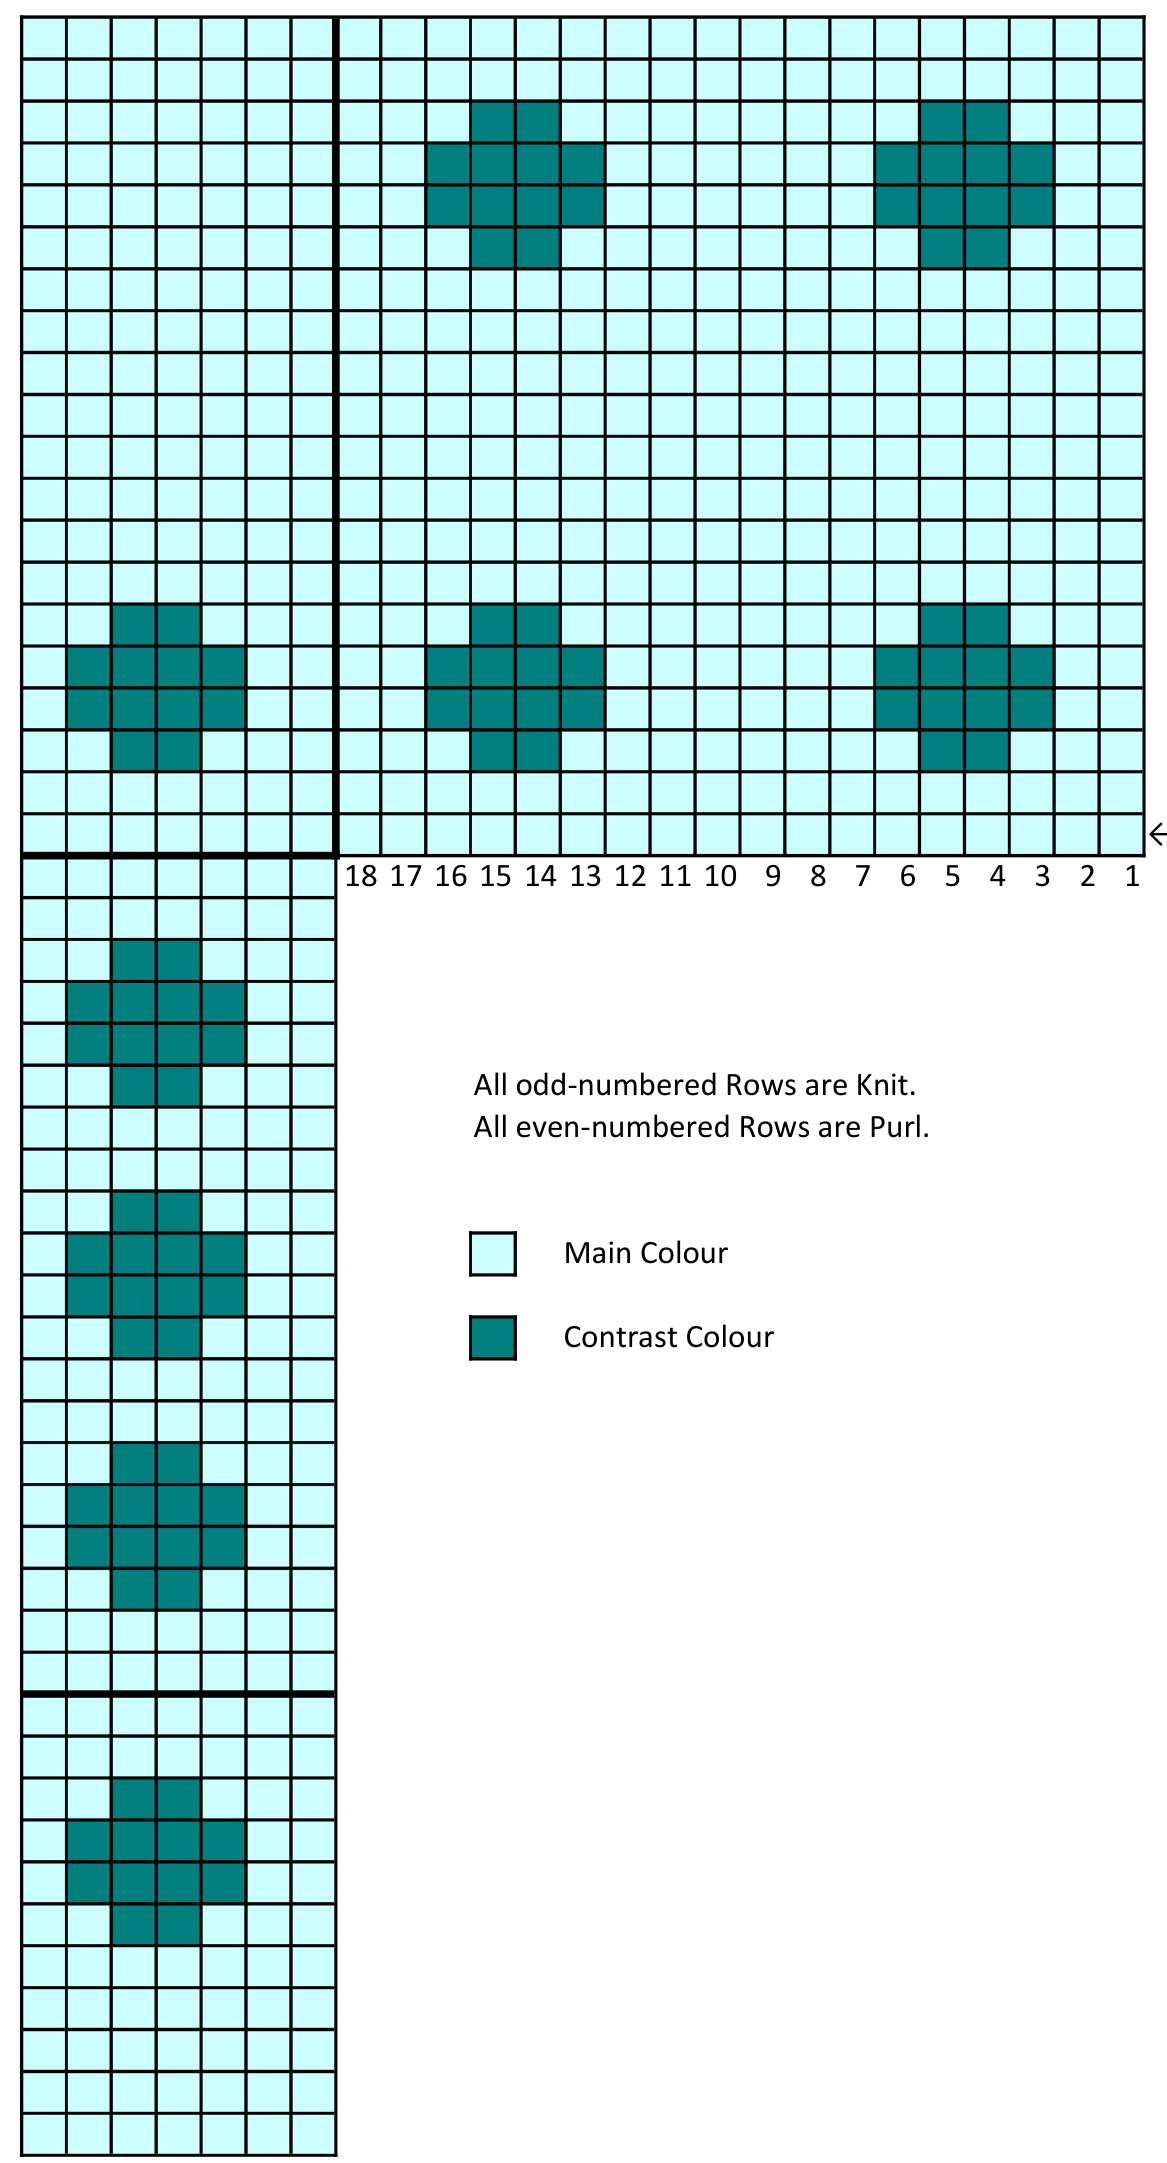
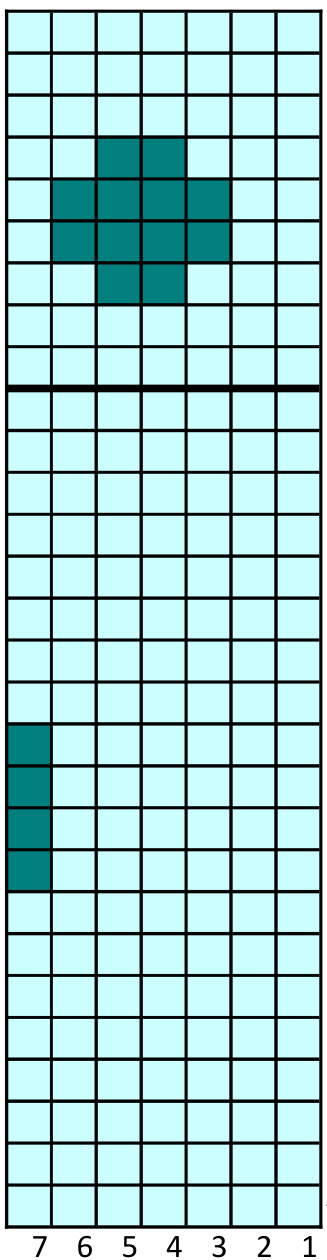
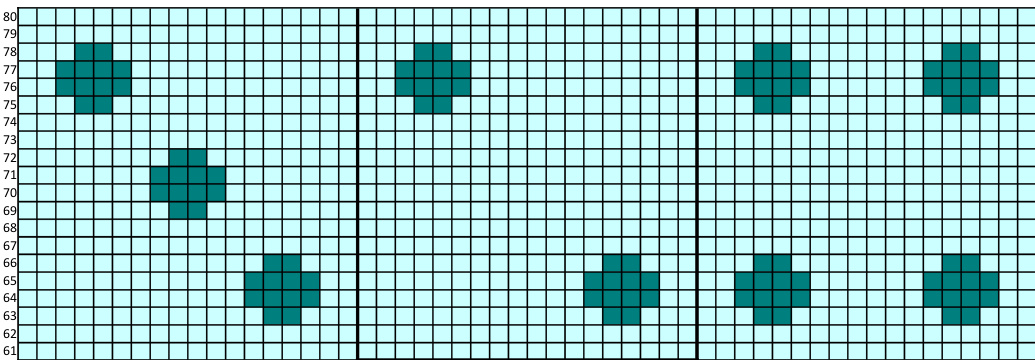
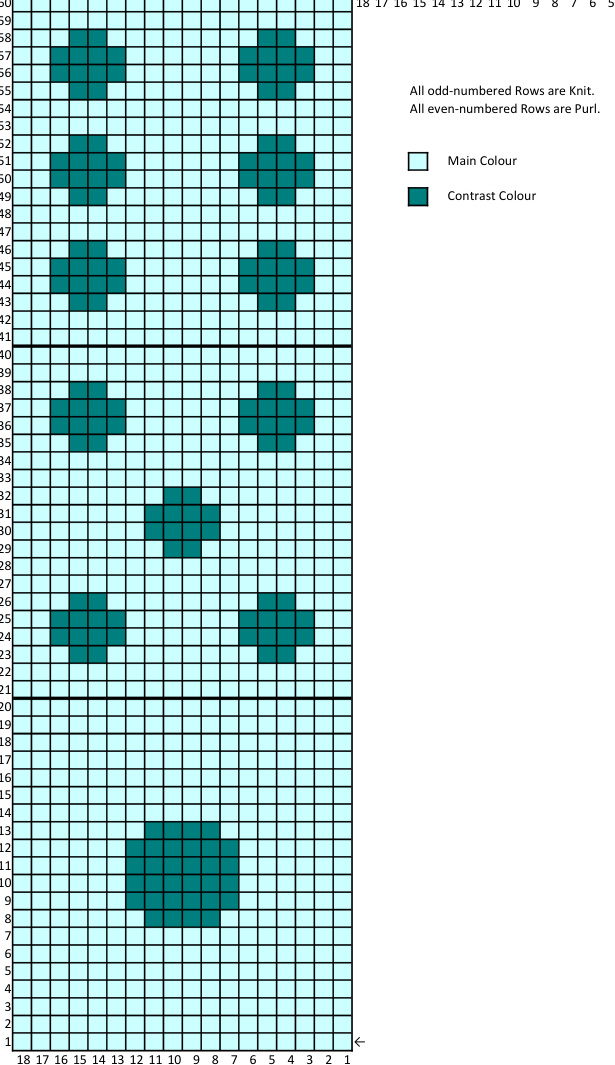
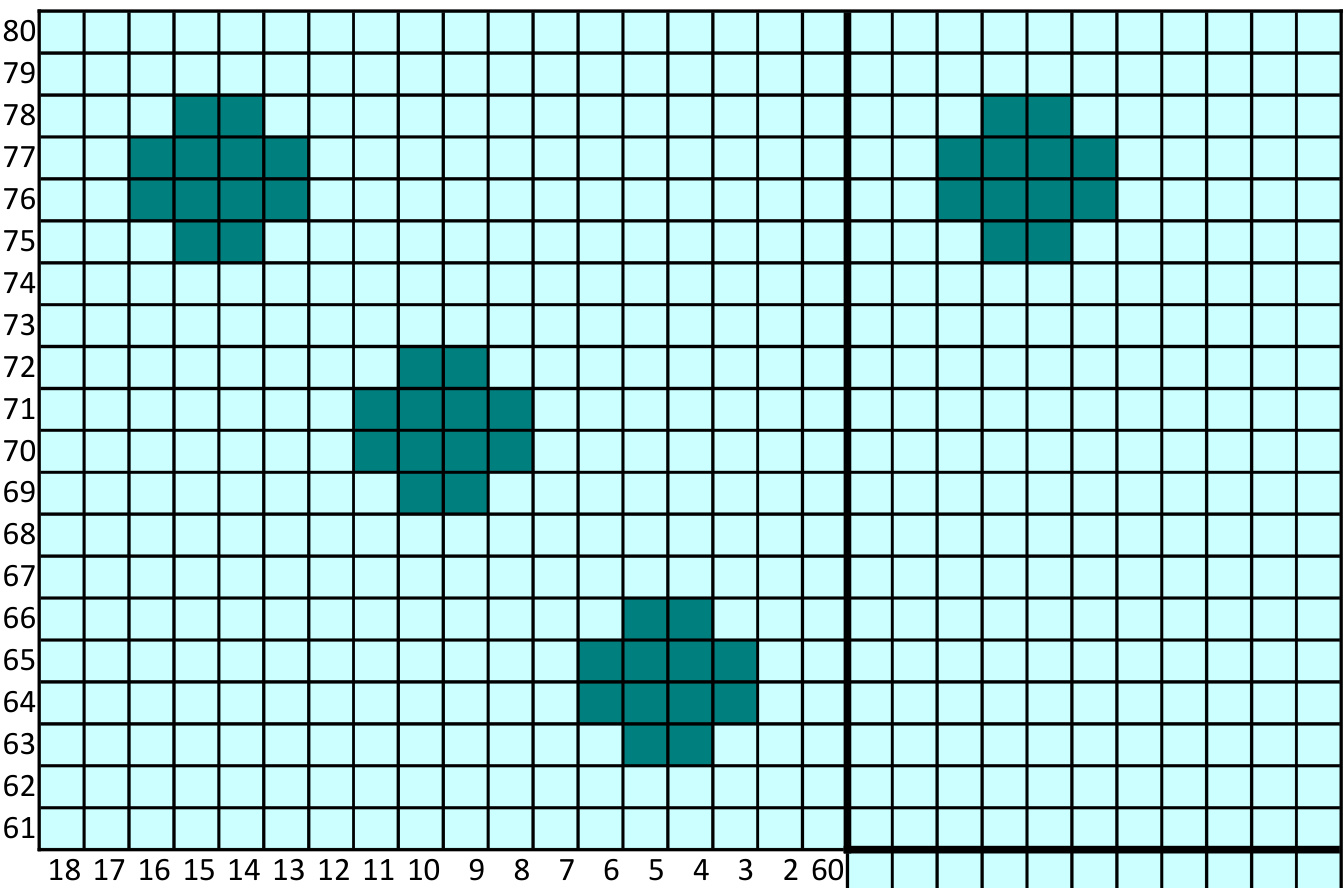
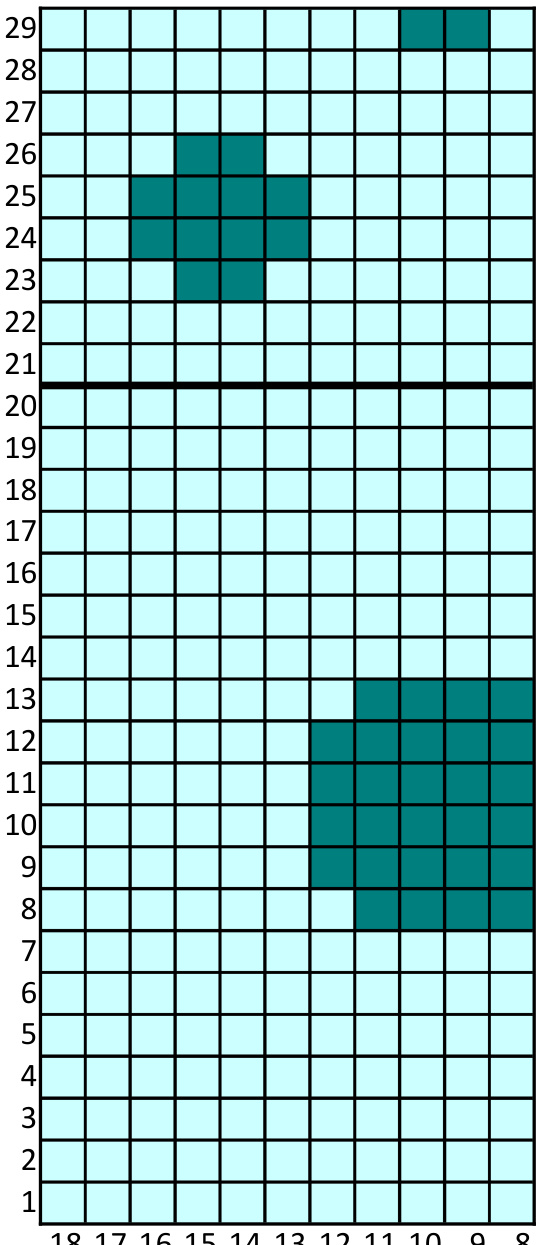
Notes on the Chart
Because the chart is an odd shape, I have included two versions. The first version shows the complete chart in one piece, however it's very small. If you find it too small, you could enlarge it in your PDF reader or on a photocopier. The second version is a much larger and more readable size, but it's in bits. You could print it out, cut it up and stick it together using the first chart as a guide. I have tried to make reading the chart as easy as possible by including the two versions for your choice.
How To Make It!
Cast on 18 stitches. Follow the colour chart, starting at the bottom right-hand corner (indicated by the arrow). As you knit, attach a safety pin on each side of the piece at Rows 20 and 40 (indicated by thick lines). At Row 60, cast on 18 stitches on each side to start the wide section. Continue to the end of the chart. To cast off: Cast off 18 stitches, place a safety pin in the stitch you just cast off. Cast off another 18 stitches and place another safety pin. Cast off to end. Secure yarn. At this stage, the piece will probably curl at the edges, but this doesn't matter. Check the coloured dots. If any seem very distorted or loose, gently tug on the hanging ends on the wrong side to even them up. The ends do not need to be woven in. Thread the sewing needle with a scrap of Main Colour yarn. With right sides together, sew up the sides into a cube, using the safety pin markers as a guide for matching up the corners. Leave half of one edge open. Turn right side out and manipulate the seams to create sharper edges and corners. Lightly stuff with fibrefill. Sew the remaining side closed, making sure that all the loose ends are tucked inside. Repeat this whole process to make a second die.
Making the cord, method 1 (i-cord):
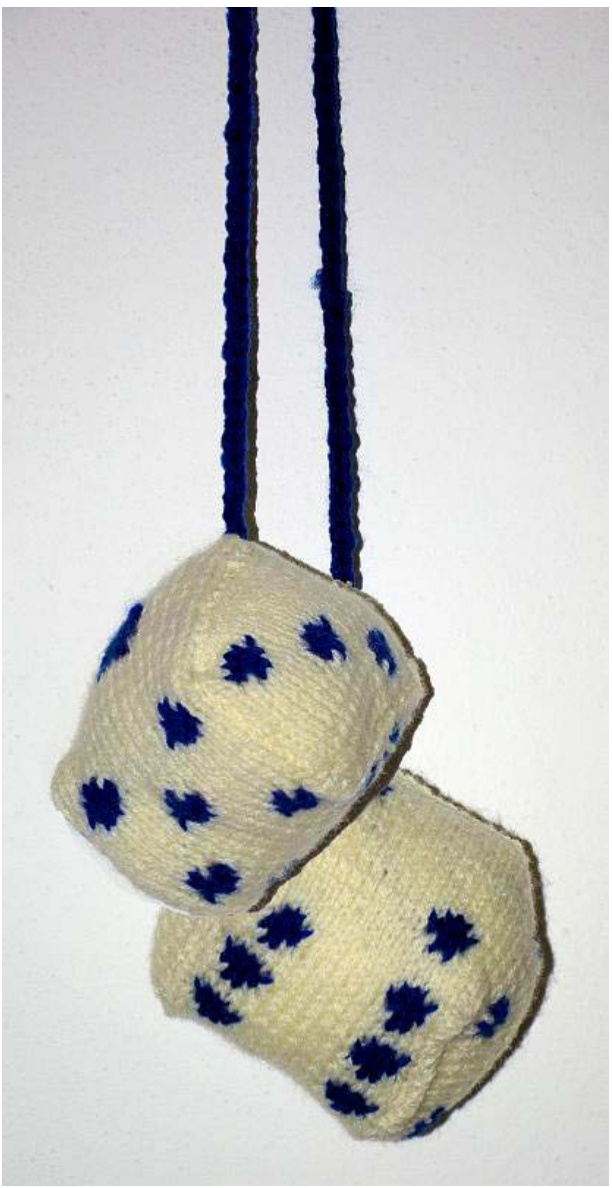
Using Contrast Colour and two Double-Pointed needles, cast on 3 stitches, leaving a 15cm / 6in tail Knit to end. DO NOT TURN. Move the stitches to the other end of the needle. Bring the yarn around the back and pull gently. Knit to end. I"lpeut uitl l uiu iIs Jot!I / ++ iulig. Lust uil, Luviis u ioe!!I u+ tu. Using the tails from each end of the cord, sew them firmly to one corner of each die. Weave the ends in. Fold the cord in half with one end longer than the other. (See the picture for reference.) Sew the two halves together about 2cm / .75in from the fold to form a hanging loop.
Making the cord, method 2 (crochet):
Using Contrast Colour and crochet hook, work a chain 35cm / 14in long, leaving a 15cm / 6in tail at each end. Finish off the cord as for Method 1. Now get all Retro with your Knitted Fluffy Dice!
Official Part
$\circledcirc$ Catharina Theodora 2010. http://apartmentcat.livejournal.com This pattern has NOT been test-knitted. Although carefully checked, there may be errors. You may: You may NOT: Give this pattern to others. Sell this pattern. Make this pattern to give to others. Sell items made from this pattern.

18 171615 141312111098