Renewal shawl
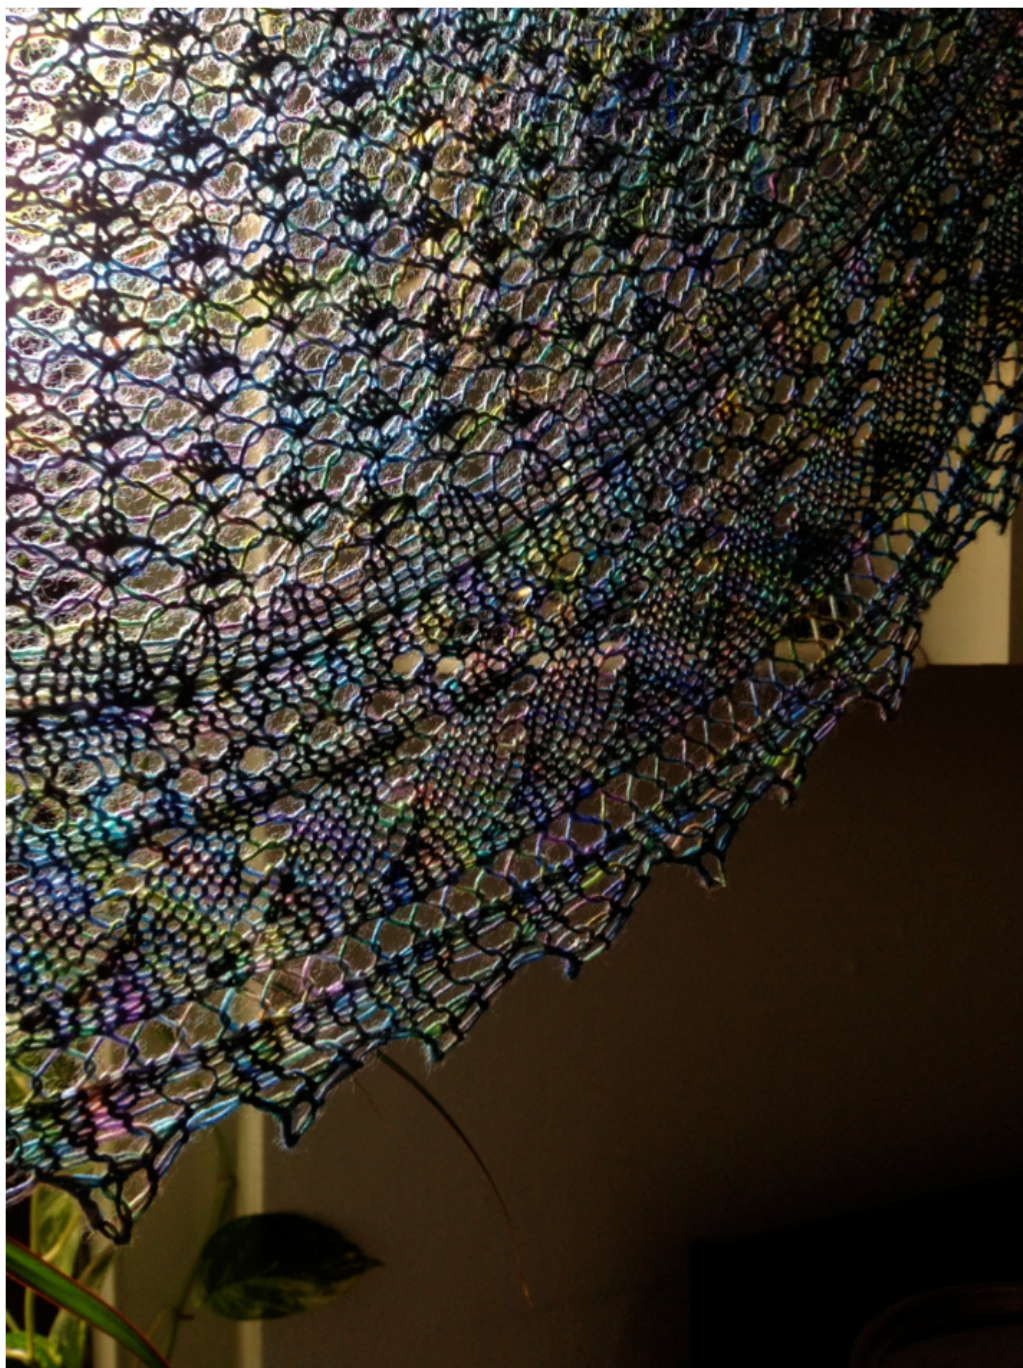
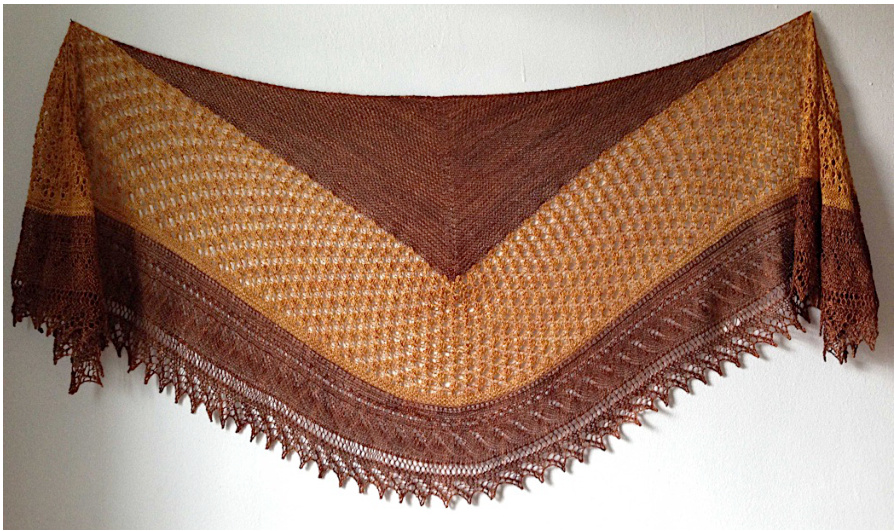
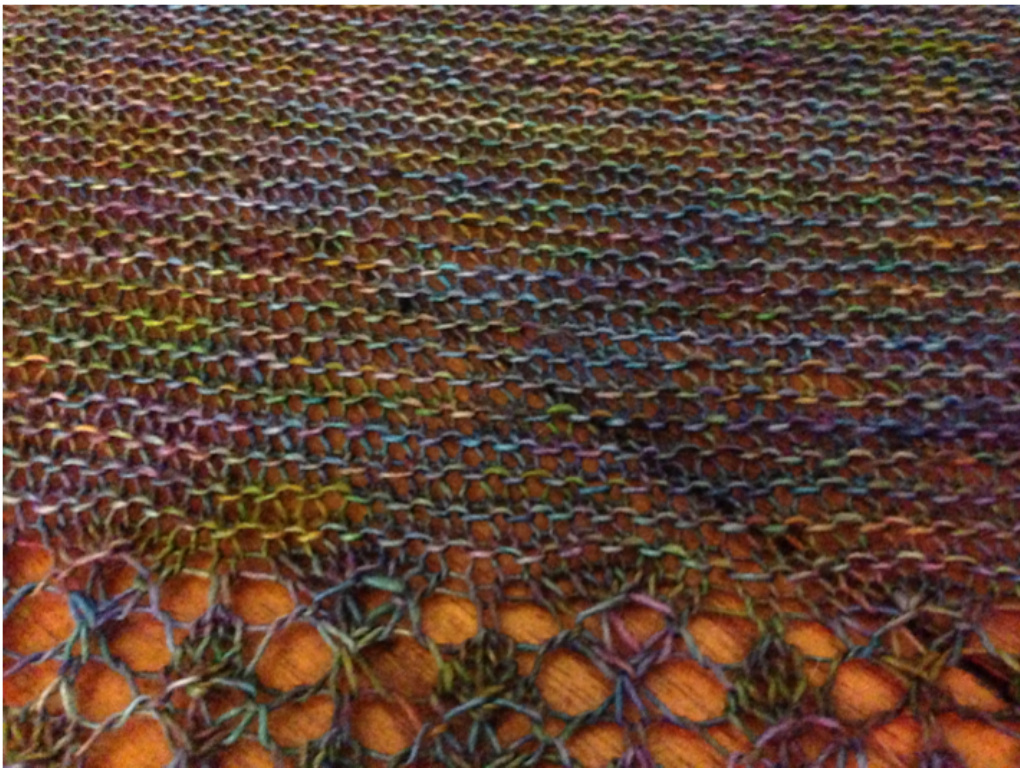
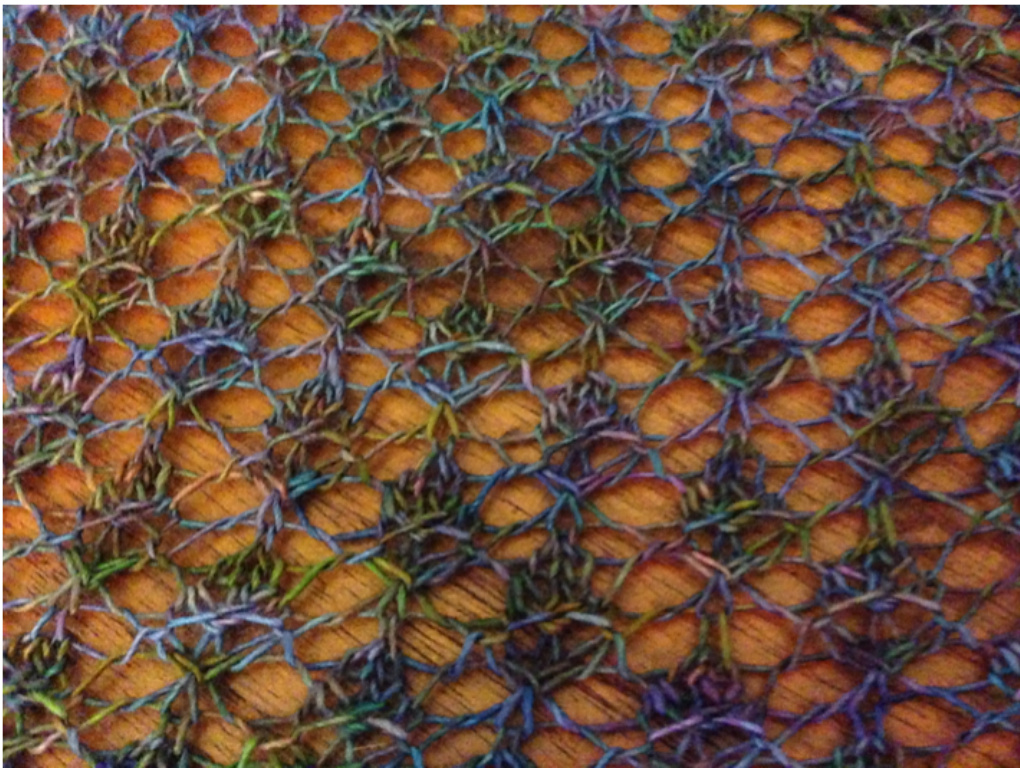
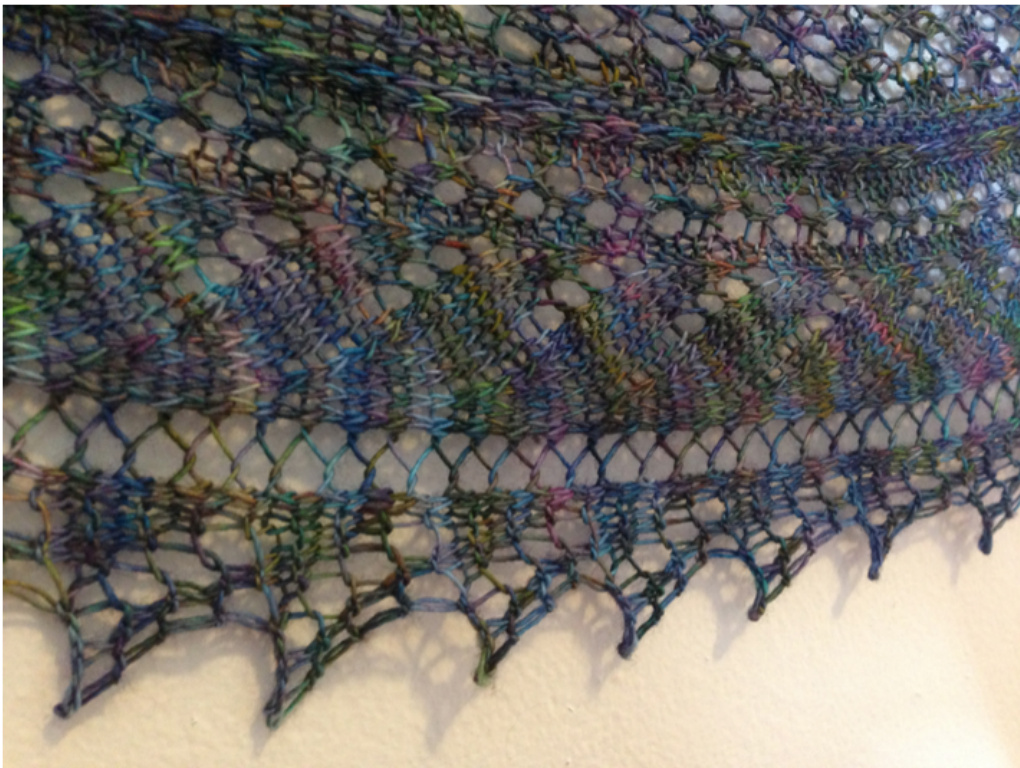
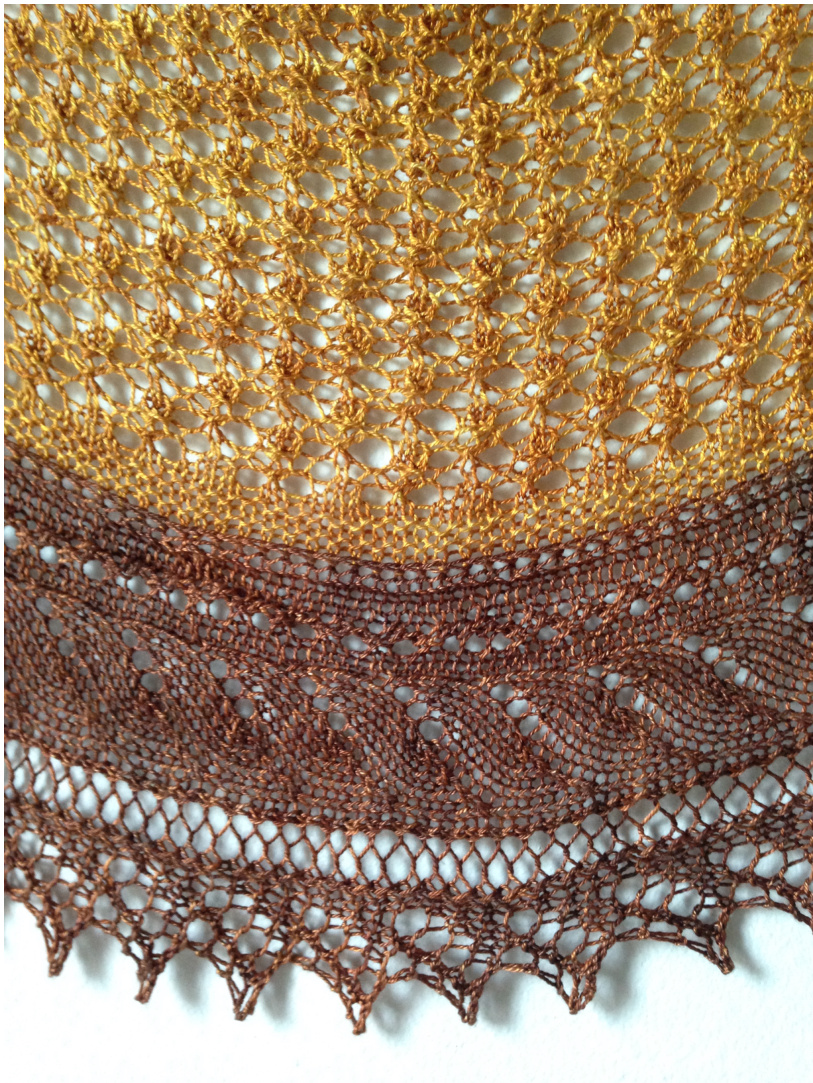
Renewal is a large shawl that can be worked in either lace-weight or light fingering weight yarn. The shawl begins with a garter tab and is worked top-down in a triangle shape, then is worked in a crescent shape throughout the lace section of the body. The shawl is finished with a knit-on border that is worked perpendicularly to the body stitches. Everything is knitted in one piece. The shape of Renewal is rather unique, in that it begins as a triangle, and finishes as a crescent. The shaping creates a shawl that is satisfyingly wide in wingspan, and moderately deep (but not too deep). The crescent shaping lends itself to fitting well around one's shoulders, while the triangular body allows the shawl to be easily worn wrapped around the neck with the point in front - bandanna-style. The stitch patterns in Renewal are intended to represent the changes of trees in spring: bare branches, stark from winter's chill; the buds of leaves and small flowers that appear as spring begins; and full, leafy foliage as summer nears.
Yarn Requirements: 850-900 yards of lace-weight or light fingering-weight yarn in a solid or semi-solid color To make a 2-color version, you will need: 0 500 - 525 yards for garter triangle and border 0 350 - 375 yards for emergent buds lace Be sure to do a gauge swatch and make gauge to confirm you will have enough yarn, or have extra yarn on hand, just in case you run out. Other Materials Needed: Size US 5 circular needles with a cable length of at least 32" Stitch markers as desired. Four stitch markers may be useful when knitting the garter stitch body, and more stitch markers may be desired to delineate pattern repeats or stitch counts for the lace body section. Darning needle for weaving in ends Blocking supplies: foam mats and stainless steel T-pins Spray bottle containing just water for blocking, if necessary Sizing and Gauge: The size of the finished shawl will depend on the weight of yarn used, as the gauge will differ. Your gauge does not have to be exact, but a different gauge will result in a shawl of a different size, and may require more or less yarn than the amounts listed here. Gauges listed are measured after blocking, where the swatch has been allowed to dry and relax. Lace-weight version: Yarn with \~850-900 yards per 100g skein Gauge: 22 stitches x 44 rows per 4" square in garter stitch Finished Size: 18" deep at center x 82" wide at top edge Light Fingering-weight version: Yarn with \~500-550 yards per 100g skein Gauge: 17 stitches x 40 rows per 4" square in garter stitch Finished Size: 24" deep at center x 90" wide at top edge Pattern Notes: Stitch markers are suggested for the garter stitch section, but are not required, and no instructions for using stitch markers are given for the lace sections. It is ultimately left up to the knitter to decide whether to use stitch markers and where she feels they should be placed in the lace to provide the most benefit. Charts and pattern instructions do not differentiate between different styles of yarn-overs (YOs). Because of how the yarn is carried for knit stitches versus purl stitches, it is recommended that you: Wrap the yarn from front to back when making a YO between knit stitches, a knit and a purl, or a purl and a purl Wrap the yarn from back to front when making a YO between a purl and a knit Wrapping your YOs in this manner will ensure that the amount of yarn used for the YO is kept relatively consistent, so your YOs will all appear to be the same size. When knitting or purling into a YO that has been wrapped the opposite way, you will need to knit or purl into the opposite side of the stitch to prevent it from twisting. For example, if you usually wrap your YO from front to back and you instead wrap it from back to front between a purl and a knit, when you encounter that YO on the next row you will likely need to knit or purl into the BACK of the stitch instead of the front. You will notice if you are knitting or purling into the wrong side of the YO stitch, because the YO will appear as a twisted stitch instead of an open hole.
Beginning - Garter Branches
1. Cast on 2 stitches. 2. Knit in garter stitch (knit every row) for 10 rows until there are 5 garter ridges. 3. Turn the work sideways 90 degrees. 4. Pick up and knit into a loop at the end of each of the 5 garter ridges, then turn the work sideways again. 5. Pick up and knit into a loop from each of the two cast on stitches from the end of the tab. You should now have 9 stitches on your needle. Begin the Garter Branches section as follows: Row 1 (WS): K all stitches Row 2 (RS): (K)x2, PM, M1R, (K)x2, PM, KYOK, PM, (K)x2, M1L, PM, (K)x2 In this section, a make one (left- or right-leaning, as appropriate) is always made after the first two and before the last two stitches on each right side row. Additionally, two stitches are increased on either side of what will emerge as the center spine, using the KYOK (knit-yo-knit) stitch. If you initially place markers as indicated, the KYOK will fall right between the center two markers, so it will be easy to find. As you knit the rest of this section as outlined below, you will need to continually move the center markers every right-side row so that they are always directly on either side of the KYOK. Your KYOK will be made into the MIDDLE of the three stitches between your stitch markers, after which you will move the markers so that they are directly on either side of the new KYOK you just made. Moving the markers sets the stage for the next increase row. You may find that you are able to read your knitting and can spot the KYOK because of the small hole it makes. If this is the case, feel free to ignore pattern instructions about the stitch markers in the center, and simply always do your KYOK in the center stitch (the YO) of the previous KYOK, so that they remain centered, row after row. Continue to work in garter stitch, increasing in the same manner: Row 3 (WS): K all stitches Row 4 (RS): (K)x2, SM, M1R, K to next marker, K, MM, KYOK, MM, K, K to next marker, M1L, SM, (K)x2 Repeat rows 3 and 4, increasing on each edge and in the center of each right side row, until have 185 stitches, ending on a RS (increase) row.
Middle - Emergent Buds Lace
Set up row (WS): (K)x2, P until 2 stitches remain, (K)x2 Work the chart or written instructions for the Emergent Buds Lace a total of 8 times, at which point you should have 376 stitches. Each repeat of the lace pattern increases 24 stitches (12 stitches on each edge). The knit-on border is 8 rows, where every other row of the border will join to one of the edge stitches. Therefore, if you wish to increase or decrease the size of the shawl by knitting more or fewer repeats of the lace pattern, ensure you have a multiple of 4 stitches on your needles before proceeding to the border.
Initial set up rows: Row 1 (RS): (K)x2, YO, K until 2 stitches remain, YO, (K)x2 Row 2 (WS): (K)x2, KYOK, K until 3 stitches remain, KYOK, (K)x2 Work rows 1 and 2 twice, and then row 1 a third time, for a total of 5 setup rows worked, and 8 additional stitches increased. 384 stitches total. You should have just finished a right-side row. Ready work as if to begin knitting the next row as usual. Cast on 26 stitches using the backwards loop method. The 25 stitches you just cast on should now be at the very end of your needle, followed by the stitches from the rest of the body. Do not turn the work. Border Set up row: (P)x17, (K)x2, (P)x2, (K)x2, P, P2tog Turn work, and begin working the Foliage Border using the written instructions or chart. This section is worked back and forth across the new border stitches you cast on, and on every WS row you P2tog one of the border stitches with one of the stitches from the main shawl body. The first stitch of every RS row is always slipped purl-wise. Work the Foliage chart until all raw body stitches have been integrated into the border. Bind off loosely, in pattern.
Blocking
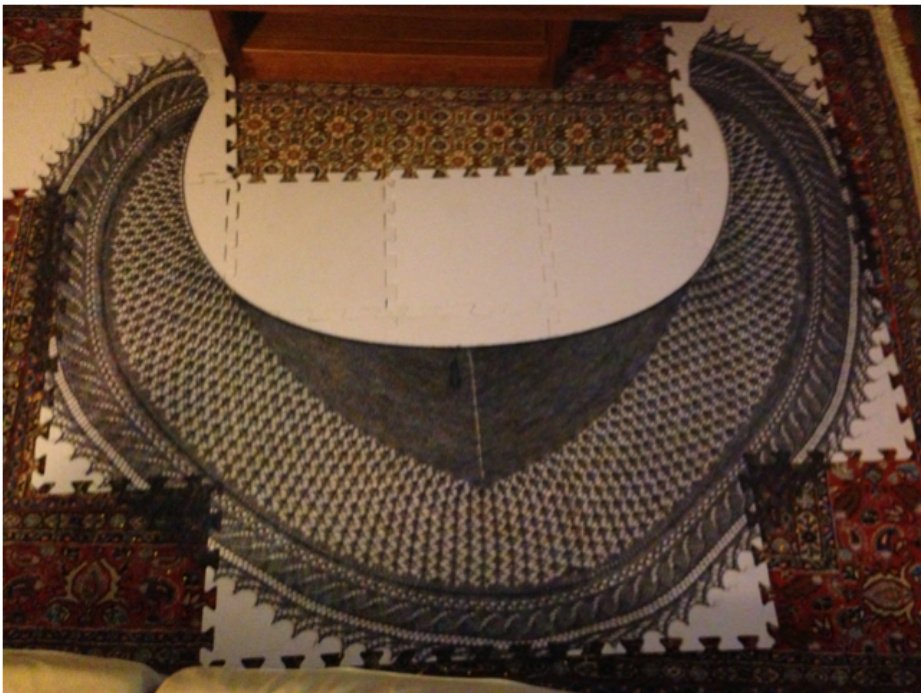
1. Soak shawl in luke-warm water with wool wash for 30 minutes, or until fully saturated. 2. Gently squeeze excess water from the shawl by compression (do not wring or twist). Roll in a clean towel and compress to squeeze out additional water. 3. Spread the shawl flat on a surface such as foam blocking mats or a large bed or carpet, and use T-pins to pin out each point in the border. The overall shape should be a mix between a crescent and a triangle: the top edge can be curved (shown above) or straight, and the middle will be an elongated curve as opposed to a sharp point. Aggressive blocking is encouraged, to fully open the lace pattern. 4. Once pinned, spray with water if the material feels dry to the touch. Allow to sit overnight, or until fully dry once more. 5. Remove pins, weave in ends, and enjoy! Written Pattern Stitch Abbreviations: K = knit P = purl M1R = make one right M1L = make one left YO = yarn over (see pattern notes) K2tog = knit two stitches together through the front loops P2tog = purl two stitches together through the front loops P3tog = purl three stitches together through the front loops P2togTBL = purl two stitches together through back loops SSK = slip the next two stitches knit-wise individually, transfer them back to the source needle, knit them together through the back loops SL-K2tog-PSSO = slip one stitch knit-wise, knit the next two stitches together, pass the slipped stitch over the k2tog KYOK = (knit, yo, knit) all in the same stitch BO = bind off one stitch SL = slip one stitch purl-wise, with yarn held in back PM = place marker for the first time SM = slip marker as is in the stitch order MM = move marker one stitch to the right or left so that it now resides in the order indicated Chart Symbols Legend:
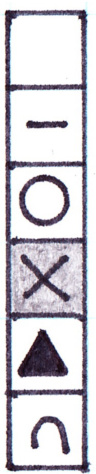
RS: Knit / WS: Purl RS: Purl / WS: Knit Yarn Over No Stitch (Knit, YO, Knit) all in same stitch Bind Off one stitch RS: K2tog / WS: P2tog through back loop (Slip knit-wise)x2, Knit slipped stitches together through back loop (aka SSK) Purl 2 stitches together Purl 3 stitches together Slip knit-wise, K2tog, PSSO Slip knit-wise with yarn held in back

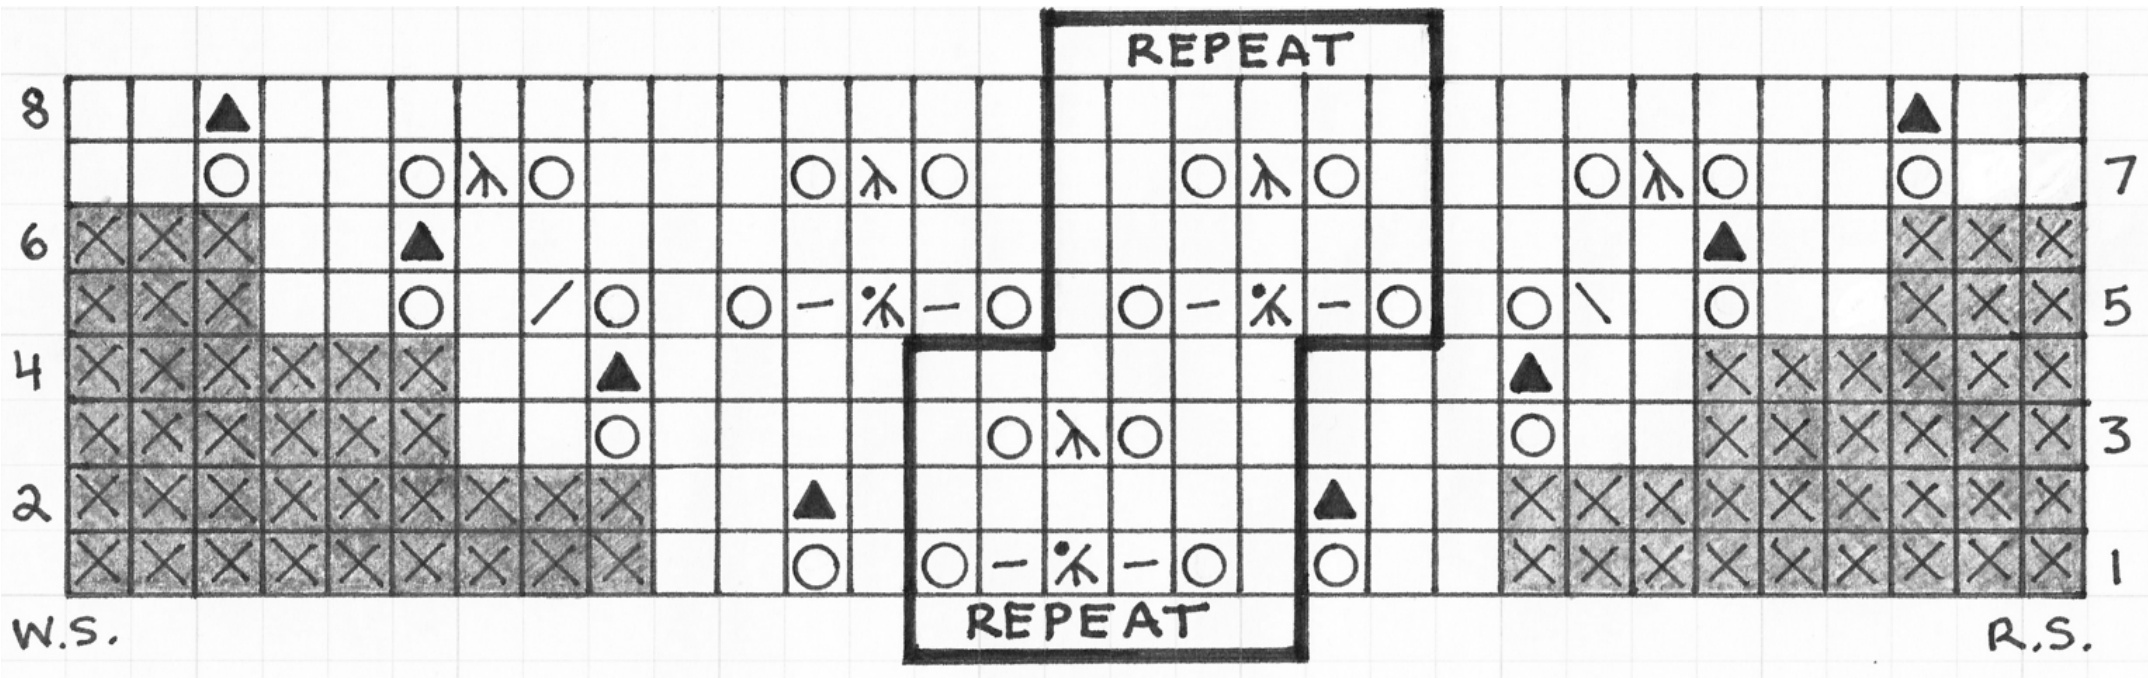
Emergent Buds Lace - Written Instructions
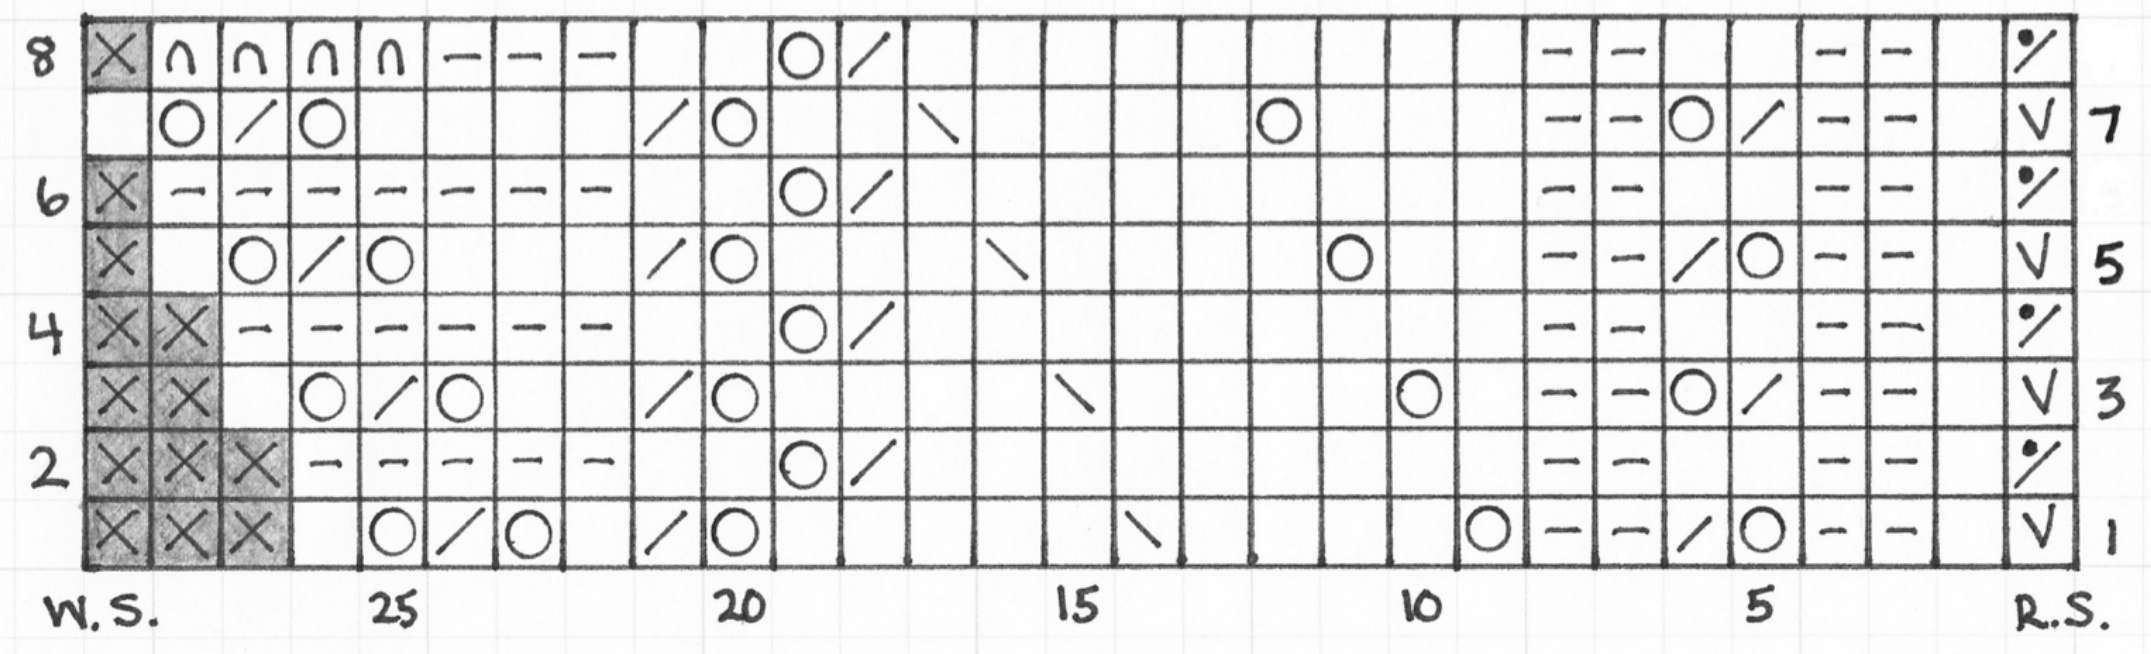
Row 1 (RS): (K)x2, YO, \*\* K, YO, P, P3tog, P, YO, repeat from \*\* until 3 stitches remain. K, YO, (K)x2. Rows 2, 4, 6, 8 (WS): (K)x2, KYOK, \*\* P repeatedly until 3 stitches remain. KYOK, (K)x2. Row3: (K)x2, YO, (K)x3, \*\* (K)x2, YO, SL-K2tog-PSSO, YO, K, repeat from \*\* until 6 stitches remain. (K)x4, YO, (K)x2. Row5: (K)x2, YO, K, SSK, YO, K, \*\* YO, P, P3tog, P, YO, K, repeat from \*\* until 5 stitches remain. YO, K2tog, K, YO, (K)x2. Row7: (K)x2, YO, K \*\* K, YO, SL-K2tog-PSSO, YO, (K)x2, repeat from \*\* until 2 stitches remain. YO, (K)x2.
Emergent Buds Lace - Chart
Foliage Border - Written Instructions
Row 1 (RS): SL, K, (P)x2, YO, K2tog, (P)x2, YO, (K)x4, SSK, (K)x5, YO, K2tog, K, YO, K2tog, YO, K. Row 2 (WS): (K)x5, (P)x2, YO, P2togTBL, (P)x9, (K)x2, (P)x2, (K)x2, P, P2tog (one border stitch and one body stitch). Row3: SL, K, (P)x2, K2tog, YO, (P)x2, K, YO, (K)x4, SSK, (K)x4, YO, K2tog, (K)x2, YO, K2tog, YO, K. Row 4: (K)x6, (P)x2, YO, P2togTBL, (P)x9, (K)x2, (P)x2, (K)x2, P, P2tog (one border stitch and one body stitch). Row 5: SL, K, (P)x2, YO, K2tog, (P)x2, (K)x2, YO, (K)x4, SSK, (K)x3, YO, K2tog, (K)x3, YO, K2tog, YO, K. Row 6: (K)x7, (P)x2, YO, P2togTBL, (P)x9, (K)x2, (P)x2, (K)x2, P, P2tog (one border stitch and one body stitch). Row 7: SL, K, (P)x2, K2tog, YO, (P)x2, (K)x3, YO, (K)x4, SSK, (K)x2, YO, K2tog, (K)x4, YO, K2tog, YO, K. Row 8: (BO)x4, (K)x3, (P)x2, YO, P2togTBL, (P)x9, (K)x2, (P)x2, (K)x2, P, P2tog (one border stitch and one body stitch)
Foliage Border - Chart