BaoeChainRe%
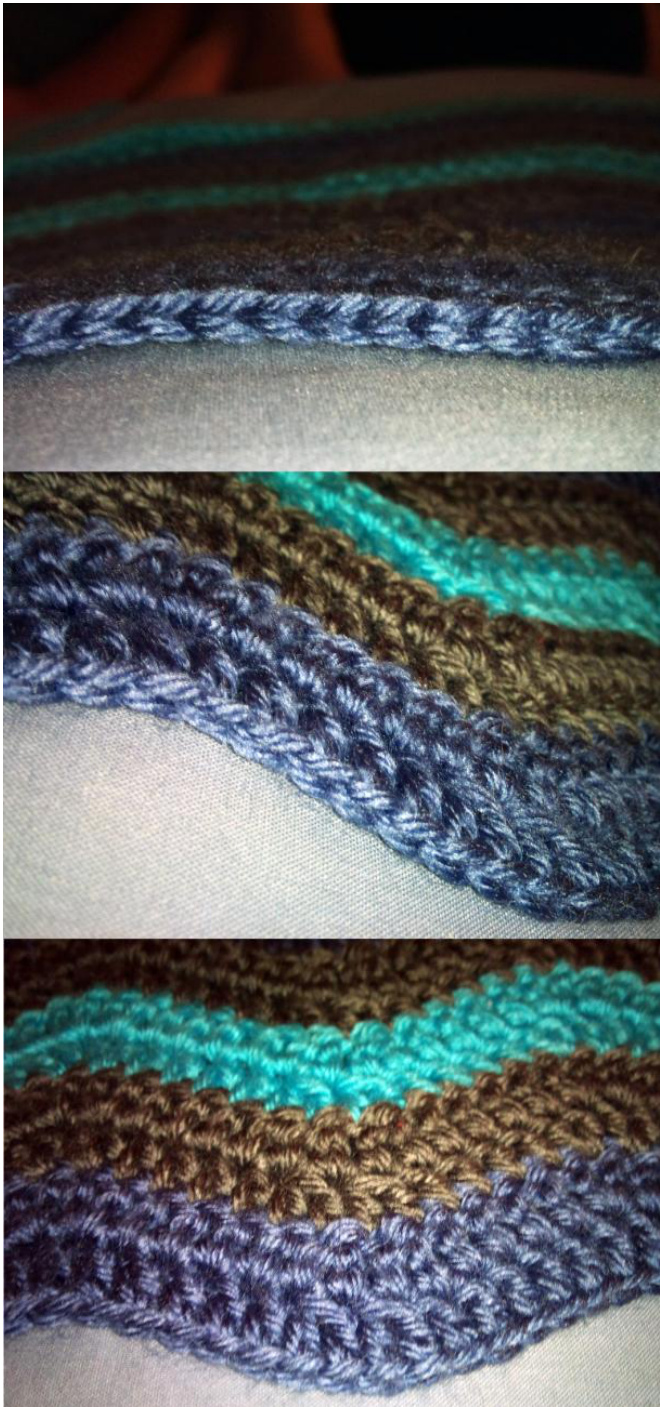
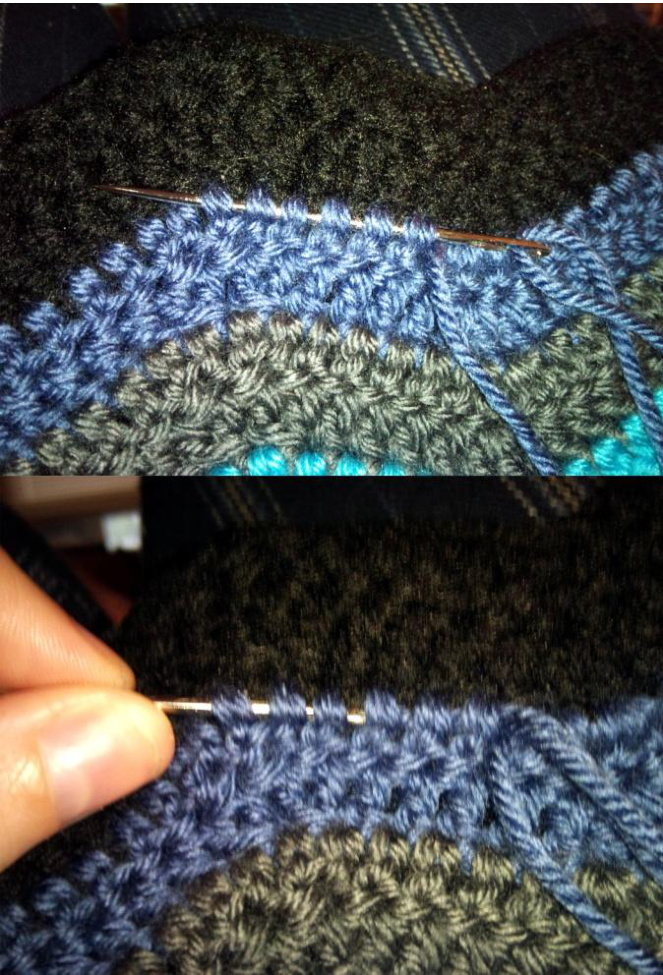
Have you ever been working on something and later decided that your base chain was too tight? The wrong colour? You didn't like the first few rows? But you were too far along to frog the whole thing and start over? You can rip out and replace your base chain without needing to frog the piece if you decide you've done too much to start over. I put together a quickie tutorial to describe how to do this. It's my first one so I hope it makes sense. Questions and comments are very welcome $\circledast$ You can find me on Ravelry, username: Hello-Operator In this particular example, I had started a blanket with a black yarn, stitched 3 rows of black at the beginning of the blanket and then later decided to change my colour scheme and no longer wanted to use the black yarn at all. By the time I made up my mind there was way too much work done and I really didn't want to start over. This is the process: Thread a tapestry or darning needle with the yarn you want to use for the new base chain. Do not cut the length of yarn from the skein. In this example the new yarn is the same colour as the stitches we are working into. Thread the new yarn through the bottom of the first row of stitches you worked into the base chain. If you are ripping out more than just your base chain, you want to thread this new yarn through the bottom of the row you made directly after all the stuff you want to cut away. See fig. 1 In fig. 1 you can see I have turned the piece upside down to make it easier to work. The black yarn is the base chain and first couple of rows. The lavender yarn is the row I made directly after the black, the black yarn being what I want to cut off. Thread this new yarn all the way through, from one side of the piece to the other. Do not cut or tie off the new length of yarn.
Figwe 1
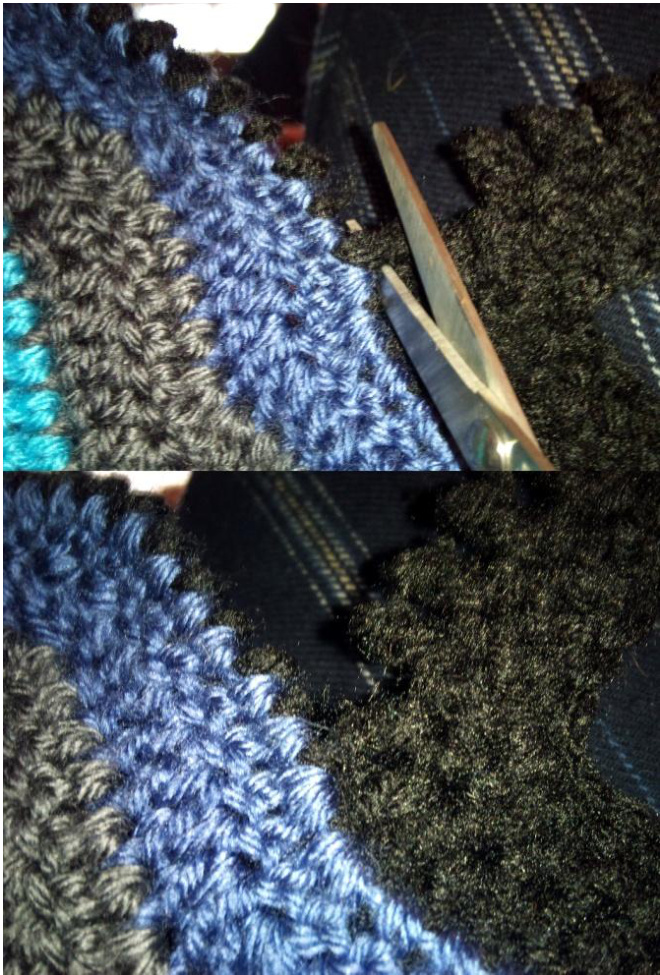
Now that you have this new yarn threaded through the length of your piece, you can cut away the unwanted portion. Be very careful to not snip your new thread or any of the stitches you want to keep. It helps to pull the stitches apart as in fig. 2 Snip, snip, snip and pull all the unwanted yarn out from your piece.
Figuvre 2
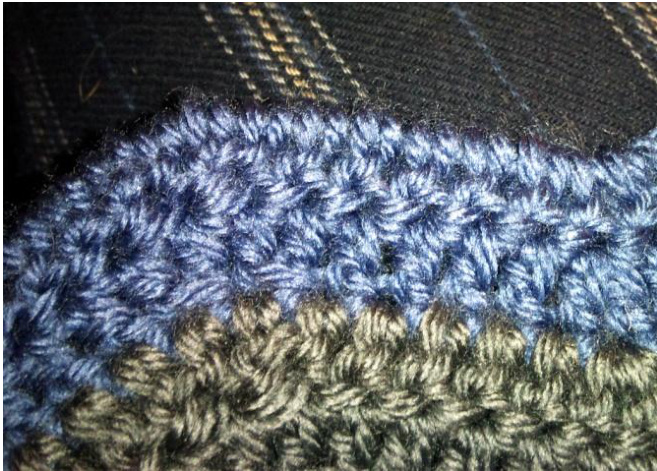
When you've done that, you end up with a nice edge that looks like this. See fig. 3 All of the unwanted yarn has been removed and if you pull the stitches apart, you can see the new length of yarn that has been threaded through all the stitches.
Figuve3
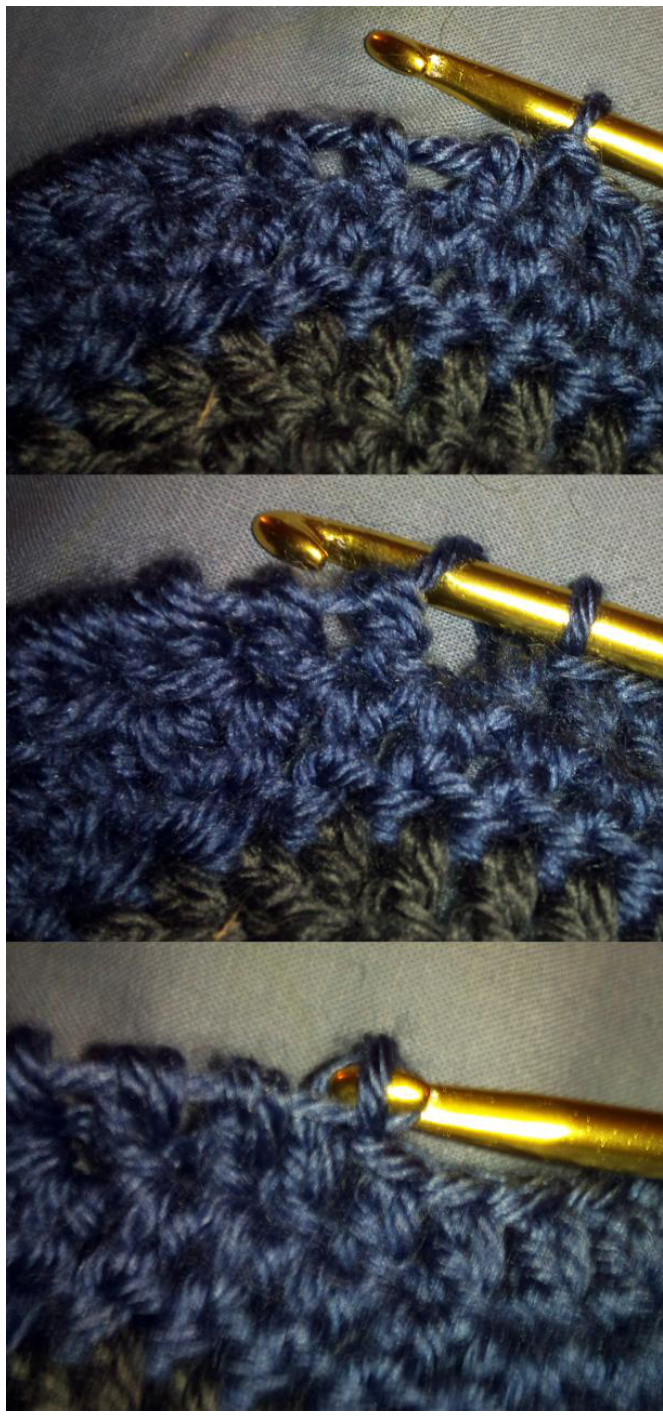
Remove your darning needle and get out your crochet hook. You may want to use a hook one size larger than what you're working with if you are replacing a base chain because it was too tight. A larger hook may also be useful if you tend to crochet on the tight side. One end of your yarn will be attached to the skein and the other end will be free. With the free end of your yarn, tie a slipknot onto the crochet hook and pull the knot and hook right up tight to your stitches. Remember to leave a long enough tail to weave in later. Now comes the fun part. Pull your stitches slightly apart so that you can see the yarn you threaded through. You will be working in between each existing stitch. You should have one loop on the hook already (the slipknot). Insert your hook into the space after your first stitch and underneath the new yarn as in fig. 4 Hook the new yarn and pullit through the loop on your hook. Tada!! It's that easy. Continue all the way across your piece, inserting your hook and pulling through a loop after each and every stitch. When you get to the end, cut the yarn from the skein and fasten off, leaving a long enough tail to weave in.
Figwe 4
When you've finished, you get a beautiful clean edge that looks like this. See fig. 5
Figvre S