Eyelet Neck Scarf by Backwardknitter
Skill Level - Advanced Beginner
Materials
Brooks Farm Solo Silk Scarf 1 skein - 400 yards (365m) Needles - US 6 / 4mm Gauge - 19 sts & 38 rows $=4^{\prime\prime}$ Notions - Tapestry Needle Stitch marker
Abbreviations
K-KnIt P- Purl YO - Yarn Over M1L - Make 1 Left M1R - Make 1 Right PM - Place Marker Sts - stitches SM - Slip Marker
Notes
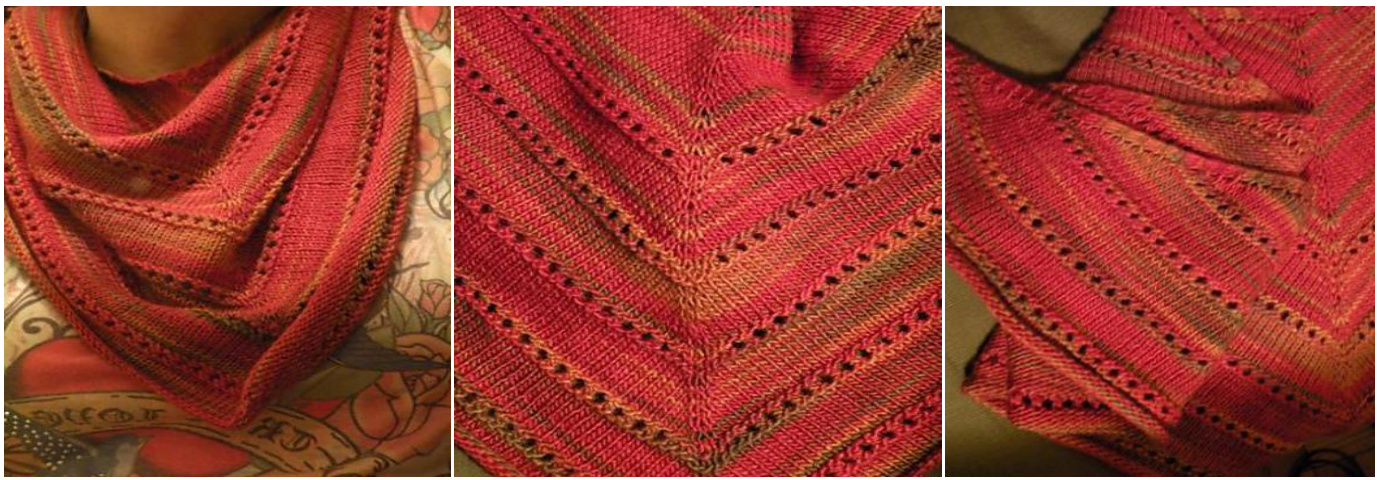
In the spirit of Ez, this is more of a recipe then a pattern. I used Brooks Farm Solo Silk but you can use any yarn you like, just use a needle that will give you a loose gauge. It is intended to be a one skein project, but that depends on the knitters preference and yarn supply. The loose gauge gives the scarf a certain airiness that makes it pleasant to wear in the spring with a denim jacket. The body of this scarf is a basic stockinette stitch pattern with an eyelet pattern repeated every 10 rows after the main neck portion is done. The neck portion can be any length you like. The pattern increases 4 stitches on the right side (2 by yarn over at the edges and 2 by make ones at the center spine) and 2 stitches on the wrong side (both by yarn over placed at each edge). This is a cold weather scarf and I didn't want center eyelets on the spine. I wanted a solid piece I could pull up over my face. I used a make one increase (M1L & M1R) that leaves no hole. To make one you lift the bar of yarn between the stitches and twist it as you knit it to close the hole. To avoid getting larger/smaller holes on the wrong side increases at the edges the yarn over has to be\* wrapped differently\*when they are either preceded or follow by a purl stitch then on the stockinette side. How to do this will be different depending on your style of knitting. Please look up an online tutorial to find what works best for you. Sometimes just a firm tug will help close a too large hole. Copyright Allyson Ryan for Backward Knitter www.backwardknitter.blogspot.com Please do not copy, distribute or sell either the pattern or garments made from this pattern.
Eyelet Neck Scarf by Backwardknitter
Notes continued
Use a loose bind - off method such as EZ's sewn bind-off or Jeny's surprisingly stretchy bind off on Knitty.com. Garter Stitch tab - Using a backwards loop cast on method, loosely cast 3 backward loops on the needle. Rows 1-6 - Knit every row (3 sts for 3 ridges). Row 7 - K3, pick up and knit 1 stitch in each garter stitch bump and 3 stitches from cast on loops. 9 sts total. Base row - K3, YO, K1, PM, K2, YO,K3.
Recipe for Body of Scarf
Row 1 (WS) - K2, YO, P to marker, SM, P to last 3 sts, YO, K3, turn. (On this and all odd rows except through eyelet pattern) Row 2 (RS) - K3, YO, K to marker, M1L, SM, K1, M1R, K to last 3 sts, YO, K3, turn. Repeat rows 1 & 2 - 22 times or until desired length to first eyelet pattern. Eyelet pattern - is worked over 4 rows starting with a wrong side row. Row 1 & 3 - K3, YO, K to marker, SM, 3 sts before end, YO, K3 Row 2 - K3, YO, K2, \*YO, K2tog\*, repeat from between $*\prime_{\mathsf{S}}$ to 1 or 2 sts before marker (depending on stitch count of a particular row)K those 1 or 2 sts, M1L, slip marker, K1, M1R, K same amount of stitches as before marker, $^{\ast}\mathsf{K}2$ tog, $\mathsf{Y O}^{\ast}$ ,repeat between $*_{\mathsf{\ell}}$ to last 5 sts, K2, YO, K3. Row 4 - K3, YO, K to marker, M1L, SM, K1, M1R, K to last 3 sts, YO, K3, turn.
Make 1 Increase -
To M1L (make one left), take the left hand needle and pick up the bar between the stitches from front to back. Use the right needle to knit this bar through the back loop. To M1R (make on right), lift the bar through the back and knit it through the front loop. The tension can seem a little tight but you will get used to it with practice.
Directions
Start with a 3 stitch Garter Stitch Tab. Move on to body of scarf. Work rows 1 & 2 for 22 rows or until desired length. Work one eyelet pattern. Then work 10 rows of body followed by 1 eyelet pattern until you run low on yarn. Work a few rows of stockinette before you bind-off. Use a loose/stretchy bind -off. Weave inends. Blocking - Soak for at least 20 minutes to allow the fiber to bloom. Squeeze - don't wring, roll in a towel to get out as much water as possible, and block with or without wires pulling out garter stitch ridge fully and shape. Allow to dry thoroughly before moving, at least 24 hours. Finished size - Depending on yarn used size will be approximately $50^{\prime\prime}$ wideby $18^{\prime\prime}$ downthe spine blocked without wires and $52^{\prime\prime}$ wideby $24^{\prime\prime}$ blocked with wires and pin.


