TESSUTO
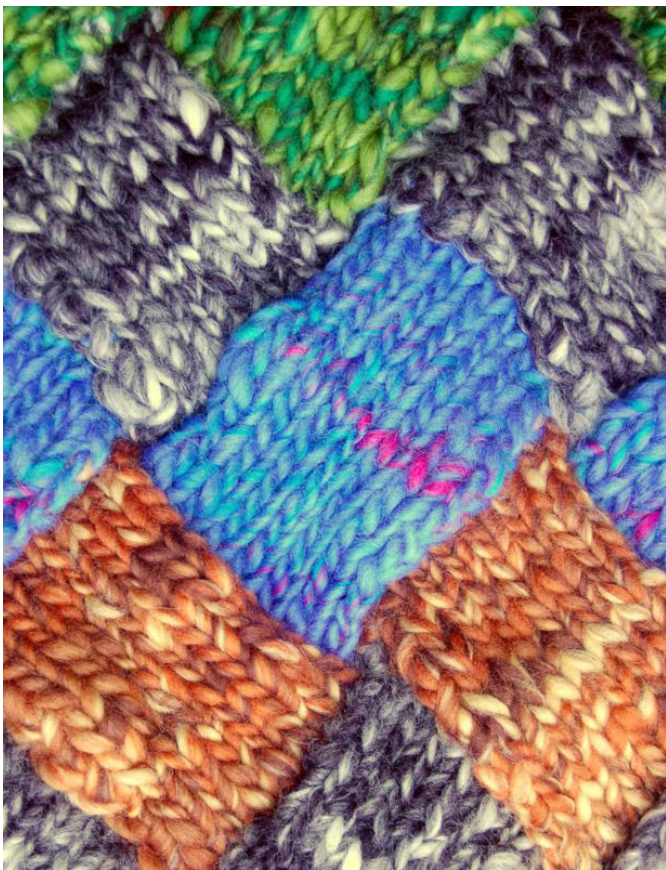
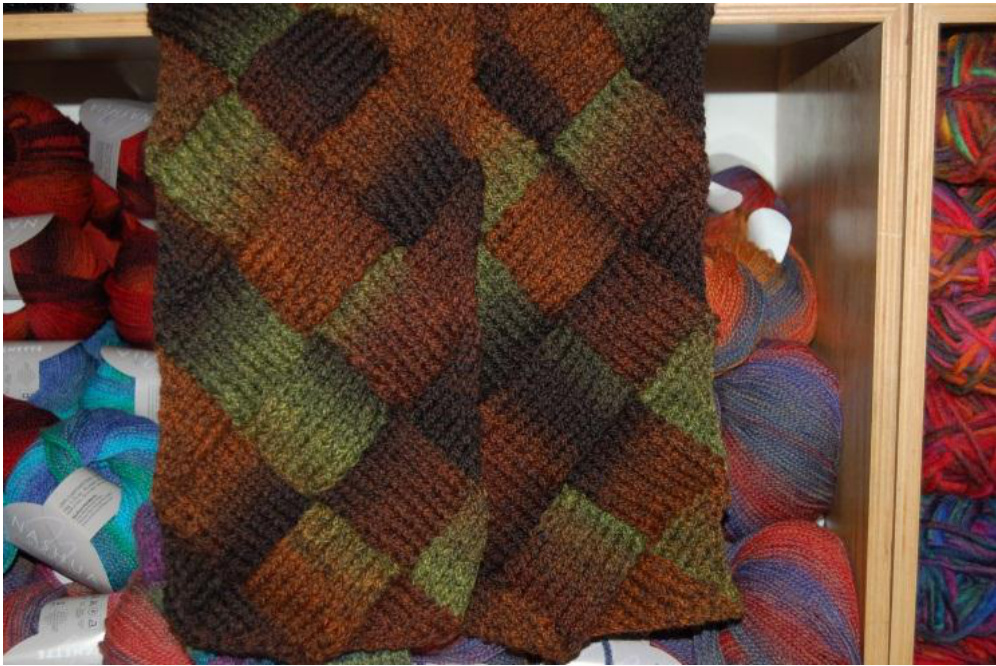
BY STEVEN HICKS Tessuto is the best kind of scarf pattern—it looks intricate but it surprising easy to work. Each row of squares builds upon the previous and is especially effective in striped or variegated yarn. The enterprising knitter can use these instructions as a starting point for his or her own version of an entrelac scarf by varying needle size and number of stitches in each square.
FINISHED MEASUREMENTS
YARN AND NEEDLES
6"x 52" (15 x 132 cm) scarf 370 yards (338 m) bulky yarn US 10.5 (6.5 mm) needles
GAUGE
Tapestry needle 3.5 stitches per inch (2.5 cm) in stockinette stitch
kknit ppurl ssk slip two stitches as if to knit, insert left needle back into these two stitches and knit together p2togpurl two stitches together m1 make one stitch pm place marker PATTERN
PATTERN NOTES
Each square or triangle in entrelac is worked separately, which makes the pattern much simpler than it may look. Because each square or triangle is worked separately, each square or triangle can be a different color or texture of yarn. While working the scarf, look for similarities to other techniques, such as the Garter Short Rows scarf, in which a decrease is used to "take up" stitches from one needle. Keeping this in mind can make each square easier to work without reading the pattern line by line. DIRECTIONS
SECTION 1 - FOUNDATION TRIANGLES
Cast on 2 stitches Row 1: p Row 2: k1, m1, k1 (3 stitches) Row 3: p Row 4: k2, m1, k1 (4 stitches) Row 5: p Row 6: k3, m1, k1 (5 stitches) Row 7: p Row 8: k4, m1, k1 (6 stitches) Row 9: p Row 10: k5, m1, k1 (7 stitches) Row 11: p Row 12: k6, m1, k1, (8 stitches)
BEGIN NEXT TRIANGLE:
itches. Repeat directions beginning with Row 1, ignoring the previous 8 stitche: Continue adding triangles for the desired width of the scarf. For this scarf, begin with two foundation triangles.
SECTION 2-RIGHT-SLANTEDWEAVE
LEFT EDGE TRIANGLE
Row 1: p2, turn Row 2: k1, m1, k1 Row 3: p2, p2tog (the third stitch and the next stitch of the triangle), turn Row 4: k2, m1, k1 Row 5: p3, p2tog, turn Row 6: k3, m1, k1 Continue in this manner until all of the triangle stitches have been used, ending with p2tog. SQUARE With wrong side facing pick up 8 stitches along the edge of the foundation triangle. Turn and knit 8 stitches. Row 1: p7, p2tog (the eighth stitch and the next stitch of the next triangle), turn Row 2:k8, turn Repeat these two rows until you have used all of the stitches of the foundation triangle.
RIGHT EDGE TRIANGLE
With wrong side facing, pick up 8 stitches along the edge of the foundation triangle. Turn and knit 8 stitches. Row 1: p to last two stitches, p2tog Row 2: k7, turn Row 3: p to last two stitches, p2tog Row 4: k6, turn Continue in this manner until there is one stitch left.
SECTION 3-LEFT-SLANTEDWEAVE
SQUARE Slip last stitch from right-edge triangle to right needle. With right-side facing, pick up 7 stitches along the edge of the triangle. Turn and purl 8 stitches. Row1: k 7, ssk (the eight stitch and next stitch from the Section 2 square or triangle), turn Row 2: . p 8, turn Repeat these two rows until you have used all of the stitches of the Section 2 square or triangle, ending with SSK. With right side facing, pick up 8 stitches along edge of the Section 2 square. Repeat directions for the Section 3 square, beginning with Row 1. Repeat Section 2 and Section 3 until the scarf reaches the desired length, ending with Section 2.
SECTION 4-ENDING TRIANGLES
Slip last stitch from right-edge triangle to right needle. With right-side facing, pick up 7 stitches along the edge of the triangle. Row 1: p to last two stitches, p2tog Row 2: k 6, ssk, turn Row 3: p to last two stitches, p2tog Row 4: k 5, ssk, turn Continue in this manner until there is one stitch left. With right side facing, pick up 7 stitches along edge of the square. Repeat directions for Section 4 triangle, beginning with Row 1. When you have one stitch left, cut yarn and pull the end through the stitch to secure. Weave in all ends.