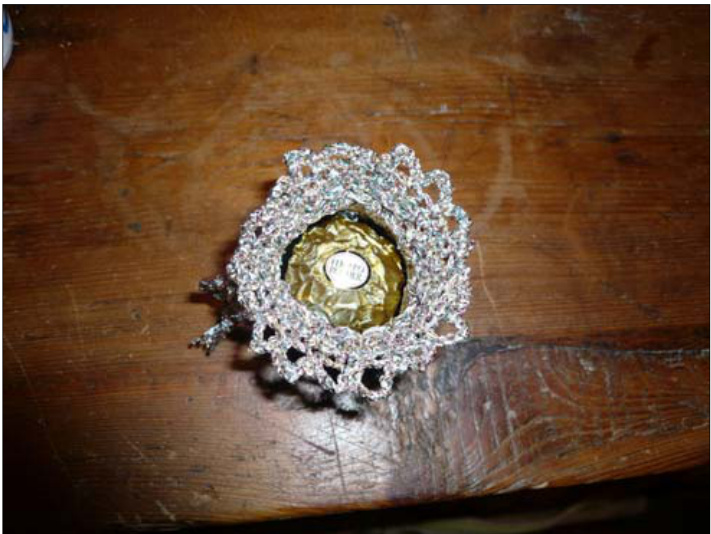
Ferrero Rocher Tree Bags
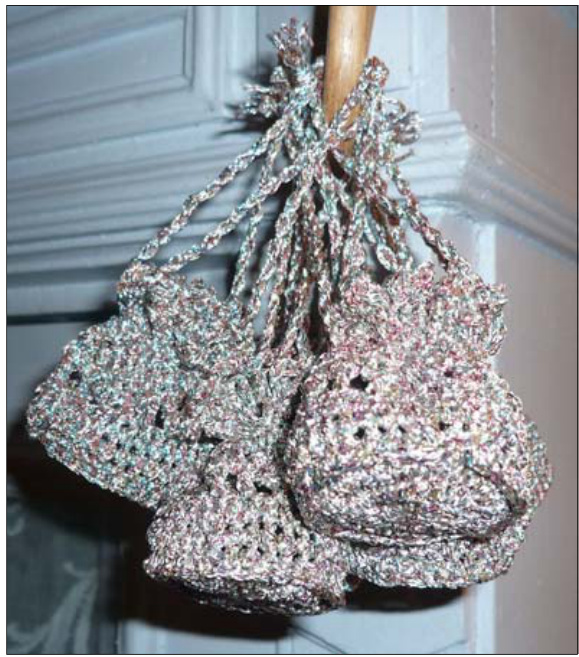
Materials: Twilleys Goldfingering or similar yarn 2.50 mm crochet hook Ferrero Rocher! Abbreviations: (English crochet terms) These little bags, each filled with one Ferrero Rocher, are designed to hang on the Christmas Tree. Ch - chain Ss - slip stitch Dc - double crochet Htr - half treble Tr - Treble Prev - previous St - stitch Ea -each Sp - space Round.1. Make a circle with the yarn and into it work 2ch (for height) and 12 htr. Ss to first htr to join. Round 2. Work 2ch for height and then 2htr into each htr of prev. round. (24 sts) Round 3. Work 2ch for height. \*Over the next 2 sts work 1htr in first st and 2htr into next st. Repeat from \* to end. Ss to first htr to join. (36 sts) Round 4. Work 1dc into each st. Round 5- (NB This round is worked from the BACK and makes the dc round stand out as an edging to the base of the bag.) Work 2ch for height; work 1htr into ea st of dc round, but working through the dc st from the back of the work and going down into the top of the prev htr st. This makes the previous dc round stand out at the front of the work (see illustration below). (NB. The following illustrations are from a different project, but using the same technique)
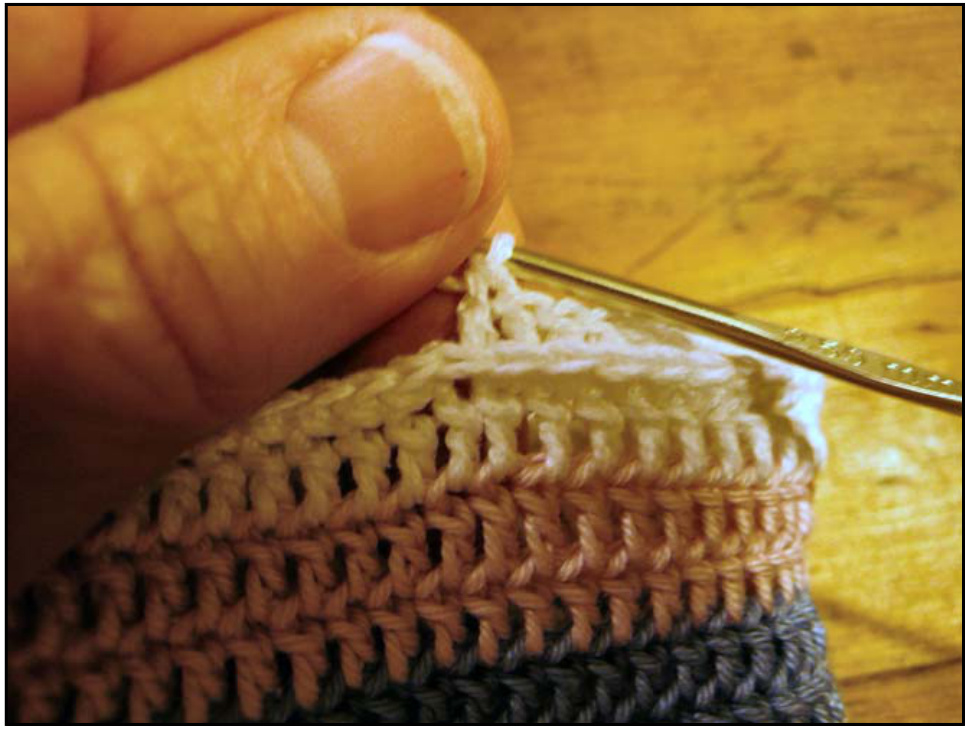
To achieve this, work as follows: Put your hook through the top of the required stitch, from the back, and go down into the htr of the row below. Keep the hook at the front of the work as you do this (the hook tip will now be at the back of the work).
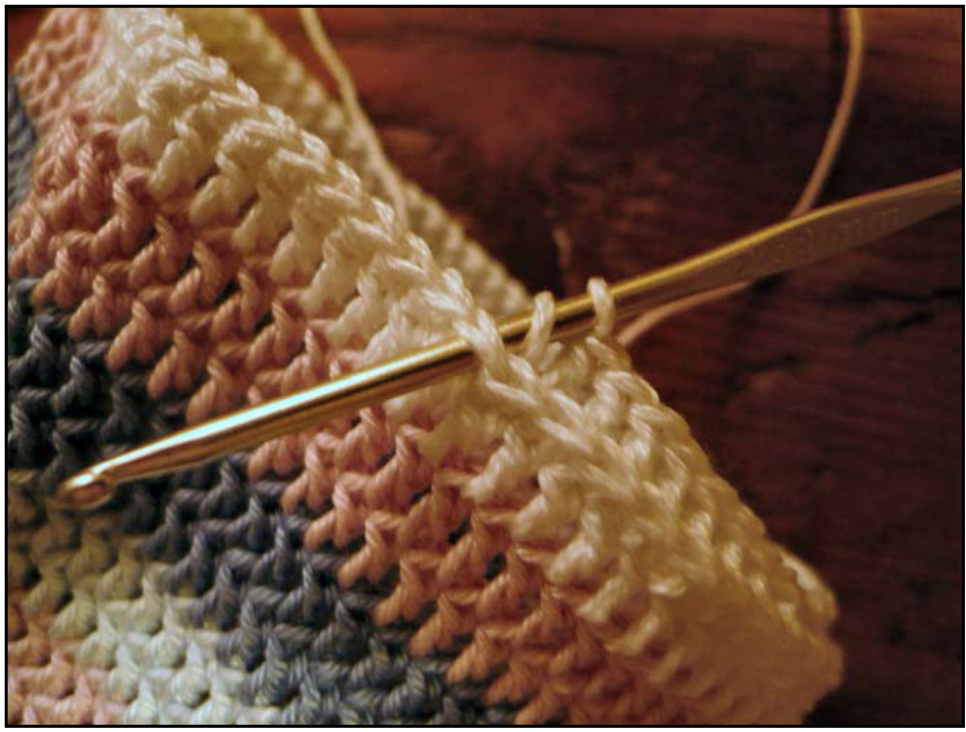
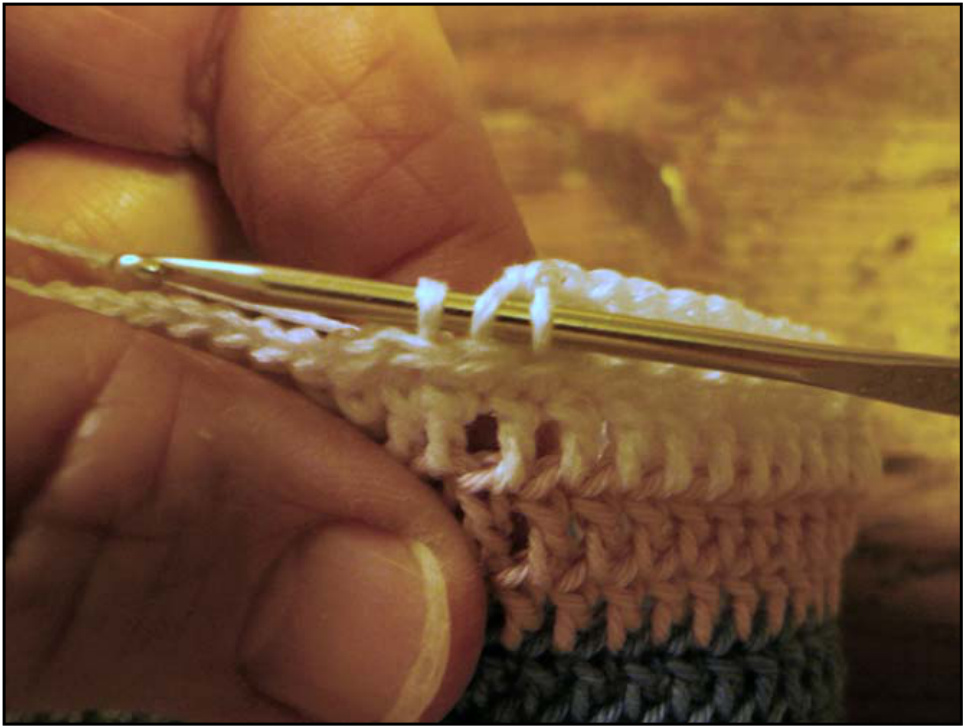
Pull the yarn through and make the htr as usual. Round 6 & 7. Work in htr Round 8. Work 2ch for height, then work \*1tr in the first st, miss next st, 1ch, 1tr in next st. Rep from \* to end, but joining the ch to the first st with a ss. Round 9. Making 2ch for height at the beginning of the round, as before, work 1htr into ea tr of prev row and 1htr into ea ch sp. Ss to first st to join. Work rounds 6 to 9 again.
Edging.
\*1dc into first st, 5ch, miss next st. Rep from \* to end, ss to join. Break off yarn and sew in the end.
Finishing: Make 2 twisted cords (use 1.5m yarn for each) and thread through the top row of holes,in opposite directions. Knot the ends of each cord together and cut to form a little tassel.
Twisted Cord
Take $1.5\;\mathsf{m}$ of yarn and double it. Put the doubled end around a small hook, or doorknob. Hold the other two ends together and twist in one direction (at least 25 twists). Keep hold of this end tightly and release the other end from the hook or doorknob. Put both ends together and knot tightly. The yarn will twist back on itself to form the twisted cord. Smooth out the twists evenly by running your finger and thumb up and down the cord.


