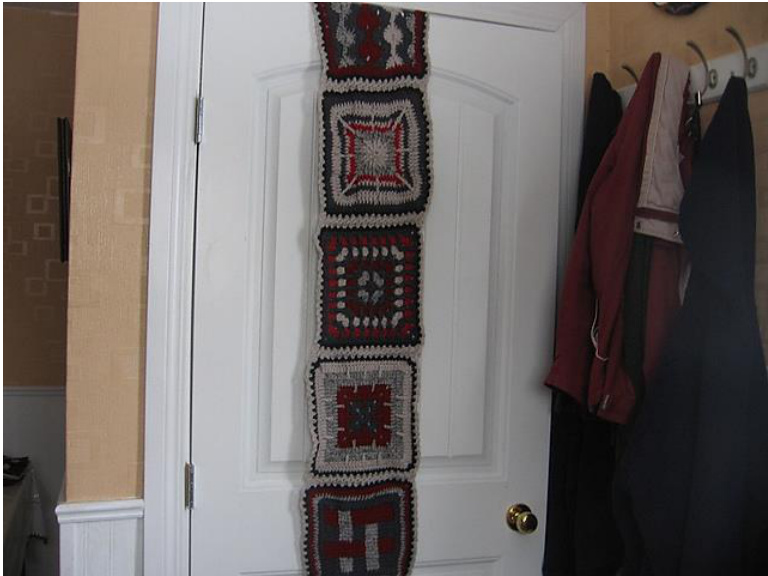
Flat Braid 3-Chain Tutorial (non-Continuous) for joining afghan blocks
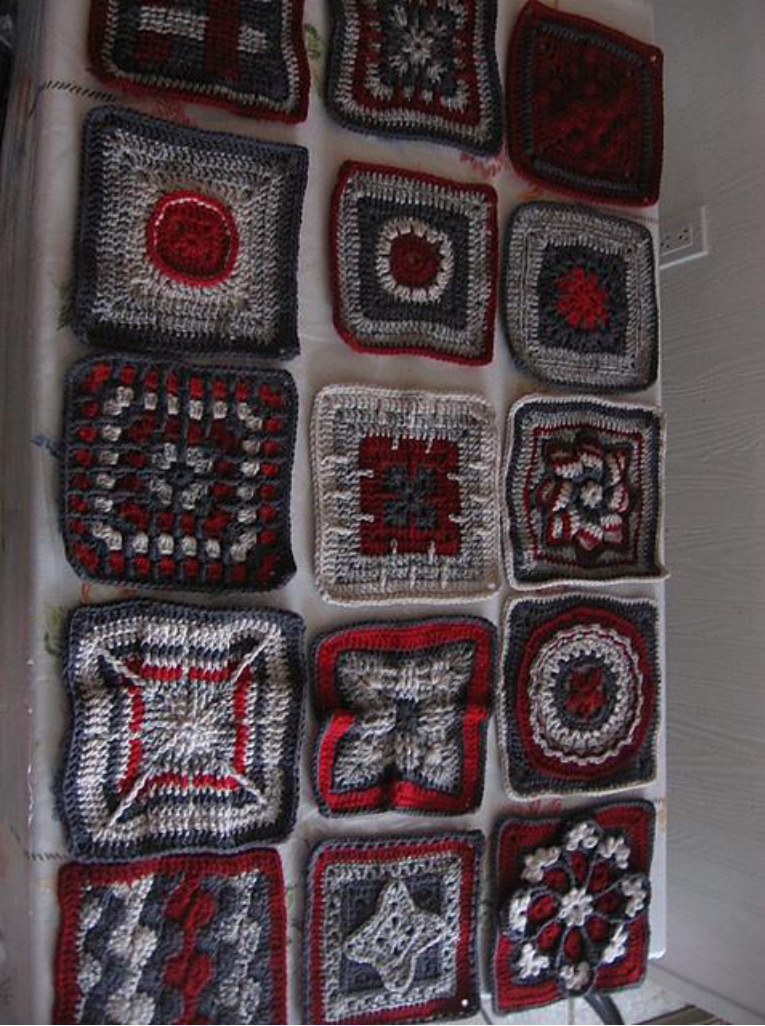
This will be the tutorial for the Flat Braid 3-chain crochet standard technique. Did you invent this? Um, no. I'm merely out to show my methods of achieving good joins. I do take credit for the equalizer round material and I also approach the corner issues more thoroughly than most of the current material available on this technique. I'm going to join 15 of my Monkey Blocks. First I lay them out and make some decisions as to placement, etc. Then I look at each, and label them for stitch counts for the sides, fix the ones that are offsize/poorlymade.
Yarn
For 15 9" blocks--one equalizer round of 32 stitches--2 skeins (charcoal) One Join round of 3 chain style--2/3 skeins (linen) Hook Size: I go down one hook size when joining blocks; I'm using an “H' or 5.0 mm Blocks so far:
Today I'm fixing and working on equalizer rounds. It takes me 10 minutes a block, 15 for the ones that need a second round of fixing. So I need about 3 hours to do the equalizer/fixing work.
Equalizer Rounds:
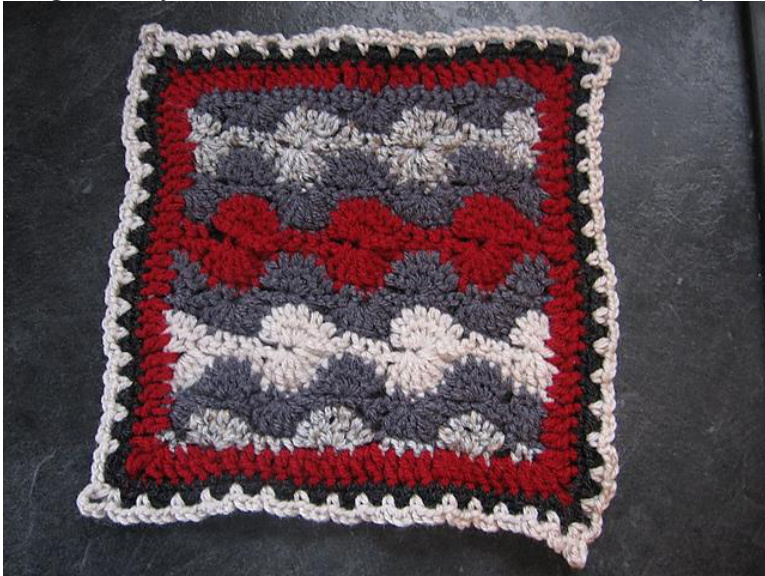
The tutorial for doing the math on equalizer rounds is here. I'm just doing ONE ROUND, since almost all of these blocks have between 28 and 30 stitches already, so there isn't much math involved. For example Current st number per side Desired number per side Increase by 28. 32 29. 32. 30. 32. none 3 32 32 If blocks have fewer than 28 stitches per side, I'll put another round on them in another colour to make them conform. I have to do that to two blocks only. One has 26 sts, and the other has 27 and is quite a bit smaller. My Equalizer Rounds --32 stitches per éside′ since Flat Braid needs an even number. You could do fewer or more, but make sure it's EVEN number. The wonky looking block actually \*blocked’ out nicely. It was just pulled in a little. And fixing the blocks doesn't bother me, unless the side counts are widely discrepant. I'm more concerned with solid construction, well-woven ends, etc. A lot of the waviness and those sorts of things tend to work themselves out when joined and pulled by other blocks. I worked my even count 32 sc on all my blocks. Each corner has 3 sc, and each side has 29. My method requires an even number. It doesn't matter if that's 26, 36, or even 40 for a larger block, as long as they are all the same.
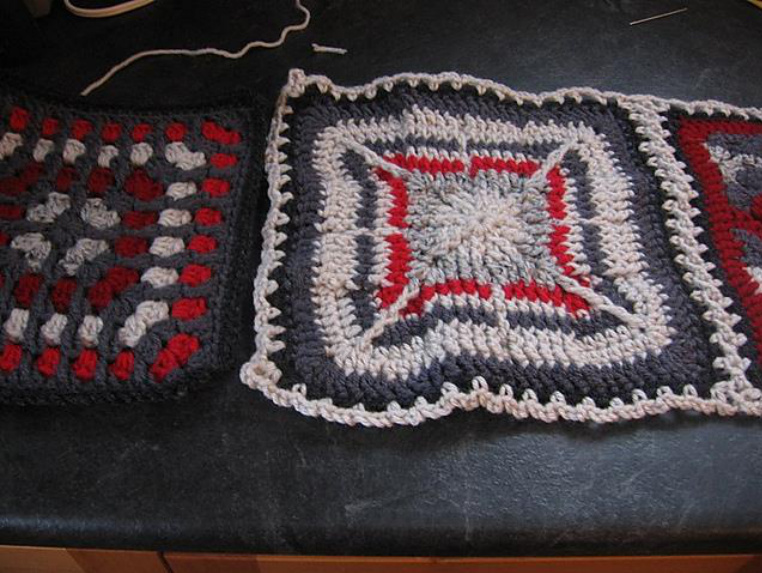
Preparing blocks for Joining.
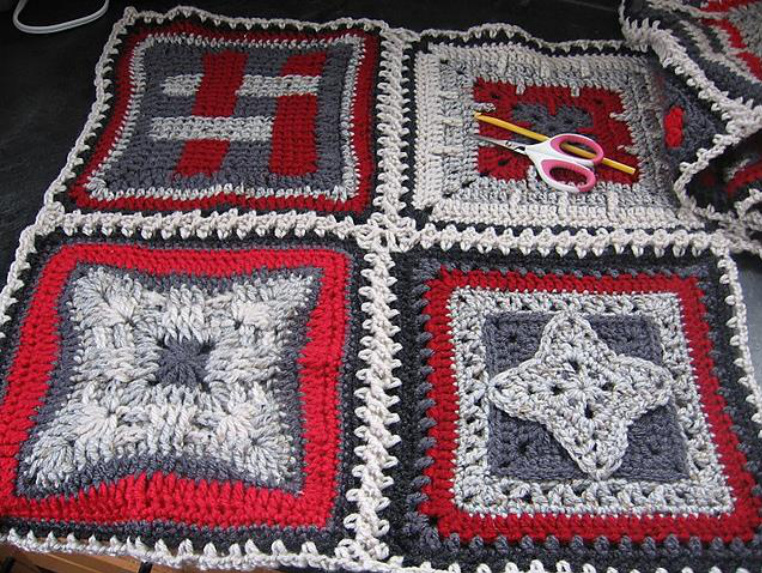
Line up your blocks and pile them in the order you will be using them. I'm putting 5 in a row. There will be three rows.
ROW 1, BLOCK 1
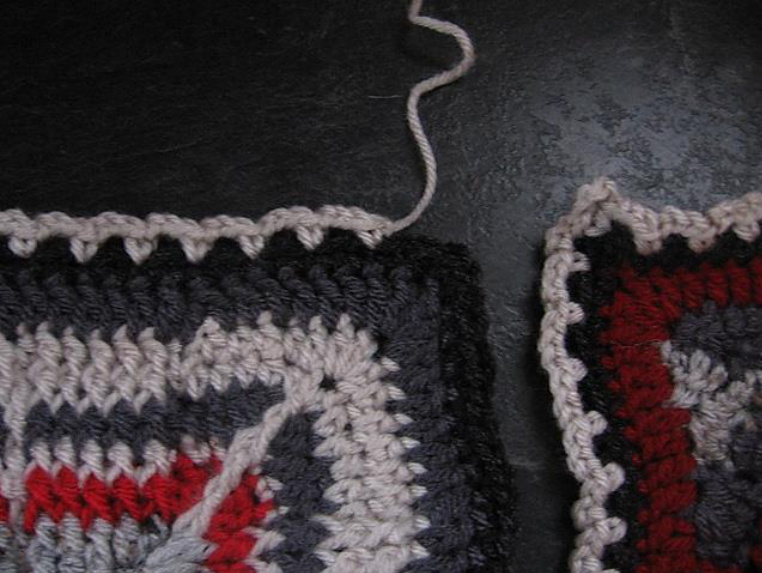
The first block, and ONLY the first block, gets a complete border. Instructions for border of first block: (Join with a sc in any corner st, ch 4, sc in same corner st), [(sk st, ch 3, sc in next st) along full side until stitch before corner st, ch 3, sk st before corner st, (sc in corner st, ch 4, sc in corner st again)] x 4, omit corner on last rep, sl st in beg sc, or fasten off Invisible join. I ended out with 16 ch-3 spaces per side, and one ch-4 space in the corners. It doesn't matter, as long as they are all the same. Looks kinda wonky, but it will work out.
If you think it's not worth your time to COUNT, think again. I've thrown many a join block into a corner as I was working it to another, because I had 15 ch-3 along a side instead of 16. If I had counted them before I started joining....YEAH. DO IT.
BLOCK 2, 3, 4, 5/ROW 1--BUTT JOINS
'Butt Joins’ because they are simply joined by butting up against one another
Step 1
Work around the block with border. I work just about 3 sides, leaving 2 corners ^open'. So I start Starting 2nd st from any corner (or 4th if you want a little more wiggle room later) Join with a sc, (ch 3, sk st, sc in next st) across side until corner; corner as (sc into corner st, ch 4, sc into corner st). Work side 1, corner, side 2, corner, and work up to the third corner, working exactly HALF of that corner (sc, ch 2) g with sc, skipping stitch next to corner. ch 3, sk st, and sc into next alongside rk 3 sides and 2 corners, and work exactly HALF of the third corner (sc, ch 2)
Flat Braid 3 chain Non-Continuous Page 3
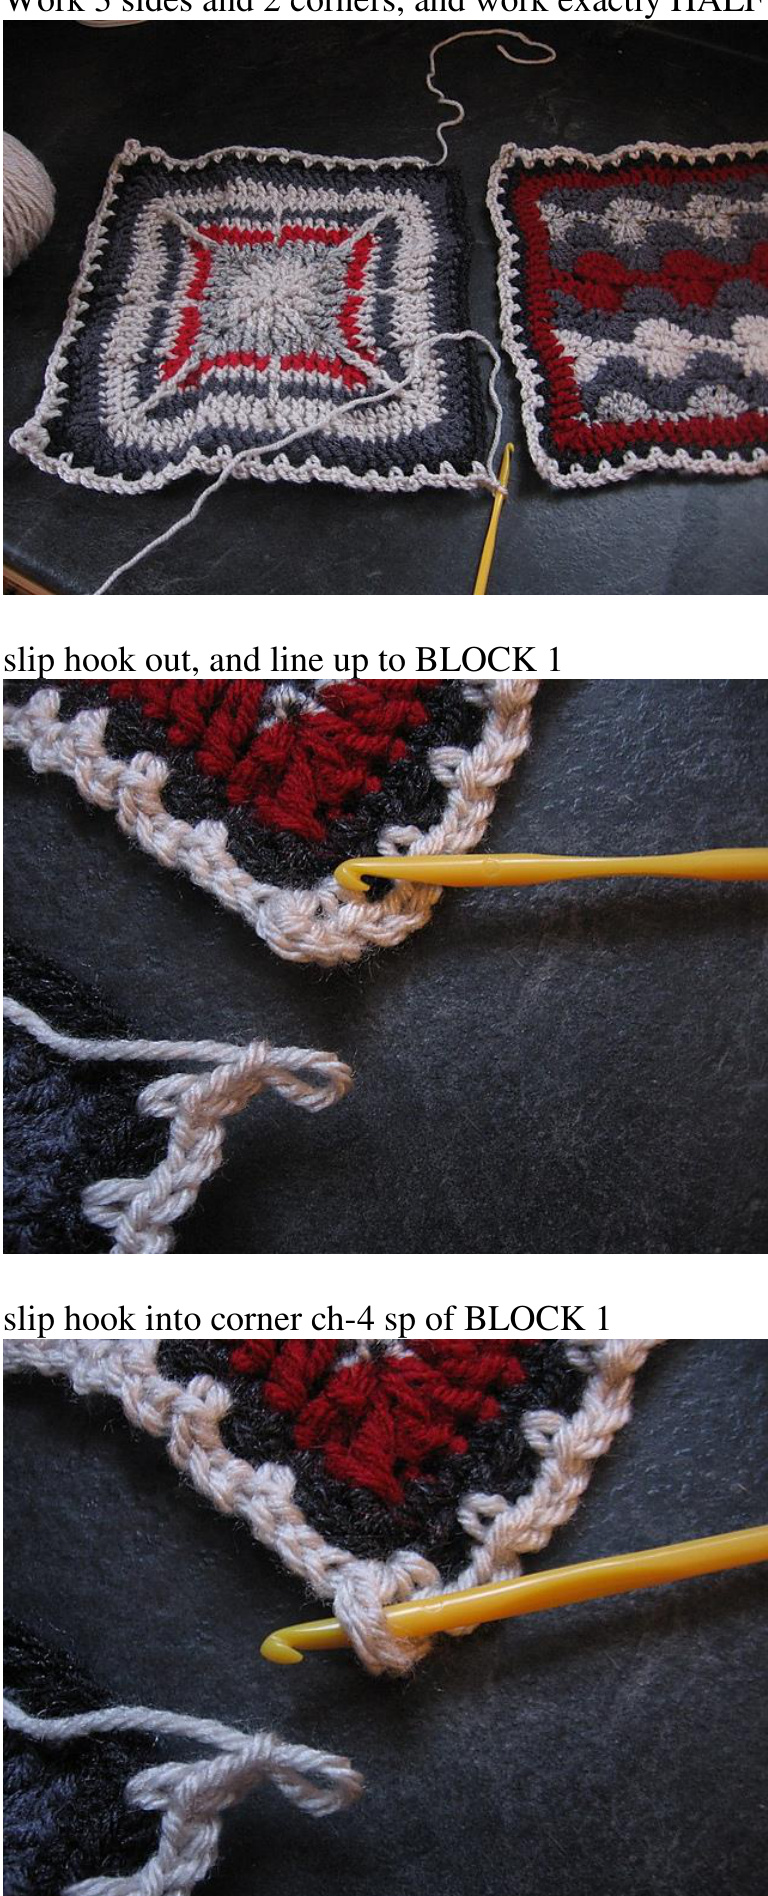
Flat Braid 3 chain Non-Continuous Page 4 Pull the loop through with the hook, and immediately CHAIN 2. That completes the corner ch-4. Remember, you want a total of FOUR CHAINS in the corners. 2 before and 2 after the slip out.
Then go back to Block 2, and FINISH YOUR CORNER. That is done with a sc in that same corner you started in.
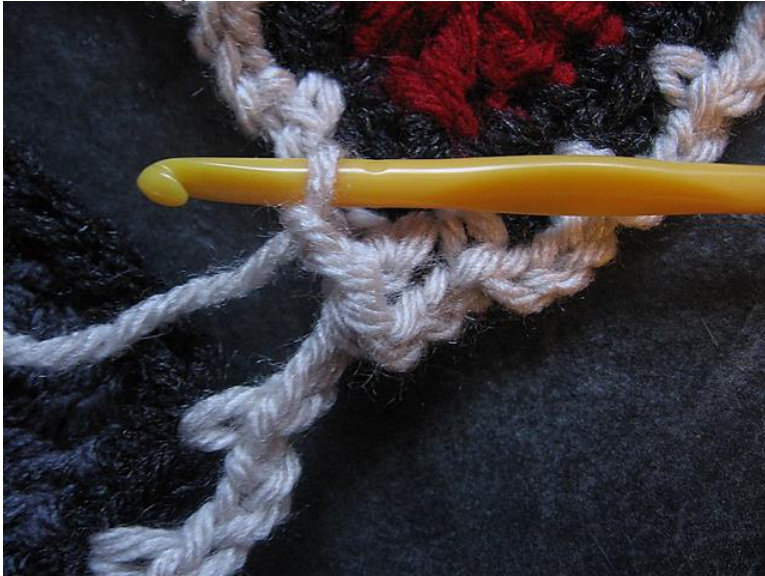
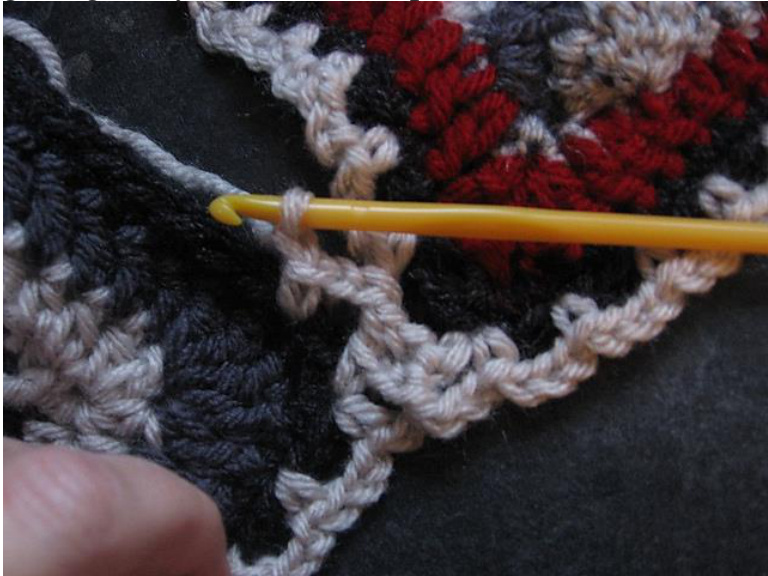
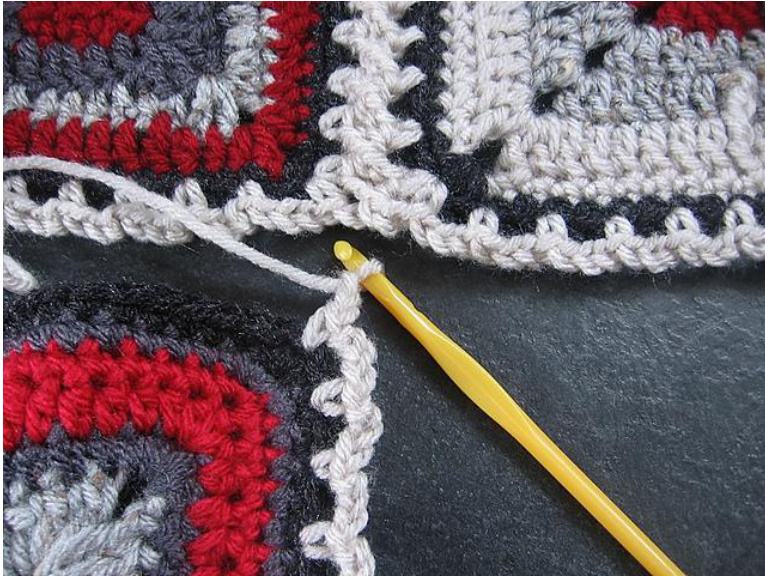
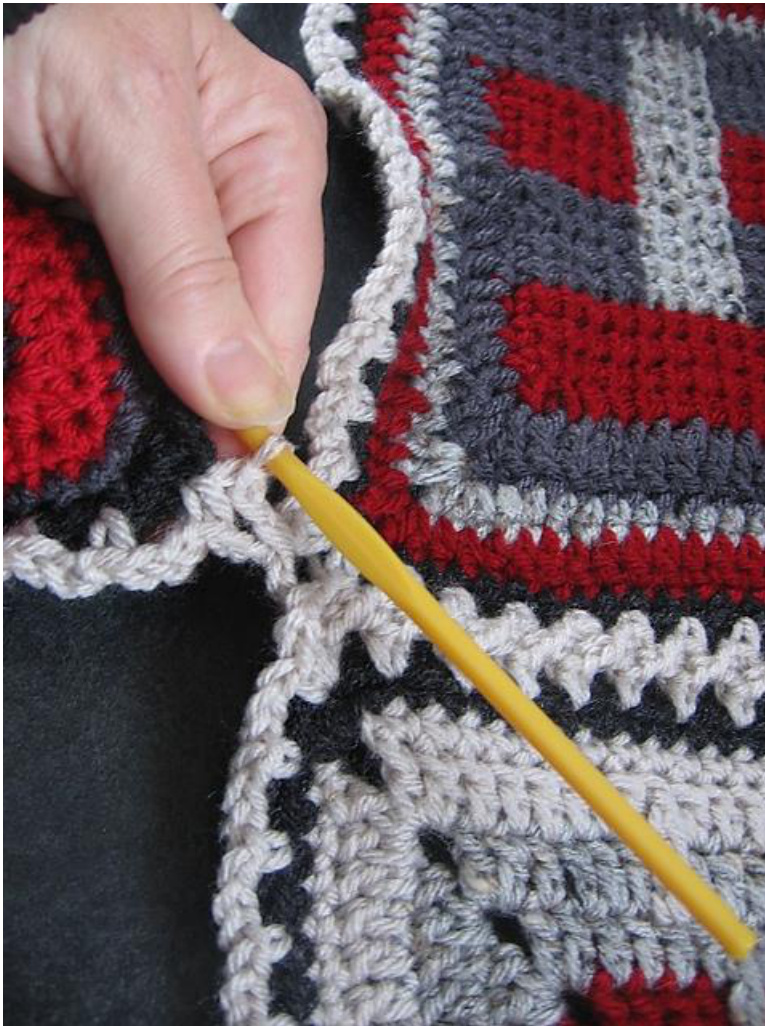
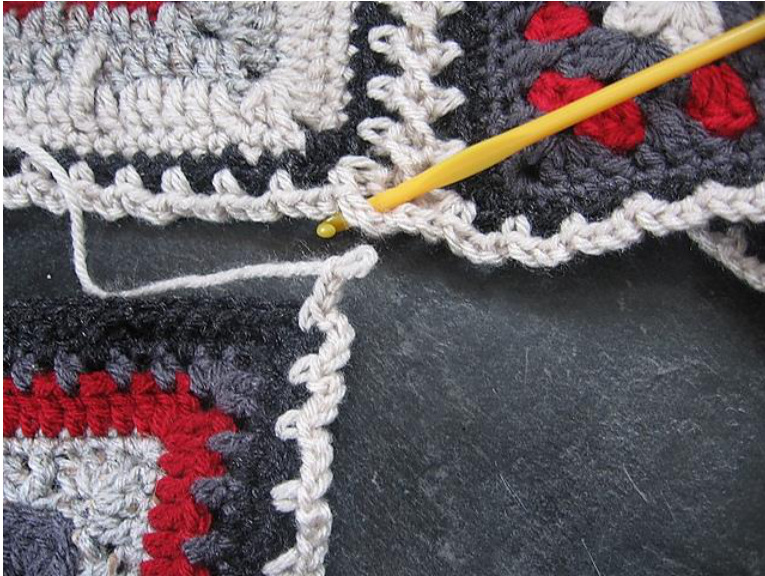
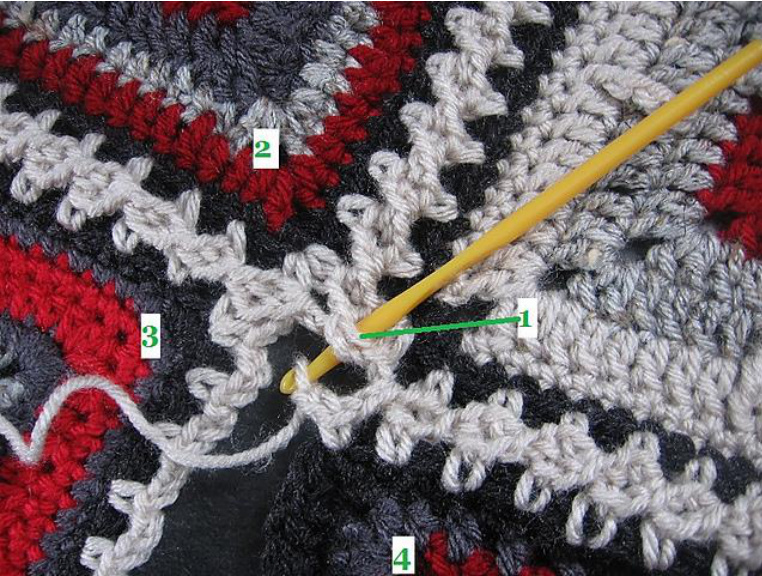
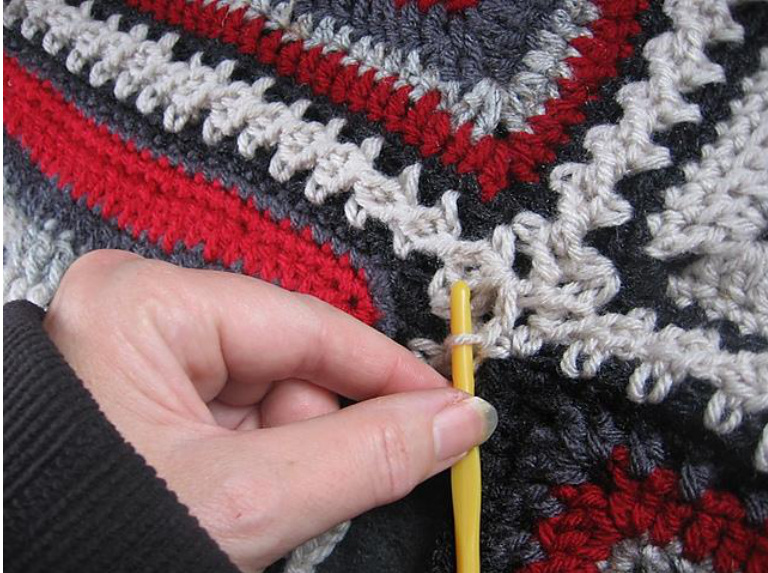
Now we're going to BUTT JOIN' each of the chain 3 sections to each other. Always ^start at BLOCK 2’ and work toward BLOCK 1. So start with a CHAIN 1. You will complete your CHAIN 3 by working the other 2 chains after you do the slip hook trick.
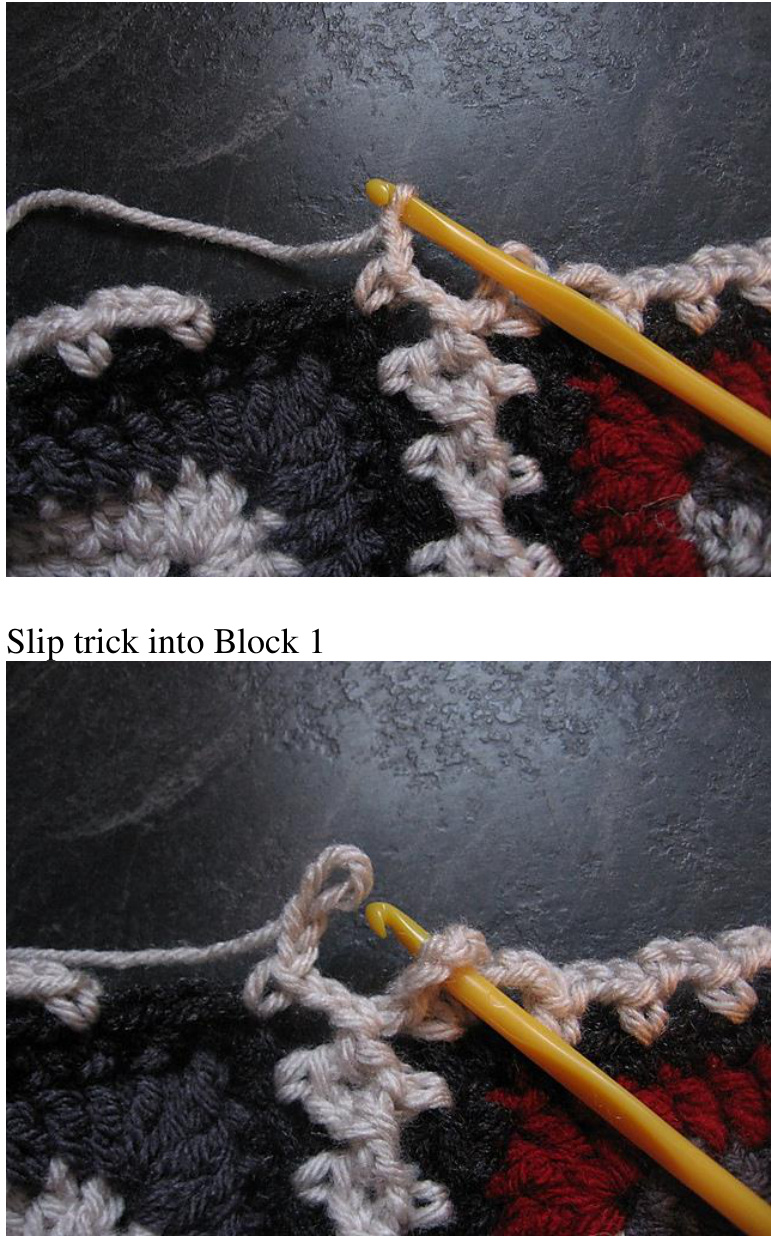
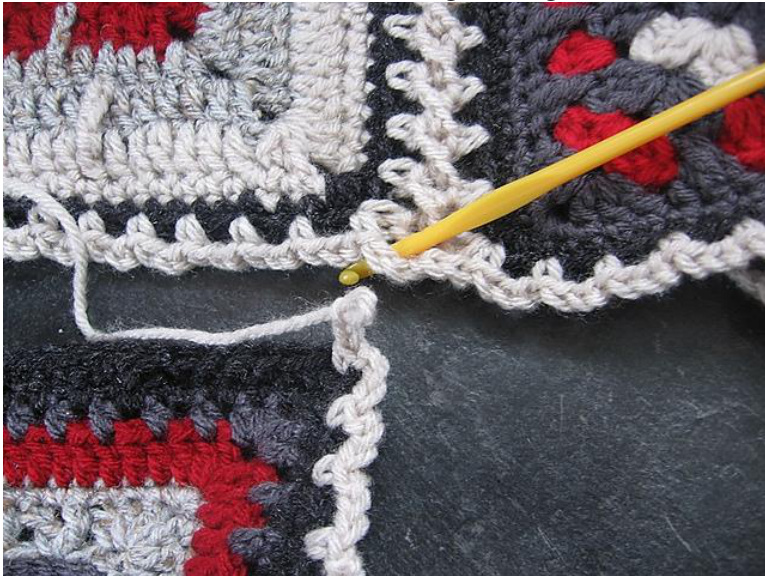
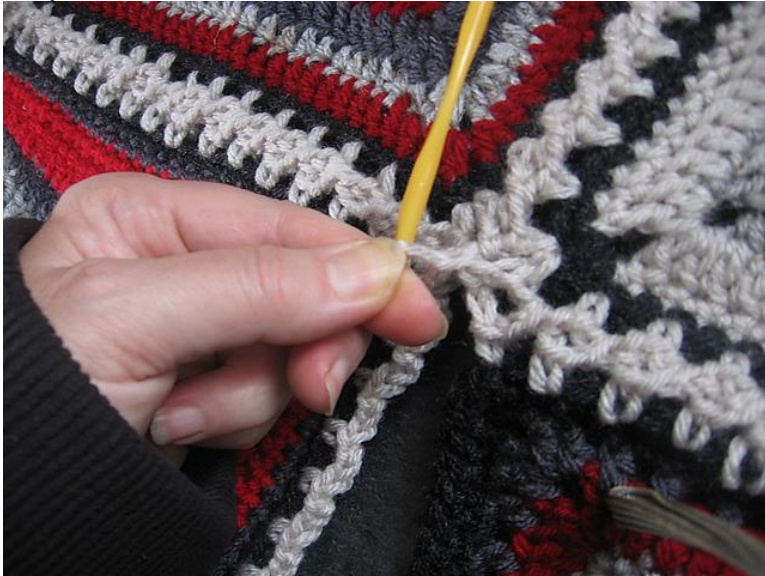
Slip the hook out...and poke it in the next available ch-3 sp on Block 1.

ou only have one chain so far, and you need three, so, DUH, --chain 2 more!
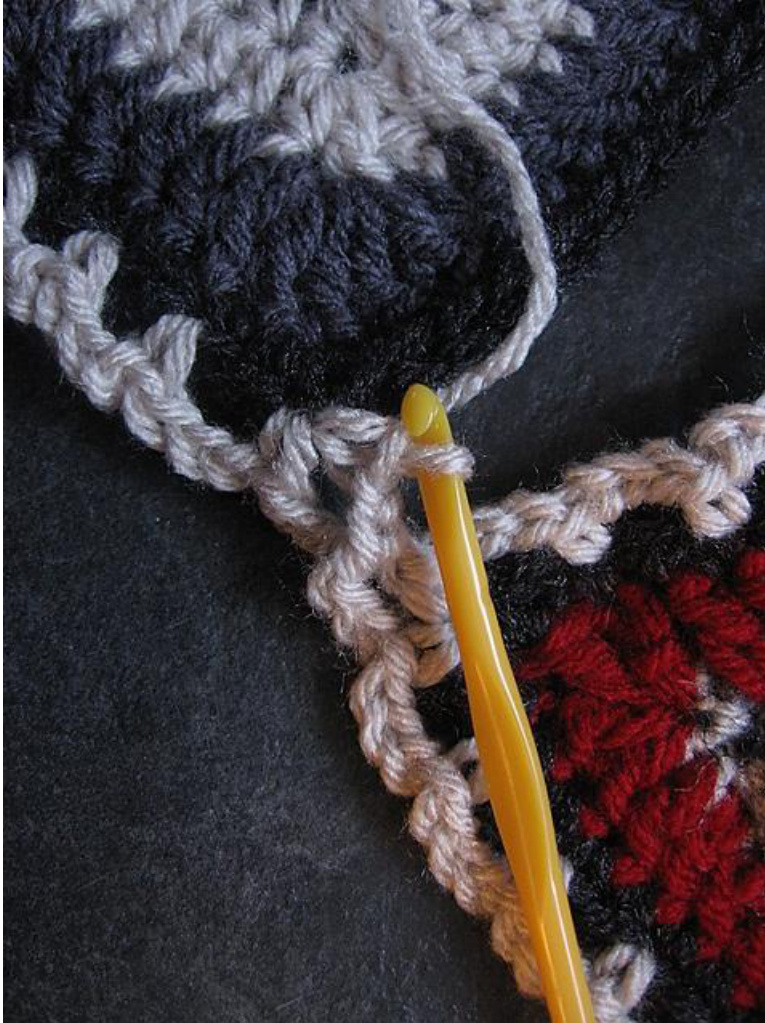
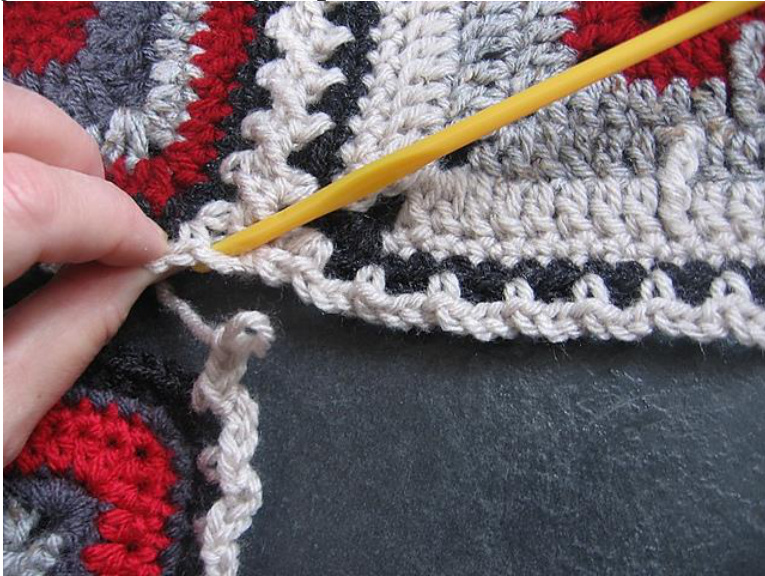
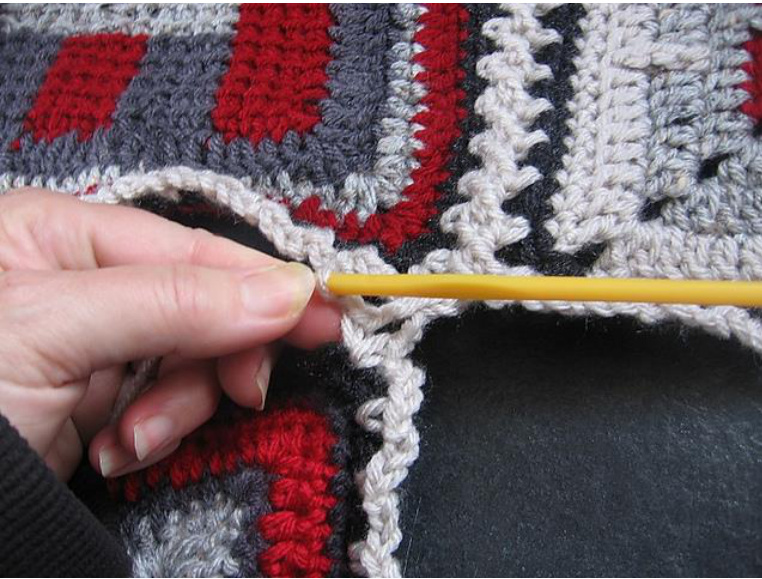
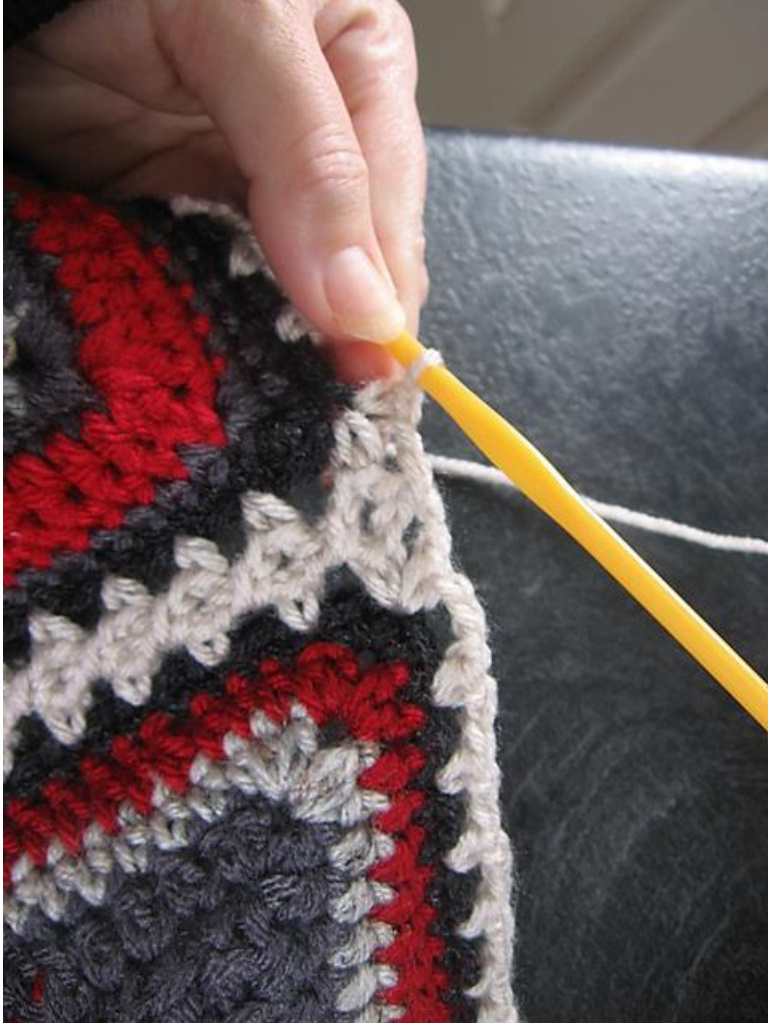
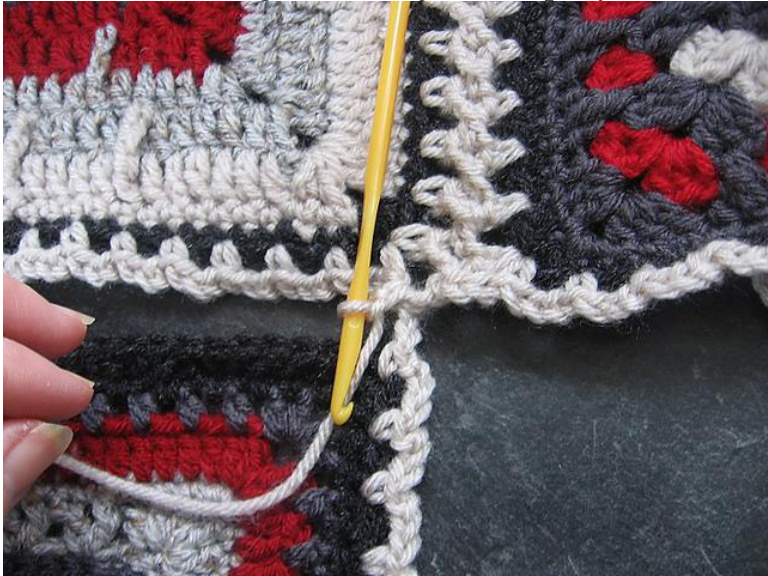
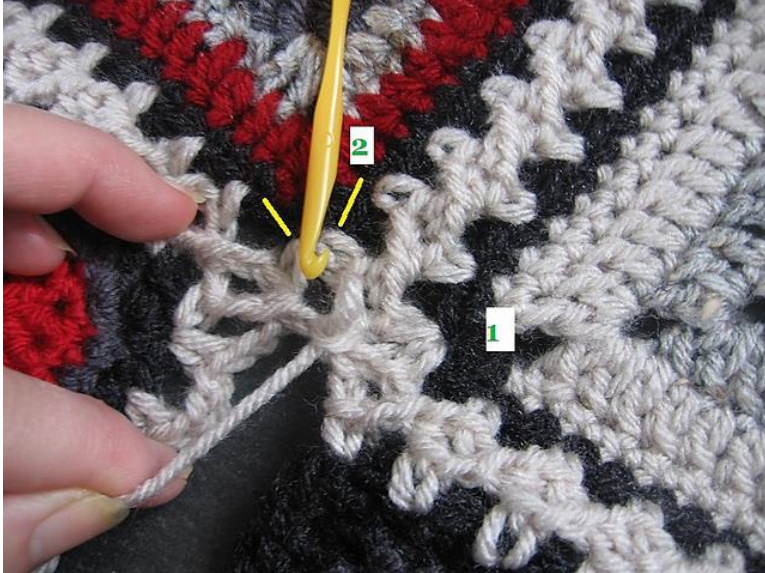
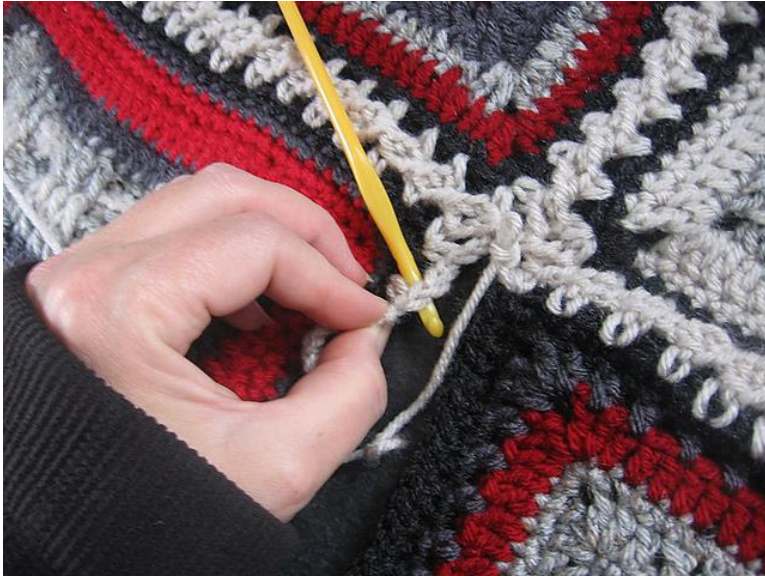
Flat Braid 3 chain Non-Continuous Page 6 Then skip a stitch on Block 2, and sc into the next one after that, and immediately, chain 1 again, getting ready for the next slip trick.
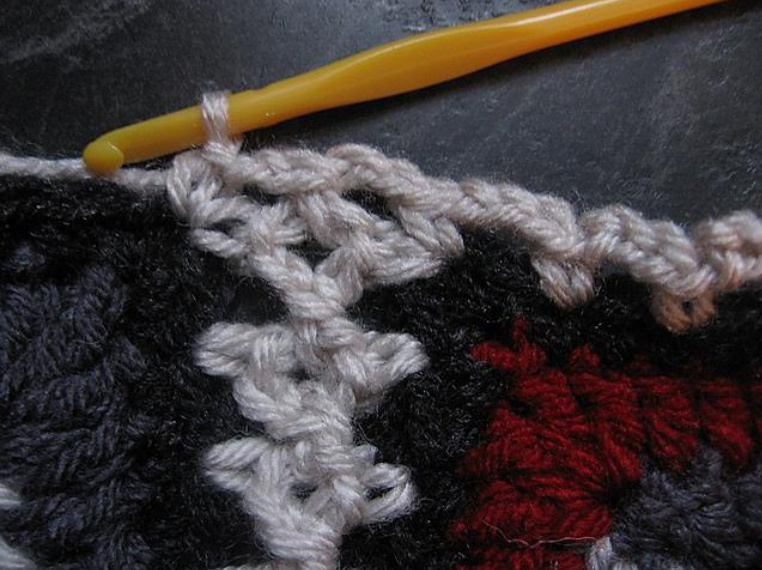
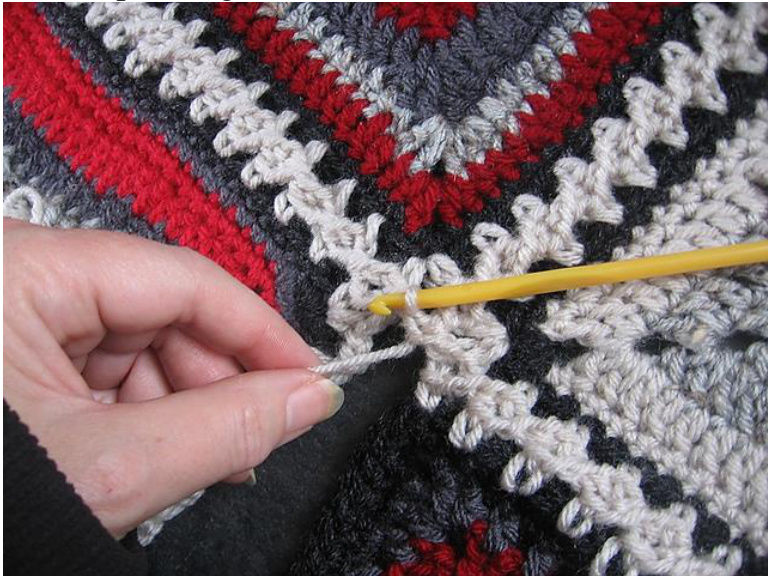
Carry on along the side, and keep doing that. (sc into Block 2, ch 1, slip trick into Block 1, ch 2, sk st on Block 2, sc into block 2....and so on) Here I am approaching the corner. I sigh a sigh of relief that my numbers are good, and there are ‘enough’ chain 3 spaces to keep the sides even. (I knew that ahead, but it's easy to ‘miss’ one)

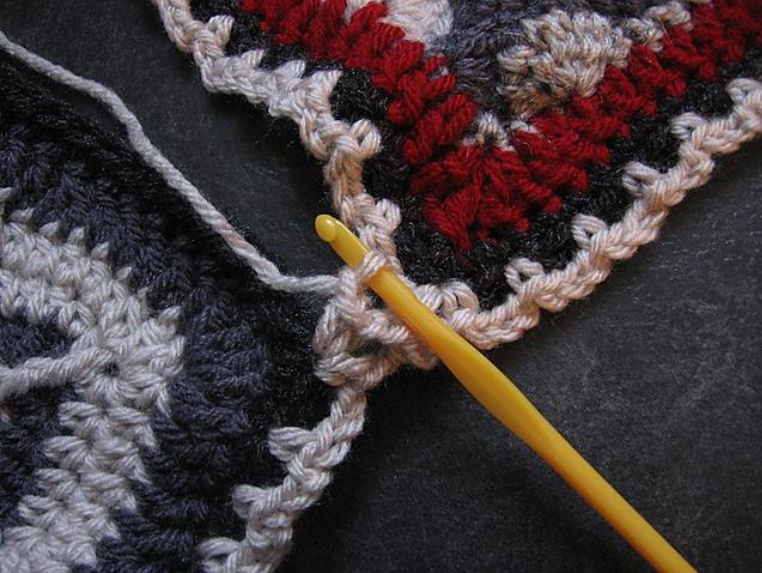
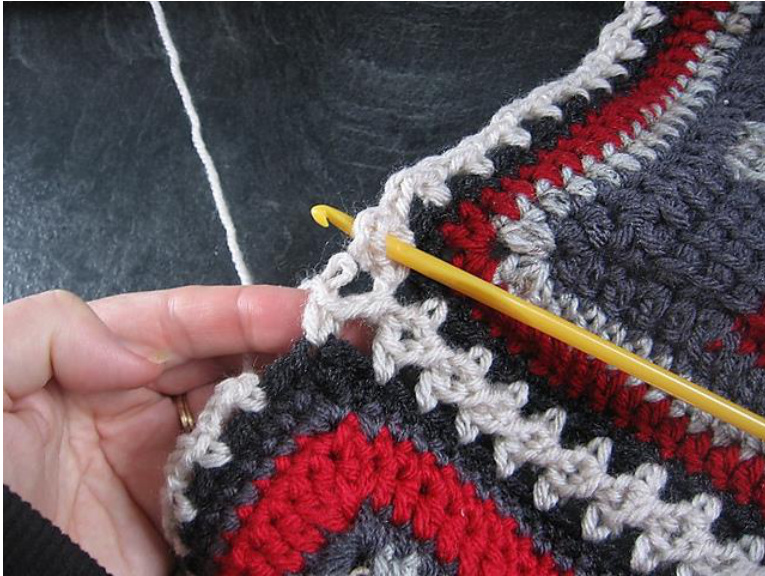
BUTT JOIN. Start in Block 2, and sc into the corner, and ch 2. ‘Half a corne1 hrough, ch 2 ; total 4 ch, and sc back in corner of Block 2, to ^finish the corne Now you are just one step away from finishing the round, since you only skipped one or two sections from the corner to start that round on Block 2. So now you just chain 3..., and work as many sections as you need to come back to the beginning (I needed one more)
Flat Braid 3 chain Non-Continuous Page 8
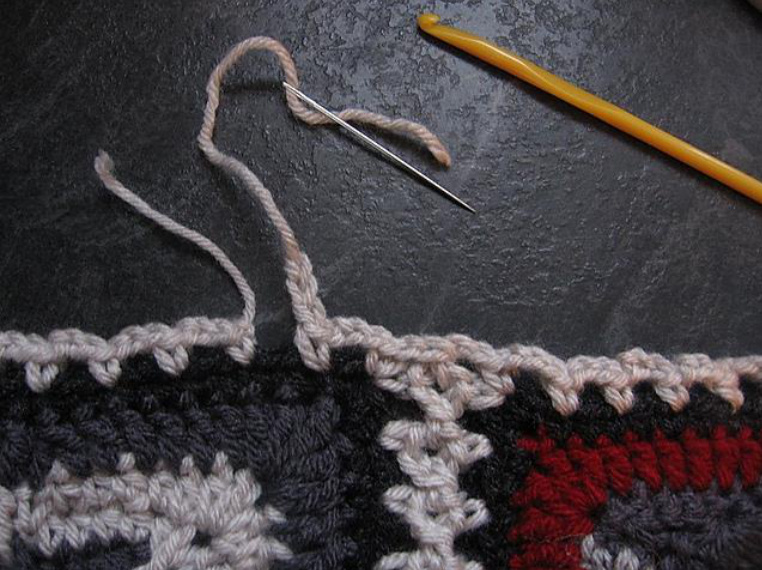
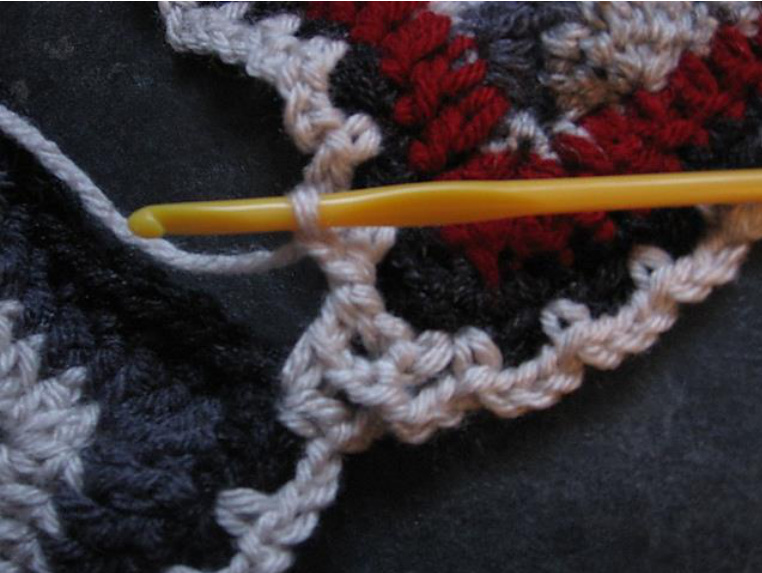
Then I Invisibly Joined.
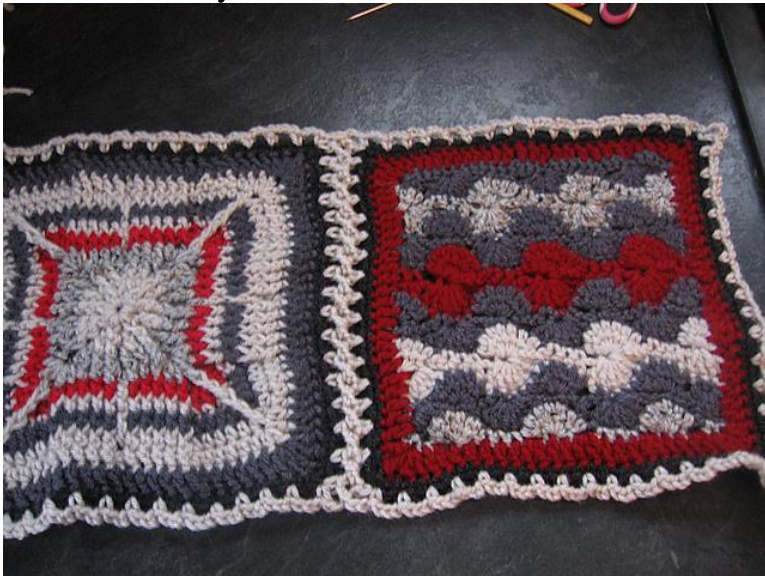
Here is the corner: I like the result of a 4 chain corner. It seems to keep the sides flush. There are variations on this. I know some people work two loops of chain 3 in the corners. That's a lal preference. I say ^do what you want but just keep it consistent throughout Now do the same with Blocks 3/4 and possibly 5 if you have that many for a row. At any rate, do a ROW of them. Don't do two rows though, and expect me to figure out what to do with them. The joins are different.
Tomorrow, I'll cover working a 3-way, and then a 4-way corner. Trouble-shooting
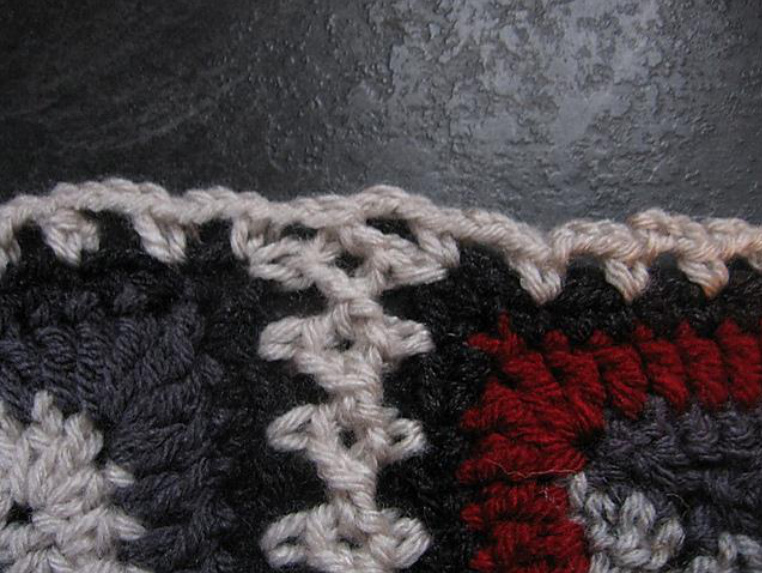
One of my join corners looks odd:
I find the most common reason for that is neglecting to work the SECOND sc in the original corner as you come back from the block you joined into. Check that first. (I just ripped one out that was done incorrectly and fixed it). The other reason would be an incorrect number of chains, or perhaps you pushed the hook through from under rather than on top. Which doesn't matter, as long as you always do that.
I'm ending out with too few/too many ch-3 spaces:
First, double check you didn't miss one along the way, while you were slipping in and out. Secondly, double check your equalizer count on the block you are currently joining, and thirdly, check that you skipped only ONE st each time. Finally, double check your border (ch-3) count on the block that you are joining into. And if all that doesn't work, double check your corners. Make sure you didn't inadvertently do a direct join sc into the next st instead of into the original corner st. If all these solutions are not solving your problem, contact the Support Desk (aka me). Provide as much information as you can, including detailed photos....hehe.
Working 3 way corners
Firstly, I 're-number my blocks' in my head. There are four in a square, so I'll call the top right one Block 1, top left Block 2, bottom left will be Block 3, and bottom right will be Block 4. I join from left to right. You can do it from right to left, but don't vary from that, or your corners will vary on their angles. Place Block 3 under Block 2, and see what it needs. This will be a simple “BUTT JOIN' and you will do it exactly as the others, except it will be from the bottom of Block 2, to the top of Block 3.

So we make the same pre-border, with 2 open corners that we've been doing. Then make HALF A CORNER as normal--(sc, ch 2) into corner sp of Block 3, and SLIP OUT hook
Now you'll be doing a regular corner BUTT JOIN to Block 2. Ignore the fact there is already a join in there, and just poke the hook beside it.
Pull up the loop through the corner space
your corner chains. Remember, corners have ch 4, so you need to ch 2 mor
WV NSAN Then simply work your FINISH THE CORNER by sc back into the original corner you started from, in Block 3.
BLOCK 3, TO BLOCK 2. Remember, you are joining FROM Then ch 1 as normal, and finish the whole side.
Here I'm working the final corner after the side, butting BLOCK 3 up to BLOCK 2, which is above it.
I did have one question yesterday. Someone wanted to know if I poke my hook into the TOP of the loop, or into the BOTTOM of it. I actually have started going into the bottom, from underneath. It makes the subsequent chaining lie flatter, but if you go in from the top, DO THAT EVERY SINGLE TIME after that so it always looks the same.
Here I am finishing that corner with its sc and then I'll ch 3 and Invisible Join to the beginning sc.

And here is Block 3 Joined ‘from the left' of the row to Block 2 That was actually kind of fun. ARE YOU HAVING FUN YET??? lol There will be options added for this later, which involves ^criss-cross' and a different look. I'll put those inonJan1l.
Preamble: I've seen these done in all kinds of ways. I like this method. I also like the method that has you include the both other corners instead of just the diagonal one, by going through everything. I'll show this one first BUTT JOIN--to--DIAGONAL JOIN that's all First, lay out your blocks and think about what you'll need to pre-border. You need THREE open corners and TWO OPEN SIDES.
So, make that happen. If you just say ^oh, only work one corner' you'll be good. You can start two stitches away from the first corner, and that will get you there.
Now, you'll need to think about the first corner on the right. It will be a SIMPLE BUTT JOIN, into BLOCK 1 directly above it (ignore the other block next to that. He's just babysitting). So start with a (sc, ch 2) in the originating block (BLOCK 4)
Then poke the hook into the corner of the block above it (BLOCK 1). Yes, there is already a join there. Get over it. Just work beside that one.
SLIP OUT, SLIP IN other block, PULL LOOP THROUGH, and ch 2....BUTT JOIN--ignore the block to the right. That's just company.
FINISH the corner with a sc in the originating block, as normal.
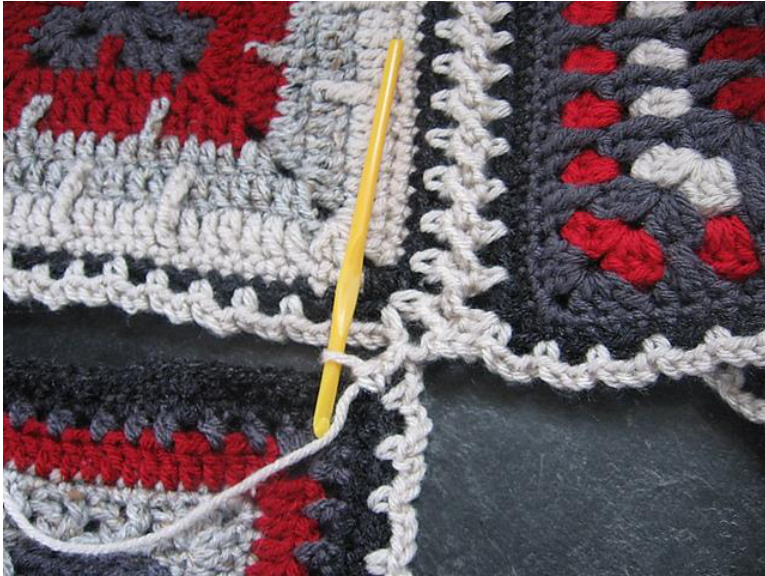
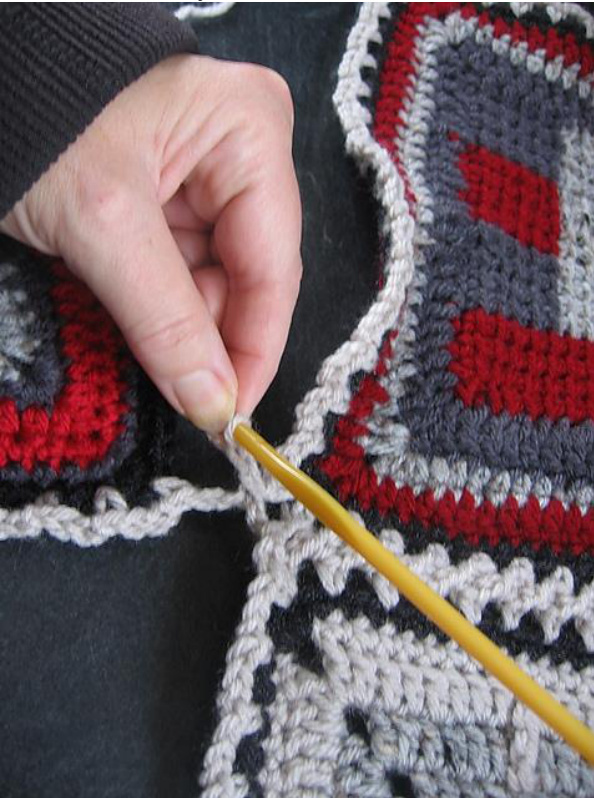
Then go along the side, as normal....with ch 1, slip out, slip in, pull loop, ch 2, sk, sc in next...etc. Here I've gotten to the DREADED 4-WAY!! Calmly, and deliberately, (sc, ch 2) into the originating block corner as always.
Then I think ahead. Corners have four chains. I have 2 done. Why not work one into the BUTT JOIN above, and the second one ON THE DIAGONAL. That would give me 4 chains, right? If I ch 1 after each join, right? Be careful to select the corner of the BUTT JOIN block above, first. PULL it until you see the discrete sc there, and work between them.
Do the SLIP OUT, SLIP IN, and pull loop through trick. Then CHAIN ONE, since you are now on your third chain of four.
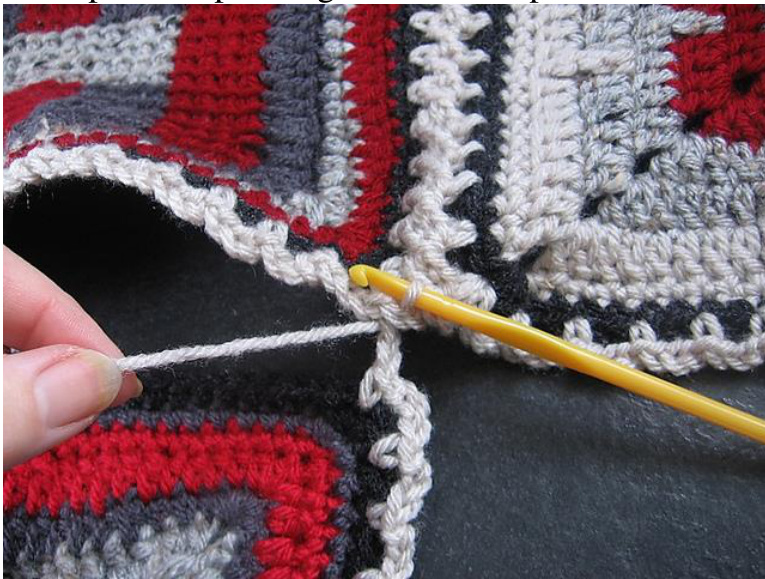
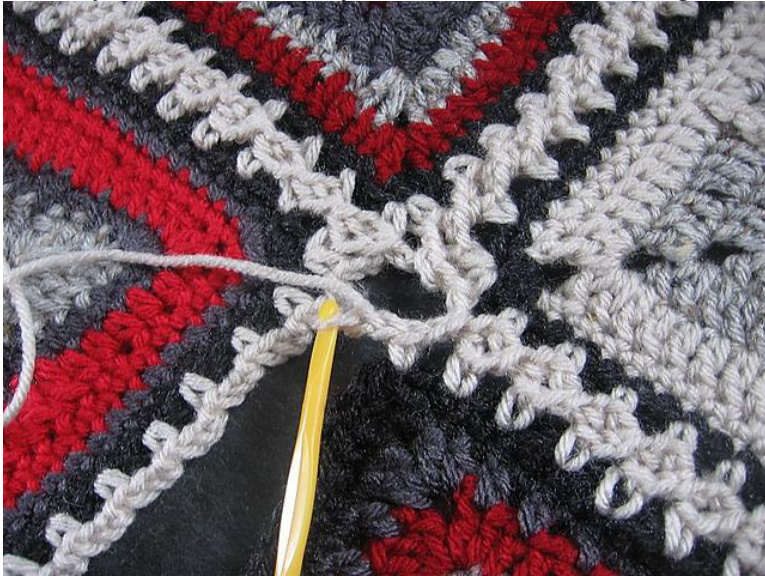
Now, look diagonally. (OMG MATH...GEOMETRY!!) Get over it. Diagonal. Slant to the left. 45 degrees. In other words, go diagonal to the CORNER of BLOCK 2. Get right into the corner. Force the edges apart so you can isolate the 2 sc on either side of it, so you KNOW you are in that corner. Slip out.. Poke your hook in there.
Pull loop through
CHAIN ONE--that finishes the FOUR CHAINS. Two to start, One after the Butt Join, and One after the diagonal join. And make a sc in the originating block corner.
Now you'll carry on, and BUTT JOIN the side of BLOCK 4, to the side of BLOCK 3. It's really the only time you'll use block three. You will never use the top corner of it. Start right into the chain three loops after the corner. So come off the corner, ch 1, and slip out, and then slip into the FIRST CHAIN 3 space of Block 3. NOT INTO THE CORNER. THE CORNER IS DONE DONE DONE.
Finish the side and BUTT JOIN the bottom corner as normal (remember, sc into corner, ch 2 off that, slip out, slip in, pull loop, ch 2 out of corner, sc into originating corner)
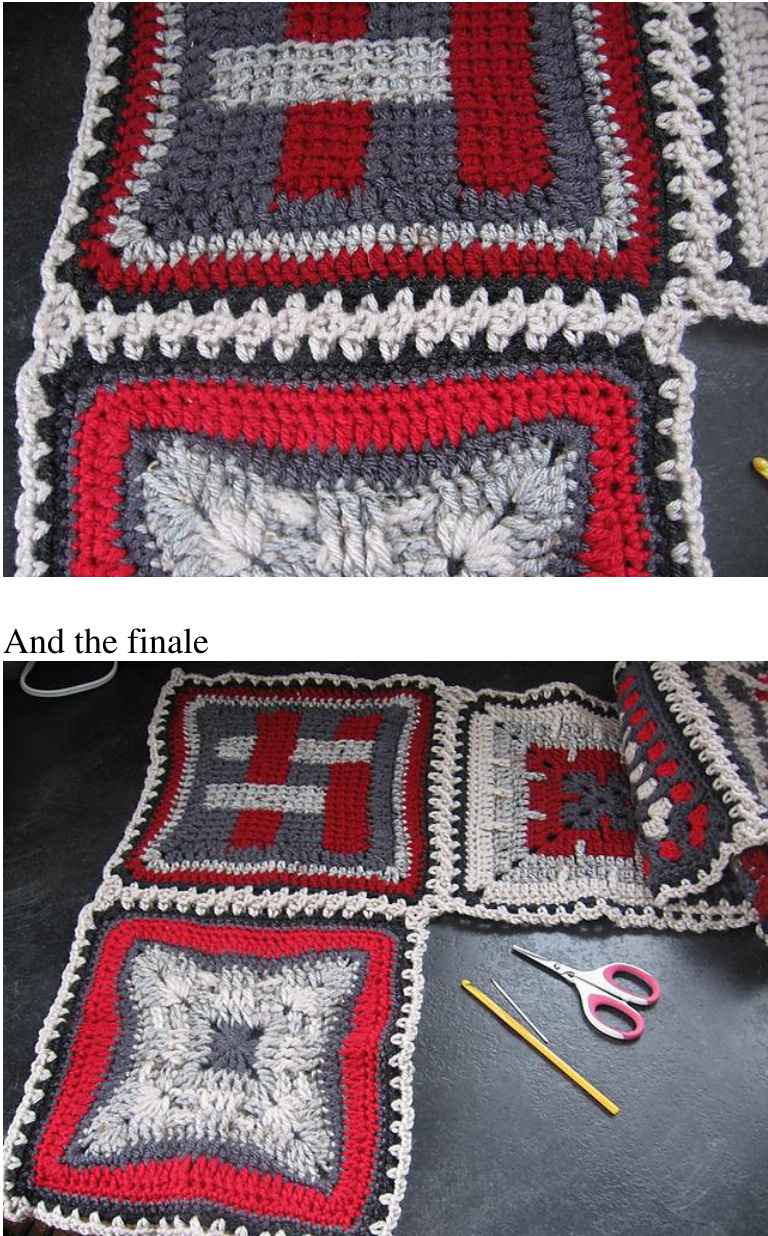
Now, it's just a matter of treating subsequent additions to that row in the very same fashion. Of course, when you start your following row, you'll have first a 3-way BUTT JOIN, and then you'll get into the 4-ways again. Have fun!! I'll show my photos of the completed afghan as I complete it. More Trouble-Shooting and Questions I've gotten: I have a mess on my corners, because as I went to join, I realized I'd not done two sc in each corner in a couple of instances, and things aren't matching up. Well, my answer to that is--either fix it or fudge it. I honestly have fudged one complete corner, because by the time I realized I'd done that, missed a sc, it was too late' to fix it. I can't really Flat Braid 3 chain Non-Continuous Page 25 be showing you how to fudge. In another instance, I pulled the block back out, and fixed it. 1 pulled back the corner, and made sure it had 2 sc in it, with the ch-4 between. The most common cause for ‘corner' malfunction is when you are joining a flat' Butt corner to another, and don't sc BACK into the joining block corner, but go directly to the first ch-3 space next to it. Then you don't have a FINISHED corner to work with. That's annoying. FINISH your corners, and check EACH BLOCK as you work it, and EACH side join as you work them, to make sure you didn't miss either FINISHING a corner, or missed a ch-3 sp along the side.
I don't really like the look of your corner 4-way. I saw some on YouTube I like better.
Honestly, I'm not that happy with it either, but it gets the job done. The alternates are certainly stuff you could do, and I plan to show one of them on Jan 1l, but the thing to remember is, always always always do it the same every single block. If you choose a certain method, write it down and be consistent about it. I'm liking the look of the 4-way criss-cross, which I'll show later. You are definitely free to explore and do what you find nicer, but the thing is to learn the actual mechanics of flat-braid, and work it out.
What about Continuous Join?
I'm going to be doing a continuous Join in my 5-chain braid tutorial later this month. I want to first present the ch-2, and the 'no hook out' methods that I am working on first without Continuous Join. Ultimately, after everyone has mastered the logistics of the regular join, the Continuous will fall into place, and we'll do examples of that. Each tutorial probably takes me 20 hours or more to present, photograph, and actually work blocks, so all in good time, but we'll get there. If you want to branch off and work a Continuous yourself, feel free. There are certainly excellent ones by Bethinx onYouTube. If you have any questions, feel free to PM me, bug me in the No Stupid Questions? thread, or over on‘BAWL'.


