Breakfast Club Knits
Drink Coffee · Knit Faster www.breakfastclubknits.com www.etsy.com/shop/BreakfastClubKnits www.facebook.com/breakfastclubknits This is an original pattern by Tami Hyatt AKABreakfastClubKnits
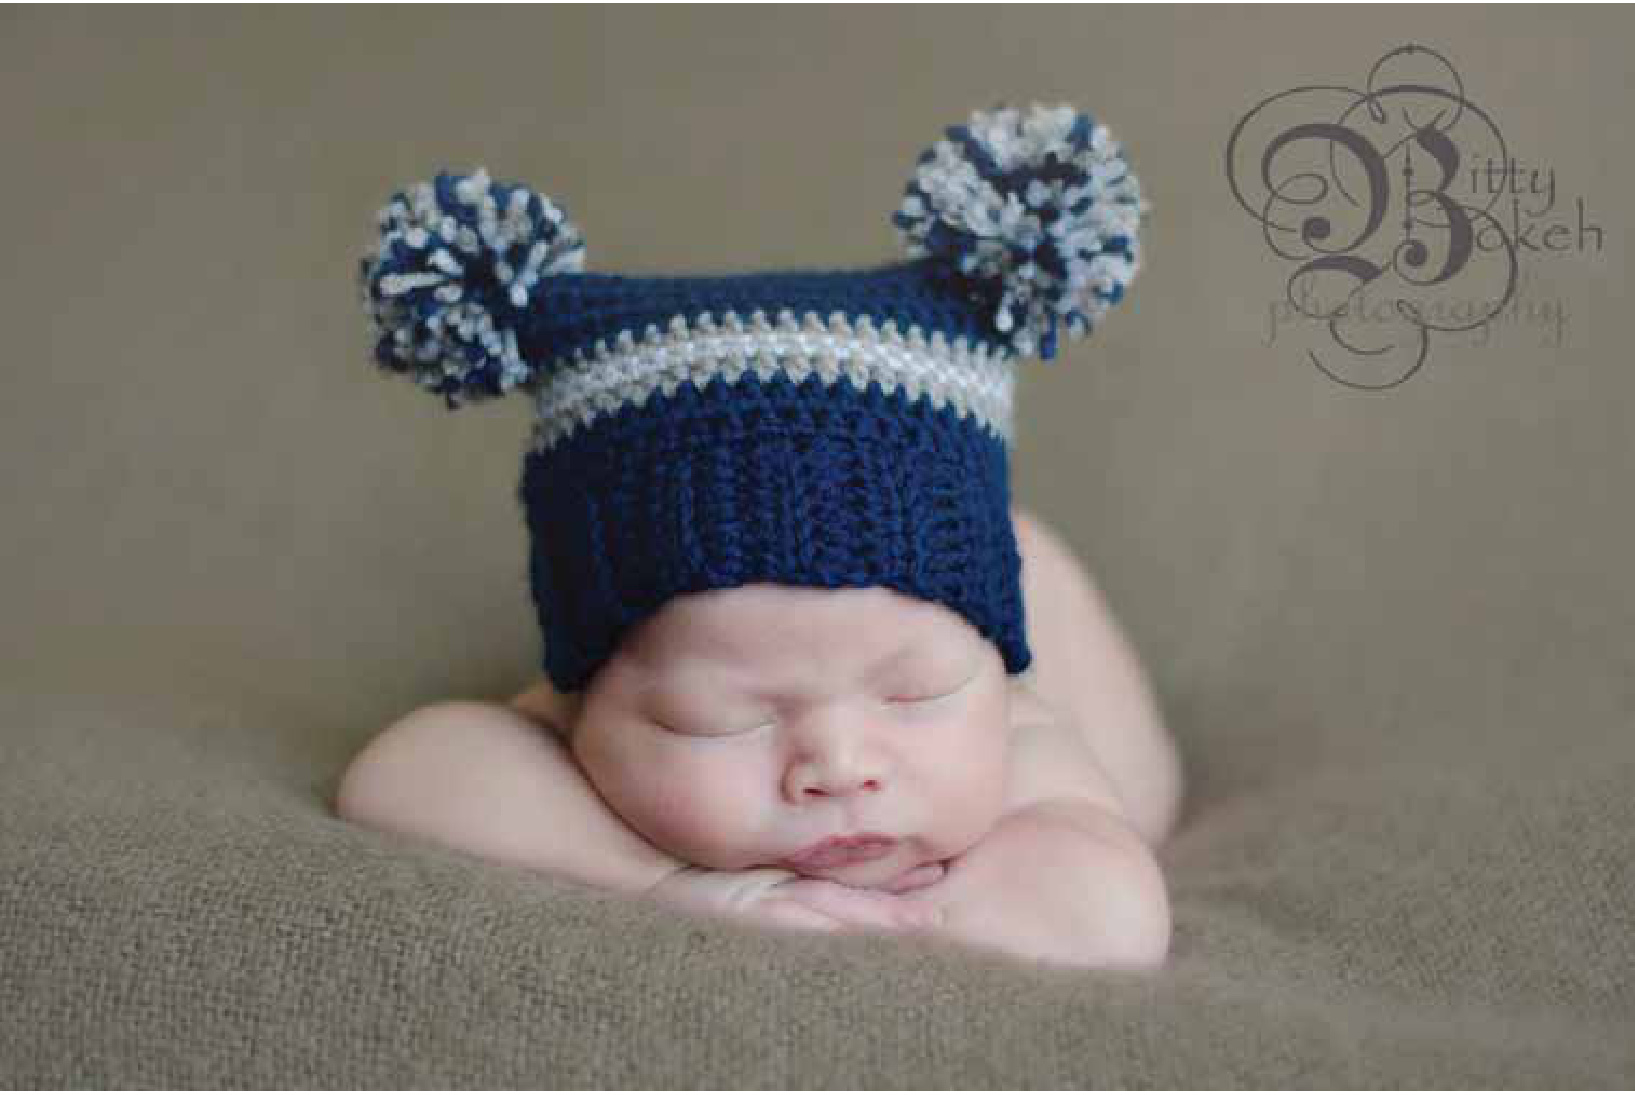
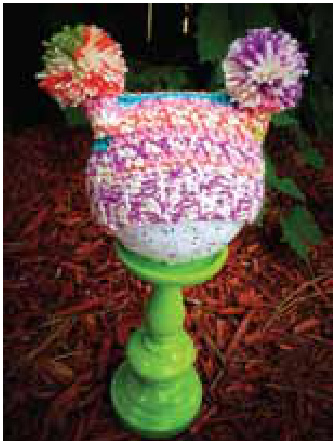
The Gappy Hat - Crochet
Breakfast Club Knits

Drink Coffee· Knit Faster www.breakfastclubknits.com www.etsy.com/shop/BreakfastClubKnits www.facebook.com/breakfastclubknits This is an original pattern by Tami Hyatt AKABreakfastClubKnits
Materials:
· Worsted (#4) Weight Yarn (Universal Tapestry and Hobby Lobby I love this Yarn shown) ·TapeMeasure · Size G Hook or size to obtain correct gauge ·TapestryNeedle · 2 1/2" Clover Pom Pom Maker (optional)
Gauge:
15 Hdc's and 12 rows = 4" square
Abbreviations:
Notes:
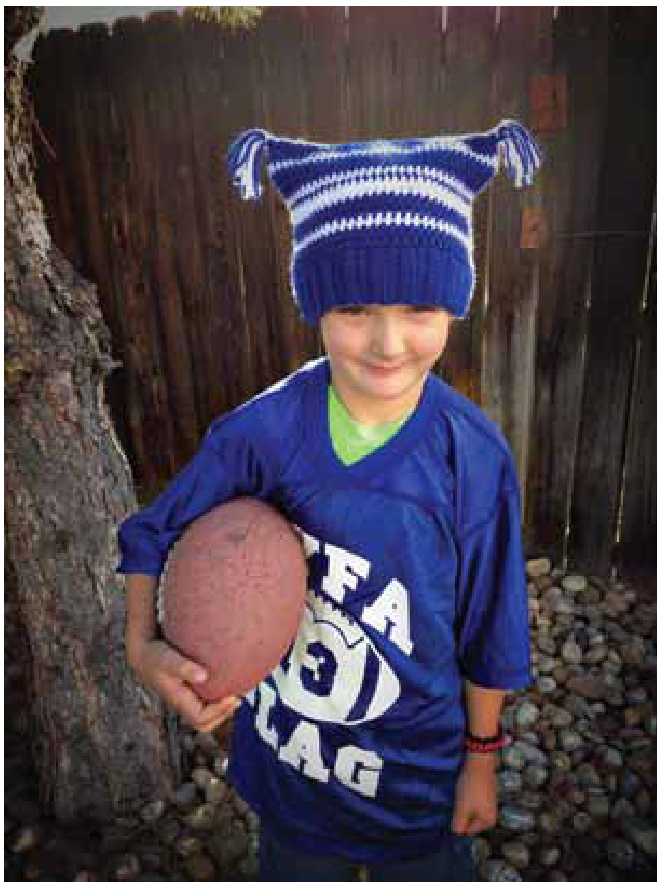
· Ch - chain ·Hdc - Half double crochet · SS - Slip Stitch ·BL -Back Loop ·FL -Front Loop · Join - You will always join round in first stich of each row. · The body of this hat is made using Hdc's on each row, but you can mix it up especially when doing the striped hat show above. I incorporated a couple Single Crochet rows to give a little variance in the stripes. · I used the Clover Pom Pom Maker, but if you don't have one, you can consult this tutorial: http://www.danamadeit.com/2010/12/pom-poms-a-very-simple-tutorial.html · This hat can be made solid or striped. The hats shown are made with variegated and/or self-patterning yarn. Use your imagination and have fun!
The Gappy Hat - Crochet
Newborn:
Ribbed Band Section: Row 1 - Hdc in 3rd Ch from hook, Hdc 5, ch2, turn (6 Hdc's) Row 2 - Hdc in BL only to the end of row, ch 2, turn (6 Hdc's) Row 3-29 -Repeat Row 2 Row 30 - Hdc in BL, ch1 (don't turn) Join band - Fold piece together WS facing and SS to join. Now you will work your hook into the BL of each stitch and your foundation chain. (See Figure 1) This join will give you an almost seamless join. (SeeFigure 2) Main Body of Hat: \* You will now be working around the top edge of your ribbed band. Row 1 - Ch1, sc around the entire hat adding 3 stitches per ribbed section (see Figure 3), Join, (45 stitches) Row 2 - Ch2, Hdc in FL of first stitch (where you joined), Hdc in FL of each stitch, Join Row 3 - Ch 2, Hdc (in both loops) in first stitch (where you joined), Hdc (in both loops) in each stitch, Join Repeat Row 3 until entire hat measures approximately 4" tall. Seam Closed: Line up the edges at the top of your hat, Ch1, insert hook into the inside loops and SS across to seam closed (see Figure 4). Finishing: Weave Ends and add pom poms or tassles.
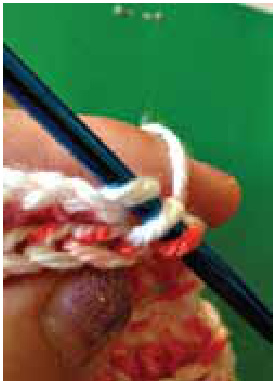
Figure 1
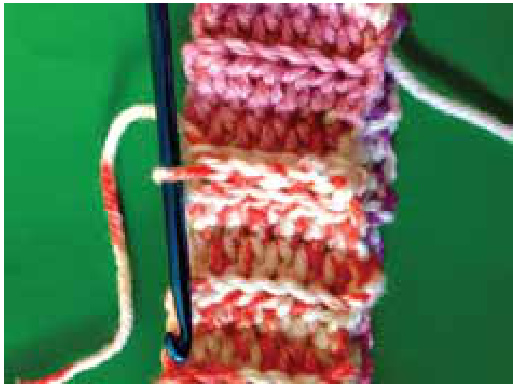
Figure 2
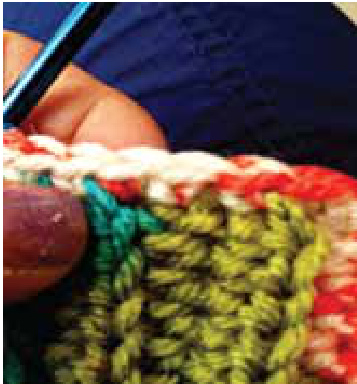
Figure 3
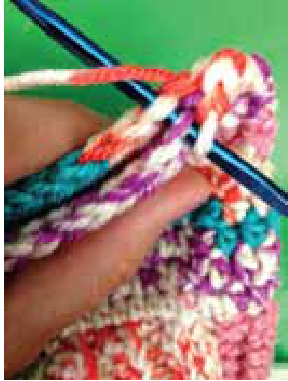
Figure 4 Copyright 2013, Tami Hyatt, aka Breakfast Club Knits. You may use this pattern for personal use, gifts & charity. Sales of finished items are permitted, but the designer requests that you link back to the pattern and credit Breakfast Club Knits with the original design under the Creative Commons Attribution-Share Alike license. No part of this document can be reproduced or transmitted in any form by any means; electronic, mechanical, photocopying or otherwise,withoutwrittenconsentfrom the author/designer.

3-6 Month:
Row 1 - Hdc in 3rd Ch from hook, Hdc 5, ch2, turn (6 Hdc's) Row 2 - Hdc in BL only to the end of row, ch 2, turn (6 Hdc's) Row 3-31 - Repeat Row 2 Row 32 - Hdc in BL, ch1 (don't turn) Join band - Fold piece together WS facing and SS to join. Now you will work your hook into the BL of each stitch and your foundation chain. (See Figure 1) This join will give you an almost seamless join. (See Figure 2) Main Body of Hat: \* You wil now be working around the top edge of your ribbed band. Row 1 - Ch1, sc around the entire hat adding 3 stitches per ribbed section (see Figure 3), Join, (48 stitches) Row 2 - Ch 2, Hdc in FL of first stitch (where you joined), Hdc in FL of each stitch, Join Row 3 - Ch 2, Hdc (in both loops) in first stitch (where you joined), Hdc (in both loops) in each stitch, Join Repeat Row 3 until entire hat measures approximately 4 1/2" tall. Line up the edges at the top of your hat, Ch1, insert hook into the inside loops and SS across to seam closed (see Figure 4). Finishing: Weave Ends and add pom poms or tassles.
6-12 Month:
Ribbed Band Section: Ch 8 Row 1 - Hdc in 3rd Ch from hook, Hdc 5, ch2, turn (6 Hdc's) Row 2 - Hdc in BL only to the end of row, ch 2, turn (6 Hdc's) Row 3-39 - Repeat Row 2 Row 40 - Hdc in BL, ch1 (don't turn) Join band - Fold piece together WS facing and SS to join. Now you will work your hook into the BL of each stitch and your foundation chain. (See Figure 1) This join will give you an almost seamless join. (See Figure 2) MainBody of Hat: \* You will now be working around the top edge of your ribbed band. Row 1 - Ch1, sc around the entire hat adding 3 stitches per ribbed section (see Figure 3), Join, (60 stitches) Row 2 - Ch 2, Hdc in FL of first stitch (where you joined), Hdc in FL of each stitch, Join Row 3 - Ch 2, Hdc (in both loops) in first stitch (where you joined), Hdc (in both loops) in each stitch, Join Repeat Row 3 until entire hat measures approximately 5" tall. SeamClosed: Line up the edges at the top of your hat, Ch1, insert hook into the inside loops and SS across to seam closed (see Figure 4). Finishing: Weave Ends and add pom poms or tassles.
Toddler:
Ribbed Band Section: Ch 8 Row 1 - Hdc in 3rd Ch from hook, Hdc 5, ch2, turn (6 Hdc's) Row 2 - Hdc in BL only to the end of row, ch 2, turn (6 Hdc's) Row 3-41 - Repeat Row 2 Row 42 - Hdc in BL, ch1 (don't turn) Join band - Fold piece together WS facing and SS to join. Now you will work your hook into the BL of each stitch and your foundation chain. (See Figure 1) This join will give you an almost seamless join. (See Figure 2) Main Body of Hat: \* You will now be working around the top edge of your ribbed band. Row 1 - Ch1, sc around the entire hat adding 3 stitches per ribbed section (see Figure 3), Join, (63 stitches) Row 2 - Ch 2, Hdc in FL of first stitch (where you joined), Hdc in FL of each stitch, Join Row 3 - Ch 2, Hdc (in both loops) in first stitch (where you joined), Hdc (in both loops) in each stitch, Join Repeat Row 3 until entire hat measures approximately 6" tall. SeamClosed: Line up the edges at the top of your hat, Ch1, insert hook into the inside loops and SS across to seam closed (see Figure 4). Finishing: Weave Ends and add pom poms or tassles.
Child:
Ribbed Band Section: Ch 8 Row 1 - Hdc in 3rd Ch from hook, Hdc 5, ch2, turn (6 Hdc's) Row 2 - Hdc in BL only to the end of row, ch 2, turn (6 Hdc's) Row 3-44 - Repeat Row 2 Row 45 - Hdc in BL, ch1 (don't turn) Join band - Fold piece together WS facing and SS to join. Now you will work your hook into the BL of each stitch and your foundation chain. (See Figure 1) This join will give you an almost seamless join. (See Figure 2) MainBody of Hat: \* You will now be working around the top edge of your ribbed band. Row 1 - Ch1, sc around the entire hat adding 3 stitches per ribbed section (see Figure 3), Join, (68 stitches) Row 2 - Ch 2, Hdc in FL of first stitch (where you joined), Hdc in FL of each stitch, Join Row 3 - Ch 2, Hdc (in both loops) in first stitch (where you joined), Hdc (in both loops) in each stitch, Join Repeat Row 3 until entire hat measures approximately 7" tall. SeamClosed: Line up the edges at the top of your hat, Ch1, insert hook into the inside loops and SS across to seam closed (see Figure 4). Finishing: Weave Ends and add pom poms or tassles.
Teen:
Ribbed Band Section: Ch10 Row 1 - Hdc in 3rd Ch from hook, Hdc 7, ch2, turn (8 Hdc's) Row 2 - Hdc in BL only to the end of row, ch 2, turn (8 Hdc's) Row 3-47 - Repeat Row 2 Row 48 - Hdc in BL, ch1 (don't turn) Join band - Fold piece together WS facing and SS to join. Now you will work your hook into the BL of each stitch and your foundation chain. (See Figure 1) This join will give you an almost seamless join. (See Figure 2) MainBody of Hat: \* You will now be working around the top edge of your ribbed band. Row 1 - Ch1, sc around the entire hat adding 3 stitches per ribbed section (see Figure 3), Join, (72 stitches) Row 2 - Ch 2, Hdc in FL of first stitch (where you joined), Hdc in FL of each stitch, Join Row 3 - Ch 2, Hdc (in both loops) in first stitch (where you joined), Hdc (in both loops) in each stitch, Join Repeat Row 3 until entire hat measures approximately 8" tall. Seam Closed: Line up the edges at the top of your hat, Ch1, insert hook into the inside loops and SS across to seam closed (see Figure 4). Finishing: Weave Ends and add pom poms or tassles.
Adult:
Ribbed Band Section: Ch10 Row 1 - Hdc in 3rd Ch from hook, Hdc 7, ch2, turn (8 Hdc's) Row 2 - Hdc in BL only to the end of row, ch 2, turn (8 Hdc's) Row 3-51 - Repeat Row 2 Row 52 - Hdc in BL, ch1 (don't turn) Join band - Fold piece together WS facing and SS to join. Now you will work your hook into the BL of each stitch and your foundation chain. (See Figure 1) This join will give you an almost seamless join. (See Figure 2) MainBody of Hat: \* You will now be working around the top edge of your ribbed band. Row 1 - Ch1, sc around the entire hat adding 3 stitches per ribbed section (see Figure 3), Join, (78 stitches) Row 2 - Ch2, Hdc in FL of first stitch (where you joined), Hdc in FL of each stitch, Join Row 3 - Ch 2, Hdc (in both loops) in first stitch (where you joined), Hdc (in both loops) in each stitch, Join Repeat Row 3 until entire hat measures approximately 9" tall. SeamClosed: Line up the edges at the top of your hat, Ch1, insert hook into the inside loops and SS across to seam closed (see Figure 4). Finishing: Weave Ends and add pom poms or tassles.


