CrazyMonkey's Vanilla Sock Pattern
Christina Cooper christy $@$ crazymonkeycreations.com
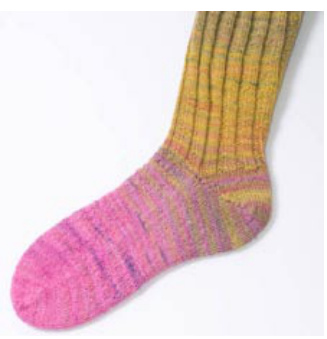
Vanilla Socks
Sometimes, you want to knit a sock that is chocolate fudge mint ripple with rainbow sprinkles, and sometimes you want to knit a sock that's just plain vanilla. Something that can be your emergency knitting when you're out and about and in line or waiting for something. Sometimes you want to make the yarn the focus of the oohs and ahhs from your knitting friends, instead of the stitch pattern. Sometimes, you just want stupid knitting that you can pick up and put down at will, and a pair of socks at the end. It's taken me a while to figure out what I like in a sock, and how I like to construct it. I tried short-row toes, then I tried “increase' toes in the same shape, and I finally setled on the toe-up German Round Toe. For heels, I've always liked short-row hees. I've gone from traditional wrap-and-turn heels to the Priscilla Gibson Roberts short row heels (with yarnovers) to the Sherman Heel (which has no wraps). I've tried other provisional cast-ons that you can knit both sides from immediately, and have settled on Judy's Magic Cast-on, although you can use the Figure-8 or Turkish cast-on if you're more comfortable with those cast-ons.
Gauge and needles
My normal gauge is 8 stitches per inch (3.2 stitches/cm, or 32 stitches over $10\;\mathrm{cm})$ with fingering weight (Monkey Toes or Panda Toes) on size O needles. I'm a loose knitter, though, and if you are a tight knitter, and can get gauge on 1's or $2\,\mathrm{\dot{s}}$ , use those. My foot is $8^{\circ}$ $(20.5\;\mathrm{cm})$ around at the widest, and $9.5^{\circ}$ (24cm) long. My socks tend to be wider than my foot, but shorter, so that the fabric stretches nicely to fit my boxy-shaped feet. I also knit both socks at once on a Magic Loop, so that both socks match. I prefer a $40^{\circ}$ (101cm) needle with a flexible cord, but will take a $36^{\circ}\,(\,91\mathrm{{cm})}$ if that's what's available. I like the Knitpicks Options needles in this size, as wellas the Addi Turbos and the Addi Lace in the smaller sizes. The only difference between knitting one sock on a magic loop and knitting two socks on a magic loop is that instead of casting on one sock at a time, I cast on one, then cast on the other. If you're more comfortable with 2 circular needles, feel free to substitute. Both Magic Loop and the Two Circular methods have you working on one half of the sock, then the other. When you're working 2 socks at once, you'll work the instep of one sock, drop the yarn, pick up the other working yarn, work the instep of the other sock, turn your work, work the arch side of one sock, drop the yarn, pick up the other yarn, and then work the arch side of the second sock. You can knit from either end of a single ballof yarn, or from two separate balls of yarm. When your yam gets twisted, hold the ball(or balls of yarn, and let the socks dangle. Give them a shove in the right direction, and they'll untwist. I refer to “each end of the needle”, this means for each sock, increase one stitch from the beginning of the row' and one stitch from the end. For example, Round 2 would be Knit 1, KFB, Knit 8, KFB, Knit 1, which would increase 12 stitches for each side of your sock to 14. If you have to put your sock down while you're knitting the toe, count your stitches to figure out where you were. Both instep and arch sides of the sock should have the same number of stitches. For increases, I use KFB (Knit in the Front and Back) one stitch from each end, because they stack wellon the first few rounds, and leave alittle evidence so that you can tell whether you increased in the last row or not. Some people like to use a locking stitch marker to mark their instep side of their sock as they knit these rounds, so that they don't lose track.
Casting On and Knitting the Toe
Cast on 12 stitches to each of your 2 needle tips. Round 1: Knit plain. (Remember to knit the 2nd half of each sock through the back loops, so that you untwist your stitches.) Rounds 2-5: Increase on each end of the needle (14, 16, 18, 20 sts) Round 6: Knit plain. Round 7: Increase on each end of the needle (22 sts) Round 8: Knit plain. Round 9: Increase on each end of the needle (24 sts) Round 10: Knit plain. Round 11: Increase on each end (26) Round 12-13: Knit plain. Round 14: Increase on each end (28) Round 15-16: Knit plain Round 17: Increase on each end (30) Round 18-20: Knit plain Round 21: Increase on each end (32) Round 22-25: Knit plain Round 26: Increase on each end (34) Round 27-30: Knit plain Round 31: Increase on each end (36) Knitting the Foot of your Sock You now have 72 stitches total for your sock, and a nice rounded toe. I usually weave the beginning tail in at this point, as it's a nice stopping point to admire your work, and if you weave it in now, when you're done, you'll only have the one end to weave in before you can wear your socks. Knit in stockinette until your sock is 2.5 inches $(6.25\;\mathrm{cm})$ shorter than your foot. If you're working both socks at once, just remember that each heel is worked separately, with the other sock ‘hanging out on the needle. These rows will be worked back and forth.
Knitting the Short Row Heel
Heel Row 1: Knit 36 stitches, turn. Heel Row 2: Slip 1, purl 35 stitches, turn. Heel Row 3: Slip 1, knit 34 stitches, turn.
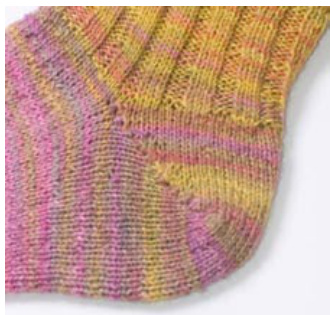
Continue this, slipping a stitch and knitting (or purling) one fewer stitch until you get to slip 1, purl 12 stitches, turn. Your heel will look kinda weird at this point, as it's kind of wedge shaped with lots of loose? stitches on the side. The magic comes from what the Sherman Heel instructions call the rest of this process “en croachments"'. A Knit Encroachment (KEnc) consists of a knitwise slip, pick up the stitch in the row below the next stitch, then put your Left needle in through both stitches in front of your right needle, and k2tog. The place ment of your left needle means your knitting the 2 stitches together through the back loop. A Purl Encroachment (PEnc) consists of a purlwise slip, pick up the stitch below the next stitch, then put your left needle into both stitches behind the right needle, and purl 2 together. A faster way to do this is to slip the stitch, put your right needle into the next stitch, and k2togtbl, or p2tog, depending on which encroachment you're working on.
Heel Turn Row 1: knit 11 , KEnc, turn. Heel Turn Row 2: purl 12, PEnc, turn.
Continue in this manner, working one more stitch until you have worked all but one of the stitches. You'll be on the knit side, and at the point where you'd normally start knitting the second sock, or start knitting back around to the front of the sock. You'll have left only one stitch not worked, and you'll work that one on the way back around by doing a Make One (lift the strand between the 2 stitches, knit through the back loop), then knit the frst stitch on the needle and pass the M1 stitch over. Knit the second heel, and then knit around back to the front of the sock. Knit 5 rounds plain and then start your ribbing.
Ribbing
For plain socks, I like a K3 P3 ribbing, but with 72 stitches, you have the flexibility to knit any one of many ribbings. K1 P1, K2 P2, K3 P3, or K4 P4 allfit within the number of stitches, and while K2 P2 is the most snug, the rhythm of it doesn't work for me. You can use an uneven ribbing, like K2 P1 or $K3\,P2$ , as well.It's all up to you from here. I usually make my socks 8 to 9 inches long $(20{-}23\;\mathrm{cm})$
Can't Get Enough? Make knee socks!
If you want to make your socks into knee socks, you'll have to do some calf shaping. Since this is an individual thing, as everyone's calves are shaped differently,Ill give you the instructions on how toincrease for your calf. Since we're knitting socks toe-up,the easiest way to figure this out is to TRY ON THE SOCK. Put the sock on (needles and all), then take your measuring tape and measure the circumference of your leg where your sock is. Write that down somewhere. If it is less than your current number of stitches divided by your gauge, note that. Measure up 1”" above the sock and measure around your leg at that point. Multiply that number of inches by your gauge, and subtract 8. The difference between that number and your current number is how many stitches you'll need to add to your sock. I add the stitches to the back of the sock (above the heel), as that's where your calf generally changes. When you get to the point where your calf reduces to meet your knee, do one or two decrease rows so that your socks willstay up. You need to make sure that you can still get your socks over the largest part of your calf, as if you can't do that, it won't make it up to your knee.
Binding Off Loosely
To bind offloosely enough to allow the ribbing to stretch and relax, I use Elizabeth Zimmermann's Sewn Bind-Off. It's very similar to kitchnering, and also similar to a back stitch in sewing or embroidery. Cut a piece of yarn 3-4 times longer than your sock circumference, and thread a yarn needle with it. \* Put the yarn needle into the first 2 stitches as if you were going to knit the 2 together and pull through loosely. Put the yarn needle back through the first stitch and drop that stitch off the needle. \* Repeat until you have one stitch left, and pull the yarn through the last stitch and weave your end in. I always bind off the stitches while they're on the magic loop, which means the last stitch on half of the needle has to be sewn through with the next stitch in its sock on the other half of the needle, then dropped off, or put onto a locking stitch marker to hold onto it until it makes sense. I know people who transfer one of their socks to dpn's or another magic loop set up so that they can bind the sock off all at once. Once your socks are bound off, weave in the remaining end and wear them proudly. Handknit socks are a luxury item these days, and the hours you put into these humble foot-coverings are hours well spent. Once you've got the hang of vanilla socks, you can use any stitch pattern to make your socks personalized. Since you're knitting them toe-up, if the pattern pulls in too much, you can simply rip back to where your toe ended and try another one.
Further Reading
Heels: Simple Socks Plain and Fancy, Prisilla A. Gibson-Roberts (Includes her yarnover short row heel.) Short row heel instructions (with wraps, from cosmicpluto),http://www.cosmicpluto.com/blog/?p=585 Sherman Heel Instructions (from the inventor), http://www.knitlist.com/2002/ToeUpSock.htm Cast-ons: Judy's Magic Cast-on (from Persistent Ilusion), http://www.persistentillusion.com/blogblog/techniques/magiccast-on/magic-cast-on-2 Figure 8 Cast-on (from A Gathering of Wool), htp://agatheringofwool.blogspot.com/2005/08/figure-8-castOn.html Turkish Cast-on (from FluffyKnitterDeb),http://fuffyknitterdeb.blogspot.com/2005/10/knitting-made-easierturkish-cast-on.html Stretchy Bind-offs: Russian bind-off (from KnitWiki), knitting.wikia.com/wiki/Russian_cast-off Sewn bind-of(from Knitting Daily),http://www.knittingdaily.com/blogs/howto/archive/2008/05/15/sewn-bind off.aspx Knitting Without Tears, Elizabeth Zimmermann (Sewn bind-off)


