Amigurumi Baby Mouse
Copyright 2015 Pattern created by: Jenn Mulherin
NOTE: When finished, this cute little mouse will be 3.5" x 3". This crochet pattern set may not be sold, copied, or redistributed in any way, shape, or form. However, you may sell the finished product. Just be sure to give the designer credit by stating that this pattern was created by Shimmeree Creations, and provide a link to one of the following websites: Etsy: https://www.etsy.com/shop/ShimmereeCreations Ravelry: http://www.ravelry.com/designers/jenn-mulherin Skill Level: Easy
Materials:
Size F/6 or 3.75mm Crochet Hook Yarn Needle Stitch Marker Scissors Polyester Fiberfill Worsted Weight Yarn (I used Red Heart Super Saver Solids) Charcoal (or gray) for head, ears, body, arms, legs, and tail Black for eyes and mouth Baby Pink for nose and ears
Abbreviations:
Ch - Chain Lp(s) - Loop(s) Sc - Single Crochet Sc2tog - Single Crochet 2 stitches together (decrease) Sk - Skip Sl st - Slip Stitch St(s) - Stitch(es)
Head
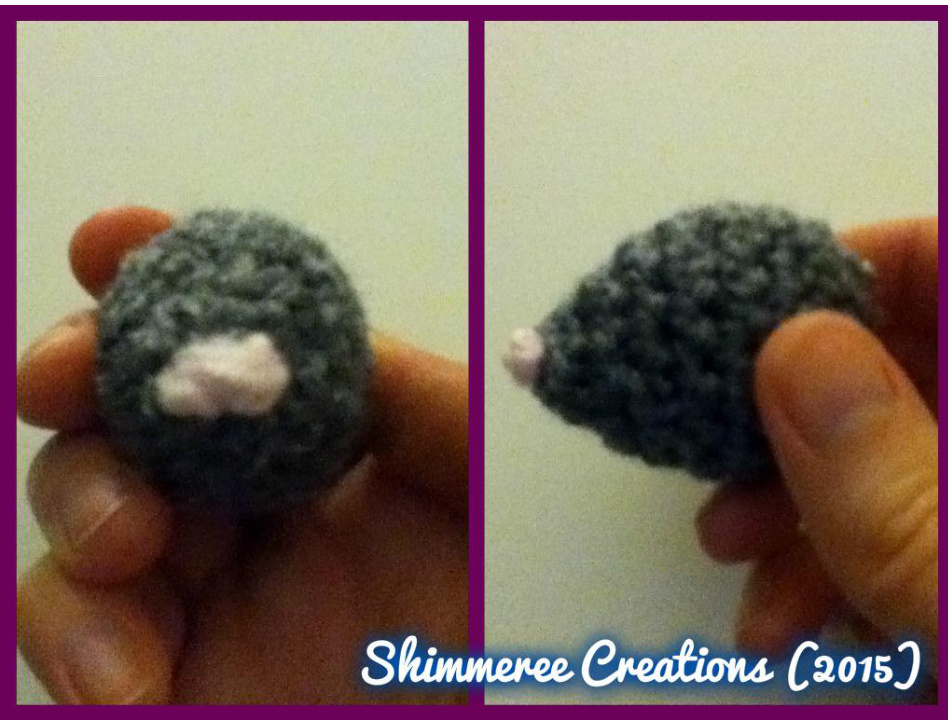
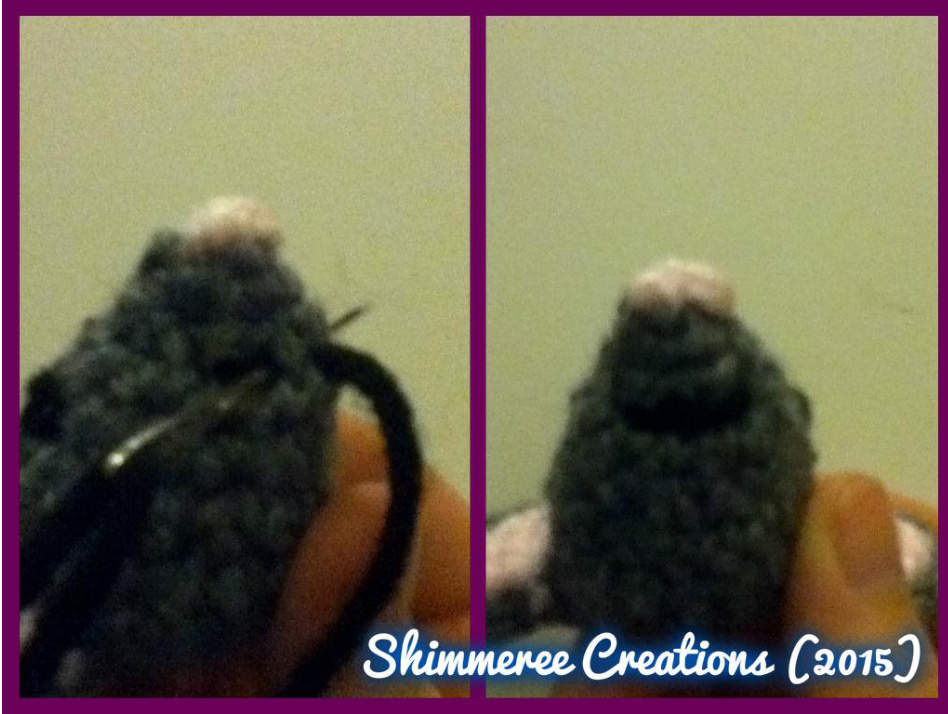
Round 1: With Charcoal (or gray) yarn, make a magic circle. Do 6sc in the magic circle. Pull on the yarn end to close up the hole. (6) Round 2: Make 2sc in each st. (12) Round 3: 2sc, sc in the next st (repeat this pattern around). (18) Rounds 4-6: Sc around. (18) Round 7: Sc2tog, sc in the next st (repeat this pattern around). (12) Round 8: Sc around. (12) Begin stuffing as you go. Round 9: \*Sc2tog\* six times. (6) Round 10: Sc around. (6) Fasten off. Sew the hole closed. With light pink yarn, embroider the nose on this end (see imagebelow).
Front of Ears (make 2)
Round 1: With light pink yarn, make a magic circle. Do 5sc in the magic circle. Pull on the yarn end to close up the hole. (5) Round 2: Make 2sc in each st. (10) Sk 1 st and sl st in the next. Cc to Charcoal (or gray) Round 3: Sl st in the first 9 sts. Fasten off, leaving a long tail for sewing. Weave in the end.
Back of Ears (make 2)
Round 1: With Charcoal (or gray) yarn, make a magic circle. Do 5sc in the magic circle. Pull on the yarn end to close up the hole. (5) Round 2: Make 2sc in each st. (10) 3: Do \*2sc, sc in the next st\* four times. (Leave the last 2 sts untouched Fasten off, leaving a long tail for sewing. Weave in the end.
Placing the front ear on top of the back ear, sew these two pieces together (steps 1-4).
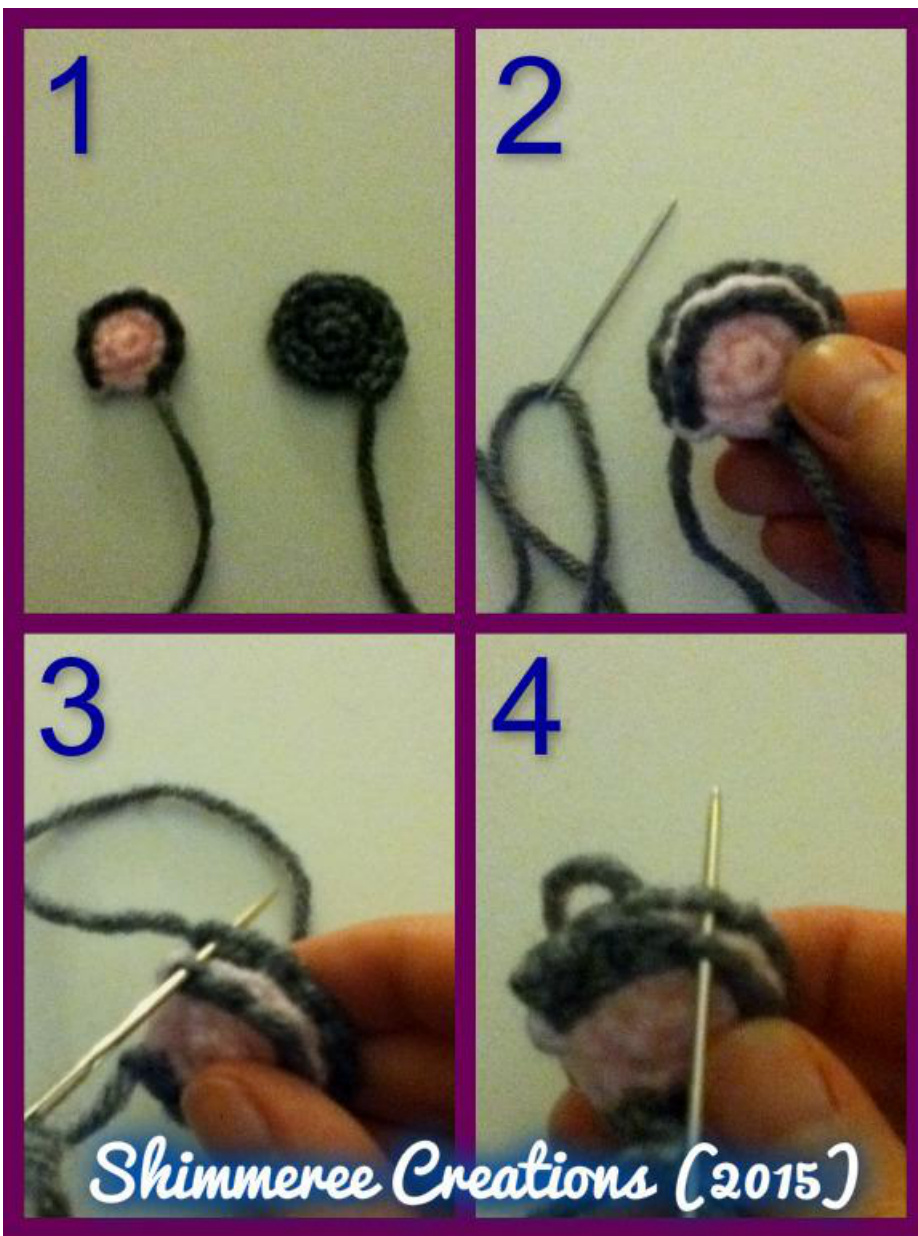
When you reach the bottom of the ear, put the needle through both sides (the left and right side) of the ear. Pull the yarn through, and continue this step two more times. Make sure the yarn is snug—-this will make the ear shaped more like a raindrop. Fasten securely. (Steps 5-8)

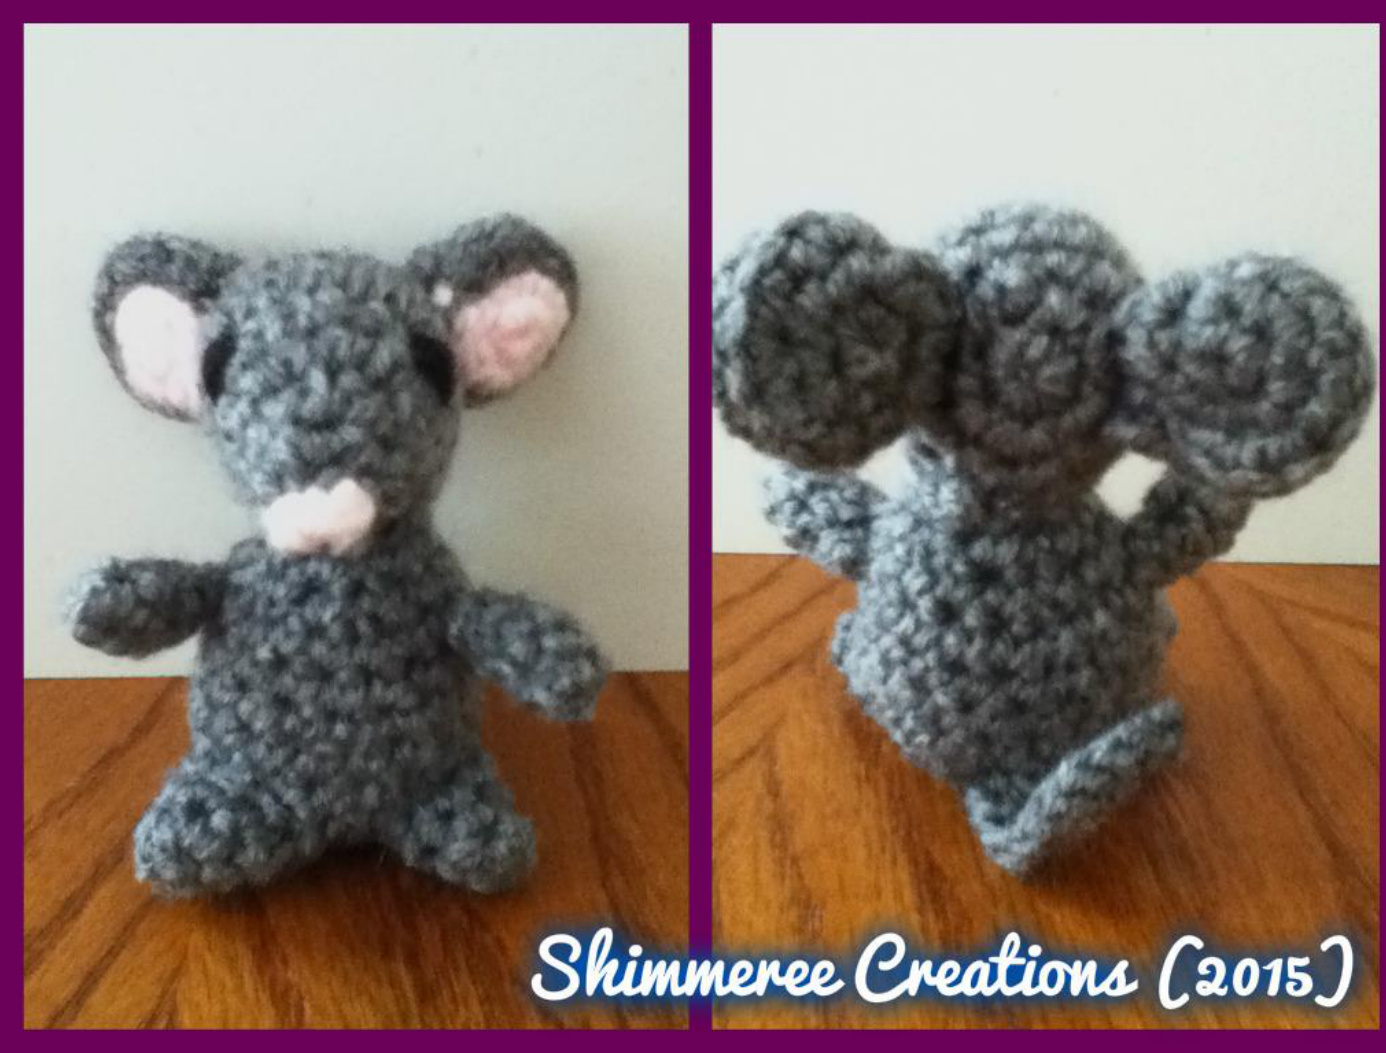
Sew the ears between rounds 3-4 of the head (closer to the back of the head).
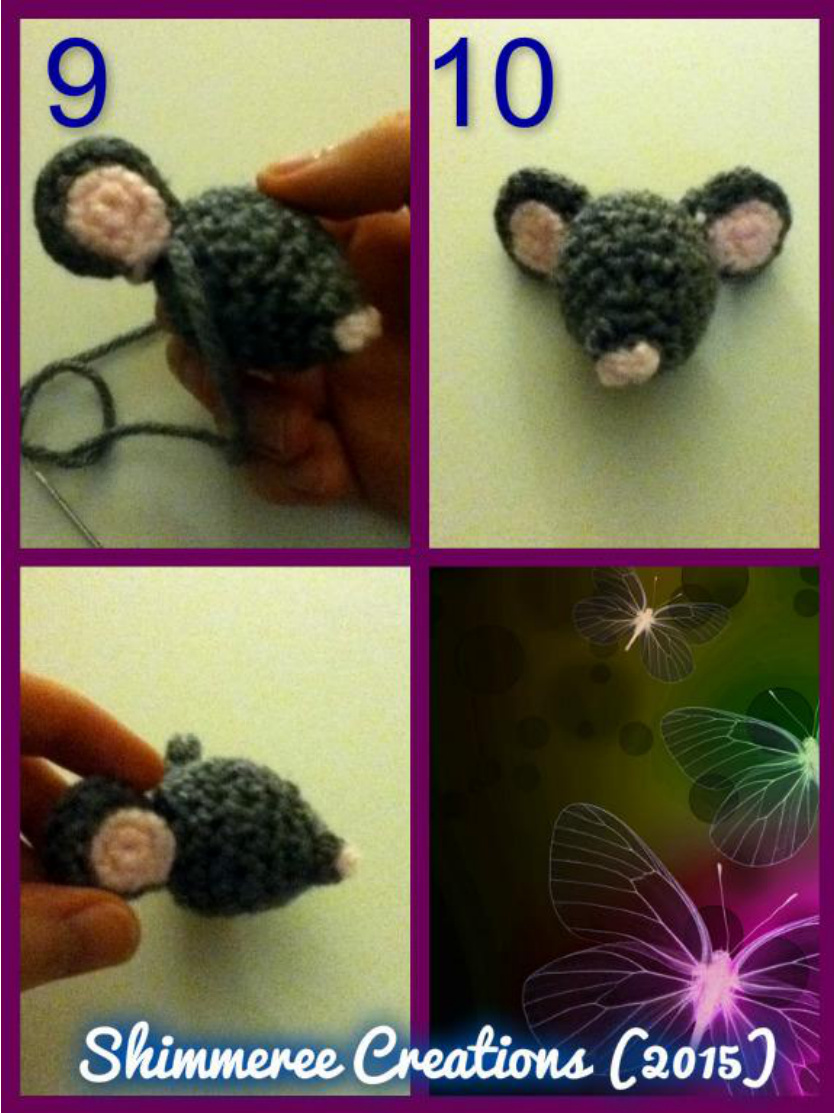
When finished with sewing the ears onto the head, embroider some eyes and a mouth using black yarn. (See images below)
Body
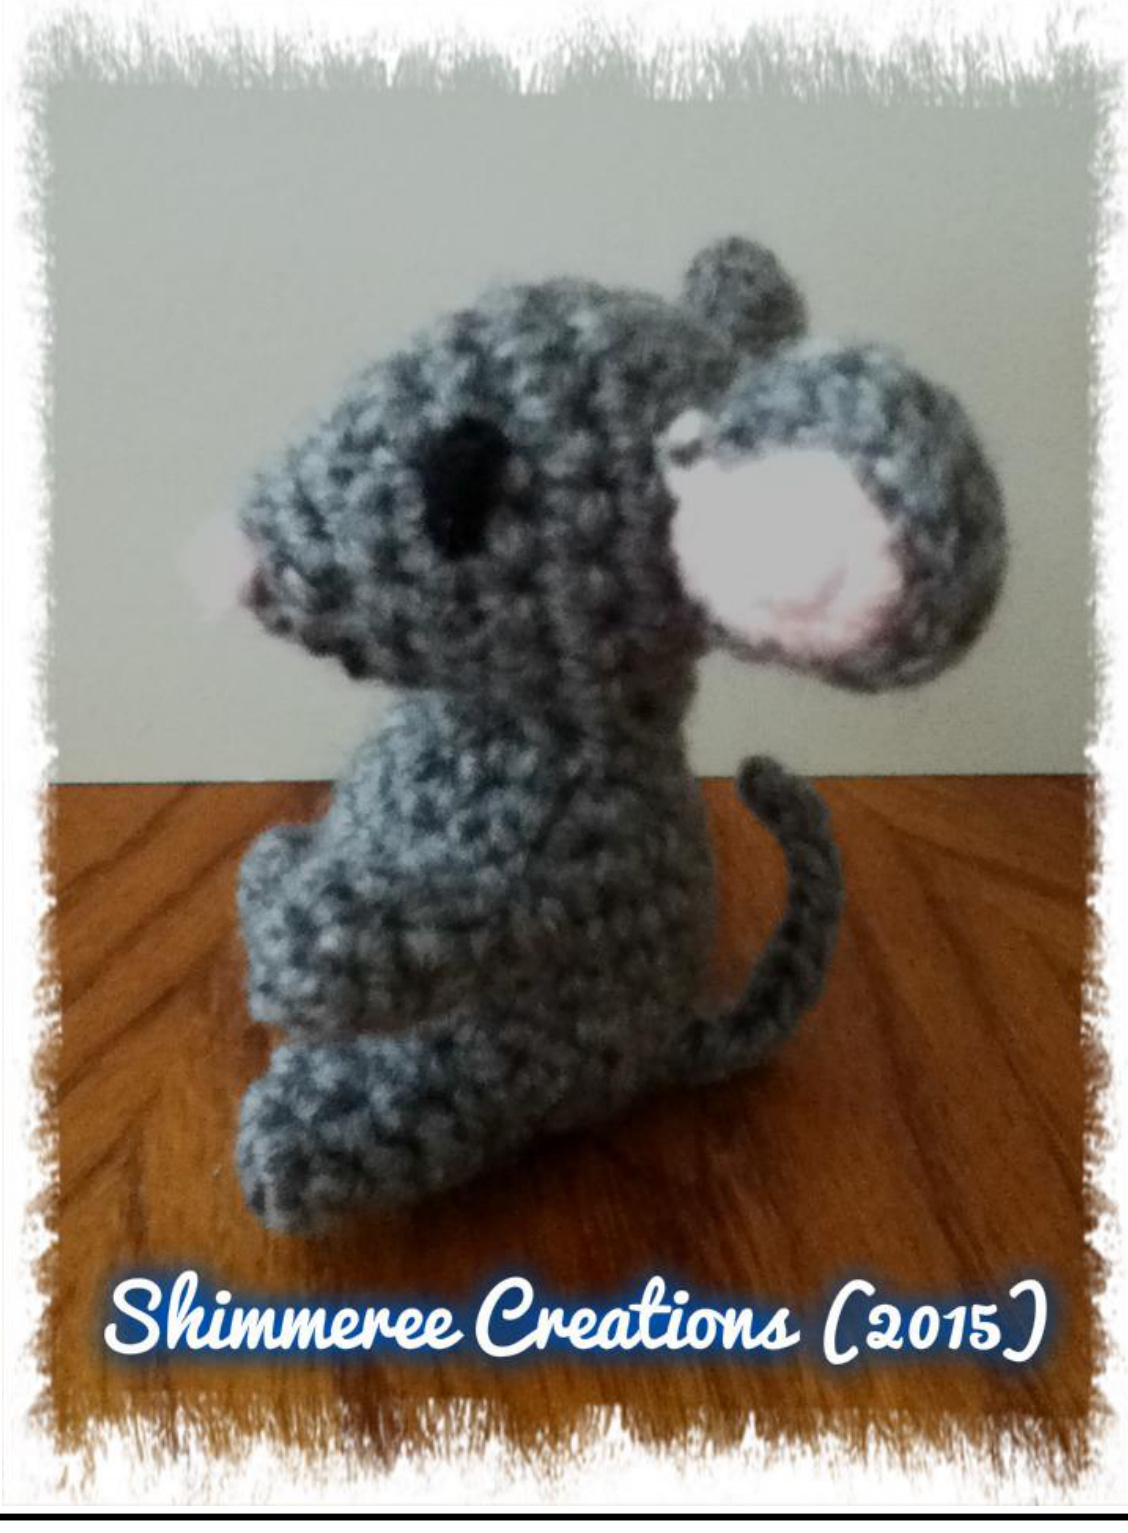
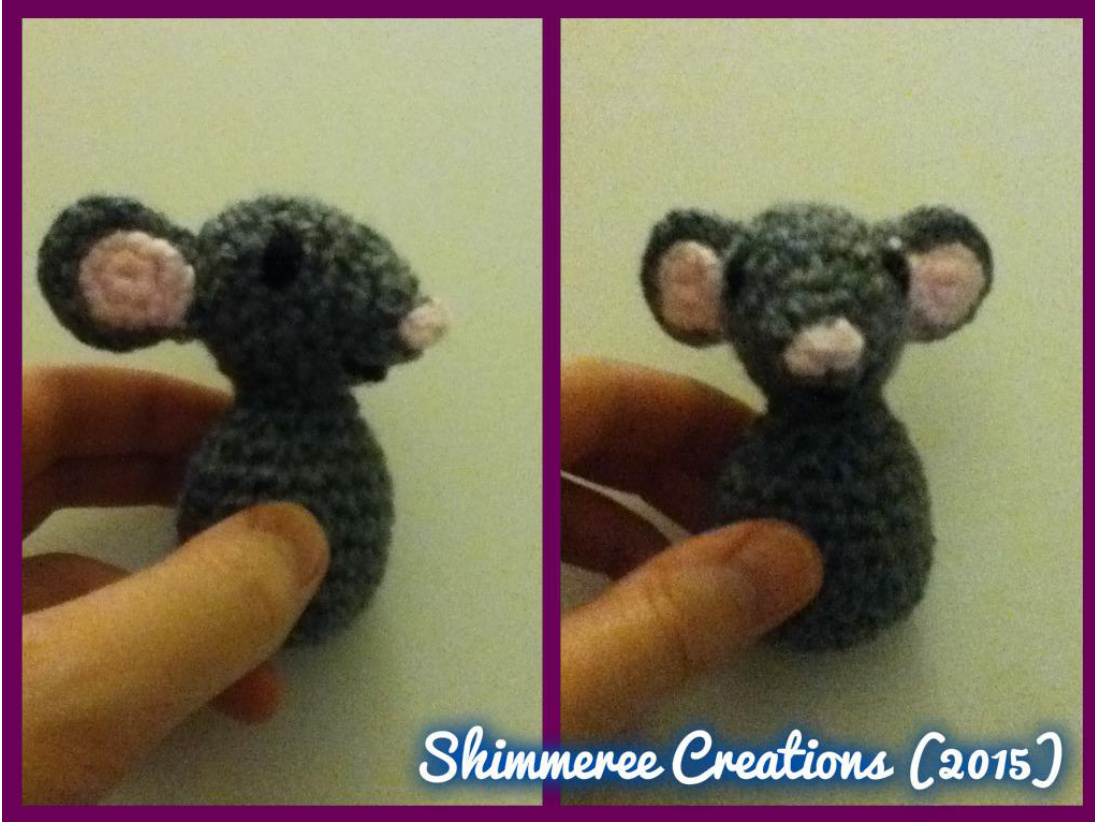
Round 1: With Charcoal (or gray) yarn, make a magic circle. Do 6sc in the magic circle. Pull on the yarn end to close up the hole. (6) Round 2: \*3sc. 2sc in next st. Sc in next st\*. Repeat pattern one more time. (12) Round 3: Sc. Do \*2sc\* in the next 3 sts. Sc in the next 3 sts. Do \*2sc\* in the next 3 sts. Sc in the last 2 sts. (18) Rounds 4-9: Sc around. (18) Round 10: Sc2tog, sc in the next st (repeat this pattern around). (12) Begin stuffing the body. Round 11: Sc2tog, sc in the next st (repeat this pattern around). (8) Fasten off, leaving a long end tail for sewing body to the head. Place the head over the neck of the body and sew together (see image below for how the mouse will look when finished with this step).
Arms (make 2)
With Charcoal (or gray) yarn, ch 2. Round 1: Do 4sc in the 2"d ch from the hook. (4) Round 2: \*2sc, sc in the next st\* two times. (6) Round 3: Sc around. (6) Round 4: \*Sc2tog, sc in the next st\* two times. (4) Fasten off, leaving a long tail for sewing. Do not stuff the arms. Sew the arms onto each side of the mouse's body.
Feet (make 2)
With Charcoal (or gray) yarn, ch 2. Round 1: Do 4sc in the 2"d ch from the hook. (4) Round 2: Sc around. (4) Round 3: Do 2sc in the first 3 sts. Sc in the last st. (7) Round 4: Sc around. (7) Fasten off, leaving a long tail for sewing. Lightly stuff the feet. Sew the feet onto the bottom-front part of the mouse's body.
Tail
Slip the crochet hook through the lower-back part of the body. Make a slip knot with Charcoal (or gray) yarn. Pull the hook and yarn through the loop. across. Slip the hook in the same part of the body and make another sl s1 Fasten off. Weave in the ends.

Thank you for downloading this crochet pattern from Shimmeree Creations! Happy Crocheting! Etsy - https://www.etsy.com/shop/ShimmereeCreations Ravelry - http://www.ravelry.com/designers/jenn-mulherin Facebook - https://www.facebook.com/shimmereecreation Instagram - http://instagram.com/shimmereecreation


