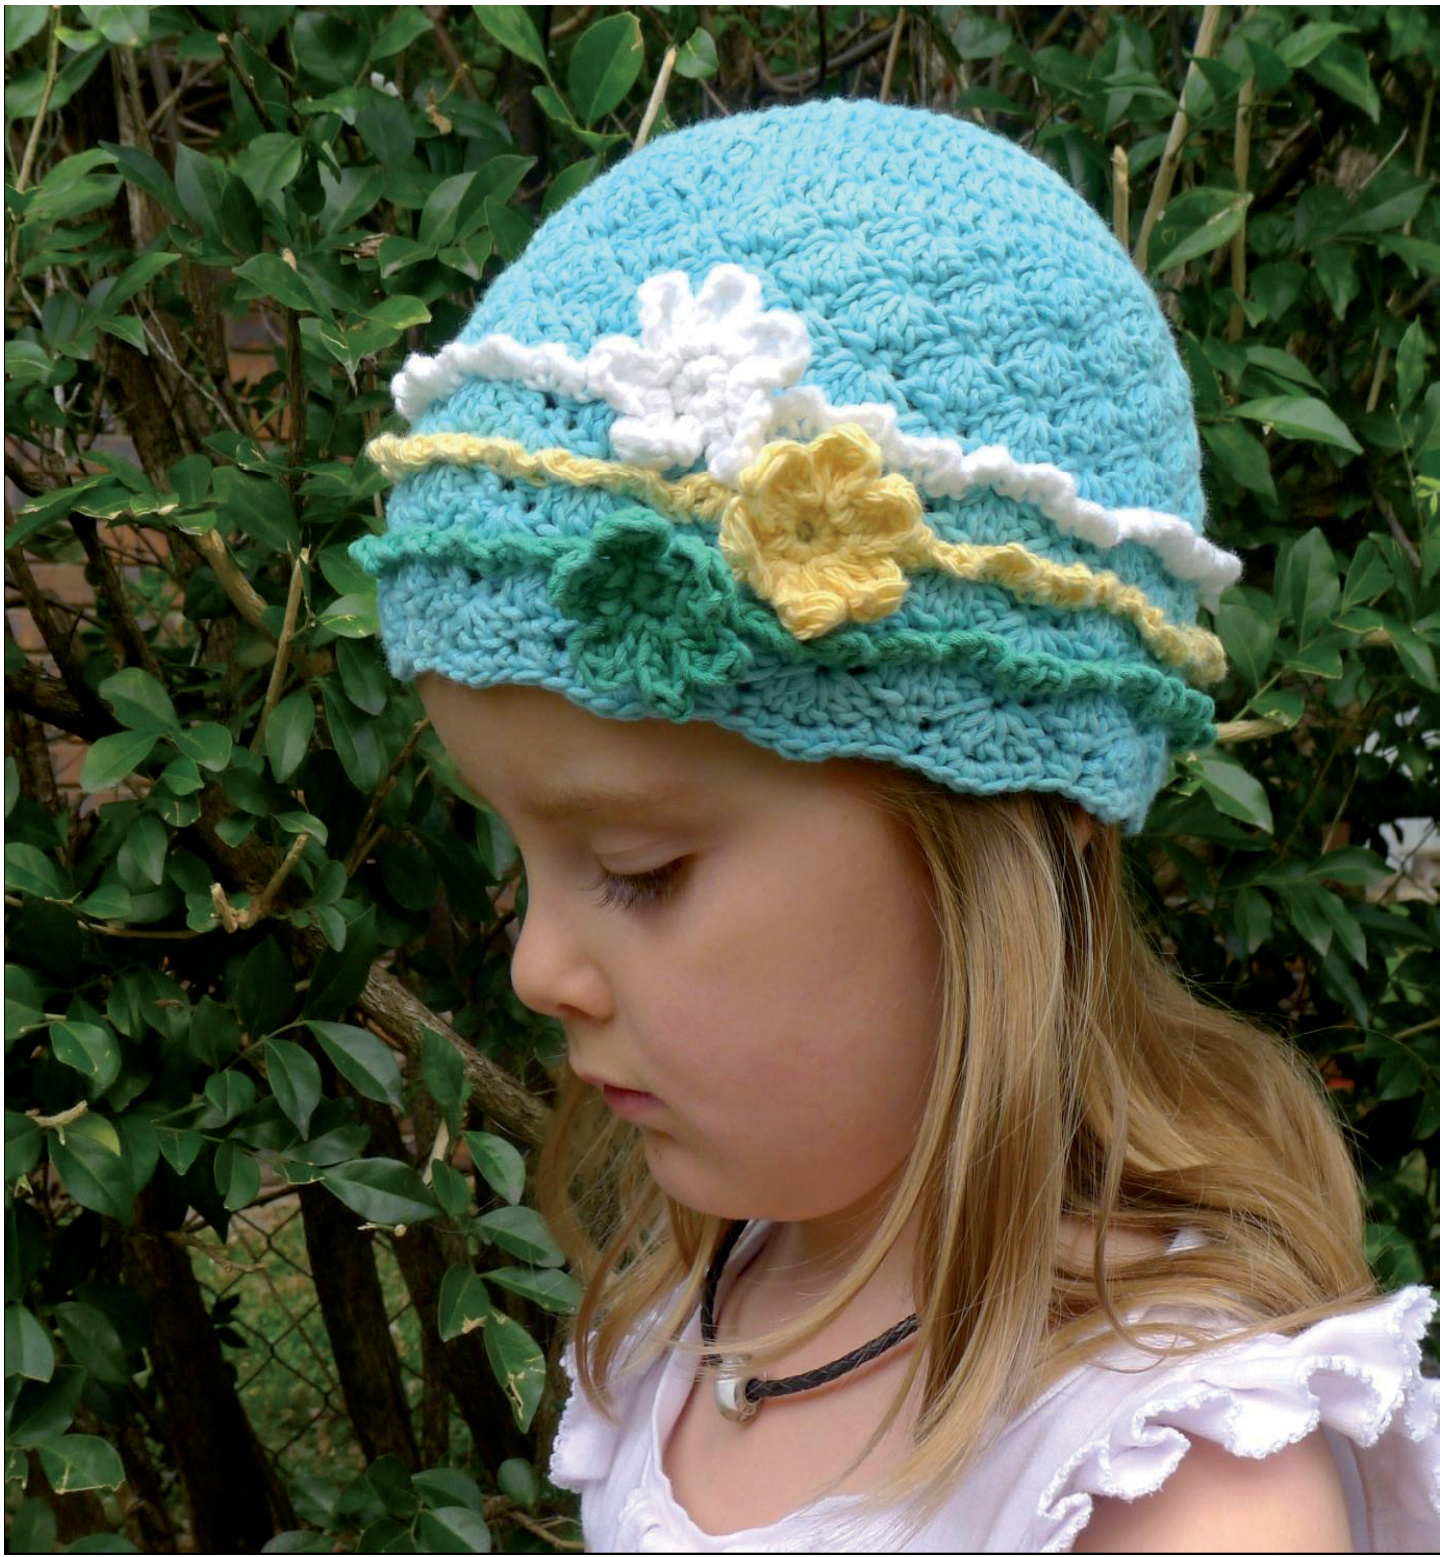
ipsy Dirl
Ein Originalhakelanleitung von Deanne Ramsay Gipsy Girl wurde als passendes Acesoire fur den ,Andalucia" Hakelrock entworfen. eiche madchenhafte Rischen und Blumen machen dieses einfache Muster Zu etwas Besonderem. Mebr von Addydae Designs stndest du bier: www.adydae.com
MATERIALS
Any fingering/4ply, DK/8ply or worsted weight/10ply yarn may be used for this pattern. Heavy worsted is not recommended.
YARDAGE REQUIREMENTS
Exact yardage will depend on the yarn chosen and the size required. As a guide, you will need between 65 and 220 yards (60 and 200m) of DK/8ply. You will need a bit less if using worsted/10ply and a bit more if using fingering weight/4ply.
GAUGE
There is no set gauge for this pattern. All of the work is done using measurements. Simply choose the hook size best suited to your yarn and crochet style. About 1 inch/ 2.5cm of negative ease is factored in to the pattern for a nice fitting beanie, so you just want a nice amount of spring to the fabric of it, therefore you will need to take into account the amount of stretch in the fibre chosen.
SKILL LEVEL: EASY
This is a project created using basic stitches, simple colour changes and minimal shaping and finishing. It incorporates a repetitive pattern using basic crochet stitches.
GLOSSARY:
st/s stitch/es beg beginning yo yarn over rem remaining RS right side WS wrong side
STITCHES USED: (AMERICAN TERMINOLOGY)
ch chain sc single crochet dc double crochet tr treble crochet
PATTERN STITCHES:
3dc fan work 3 dc into stitch indicated 5dc fan work 5 dc into stitch indicated sc inc work 2 sc into the stitch indicated dc inc work 2dc into the stitch indicated sc3tog [insert hook into the st, yo and draw up a loop] in each of the three sts indicated, yo and draw through all 4 loops to finish When instruction is given at the beginning of a round to "ch 1, sc in same st" this means to ch 1, then work a sc in the same stitch that the ch 1 originated from, not into the chain itself.
MATERIAL
Jedes Garn fur Nadelstärken 2,5 bis 5,5 ist geeignet. Fur die verschiedenen moglichen LL bitte im Anhang die Tabelle zu Rate ziehen.
BEDARF
Der genaue Bedarf hangt vom verwendeten Material, der GroBe und der Hakelnadel ab. Man braucht von einem DK/8ply-Garn (zwischen Catania und Catania grande) zwischen 60 und 200m. Etwas weniger bei dickerem Garn, etwas mehr bei dunnerem.
MASCHENPROBE
Es gibt keine festen Maschenangaben fur diese Anleitung. Alles wird nach MaBen gemacht. Einfach die zum Garn passende Hakelnadel verwenden. Ca. 2,5 cm ist in der Anleitung als ,Dehnbereich" angenommen worden, von daher sollte auf den Stretch der Faser geachtet werden. Baumwollgarn hat weniger Stretch als Poly-Garne oder Mischungen.
LEVEL: LEICHT
Hier werden Basismaschen angewendet, einfache Farbwechsel und minimales Formen. Mit diesen Basismaschen wird ein wiederholendes Muster gehakelt.
GLOSSAR:
M - Maschen Anf - Anfang Umsch - Umschlag verbl - verbleibende RS - rechte Seite LS - Linke Seite
VERWENDETE MASCHEN
Lm - Luftmasche fM - feste Masche St -Stäbchen Dst - Doppelstabchen
MASCHEN IN DER ANLEITUNG:
3 St in 1 - 3 Stäbchen in die angegebene Masche hakeln 5 St in 1 - 5 Stäbchen in die angegebene Masche hakeln fm verdoppeln - 2 feste Maschen in angegeb. Masche hakeln St verdoppeln - 2 Stabchen in angegebene Masche hakeln 3fMzus - 3 feste Maschen zusammen abmaschen Wenn die Anleitung am Anfang der Runde besagt: .1 Lm, fM in die gleiche M", heiBt das, 1 Lm hakeln und eine fM in die gleiche Stelle, aus der die Lm kommt und NICHT in die Lm selber.
BEFORE YOU BEGIN
If you are able to take measurements from the intended wearer, please note the following: Measure around the widest part of the wearer's head, then subtract approximately 1 - 1.5 inches (2.5- 4cm) depending on how snug you would like the fit. Write the subtracted figure at Measurement A. (For this design, do not subtract any more than 1"/2.5cm if making sizes smaller than 18mths. If you are using 1o0% cotton, I recommend not subtracting any more than 1.5 inches given that cotton does not stretch and your beanie may end up too small) Grab your calculator and divide Measurement A by 3.142. Note this as Measurement B. Calculate the length required by measuring from the crown of your head (the top towards the back of your head) to somewhere just above the eyebrows. Note this as Measurement C. Measurement A: Measurement B: Measurement C: If you don't have the intended wearer handy, the following table has been provided as a guide. It might not be as perfect a fit, but hopefully will be close enough!
VoR DEM START
Wenn es dir moglich ist, vom zukunftigen Trager die KopfmaBe zu bekommen, beachte folgendes: Messe um den breitesten Teil des Kopfes, dann ziehe ca. 2,5 bis 4 cm ab, je nachdem wie eng die Mutze sitzen soll. Schreibe die subtrahierte Zahl als MaB A. (Bei diesem Design ziehe nicht mehr als 2,5 cm ab, wenn du GroBen kleiner als 18 Monate hakelst. Wenn du 100% Baumwolle verwendest, empfehle ich, nicht mehr als4cmabzuziehen,dasichBaumwollekaum dehnt und die Mutze schnell zu klein ware.) Schnapp dir den Taschenrechner und teile das MaB A durch 3,142. Notiere das als MaB B. Die benotigte Lange der Mutze berechnet sich aus dem MaB von der Kopfmitte (oben Richtung des hinteren Teils vom Kopf) bis irgendwo grad uber die Augenbrauen. Notiere das als MaB C. MaB A: MaB B: MaB C: Wenn der zukunftige Trager nicht greifbar ist, kannst du die folgende Tabelle nutzen. Es wird nicht ganz perfekt, aber doch ziemlich genau.
| Alter | MaB B | MaB C |
| Newborn - 3 months | 4.25 inches/11cm | 5 inches/13cm |
| Newborn - 6 months | 4.75 inches/12cm | 5.5 inches/14cm |
| 6 - 18 months | 5.25 inches/13cm | 6 inches/15.5cm |
| 18 months - 3 years | 5.5 inches/13.5cm | 7 inches/18cm |
| 2 - 6 years | 6 inches/15.5cm | 7.5 inches/19cm |
| 3 - 8 years | 6.5 inches/16.5cm | 7.75 inches/19.5cm |
| 8 - 16 years | 6.75 inches/17cm | 8.5 inches/21.5cm |
| 16 years - small adult | 7 inches/18cm | 8.75 inches/22cm |
| Medium adult | 7.25 inches/18.5cm | 9 inches/23cm |
Ok, now we can get started. Ok, jetzt kann es losgehen.
PART 1: THE CROWN
For Part 1, you only need to do as many rounds as it takes for your work to reach MEASUREMENT B in diameter. Round 1: Using MC and your chosen hook, form a magic ring, chain 2, and work 12 dc into the ring. Pull the ring closed and join by working a sl st into the top of the first dc - not into the top of the beg ch2. (12dc) Note: the Ch 2 at the beginning of each round for the crown is not counted as a stitch. Be sure at the end of each round that you sl st into the top of the first dc. For a video of the magic ring technique, check out: http://www.howcast.com/videos/134192-How-To-Do-theMagic-Circle-Loop Round 2: Ch 2, 2 dc in same st and every dc around. (24dc) Round 3: Ch 2, 1 dc in same st, \*2dc in next dc, 1dc in next dc; Repeat from \* around. Join with a sl st to top of beg dc. (36dc) Round 4: Ch 2, 1 dc in same st, 1 dc in next dc, 2dc in next dc, \*1 dc in next 2 dc, 2 dc in next dc; Repeat from \* around. Join with a sl st to top of beg dc. (48dc) Round 5: Ch 2, 1 dc in same st, 1 dc in next 2 dc, 2dc in next dc, \*1 dc in next 3 dc, 2 dc in next dc; Repeat from \* around. Join with a sl st to top of beg dc. (60dc) Rounds 6 +: Continue increasing 12dc per round by working one extra dc between each dc inc until your work reachesa diameter ofMEASUREMENTB. You may find that you cannot quite make it to Measurement B because adding another round will make it too big. This may be more likely to happen if making a small size with worsted weight which creates greater row height. This design creates quite a firm fitting hat so don't be tempted to gounderMEASUREMENTB. · Another suggestion is to work a round of sc, but this time only increasing 6 stitches evenly around the row (ie working 2sc into the same stitch 6 times throughout the round.) This 6-stitch increase will add an extra 5dc fan to the circumference. · Start again with a bigger hook to try and get the crown section as close to Measurement B as possible. Continue using the bigger hook for the rest of the hat otherwise the body section will be too tight. This will only work if going up a hook size does not make your stitches too loose.
TeIL 1: DIE KAPPE
Bei diesem Teil musst du nur so viele Runden machen, wie deine Arbeit benotigt, um MAss B im Durchmesser zu erreichen. Runde 1: Fadenring mit der Hauptfarbe (HF) machen, 2 Lm als Start (zahlen nicht mit) und 12 St in den Ring hakeln. Fadenring zuziehen und Km in das erste St, NICHT in die oberste der 2 LM (12 St) Achtung: die ersten 2 LM am Anfang jeder Runde werden nicht als St gezahlt. Am Ende jeder Runde die Km immer in das erste St machen! Ein Video zum Fadenring findest du hier: http://www.howcast.com/videos/134192-How-To-Do-theMagic-Circle-Loop Runde 2: 2 Lm, jedes St verdoppeln (24 St) Runde 3: 2 LM, 1 St in gleiche M, \* 2 St in nachste M, 1 St in nachste M Wdh von \* bis Schluss, Km in 1. St (36 St) Runde 4: 2 Lm, 1 St in gleiche M, 1 St in nachste M, 2 St in nachste M, \*1 St in nachste 2 M, 2 St in nachste M; Wdh von \* bis Ende. Km ins 1. St. (48 St) Runde 5: 2 Lm, 1 St in gleiche M, 1 St in nachste 2 M, 2 St in nachste M, \*1 St in nachste 3 M, 2 St in nachste M; Wdh von \* bis Ende. Km ins 1. St. (60 St) Runde 6 +: Weiter gleichmaBig 12 Maschen pro Runde zunehmen, bis die Arbeit den Durchmesser von MaB B hat. (in Runde 6 jede 5. M verdoppeln, Runde 7 jede 6. M usw.) Es kann passieren, dass man das MAss B nicht wirklich erreicht, weil eine neue Runde das ganze zu groB macht. Das kann passieren, wenn man kleine GroBen mit dickerem Garn hakelt, was automatisch eine groBere Maschenhohe bedingt. Diese Anleitung hier kreiert allerdings einen eher festen Sitz, also bitte nicht unter das MAss B gehen! Mogliche Hilfen: · Wenn es grad ganz knapp vor dem MaB ist und du nicht noch eine Runde dransetzen willst, versuche eine groBere Nadelstarke fur den Rest der Mutze zu nehmen. · Ein anderer Vorschlag ware eine Runde fM, allerdings hier nur 6 M gleichmaBig zunehmen. Diese 6 M machen einen extra 5-St-Facher im Umfang aus. · Neustart mit einer groBeren Nadel, um die Kappe so nah wie moglich an das MaB B zu bringen. Diese Nadel musst du auch weiter verwenden, sonst wird der Korper der Mutze zu eng. Das klappt aber nur, wenn die groBere Nadel hicht allzu lockere Maschen erqibt. There is no set way of getting it exact, but as long as you get pretty close to your Measurement B figure, the fit will be fine.
PART 2: THE BODY
Round 1: Ch 1, 1 sc in same st, \*skip 2 dc, work a 5dc fan in next dc, skip 2 dc, 1 sc in next dc; Repeat from \* around. Join with a sl st to beg sc. Round 2: Ch 3 (counts as dc), 4dc in same sc, \*skip 2dc, 1 sc in next dc, skip 2 dc, 5dc fan in next sc; Repeat from \* around. Join with a sl st to top of beg ch3. Round 3: Sl st into centre dc of 5dc fan, ch 1, sc in same stitch, \* skip 2 dc, work a 5dc fan in next sc, skip 2dc, sc in centre dc of 5dc fan: Repeat from \* around. Join with a sl st to beg sc. Repeat Rounds 2 and 3 until your work measures approximately 2 inches/5cm (for fingering weight/4ply) or 2.5 inches/6.5cm (for DK/8ply and worsted/10ply) LESS than Measurement C, ending with a Round 3. This is measured from the beginning of your work. DO NOT FASTEN OFF - simply keep active loop at back of your work while working the contrast colour of the ruffle. This means fewer loose ends to weave in at the end. Continue with Part 3: Ruffle.
PART 3: RUFFLE
TEIl 2: DER KORPER
Runde 7: 1 Lm, 1 fM in gleiche Stelle, \*2 St uberspringen, 5 St in nachste M, 2 St uberspringen, 1 fM in nachste M; Wdh von \* bis Ende. Km in die 1. fM. Round 1: With CC, join with a sl st to FRONT LOOP of any stitch of previous round. CONTINUE TO WORK IN FRONT LOOPS ONLY. Ch 1, [sc, ch 2, sc] in same stitch, skip 1 stitch, \* [sc, ch 2, sc] in next stitch, skip 1 stitch; Repeat from \* around. Join with a sl st to beg sc. Fasten/bind off CC only. Round 2: With RS facing, fold the ruffle toward you to expose the un-worked back loops of the last MC round. Pick up the live loop of MC at back of work. Runde 2: 3 LM (zAHLT ALS ST!), 4 St in gleiche M, \*2 St uberspringen, 1 fM in die nächste M, 2 St uberspringen, 5 St in nachste M; Wdh von \* bis Ende. Km in die oberste LM Es gibt nicht wirklich eine Moglichkeit, das ganz exakt zu machen, aber so lange man ziemlich dicht am MaB B dran ist, ist die Passform ok. Runde 3: KM in die Mitte des 5-Stabchen-Fachers, 1 LM, fM in gleiche Stelle, \* 2 St uberspringen, 5 St in nachste M, 2 St uberspringen, fM in das mittlere der 5 Stäbchen; Wdh von \* bis Ende. Km in die 1. fM. With RS facing and working in the back loops of the last MC round, sl st into centre dc of 5dc fan, ch 1, sc in same stitch, \* skip 2 dc, work a 5dc fan in next sc, skip 2dc, sc in centre dc of 5dc fan; Repeat from \* around. Join with a sl st to beg sc. With this round it is important to place your stitches carefully so that the "hills and valleys" of your ruffles match uponsubsequentrounds. Wiederhole die Runden 2 und 3 bis die Arbeit ca 5cm (fur fingering weight/4ply\*) oder ca. 6,5 cm (fur DK und worsted\*) WENIGER misst als MaB C. Enden muss es auf einer Runde 3. Gemessen wird vom Anfang der Arbeit (Fadenring) NICHT ABKETTEN - einfach den Faden der Hauptfarbe hinten hangen lassen, wahrend man die Rusche in der Kontrastfarbe arbeitet. Man muss weniger vernahen. Weiter gehts mit Teil 3 - den Ruschen.
\*siehe Anhang
TEIL 3: RUSCHEN
Runde 1: KM mit der Kontrastfarbe (KF) in eine VORDERE SCHLINGE einer beliebigen Masche der Vorrunde. NURINDENVORDERENSCHLAUFENWEITERARBEITEN! 1 Lm, [fM, 2 Lm, fM] in die gleiche M, 1 M uberspringen, \* [fM, 2 Lm, fM] in nachste M, 1 M uberspringen; Wdh von \* bis Ende. Km in die 1. fM. NURKFABKETTEN! Runde 2: Mit der rechten Seite nach vorne, die Ruschen nach vorn klappen um die ungearbeiteten hinteren Schlaufen der Vorrunde mit der Hauptfarbe frei zu legen. Eine KM in die HINTERE SCHLINGE des mittleren Stabchens einer 5er-Gruppe setzen, 1 Lm, 1 fm in die gleiche Stelle, \*2 M uberspringen, 5 St in nachste M, 2 M uberspringen, 1 fM in das mittlere St der nachsten 5er-Gruppe. Wdh von \* bis Ende. Km in die 1. fM. In dieser Runde ist es wichtig, sorgfaltig zu arbeiten, dass die "Hugel und Taler" der Ruschen zusammenpassen in den nachsten Runden. Round 3: Ch 3 (counts as dc), 4dc in same sc, \*skip 2dc, 1 sc in next dc, skip 2 dc, 5dc fan in next sc; Repeat from around. Join with a sl st to top of beg ch3. DO NOT fasten/bind off. Repeat rows 1-3 twice more changing colours as desired. This will give you 3 ruffles. Runde 3: 3 LM (zAHLT ALS ST!), 4 St in gleiche M, \*2 St uberspringen, 1 fM in die nachste M, 2 St uberspringen, 5 St in nachste M; Wdh von \* bis Ende. Km in die oberste LM. NICHTABKETTEN. Wiederhole die Runden 1-3 noch zweimal mit wechselnden Farben (falls gewunscht). Das ergibt 3 Ruschen.
PART 4: EDGING
Continuing with MC, sl st into next dc, ch 1, sc in same st, \* 3 sc in next dc (centre of 5dc fan), sc in next dc, work a cluster of 3sctog over the next 3 stitches, sc in next st; Repeat from \* around to last 3 sts, sc3tog over these 3 sts. Join with a sl st to beg sc. Fasten/Bind off.
TEIL 4: RAND
Weiter mit der Hauptfarbe, Km in das nächste St, 1 LM, 1 fM in die gleiche Stelle, \*3 fM in nachstes St (Mitte der 5er-Gruppe), fM in nachstes St, die nachsten 3 M zusammen als fM abmaschen, fM in nachste M; Wdh von \* bis zu den letzten 3 M, diese 3 dann zusammen als fM abmaschen.MitKMinerstefMschlieBen.Abketten.
FLOWERS
Make three. I made mine in the same colours as the ruffles. Create a magic ring as with the crown of your beanie. Ch 1, and work 6sc into the ring. Pull ring closed and join with a sl st to beg sc. \* [ch 3, 1tr, ch3, sl st] into same sc, sl st into next sc; Repeat from \* around (6 petals.) Fasten off. You can use one ofthelooseendsofyourflowertosewittothebeanie.
BLUMEN
Mach drei. Ich machte meine in den gleichen Farben wie die Ruschen. Fadenring, 1 LM und dann 6 fM in den Ring. Fadenring zuziehen, KM in die erste fM. \* [3 LM, 1 Dst, 3 Lm, KM] in die gleiche fM, KM in die nachste fM; Wdh von \* bis Ende (6 Blutenblatter.) Abketten. Du kannst eins der losen Enden der Blute nehmen, um sie an der Mutze anzunahen.
FINISHING:
Fasten magic ring (if used) at crown. Using a tapestry needle, weave in all loose ends. Position and sew flowers to the beanie as preferred. COPYRIGHT This pattern is offered licence free and may be used to produce items for sale provided the numbers produced remain small scale and credit for the design is given to the designer, Deanne Ramsay. It does not permit commercial manufacturing nor commercial production of the garment in any way (commercial refers to large-scale production - an amount beyond the capacity of one person to produce by hand.) Please be respectful of the designers' rights to this pattern. No portion (text or images) may be reproduced, transmitted or distributed by any meanswhetherforfreeorforsale. Translation by Elawen - Sandra Nienkemper
BEENDEN:
Den Fadenring noch mal fest zuziehen. Mit einer Wollnadel alle losen Enden vernahen. Blumen positionieren und aufnahen.
Anhang:
Garnbezeichnungen
Die Lauflangenangaben sind Naherungswerte, sie hangen stark von der verwendeten Wolle ab.
| Fingering | 4ply | LL C ca.240m/50g | Ndlst. 2,5-3,5 |
| Sport | 5ply LL | ca. 160m/50g | Ndlst.3,0-4,0 |
| DK | 8ply LL ( | ca.100m/50g | Ndlst.4,0-5,0 |
| Worsted | 10ply LL | ca.90m/50g | Ndlst. 4,0-5,5 |
Beispiel: Catania zahlt als .Sport", Catania fine als "fingering" und Catania grande als ,Aran" (ahnlich wie Worsted). Quelle: ravelry.com


