AMIGURUMI SUPERMAN By Dolores Voglesonger
MATERIALS
Blue yarn, worsted weight Red Yarn, worsted weight Yellow Yarn, DK or worsted weight Aran/Off-white Yarn, worsted weight Brown yarn, worsted weight F hook G hook Stuffing Safety eyes, 9mm (optional - can be substituted with buttons or black yarn) Tapestry needle Stitch markers (optional) Felt (optional for cape & shield)
\*\*FEEL FREE TO USE THIS PATTERN FOR PERSONAL USE/GIFTS/CHARITY, BUT ITEMS MADE FROM THIS PATTERN MAY NOT BE SOLD. (UNLESS YOU WANT TO PAY WB FOR LICENSING RIGHTS, THAT IS!)\*\*
PATTERN NOTES
The pattern will yield a Superman doll that is about 6-7" tall, depending on how tightly you crochet. The yarns I used were mostly worsted weight, although the blue yarn was a little lighter of a worsted weight, and the yellow yarn was a "mystery" yarn that I got as a gift.. it's in the DK (3) weight range. There are some options in assembly, but I have written the pattern as I did it, crocheting pieces together and doing assembly as I went, rather than creating all the pieces & assembling after the fact. When done in this way, there are very few pieces to be sewn on and very few visible seams & very few visible color changes. )ieces were worked continuously in the round, with no slip stitches between rounds
PATTERN

HAIR
BROWNYARN;GHOOK Round 1: 8sc into magic circle [8] Round 2: 2sc each stitch [16] Round 3: (1sc next, 2sc in next) 8 times [24] Round 4: (1sc next 2, 2 sc in next) 8 times [32] Round 5: (1 sc next 3, 2 sc in next) 8 times [40] Round 6-8: sc each stitch [40] Fasten off, leaving long tail for sewing onto the head. Use the tail from the magic circle to do a "dry-fit" of the hair cap. I put mine about 3 rounds off center towards the back of the head. Your fasten-off spot should be centered on the front of his head. Use the tail to sew the hair onto the head. After one round of sewing the hair on, when you get back around to the front,
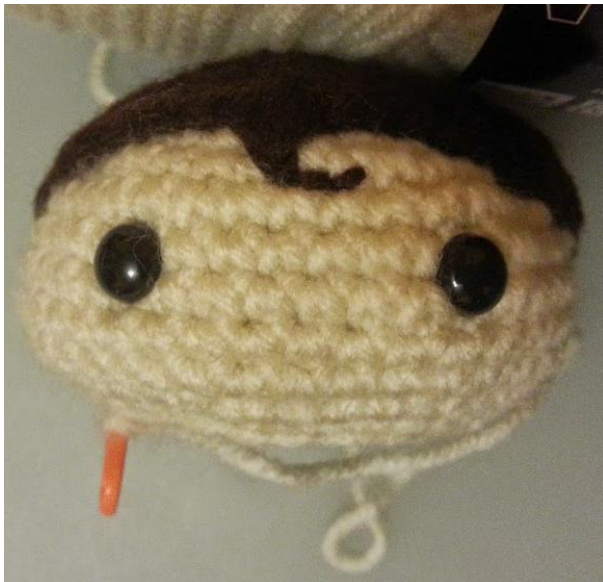
embroider the hair curl/swirl, and then sew back around with the leftover yarn tail to ensure the hair is securely on. Fasten off/knot to secure the yarn on the inside of the head. Attach the eyes. I used 9mm safety eyes, but you can use buttons or embroider the eyes with black yarn.
BODY
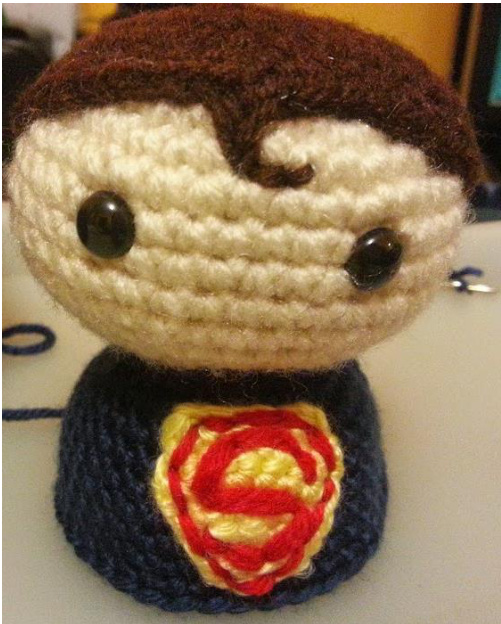
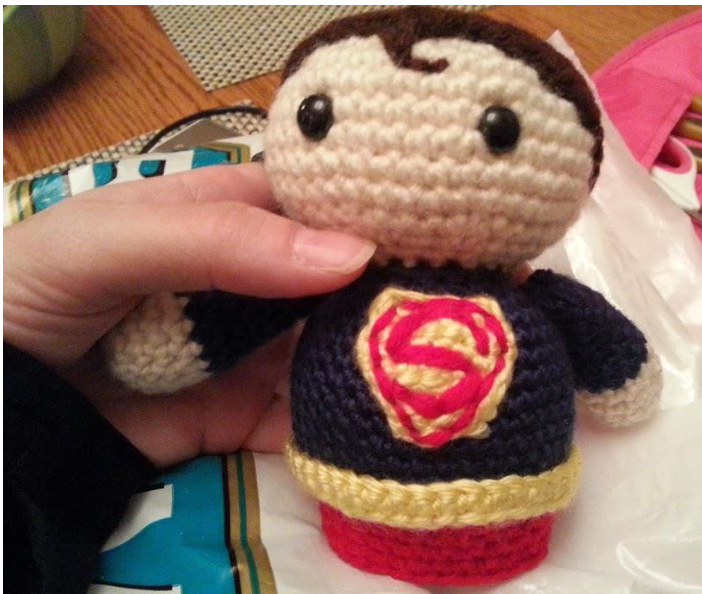
BLUE YARN; G HOOK Join blue yarn to the bottom of the head with slip stitch. The initial slip stitch does NOT count as a stitch and should be skipped in subsequent rounds. Round 1: sc in each stitch [18] Round 2: (2sc in each next 2, sc in next) 5 times. 2 sc in next, 3 sc in next. [30] Round 3: (1sc next 4, 2sc next) 6 times. [36] Pause to stuff the head! Round 4: (1sc next 8, 2sc next) 4 times. [40] Round 5-11: sc around [40] Round 12: (1 sc next 8, sctog) 4 times. [36] Fasten off. NOTE: The "shorts" are connected to the body. The remainder of the body instructions are four sections ahead, in the "Body Continued - The 'Shorts'" section of the instructions. THE“S" YELLOW YARN; F HOOK NOTE: You can use felt & fabric markers for the S shield, or you can use aniron-ondecal,butlchosetocrochet. Chain 5. Row 1: sc 2 in second chain from hook; sc next 2; 2sc in last stitch. Ch 1, turn.6 Row 2: 2sc in first stitch; sc next 4; 2sc in last stitch. Ch 1, turn. 8 Row 3: skip sc, sc across. Ch 1, turn 7 Row 4: skip sc, sc, sctog, sc, sctog. Ch 1 turn. 4 Row 5: skip sc, sc next 3. Ch 1, turn. 3 Row 6: skip sc, sc next. Ch 1, turn 2 Row 7: skip sc, sc next. Fasten off. Use red yarn to embroider the S, leaving a long tail for sewing onto the body. Use the long red tail to sew onto the center of the body's chest as show
ARMS (make 2)
ARAN/OFF-WHITEYARN,BLUEYARN;GHOOK Start with Aran/off-white yarn Round 1: 6sc into magic circle. [6] Round 2: 2sc in each stitch [12] Round 3-5: sc each stitch [12] Switch to blue yarn. I finished off with the aran & slip stitched in theblue.TheinitialslipstitchdoesNoTcountasastitchandshould beskipped insubsequentrounds. Round 6-7: sc each stitch [12] Round 8: (1sc next 2, sctog) 3 times [9] Round 9-10: sc each stitch [9]
Round 11: (1sc next 2, sctog) twice; sc in last stitch [7] Flatten out the top of the arm & sc 2-3 times to close it. Fasten off, leaving a long tail for sewing onto the body. Use the long blue tails on the arms to sew onto the body, centered on each side of the body about 3-4 rounds down from where the body meets the head.

BELT
YELLOWYARN,GHOOK Chain 39. sc in second from hook & sc across. [38] Fasten off, leaving a long tail for sewing.
BODYCONTINUED-THE"SHORTS"
REDYARN,G HOOK Round 1: sc in each stitch [36] Round 2: (1 sc next 4, sctog) 6 times. [30] Round 3: (1 sc next 3, sctog) 6 times. [24] Round 4-5: sc around. [24] At this point, pause to sew on the belt & make the feet/legs. The shorts will be continued after the legs are assembled&attached. Use the long tail to sew the belt onto the body, covering the color change from blue to red.
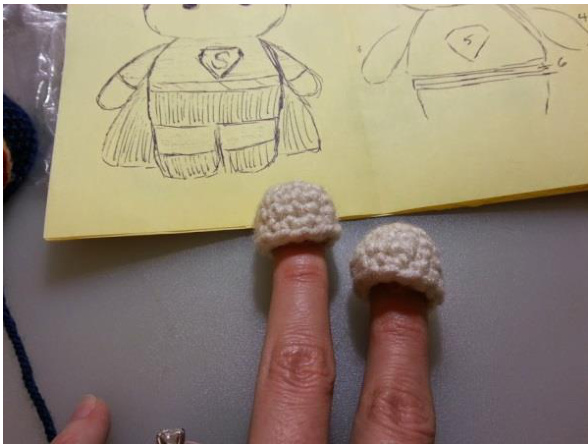
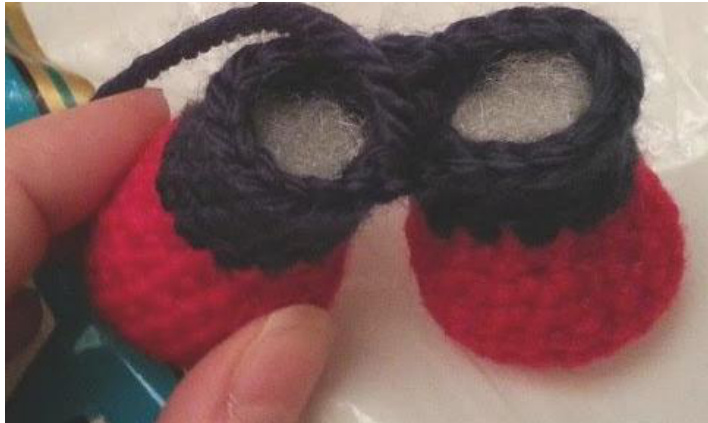
LEGS/FEET (make 2)
REDYARN,GHOOK Round 1: 6 sc in magic circle [6] Round 2: 2 sc in each [12] Round 3: (1 sc, 2sc in next) 6 times [18] Round 4-6: sc around [18] Round 7: (1 sc, sctog) 5 times; sc in next 3 [13] Round 8: sc around [13] SWITCHTOBLUEYARN,GHOOK I slip stitched in the blue yarn. The initial slip stitch does NOT count as a stitch and should be skipped in subsequentrounds.
Round 9-12: sc around [13]
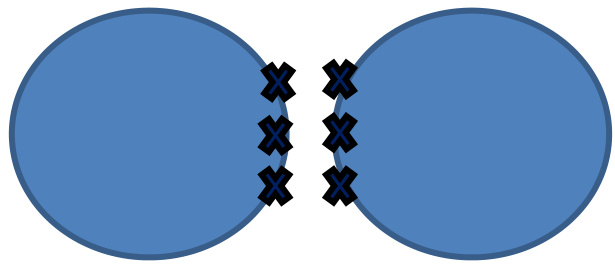
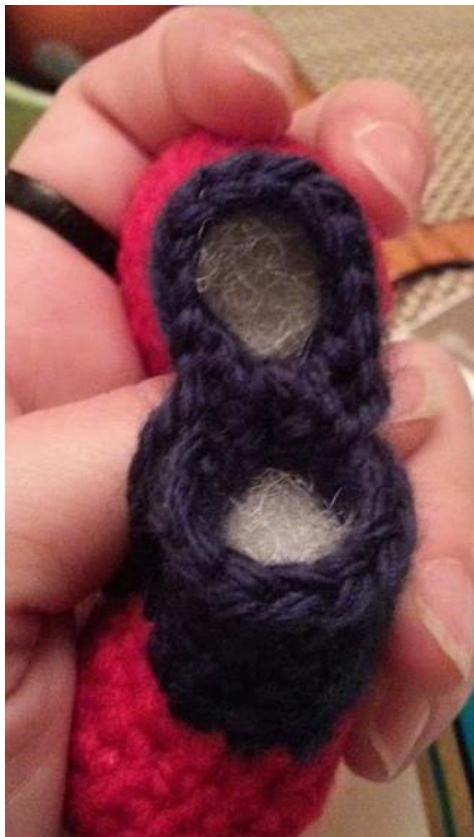
Leave a VERY long tail on the second leg (will need to stitch the legs together & sc stitch around at least once). Upon completing your second leg, position them side by side and decide which way will be facing the front of your Superman. If the yarn tail isn't positioned in the center between the two legs, weave or slip stitch around until you're in between the two legs, 1 stitch off-center. You'll want to work in the 3 center stitches between the legs (see diagram to the right). To connect the legs together, use the long yarn tail Sc in the first stitch of leg one. Sc to the first stitch of legtwo. Sc in second stitch of leg two. Sc to the second stitch of leg one. Sc in the third stitch of leg one. Sc to the third stitch of leg two. Sc around. Be sure to sc into the first & third sc's you used to connect the legs together - this should bring you to a total of 24 stitches around. If you're using a slightly thinner blue yarn like I used, sc around again. Fasten off.
CONNECTING THELEGSTOTHE BODY
Pull about 12-16" of red yarn from the skein. DO NOT CUT THE YARN. Leave the yarn attached to your skein. Using a tapestry needle and starting at the back center of your Superman, sew the legs onto the body on the back of the last round of the "shorts." This is painstaking work, and it goes slowly, but it will result in a strong & a practically invisible seam. Pull tight as you go around. e you've gone around once, fasten off the tail end that you used to sew the legs on You should now have red yarn going from the skein directly the shorts, right at the center back of your Superman. If there is any slack, pull the yarn from the skein so that it is snug before proceeding. Use a slip stitch to pick up the yarn & sc around 3 times. This will bring your total rounds for Superman's "shorts" up to 8 rounds. Fasten off, leaving a tail. Using the tail & a tapestry needle, sew the crotch of Superman's shorts together between the legs of that last round.
THE CAPE
You can use a piece of red felt for the cape, but I had yarn to spare, so I made a quick cape. Depending on how tightly you crochet, you may want to adjust the number of stitches & rows so that the cape is proportional to the body. You can also increase the number of stitches (or don't skip stitches to decrease in rows 4, 7, & 8) if you want a looser cape that drapes a bit at the neck. I pretty much "winged" the cape as I went, but the general pattern is as follows. Row 1: Chain 19. Dc in second chain from the hook; dc across. [17 Row 2-3: Dc across. [17] Row 4: skip first stitch & dc across. [16] Row 5-6: Dc across. [16] Row 7: skip first stitch & dc across. [15] Row 8: skip first stitch & dc across. [14] Row 9-11: Dc across. [14] Sc around for a smoother, more finished edge to the cape. Fasten off. Leave a long tail to sew onto the body. Center the cape on Superman's body. Starting at one "shoulder" above the arm, sew on by sewing the tail through the body & through the cape on the other side/shoulder. I preferred to have the cape secured where it meets the neck, so I kept sewing it on the whole way around. If you prefer to have the cape drape around the neck, only sew on the ends above the shoulders.

To finish off, insert the needle under the cape & fasten off with 1-2 small knots on the cape itself. Since I worked to fasten the cape the whole way around the back of the neck, I simply inserted the needle into the body at the nape of the neck under the cape, pulled through to the other side of the body, pulled VERY tight, and snipped the yarn close to the body. Once released, the yarn end "disappeared" into the body. VOILA! Your Amigurumi Superman is now finished!
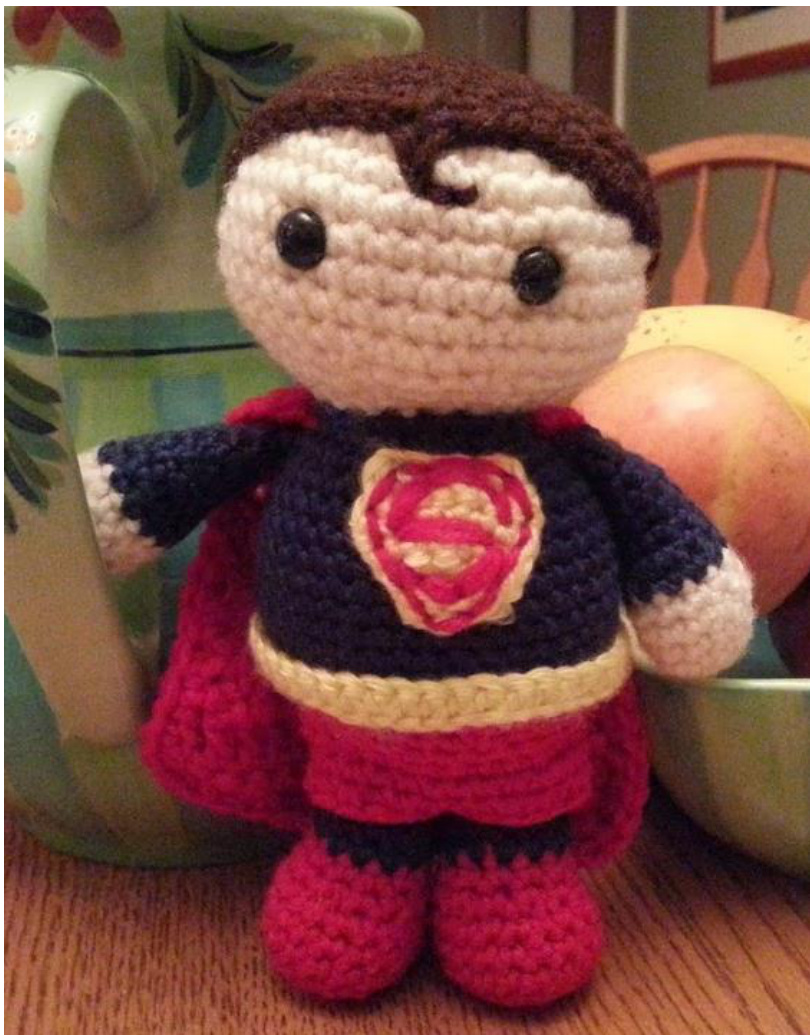
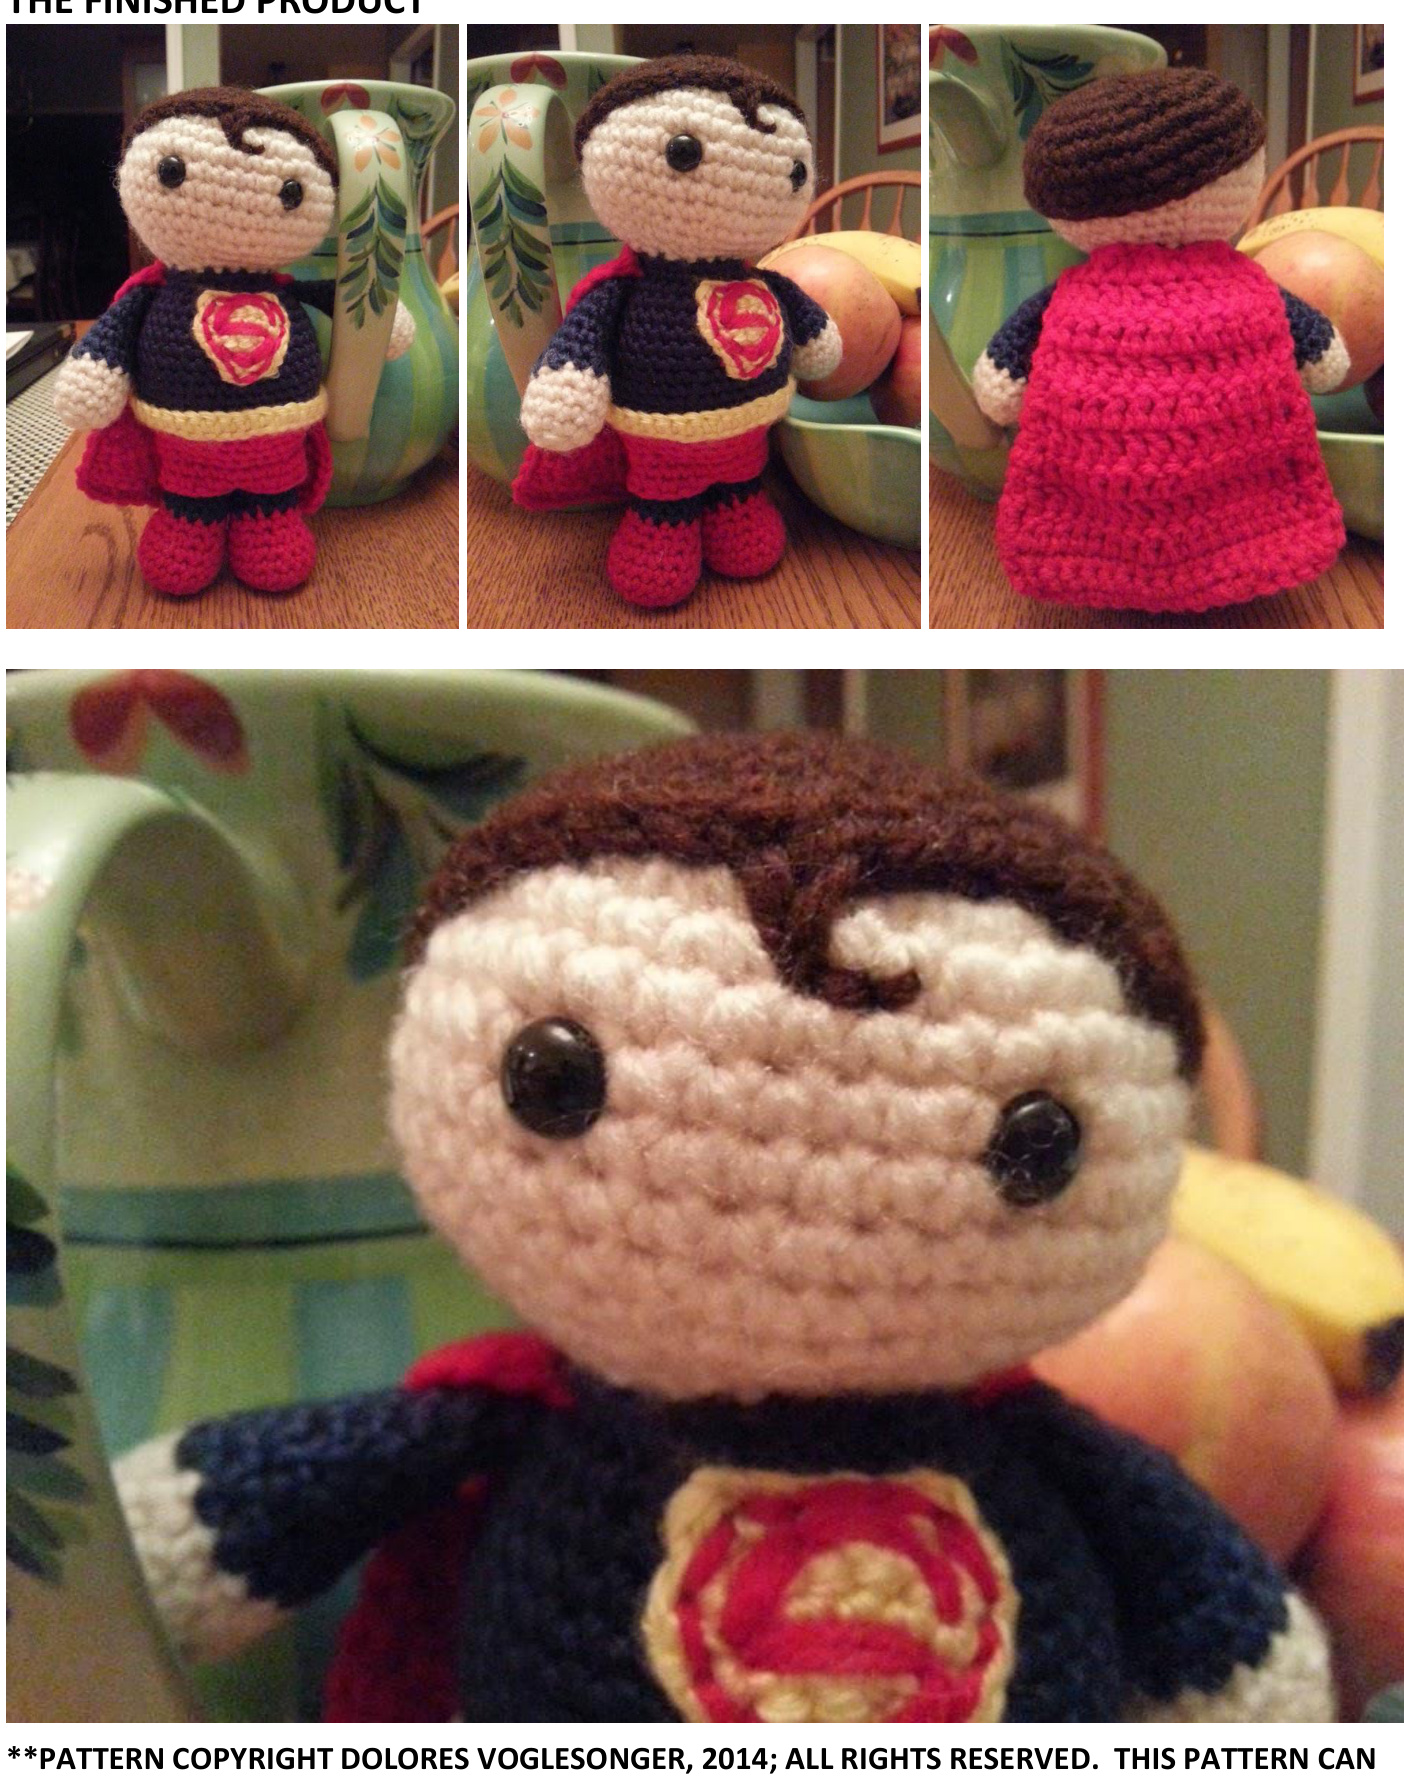
THE FINISHED PRODUCT
BE USED FOR PERSONAL USE, GIFTS, & CHARITY. NO PART OF THIS PATTERN MAY BE REPRODUCED IN PRINT ORELECTRONICALLY.PATTERNISFREE TOSHAREVATHE RAVELRYDOWNLOADLINK; PATTERN MAY NOT BE SOLD, NOR DUPLICATED OR DISTRIBUTED WITHOUT PERMISSION.\*\*


