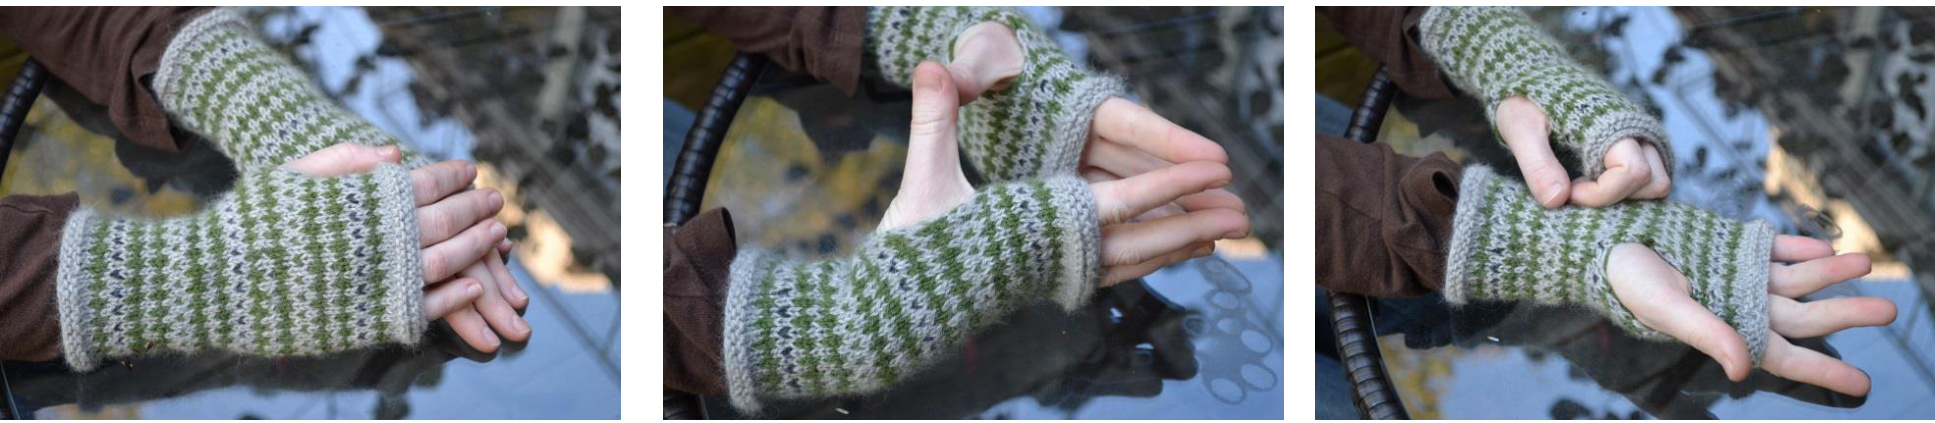
Normandie For Christmas, my mom asked me to make her a pair of fingerless gloves, in green and greys, in a pattern of my own design. Moooooooooom. Anyway, after a week of looking around Ravelry at the various fingerless glove patterns and not being satisfied (and feeling a little guilty), I finally did it. This is a pretty simple pattern if you've done stranded colourwork before. It can also be easily modified - if you want more of the charcoal you can switch the stripes of alternating green and grey to grey and charcoal, or you could even add a fourth colour. You can also cast on any amount of stitches so long as there is an even number. Normandy is my mother's favourite place on earth. She practically raised me there, and the colours she chose reminded me of the farm she loves so much. Sizing: These mitts will fit a small hand snugly, but they can easily be made larger by casting on an even number of stitches. Materials: MC: Classic Elite Yarns Fresco, in #5397 (Fern). 1 hank (1 hank = 164 yards). CC1: Classic Elite Yarns Fresco, in #5303 (Cinder Light Grey). 1 hank (1 hank = 164 yards). CC2: Rowan Kidsilk Haze in #639 (Anthracite). 1 skein (1 skein = 229 yards) AND Zwerger Garn Opal 4-fach / 4-ply in #5191 (this colour doesn't have a name but it is charcoal). 1 skein (1 skein = 465 yards). Note: My LYS didn't have Fresco or a similar yarn in the charcoal colour I needed to make these mitts, which is why I held the Kidsilk Haze and the Opal together to make my third colour. This made sense for me since I knew what else I could use those yarns for, but keep in mind that these are both expensive yarns and you will only be using a couple yards of each, so if you can find all three of your colours in your preferred yarn or have some scrap yarn that is appropriate for your third colour, by all means use that. US #5/3.75 mm DPNs (I used 4 and divided my stitches as 15, 15, 14, but you could use 5 and have 11 stitches on four needles) Stitch marker or needle cap to mark beginning of round Tapestry needle Pattern: With MC, CO 44 st and join in the round, being careful not to twist your stitches. (I used a long tail CO which gave me an already knitted row. If your preferred CO doesn't do this, k 1 row) Setup: Rnd 1: P Rnd 2: K Rnd 3: P Rnd 4: K Rnd 5: K Attach CC1 and begin colourwork pattern
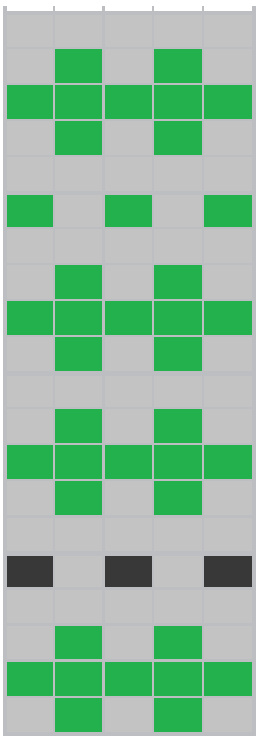
Follow the pattern in the round for 4 inches. For CC2, 1 found it easiest to attach it whenever I needed it and then detach it again after that row. For thumb hole: Turn your work and knit flat for 1.5 inches, continuing colour pattern. (Note: for the rows that are only one colour, you will have to carry the other colour along the wrong side of your work as you knit (i.e. for a row that was all grey, I stopped every four stitches or so and wrapped my green working yarn loosely around my grey working yarn, so that for the beginning of the next row I had my green yarn where I needed it to continue the colour pattern). The safety pins in this photo mark the last row I knit in the round and then the last row I knit flat:

After 1.5 inches, go back to working in the round and knit another 1.5 inches, ending after finishing one of the green/CC1 sections. Detach CC1 (and CC2 if you still have it attached). Finishing: With MC: Rnds 1-3: K Rnd 4: P Rnd 5: K Rnd 6: P Rnd 7: K BO.


