Bit O' Spring Toe-Up Socks by Nicki Miller eastskye@gmail.com
Bit O' Spring v2
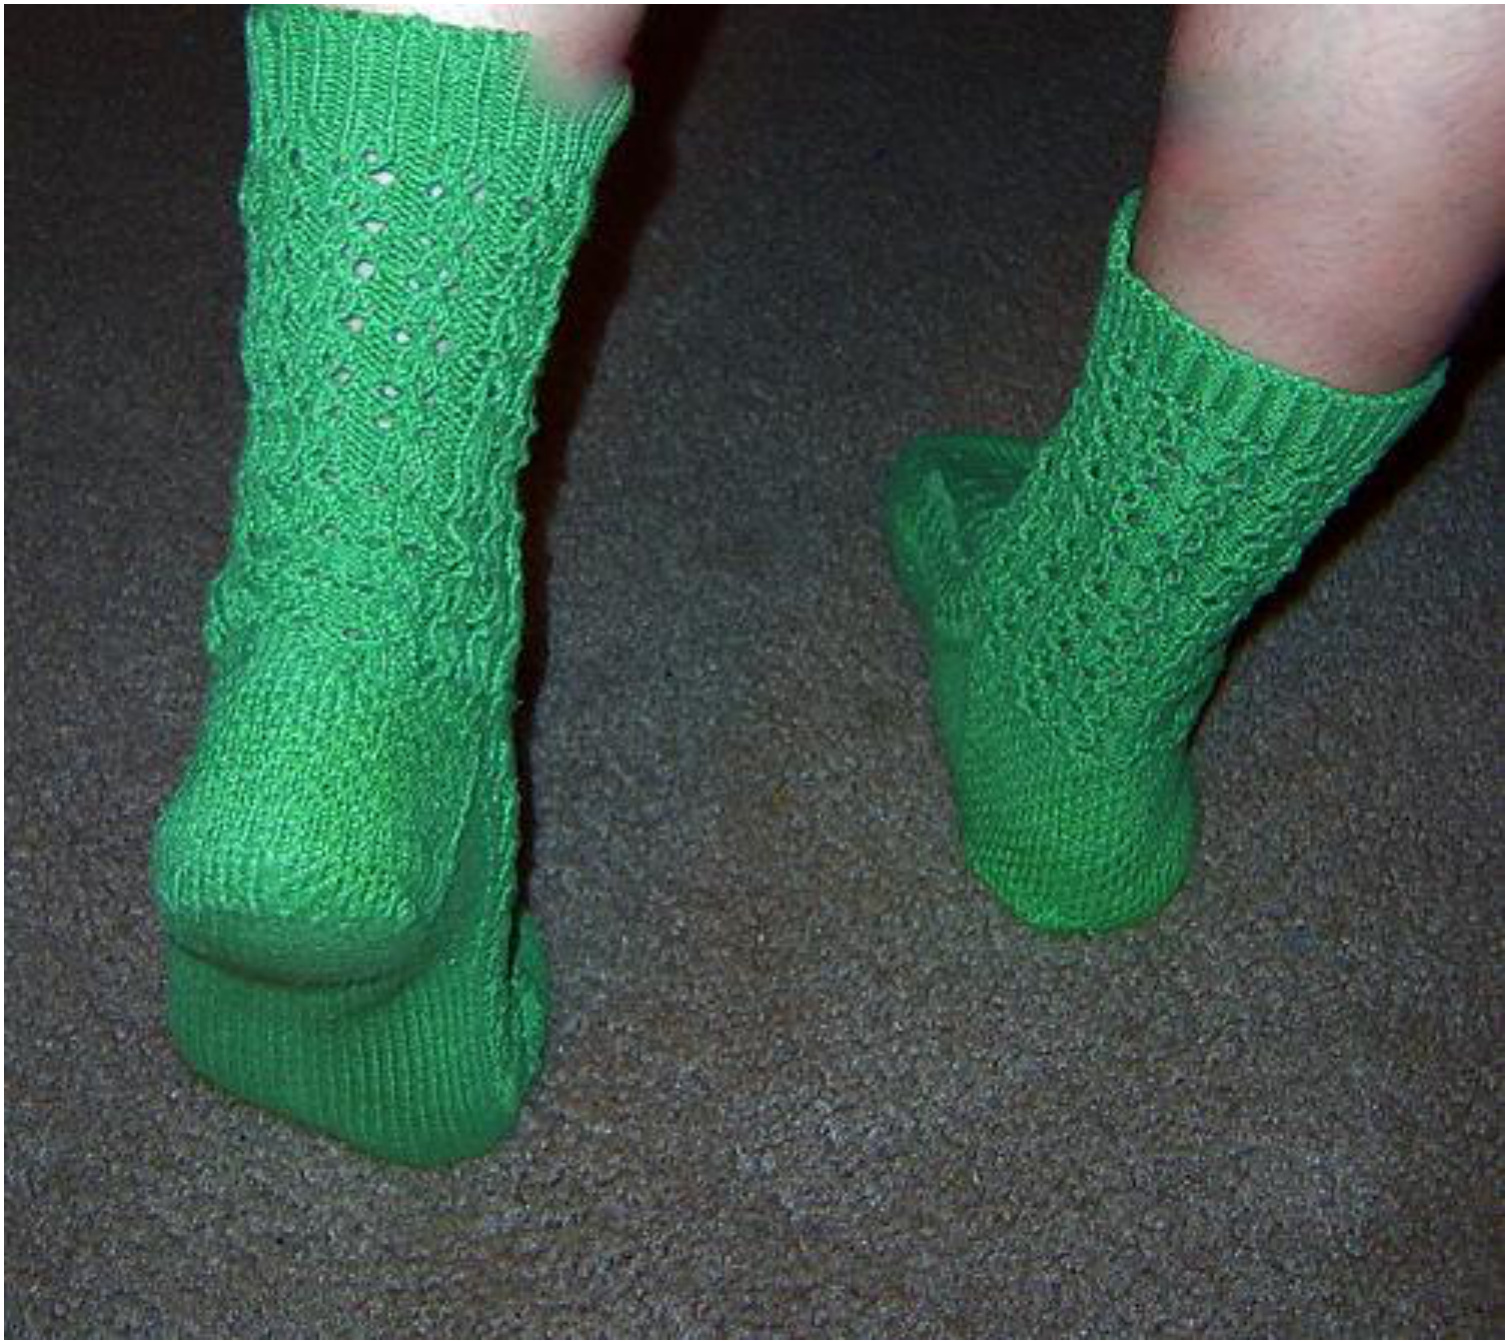
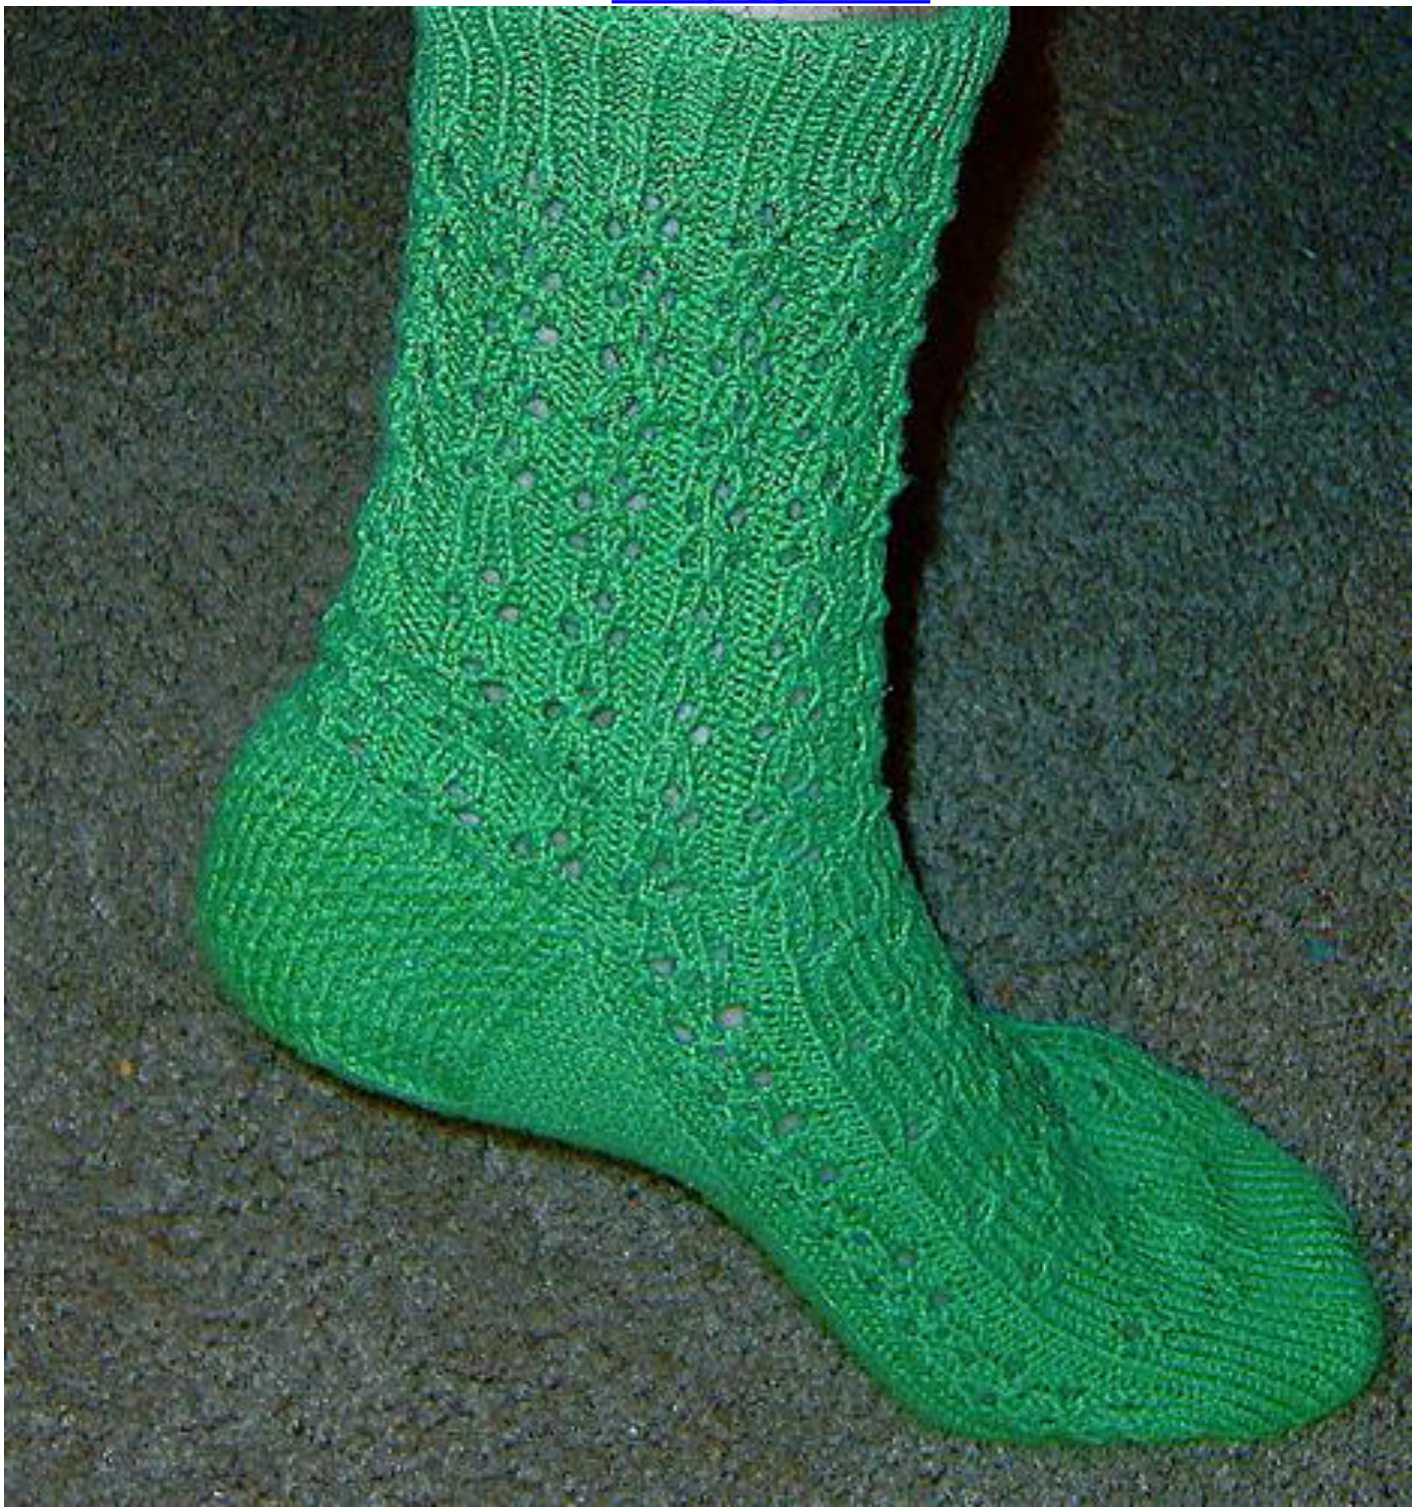
by Nicki Miller eastskye@gmail.com Pattern freeforyourown personaluse.Copyright and allrightsretainedby Nicki Miller.Maybeknit for charity, but not forcommercial sale. Pattern may not e sold, but fefree to share with others who want to make their own pair. Please let me know if you find errors or omissions. My grandfather always planted peas on St. Patrick's Day,the first activity of the spring to come. This toe-up sock patten lits you from the doldrums of winter into the promise o spring. YARN: Crystal Palace PANDA COTTON, 2 skeins, ( $59\%$ bamboo, $25\%$ cotton, $16\%$ nylon; 50 gr./182 yds.) #509 Foliage GAUGE: $8\,\mathsf{s t s}=1^{\prime\prime}$ NEEDLES: US 1.5 ( $.2.75\mathsf{m m}$ $32^{\prime\prime}$ circular needle Size: Women's M $(7.75^{\prime\prime}$ circumference, unstretched) NOTES: Worked on a $32^{\prime\prime}$ circular needle, Magic Loop Needle 1: Instep/pattern Needle 2: Sole Increase for toe: k-fbl: knit the stitch without removing it from the left needle, then knit into the back loop of the same stitch. A one stitch increase. For a video tutorial of Judy Becker's Magic Cast-On: http://www.youtube.com/watch?v=IhBISOAhhQY Stitch Patterns: See Charts for Foot and Leg
DIRECTIONS
Using Judy Becker's Magic Cast-On (see NOTES), CO 12 sts onto each needle. Knit one round even, remembering to tug the join snug between Needle 1 and Needle 2. Round 2: k1, k-fbl, knit to 2 sts before end of row, k-fbl, k1. Round 3: Same as Round 2 Round 4: Knit all stitches. Round 5: k1, k-fbl, knit to 2 sts before end of row, k-fbl, k1. Repeat Rounds 4 and 5 until you reach 30 stitches on each needle. Next Round: Knit all stitches. Next Round: Begin Stitch Pattern. (See Foot Chart.) Knit Chart A Foot Chart to 2.5 inches before the desired length of the foot. Chart A Bit $\mathbf{o}^{\prime}$ Spring Foot Chart and Symbols 31 stitches across, 12 rows

$\leftarrow$ Knitting Direction
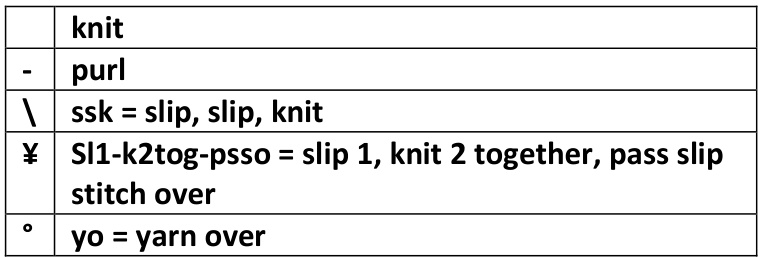
Gusset Increase Round:
Round 1: Work in patt to end of Needle 1; k1, m1, work to second to last st of Needle 2, m1, k1. Round 2: Work in pattern on Needle 1, K all stitches on Needle 2. Repeat these 2 rounds ten times more, then work Gusset Increase Round once more. 84 sts; 30 sts on Needle 1, 54 sts on Needle 2. Heel Heel is worked back and forth over the sts on Needle 2. Row 1 [RS]: Work in patt to end of Needle 1); k first 34 sts of Needle 2. Turn work. Even-numbered Row 2-16 [WS]: Sl 1, p19. Turn work. Odd-numbered Rows 3-15 [RS]: SI 1, k19. Turn work. Row 17 [RS]: Sl 1, k17, w&t. Row 18 [WS]: SI 1, p15, w&t. Row 19 [RS]: Sl 1, k13, w&t. Row 20 [Ws]: Sl 1, p11, w&t. Row 21 [RS]: Sl 1, k9, w&t. Row 22 [WS]: Sl 1, p7, w&t. Bit O' Spring, Page 3 of 5 Row 23 [RS]: SI 1, k5, w&t. Row 24 [WS]: SI 1, p3, w&t. Row 25 [RS]: Sl 1, k9, pick up and k 8 sts (1 st in each slipped st) along edge of flap. Turn work. Row 26 [WS]: Sl 1, p25, pick up and p 8 sts (1 st in each slipped st) along edge of flap. Turn work. You will now have 66 sts on Needle 2: 26 heel flap sts, and 20 gusset sts on each side of the flap sts.(? not sure, just a guess) Row 27 [RS]: [Sl1, k1] 17 times, sl 1, ssk. Turn work. Row 28 [WS]: SI 1, p34, p2tog. Turn work. Row 29 [RS]: [k1, S1] 17 times, sl1, ssk. Repeat Rows 27 through 29 fifteen times more. 34 sts on Needle 2. Work Row 27 once more, but do not turn work. Knit one round in pattern, evenly decreasing 4 stitches on Needle 2 - will have 30 stitches remaining on Needle 2, and 30 stitches on Needle 1. Proceed to Leg Chart and knit it on both Needle 1 and Needle 2 to your desired length.
Chart B Leg Chart

←—-Knitting Direction Cuff: K1, P1 for ribbing (or, do whatever ribbing you prefer) for $\mathbf{1^{\prime\prime}}$ Bind off with $\mathbf{E}\mathbf{Z}^{\prime}\mathbf{s}$ sewn bind off, or other very stretchy bind off technique. Weave in ends at the toes and cuff. Enjoy! Copyright Nicki Miller. All pattern rights reserved. For personal use only, not for sale except for legitimate charity purposes. For questions or permissions, contact Nicki at eastskye@gmail.com.