al cardigan for Merry
an adaptation by anny Purls for Jujube & Lolo
Description
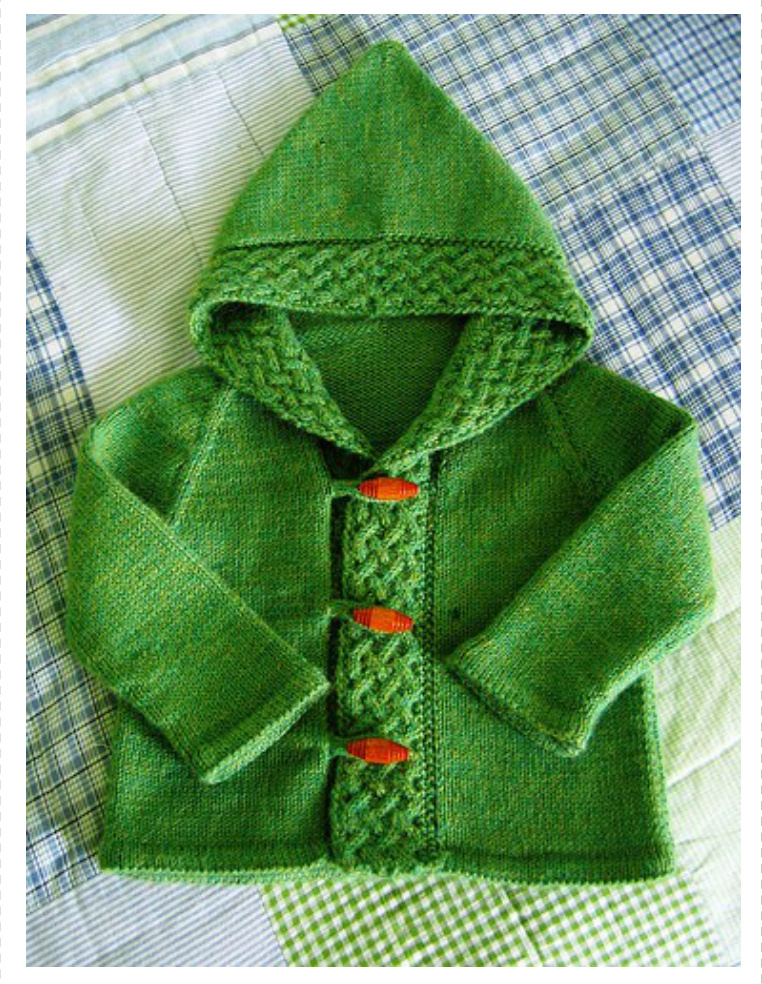
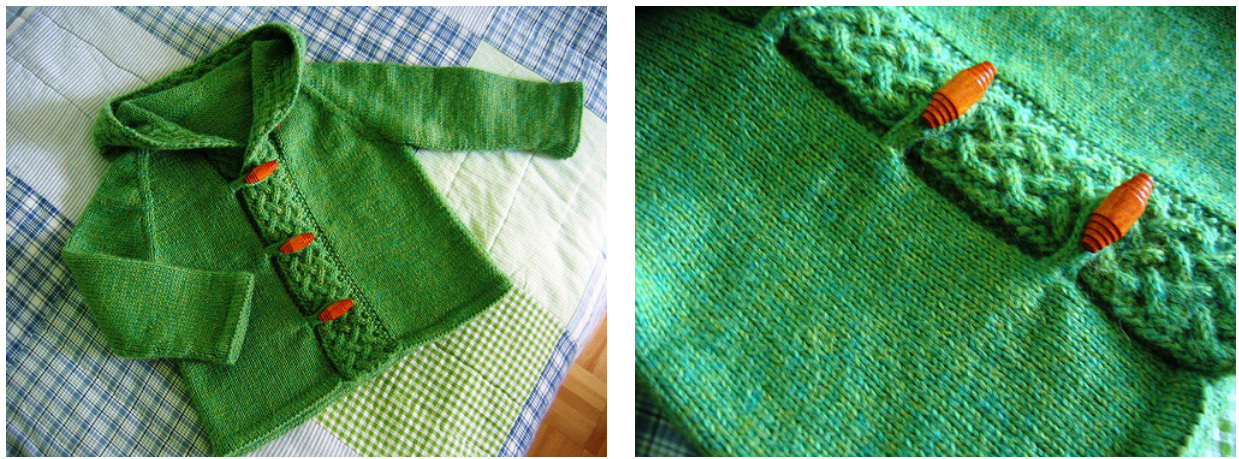
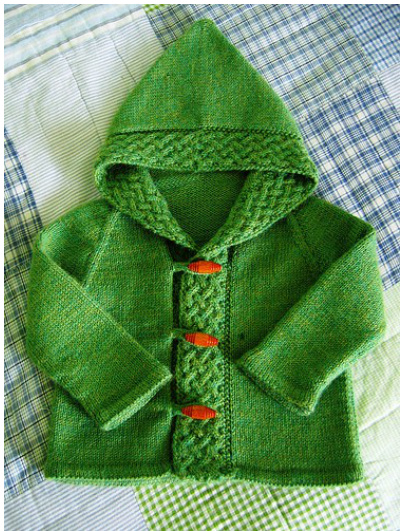
This toddler cardigan is an adaptation of Kate Gilbert's $\"_{\mathsf{A}}$ Cardigan for Arwen" originally published in the Winter 2006 Interweave Knits magazine (also available as an instant download from her site at http://www.kategilbert.com/ p_arwen.html). I resized the pattern for a 12-18 month old, altered the construction to make it a raglan cardi and added toggle buttons and loops. Note that you will need to refer to Kate's charts for the reversible cable. Important note: This pattern is for your personal use only. Please do not distribute the pattern or sell garments knit from it. Comments or questions: anny@jujubeandlolo.com $\copyright$ Anny Rail,2007-2008.

Finished measurements [with moderate fit): Chest: $25^{\prime\prime}$ Body length: $11^{\prime\prime}$ Sleeve length: $8^{\prime\prime}$ Yarn requirements: $7\times509$ sport weight yarn {I knit mine from Knit Picks Andean Treasure in Lagoon}
Gauge:
$26\,\mathsf{s t s}=4^{\prime\prime}$ in stocking stitch using $3.00\mathsf{m m}$ needles Paired deereases: On right side rows: K3, SSK, Kto last 5 sts, K2TOG, K3 On wrong side rows: P3, P2TOG, Pto last 5 sts, P2TOG TBL, P3
Cable charts:
Cardigan for Arwen pattern by Kate Gilbert published in the Winter 2006 issue of Interweave Knits magazine and available as an instant download fromt www.kategilbert.com/ p_arwen.html
Pattern notes:
1.It willbe easier to sew the shoulder seams if you remember to knit allraglan decreases on the sleeves, back and fronts 3 stitches in from the edge rather than on the first stitch. See sidebar for paired decreases,
To knit front:
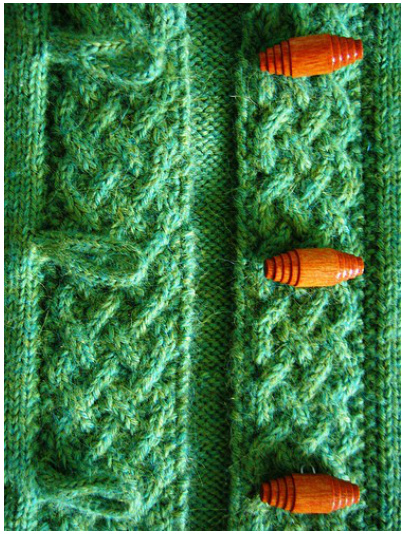
1.Beginning with cardigan right side first, cast on 33 stitches and work 4 rows in stocking stitch. 2.Work a breaking row by knitting one row on the wrong side. 3.At the beginning of next row (right side), cast on 24 stitches for the right cable and knit acrossthese 24 stitches, place a marker, and knit across the remaining 33 stitches. These 33 stitches will continue to be worked in stocking stitch while the 24 edge stitches should be worked using the right cable chart from Kate Gilbert's original pattern, A Cardigan for Arwen, published in the Winter 2006 issue of Interweave Knits magazine. Note that you can substitute another cable if you prefe --it will eed to measure 2 inches in width though to work with the rest of the pattern. 4.Remember to fold and knit the hem on the 33 original stitches once you have worked 4 rows (unless you decide to sew the hem closed later in which case just carry on ;0). 5.Continue in pattern until piece measures 8 inches from the breaking row. 6.Armhole shaping: Cast-off4 stitches at beginning of next wrong side row (29 stocking stitch stitches $+~24$ cable stitches). 7.Raglan shaping: decrease one stitch at armhole sideat every 3rd row12times (17 stocking stitches $+~24$ cablestitches remaining). Then decrease 1 stitch at armhole every second row three times ( $14\,{\mathsf{s t s}}+24$ cable sts remaining). 8.Place remaining stitches on a holder or piece of yarn to be worked later for the hood. 9.Left cardiganfront: work asfor rightsie, using thelt cable chart and revering amhl and raglanhaings.
To knit back:
1.Cast-on 79 stitches and work4 rows in stocking stitch (knit on right side rows, purl on wrong side rows). 2.Work a breaking row by knitting one row on the wrong side and continue instocking stitch for4 more rows. On the next row (which should be a right side row) fold the hem by knitting together the first stitch on yourleft hand needle together with the first stitch of your cast on row.Continue like this to the end ofthe row.Of course,ifyou prefer, you can alwaysjust sew the hem closed when you are done. 3.Continue in stocking stitch until the back measures 8 inches from the breaking row. 4.Armhole shaping: cast-off4 stitches at beginning of next 2 rows (71stitches). 5.Raglan shaping:decrease1 stitch at beginning and end ofevery 3rd row 12times, then dec 1st at armhole end(s) of every 2nd row 3 times. (41 stitches). 6.Place remaining 41 stitches on a holder or piece of yarn to be worked laterfor the hood.
To knit sleeves:
1. Cast on 45 stitches and work hem as for back. 2.Continue in stocking stitch increasing 1 stitch at beginning and end of every 5th row, 5 times (55 stitches) 3.Work even until seeve measures 8 inches from breaking row. 4. Shape cap: Cast off4 stitches at beginning of next 2 rows 47 stitches remain). 5. Raglanshaping:Decreasestitchat beginning andendofevery2nd row,2times, thendecrease stitchat eachendofevery row twice. 6. Cast-off remaining 3 stitches. 7. Knit the 2nd sleeve.
Hood:
1. Knit 24 right cable stitches $+~14$ stitches from right side, pick-up and knit as many stitches from the sleeve cap as you need to to make sure there are no holes (remember how many stitches you added, these will be decreased in the next few rows), knit 41 stitches from back, pick-up and knit stitches from the other $+~24$ cable stitches from left side. 2.Work a few rows continuing the cable patterns on each side and decreasing stitches over the sleeves by knitting 2 together for every stitch you picked up and knit in the previous step. You should have 117 stitches remaining including the cable stitches. 3.On next row, work 2 centre stitches together so that you have an even number of stitches on your needle. 4.Place marker between two centre stitches. 5. Increase 1 stitch on either side of your central marker on every right side row, 10 times (136 stitches). 6. Continue even until hood measures 8 inches, ending at centre market. 7.Fold in half and graft top of hood closed following instructions in magazine to graft cable in pattern.
Shoulder seams:
1. Sew sleeves to fronts and back.
Button Loops:
1. Using the smallet double point needles you own I used size 0) knit a 3 stitchI-cord for26 rows and cast offor ach button loop.I made 3. 2. Fold I-cord loops and sew to sweater. 3. Add buttons on other ide. 4. Ta-da! A Cardigan for Merry!
Qbout anny Purls..
Anny Purls is an obsessed kniter, wife and stay-at-home mama to Jujube (age 2) and Lolo (age 7 months). Check out www.jujubeandlolo.com to read her blog , access more tutorials, and shop original patterns for babies and toddlers. You can contact her at anny@jujubeandlolo.com