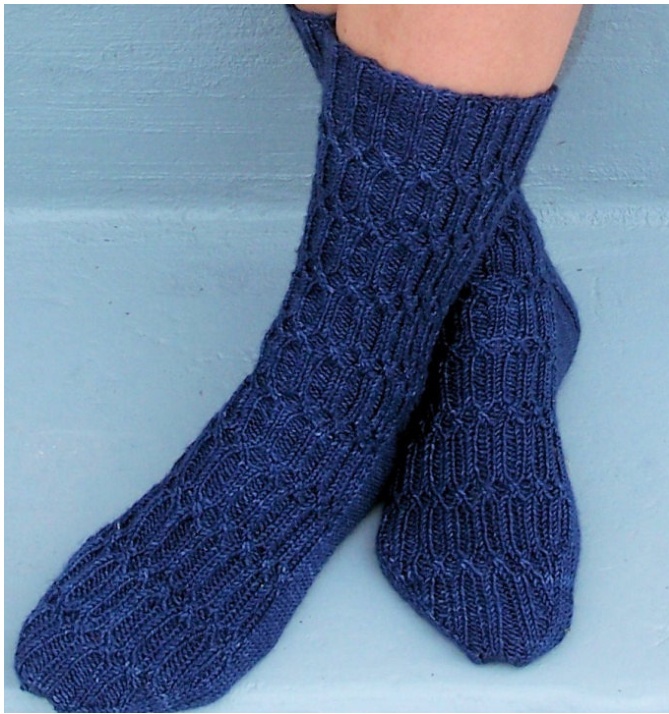
OLD NAVY
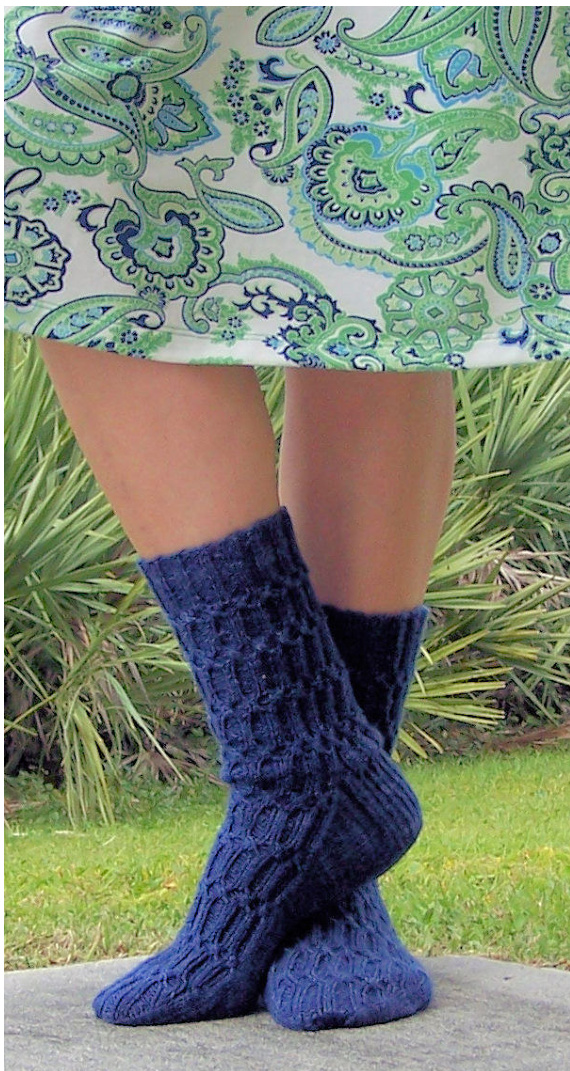
Designed by 1870 pearl http://1870pear1.typepad.com/ A new twist on the classic 2x2 ribbed sock. Perfect for a day at the office and still looks terrific with a summer dress or an old pair of blue jeans. This pattern is rated intermediate and assumes that you have basic sock knitting skills and the ability to knit cables. Please read the entire pattern including the notes before you begin to knit.
Size
Women's size - small or medium.
Materials
3 hanks Koigu PPPM sock yarn - Navy. 50 grams or 175 yards per hank. 5 DPN'S in the size that permits you to obtain 7 stitches per inch in stockinette. Cable needle - optional Sewing needle and scissors.
Abbreviations:
K - Knit P - Purl \* - Repeat SSK - Slip 2 stitches knit wise and knit them together through the back. K2TG - Knit 2 stitches together P2TG - Purl 2 stitches together S1 - Slip 1 stitch purl wise C2F- Slip 1 Knit stitch to the cable needle and hold in front. Purl the next stitch. Knit the stitch from the cable needle. C2B - Slip 1 Purl stitch to the cable needle and hold in back. Knit the next stitch. Purl the stitch from the cable needle. C2F/K- Slip 1 Knit stitch to the cable needle and hold in front. Knit the next stitch. Knit the stitch from the cable needle. Always remember that when you knitting this pattern to knit the knits and purl the purls, unless otherwise instructed. \*\*\*\*\*\*\*\*\*\*\*\*\*\*\*\*\*\*\*\*\*
Cuff:
Cast on 64 stitches and commence to knit in the round as follows: Rounds 1-17: K1 \*P2, K2\* end with K1
Leg:
Round 1: \*C2F, C2B\* Round 2: P1,\*K2, P2 \* End with P1 Round 3: P1\* C2F/K, P2\* End with P1 Round 4: P1 \*K2, P2\* End with P1 Round 5: \*C2B,C2F\* Round 6-15: K1, \*P2, K2\* End with K1 Continue knitting in the established pattern until the length of the sock is 7 1%2 inches or as long as you like, ending on Round 7.
Heel Flap:
If necessary re-position the stitches so that the cable pattern is evenly positioned on either side of the sock. The flap will be knitted over 32 stitches. Row 1: \*S1,P1\* Row 2: \*S1,K1\* Repeat rows 1-2 until you have 16 slipped stitches on either side of the heel flap and end on a knit row.
Heel Turn
Row 1: S1, P19,P2TG, P1 Row 2: S1, K7, SSK, K1 Row 3: S1, P8, P2TG, P1 Row 4: S1, K9, SSK, K Row 5: S1, P10, P2TG, P1 Row 6: S1, K11, SSK, K1 Row 7:S1,P12, P2TG, P1 Row 8: S1, K13, SSK, K1 Row 9: S1,P14, P2TG, P1 Row 10: S1, K15, SSK,K1 Row 11: S1, P16, P2TG, P1 Row 12: K18, SSK, K1 20 stitches left on needle
Gusset:
Needle 1:
With a spare needle, pick up 16 stitches on the outside loop of the slipped stitches on the heel flap and 2 additional stitches in either side of the heel flap and instep to prevent holes.
Needles 2 and 3:
Continue knitting in pattern starting at row 8.
Needle 4:
With a spare needle, pick up 2 additional stitches on either side of the heel flap and instep to prevent holes and pick up 16 stitches along the heel flap. Knit 10 stitches from heel turn onto this needle. Transfer the remaining 10 heel stitches to Needle 1. This increases the total stitch count to 88 stitches across 4 needles. Gusset decreases as follows:
Round 1:
Needle 1: Knit to the last 2 stitches, K2TG Needle 2 & 3: Knit in established pattern. Needle 4: SSK, K to end
Round 2:
Knit across all 4 needles, staying in established pattern on the instep. Repeat rounds 1 and 2 until 64 stitches remain. Continue knitting until the sock is 2 inches short of the total length of the foot.
Toe:
In order to maintain continuity of the design I continued the cable pattern through the completion of the toe.
Most sock knitters prefer to have a plain knit toe for maximum comfort so I have written the pattern to incorporate a stockinette toe. However, if you choose to finish the sock with the original design please make the following adjustments. Stay in the established rib pattern with one exception. Cross the cables on the five center ribs only. Should a cable crossing occur on a decrease row, eliminate the decrease on that row and decrease on the following row. Resume alternate rows of decreases and plain knit rows. Knit the last two rows of the toe shaping in stockinette stitch to facilitate a neat and tidy graft.
Shape the toe:
If necessary re-position the stitches so that the cable pattern is evenly positioned on the instep. Then re-Number the needles as follows: Needle 1 is the right side of the instep. Needle 2 is the left side of the instep Needle 3 is the right side of the sole Needle 4 is the left side of the sole.
Round 1:
Needle 1: K1, SSK, K to end. Needle 2: K to the last 3 stitches, K2TG, K1 Needle 3: K1, SSK, K to end. Needle 4: K to the last 3 stitches, K2TG, K1
Round 2:
K across all 4 needles. Repeat round 1 and 2 until there are eight stitches on the instep and eight on the sole.
Finishing:
Kitchner the 16 remaining stitches. Weave in both tails and lightly block. Quickly cast on for the second sock before the Second Sock Syndrome set in.
Pattern notes:
Cables. I highly recommend that if you don't know how to cable without a cable needle that you learn how to do so and this pattern would be a good place to start. The internet has a variety of tutorials on the subject should you like to toss your cables needles to the wind and learn a faster method of cabling. Sizing. I had a fair bit of yarn left over from just 2 hanks of the Koigu. If your foot is much longer than 8.5 inches I would suggest that you purchase an extra hank to ensure the completion of your socks. The rib pattern has a good bit of stretch to it. It fits my 8.5 circumference foot with room to spare. Should you desire to knit a larger size, you have several options available to you. Either work the pattern in larger needles or substitute the recommended yarn to a slightly heavier sock weight yarn. Socks that Rock, Fleece Artist Merino, and Collinette Jitterbug would be excellent substitutions. Or you may add additional stitches to increase the cast on number and adjust the pattern accordingly. The pattern is a simple repeat of only 4 stitches. Happy Knitting! Copyright 1870 pearl March 2008. http://1870pearl.typepad.com/ If you encounter any problems please email me at a1870pearl@yahoo.com Subject line: Old Navy


