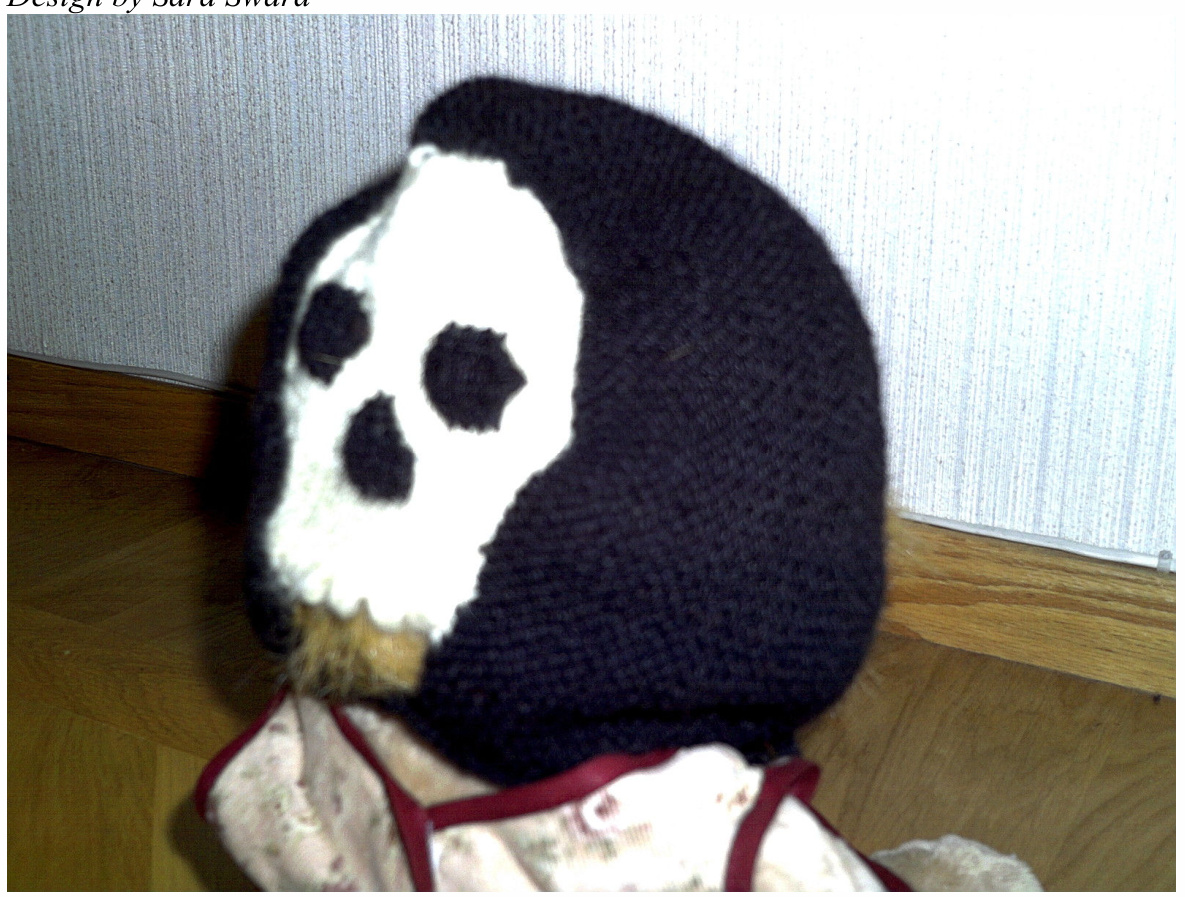
Grim Reaper Hat
Design by Sara Swird Size: Baby-child (adult)
Yarn: Baby Sport weight wool yarn (ca $300\;\mathrm{m}/100\mathrm{g}$ ) in white (approx. $15\;\mathrm{g})$ and black (approx. $30\;\mathrm{g}$ Adult Lett-Lopi or other Aran weight yarn in white (approx $20{\mathrm{~g}}$ )and black (approx $40{\mathrm{~g}},$ Needles: Baby $3.5\;\mathrm{mm}/\mathrm{Am}\,4$ Adult $5.0\;\mathrm{mm}/\mathrm{Am}\;8$ (or size needed to obtain gauge) Gauge: Baby 24 sts and $32\;\mathrm{rows}=10\;\mathrm{cm}\left(4^{\circ}\right)$ in stocking stitch. 24 sts and $48\;\mathrm{rows}=10\;\mathrm{cm}\left(4^{\circ}\right)$ in garter stitch. Adult 18 sts and $28\;\mathrm{rows}=10\;\mathrm{cm}\left(4^{\circ}\right)$ in stocking stitch. 18 sts and $36\;\mathrm{rows}=10\;\mathrm{cm}\left(4^{\circ}\right)$ in garter stitch. Notes: ● I recommend a circular needle or dpns, since picking up stitches around the knitted skull is next to impossible using straight needies. This pattern is nearly identical for baby and adult sizes; the size is mainly determined by yarn and gauge. Where the different sizes require different instructions, the adult size is given within parenthesis.
The skull
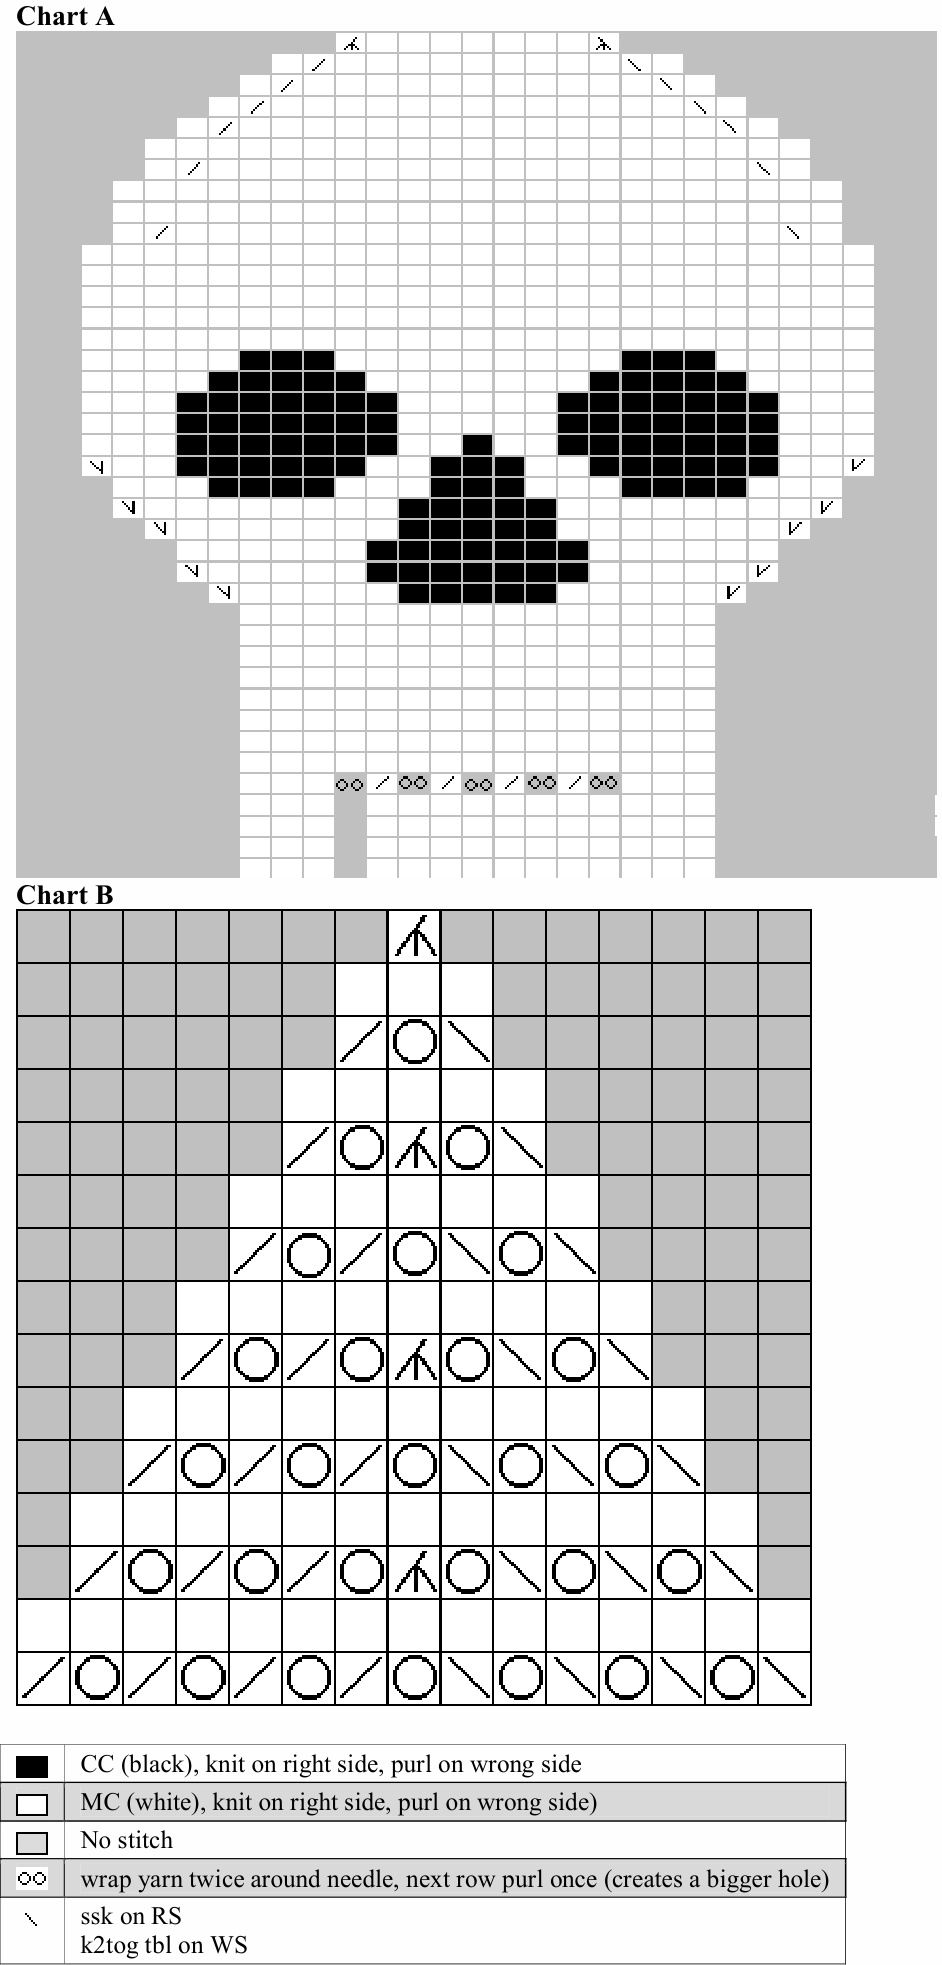
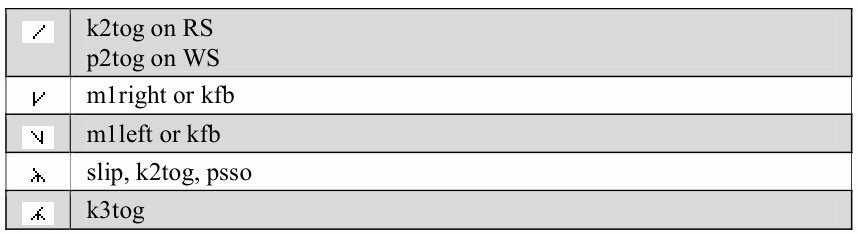
The skull is worked in stocking st. CO 14 sts and follow chart A. Black parts are Worked in intarsia (although I used another method, see below). When chart is finished, turn back the hem to form the teeth and fasten with invisible sts. (If you don't like sewing, you can instead pick up sts from the CO edge and knit them together with the working sts on the fifth row after the turning row.)
The hat
With black yarn, CO 5 sts, knit up 73 sts around skull sides and top, CO 5 sts $\Longrightarrow83$ sts. Work back and forth in garter st. On the first row, increase 12 sts evenly spaced $=>95$ sts. Knit 28 (21) garter ridges. The hat shall now reach almost as close to the face as you want it to be. Try it on -- you may want to increase or decrease the number of garter ridges. Next row: $*\,\mathrm{K}8$ , k2tog, repeat from \*, k5. Knit two more garter ridges. Cut yarn, but do not BO. With white yarn, work an I-cord bind-off. To minimize color blending, begin from the left side. With black yarn, CO 3 sts. Work I-cord for $22\;\mathrm{cm}=9^{\circ}$ $27\;\mathrm{cm}=11^{\circ}\;$ ) or desired length for ties. Starting at the front, pick up 30 sts along right lower edge and simultaneously work an I-cord BO. Do not cut yarn. Work $4\;\mathrm{cm}=1.5^{\circ}$ $\mathrm{8\cm}=3^{\circ})$ of I-cord. Starting at the back, pick up 30 sts along left lower edge and simultaneously work an I-cord BO. Continue the I-cord for another $22\;\mathrm{cm}=9^{\ast}$ $27\;\mathrm{cm}=11^{\circ}\;$ or desired length for ties. Cut yarn and pull through the sts.
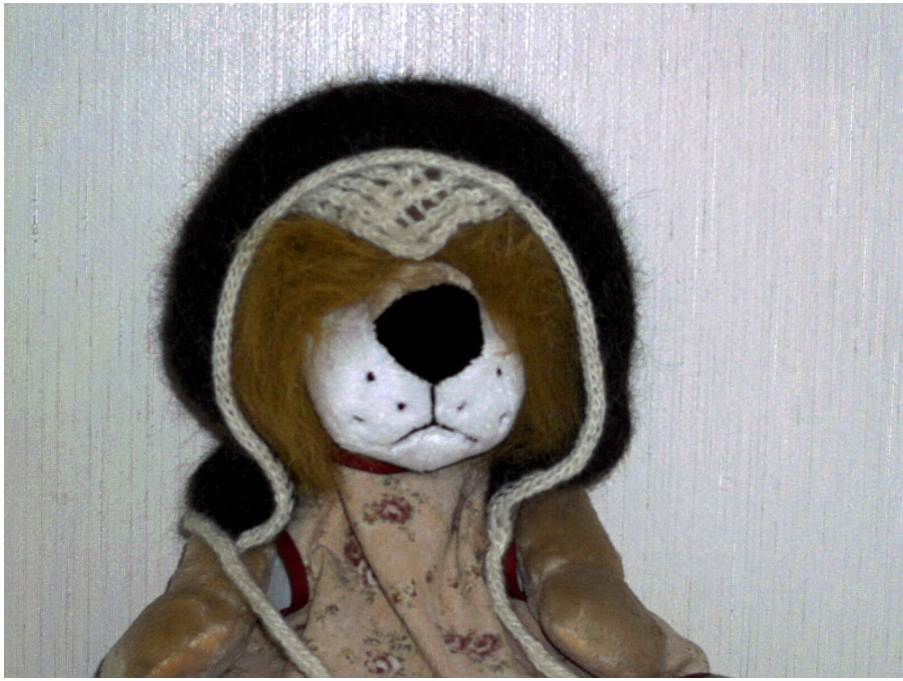
Optional: Widow's peak
With white yarn, pick up 15 sts in the midle of the forehead, between the I-cord and the black part of the hat. Pick up the sts from the outside of the hat, otherwise this will show on the RS. Follow diagram B. When 1 st remains, cut yarn and pullthrough.
Finishing...
Weave in loose ends. Block the hat - especially the widow's peak may require blocking. Dampen or wash the hat. Either rollit in a towel and gently squeeze out as much water as possible, or throw it in your washing machine and run the spin cycle only. The hat shall be damp but not wet. Shape the hat and even out any uneven stitches. Place the widow's peak on a folded towel or such and pin it into shape. Leave it to dry.
Done!
Techniques
I-cord
Easiest worked on dpns: CO 3 sts. $*_{\,\mathrm{K}3}$ .Do not turn. Slide sts to other end of needle and repeat from \*. On straight needles: CO3 sts. $*_{\,\mathrm{K}3}$ . Do not turn. Slip the 3 sts back to left needle. Repeat from \*.
I-cord bind-off
CO3sts. $*_{\textrm{K}2}$ ssk the last cast-on st with one of the sts to cast off.Slip the3sts on theright needle back tolft needle. Repeat from \* until only the 3 I-cord sts remain. Break yarn and pull through all 3 sts.
My weird patch technique
I do not recommend this technique for anything other than experimental work (like trying to achieve the perfect form for an eye-socket) but in such cases it can be really useful. Work in the main color (MC) a row or two beyond the lowest part of the intended contrast-colored (CC) area. Let the sts rest on the needle. With another needle, pick up the base sts in CC through the knitted sts. Cut yarn, leaving enough to work the entire area and pullthe yarn through the knitting to the front. Continue working a "patch in CC,attached to the MC knittng only in those picked up sts. When the patch has the correct ize and shape (I had to rip it several times), leave the CC sts on the needle and work in MC until the MC knitting has reached the top of the patch. Work each CC stitch with the corresponding MC stitch (k2tog). If needed, sew the sides of the patch to the MC knitting with a few invisible stitches.
$\copyright$ 2007 Sara Sward


