Warm Wellies Boot Liner Pattern
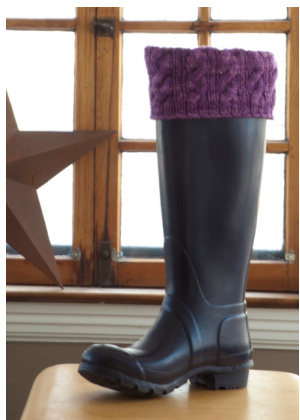
A Free Pattern for Knitters & Sewers By Erin Wagner of Clever Charlotte & Jeanne Stevenson of Destination Yarns Add instant warmth and style to your favorite pair of rain boots with these fleece boot liners topped with a decorative cable knit cuff. This project includes instructions for knitting the cable cuff (with alternative instructions for knitting in the round and flat) + the sewing pattern for the boot liner. The boot liner works with most popular women's rain boots and is provided in two shoe size ranges: 5-7 and 8-10. Note the knitted cuffis standard for both sizes of liner. Visit www.clevercharlotte.com/2012/02/warmwellies for a picture tutorial on sewing the liner and tips for with working with fleece.
What You'll Need
For the Knit Cuffs:
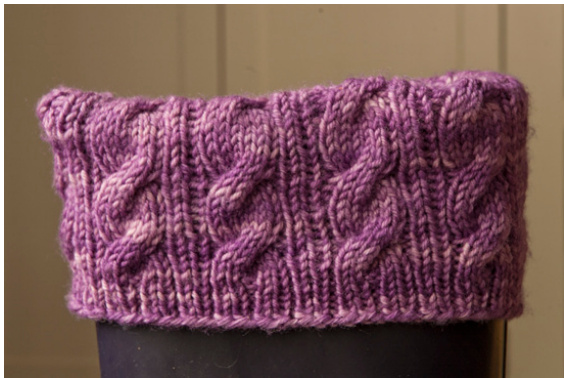
1 skein of Destination Yarn Souvenir (colorway pictured is Spring Break) or equivalent semi-solid DK weight yarn. Size 3 knitting needles - either double pointed needles (for knitting in the round) or straight needles (for knitting flat) Size 6 knitting needles (or size needed to obtain gauge) - either double pointed needles (for knitting in the round) or straight needles (for knitting flat) Cable needle Tapestry needle (if knitting the cuts flat) Row Counter / End of round marker if knitting in the round.
For the Fleece Liners:
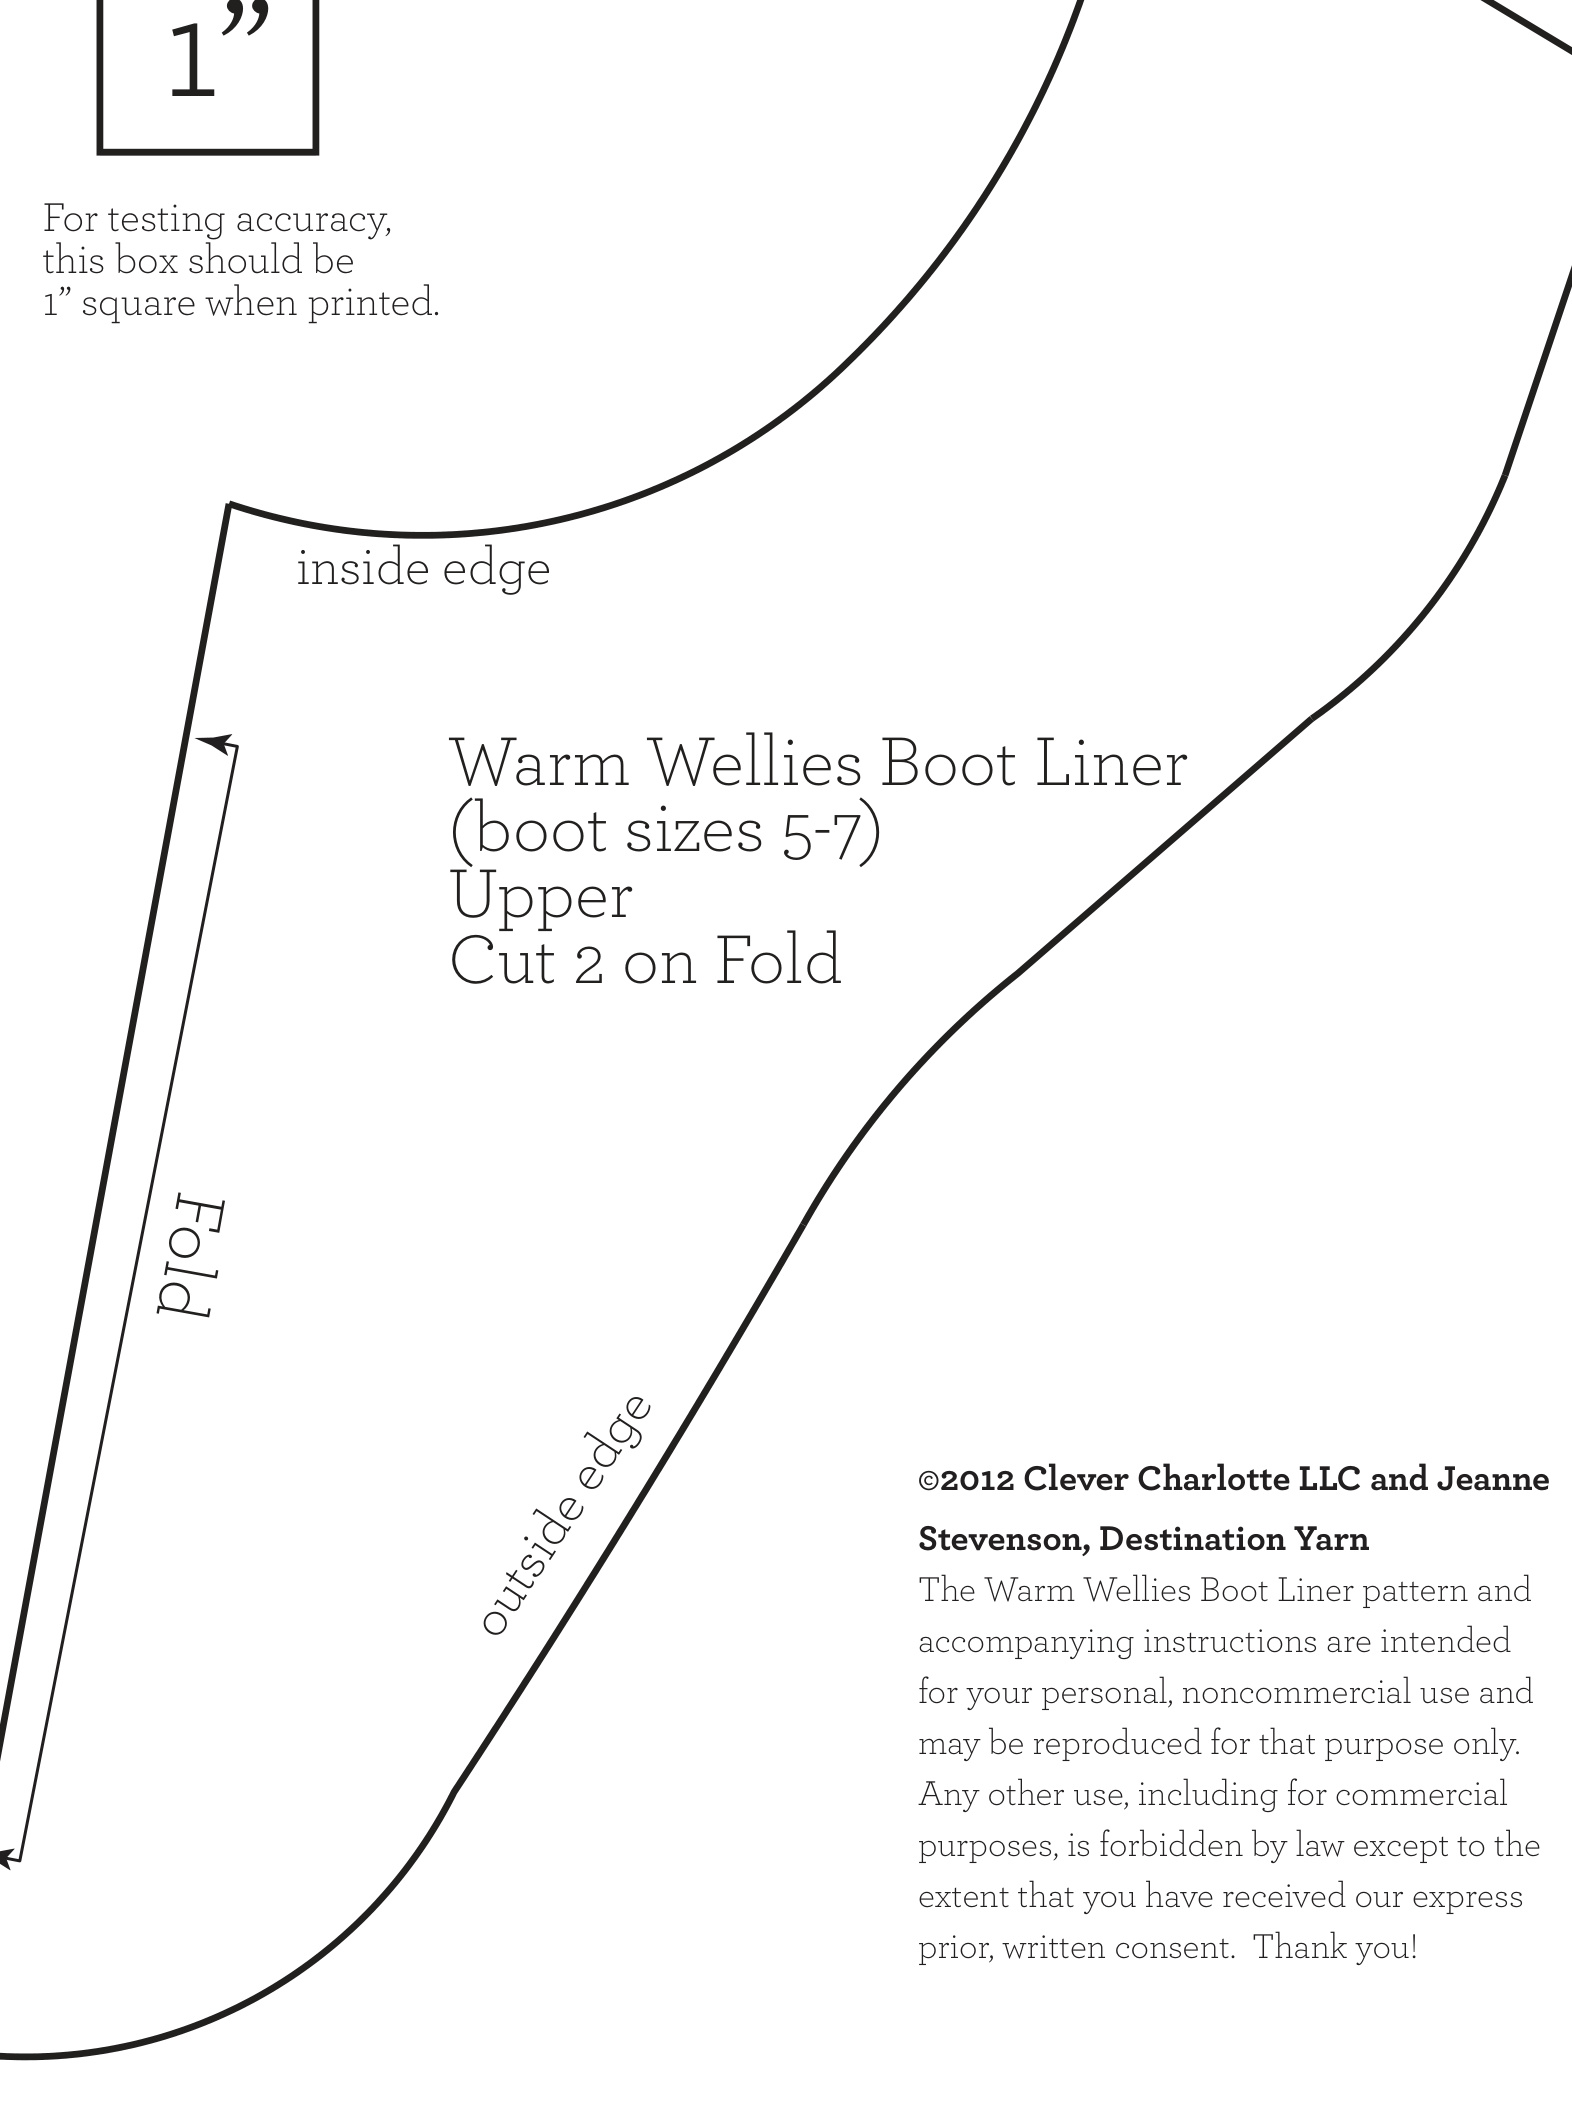
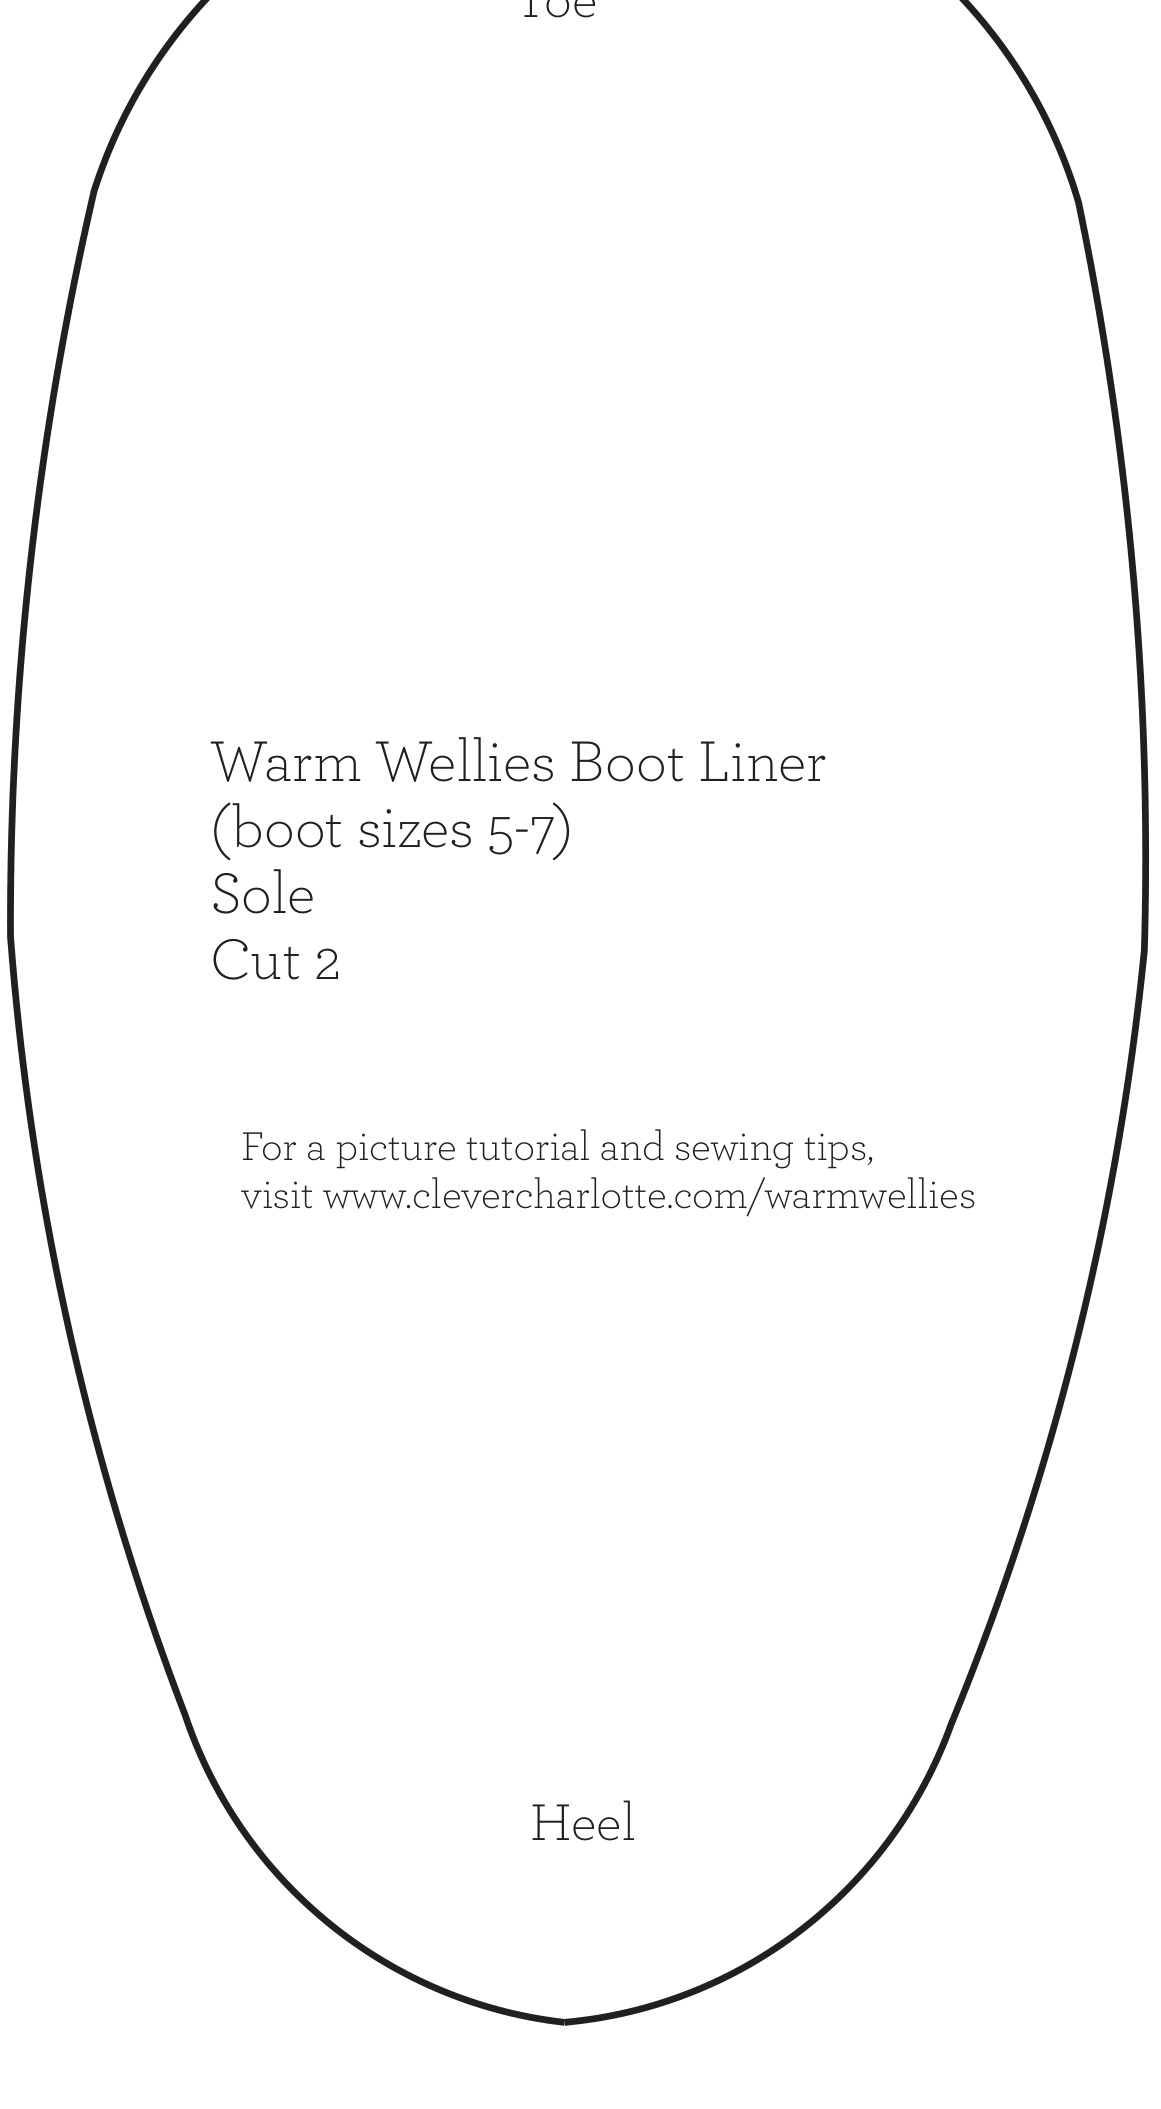
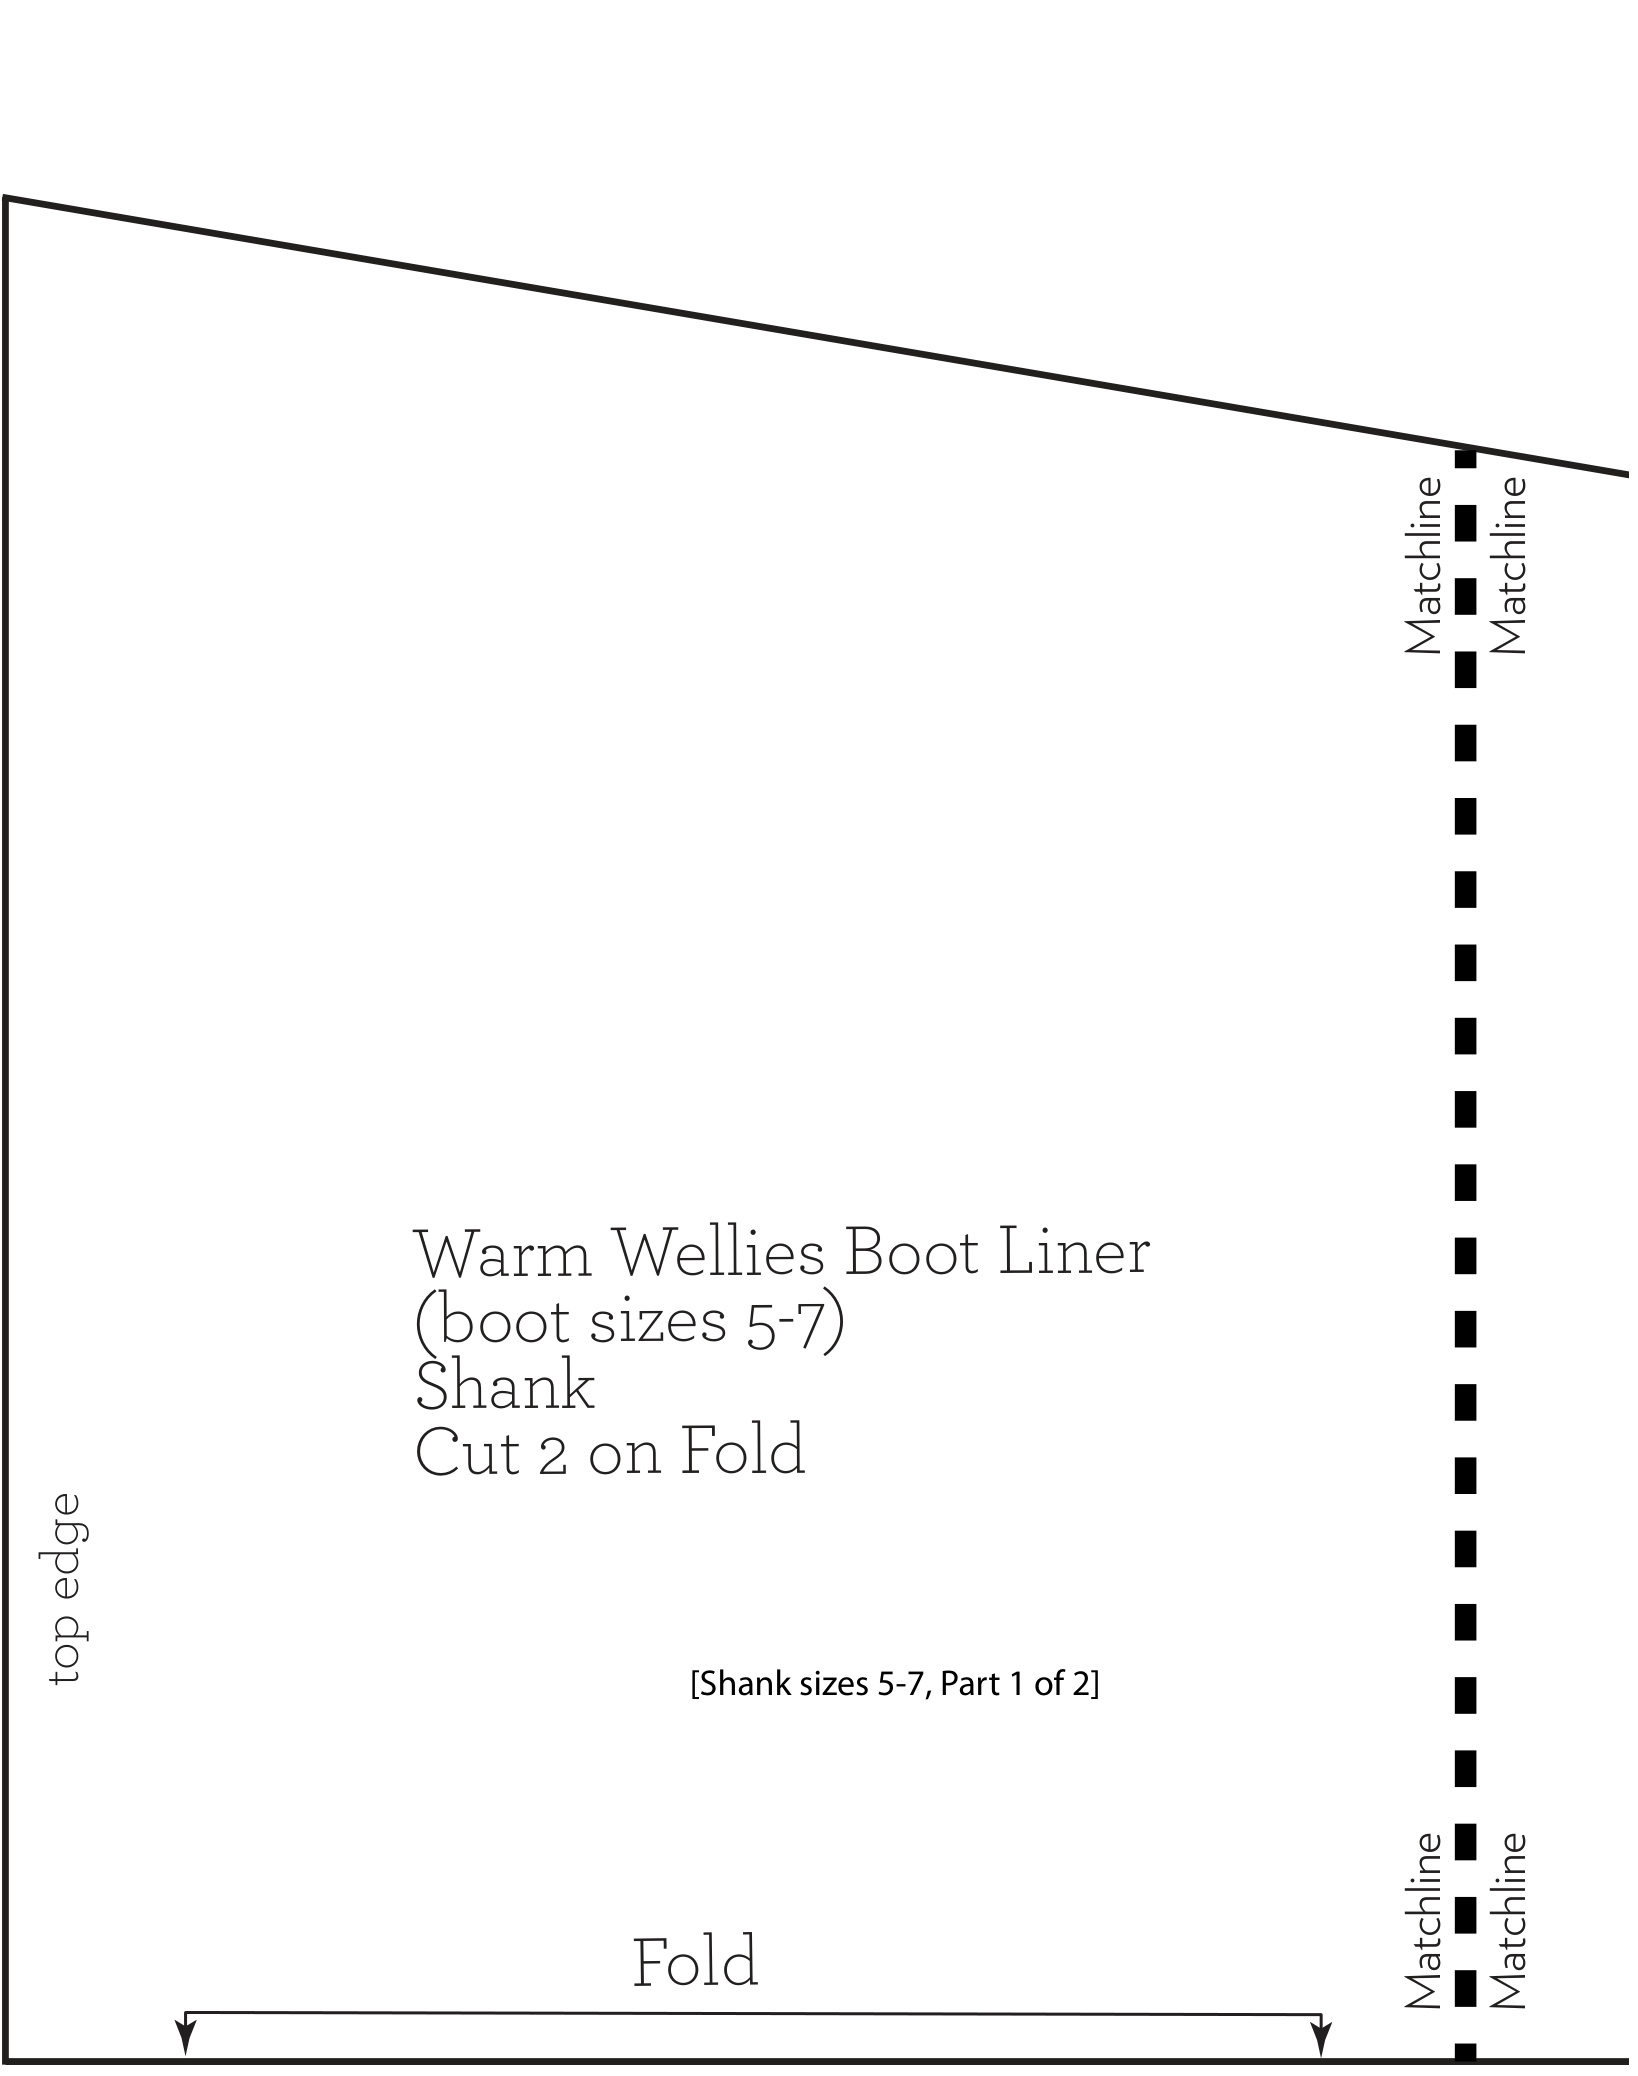
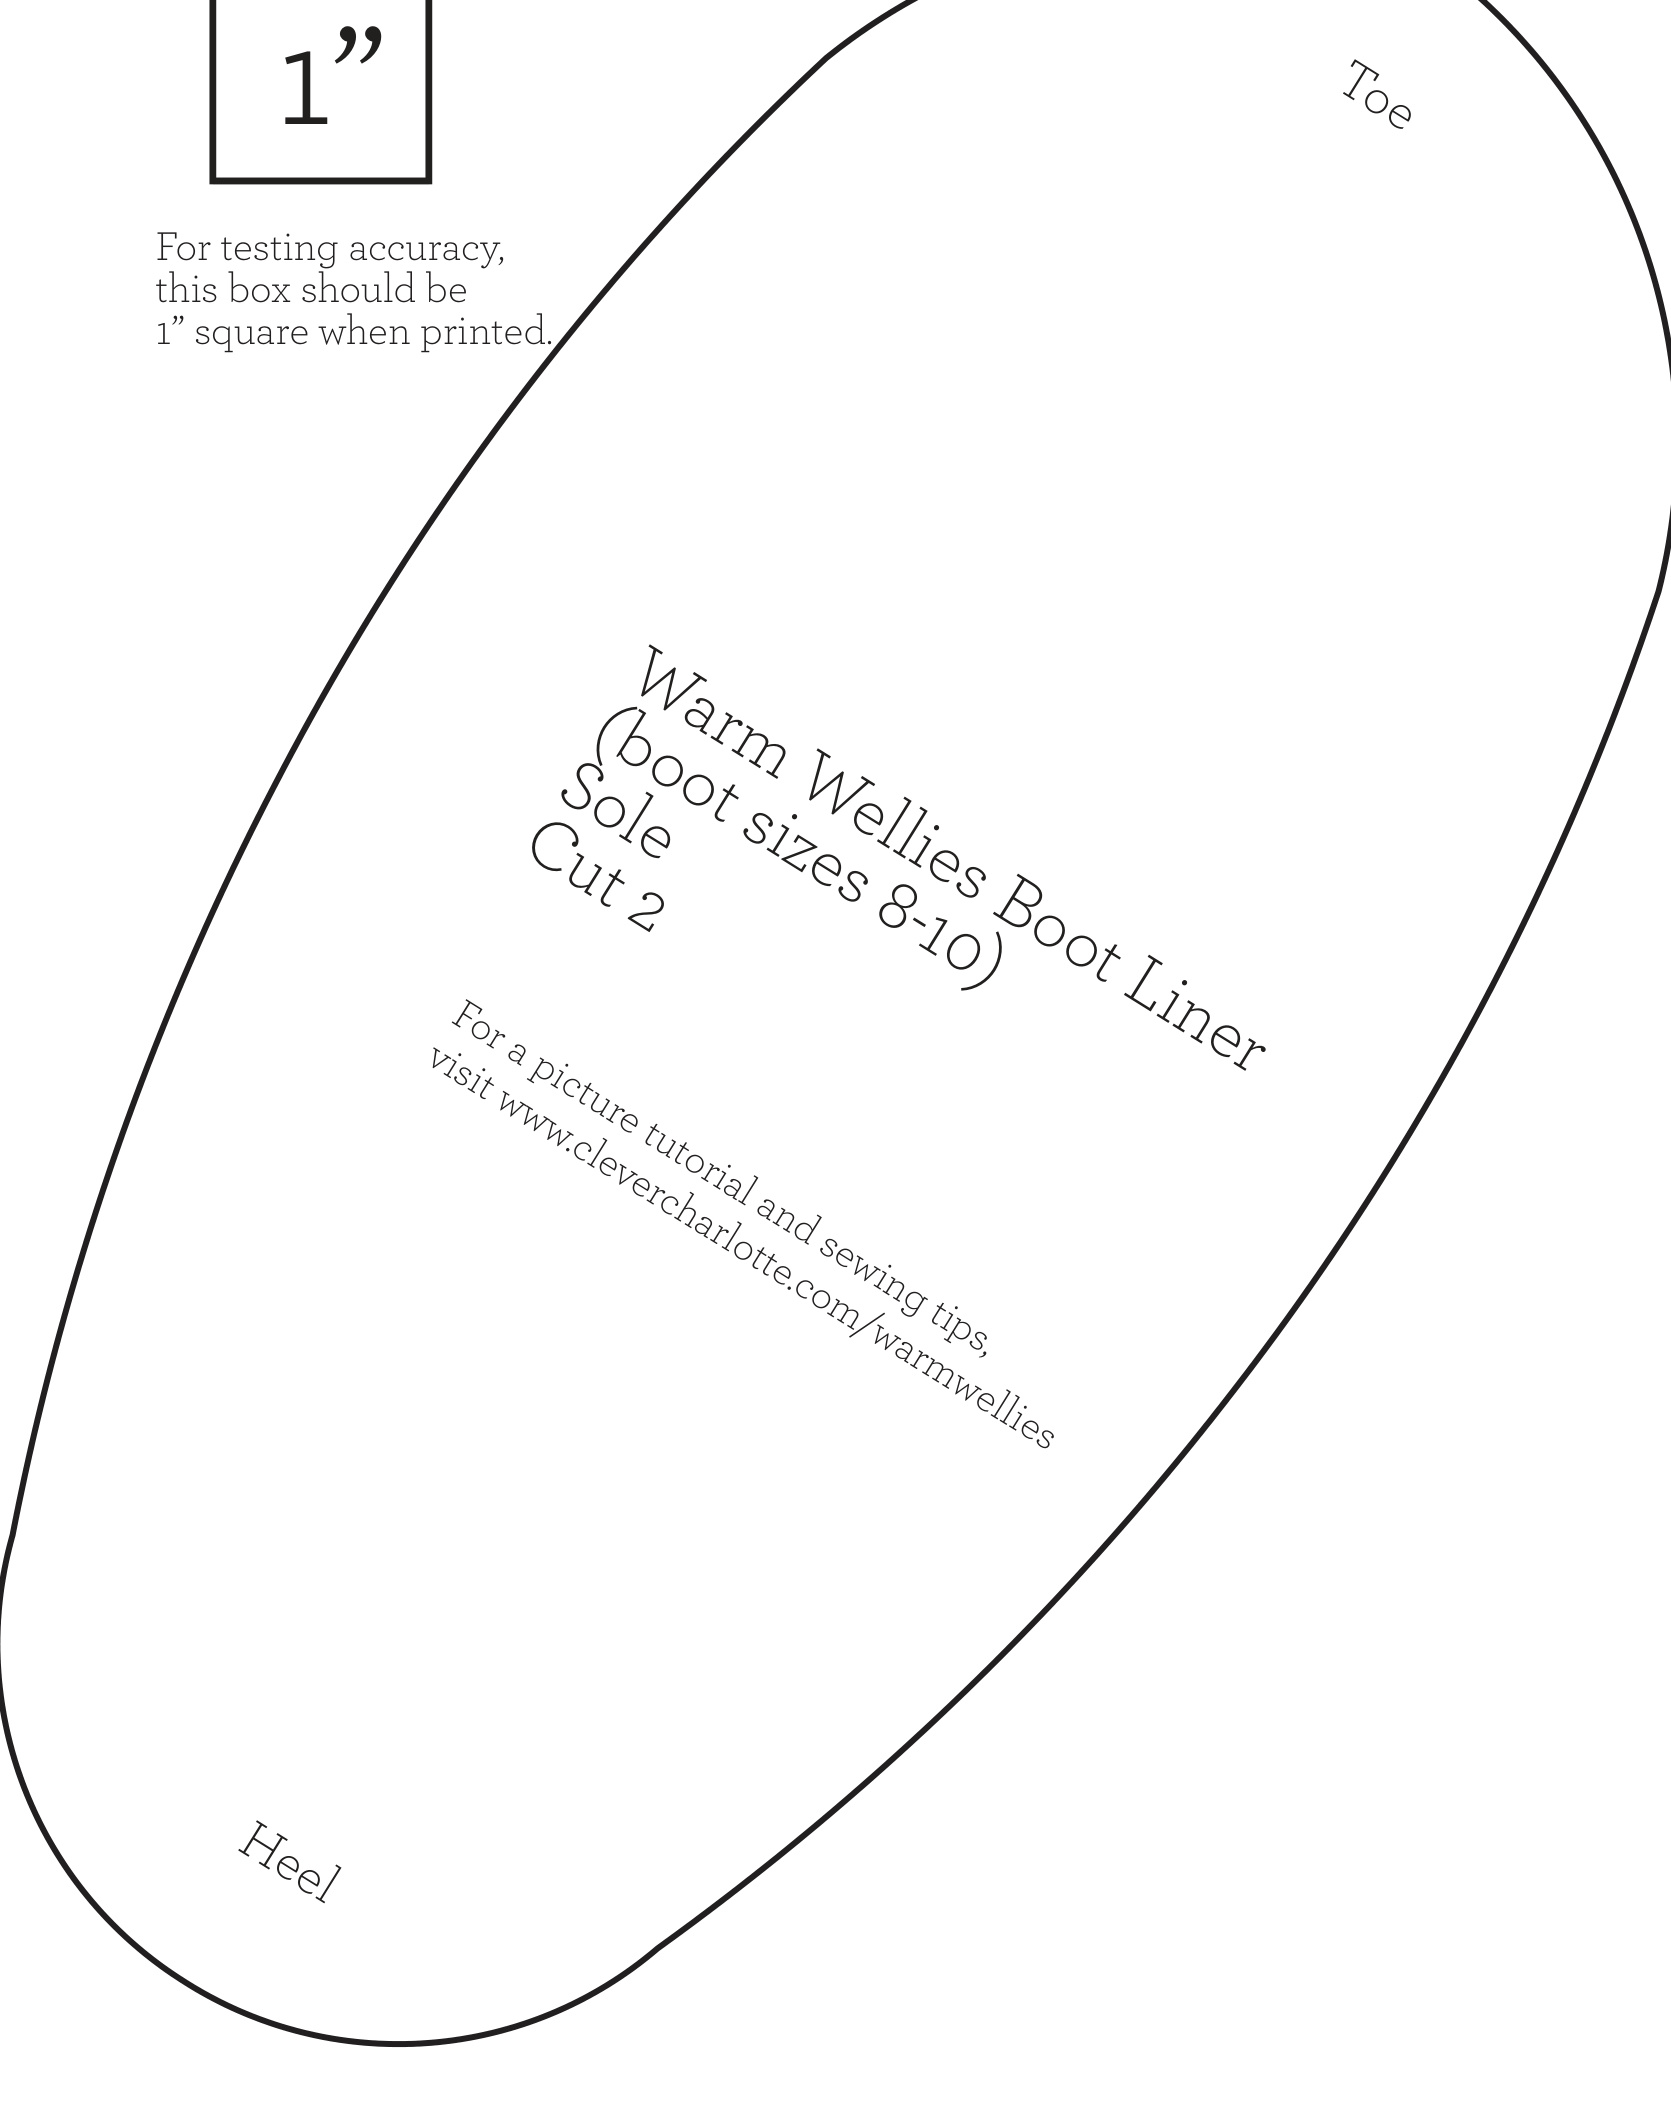
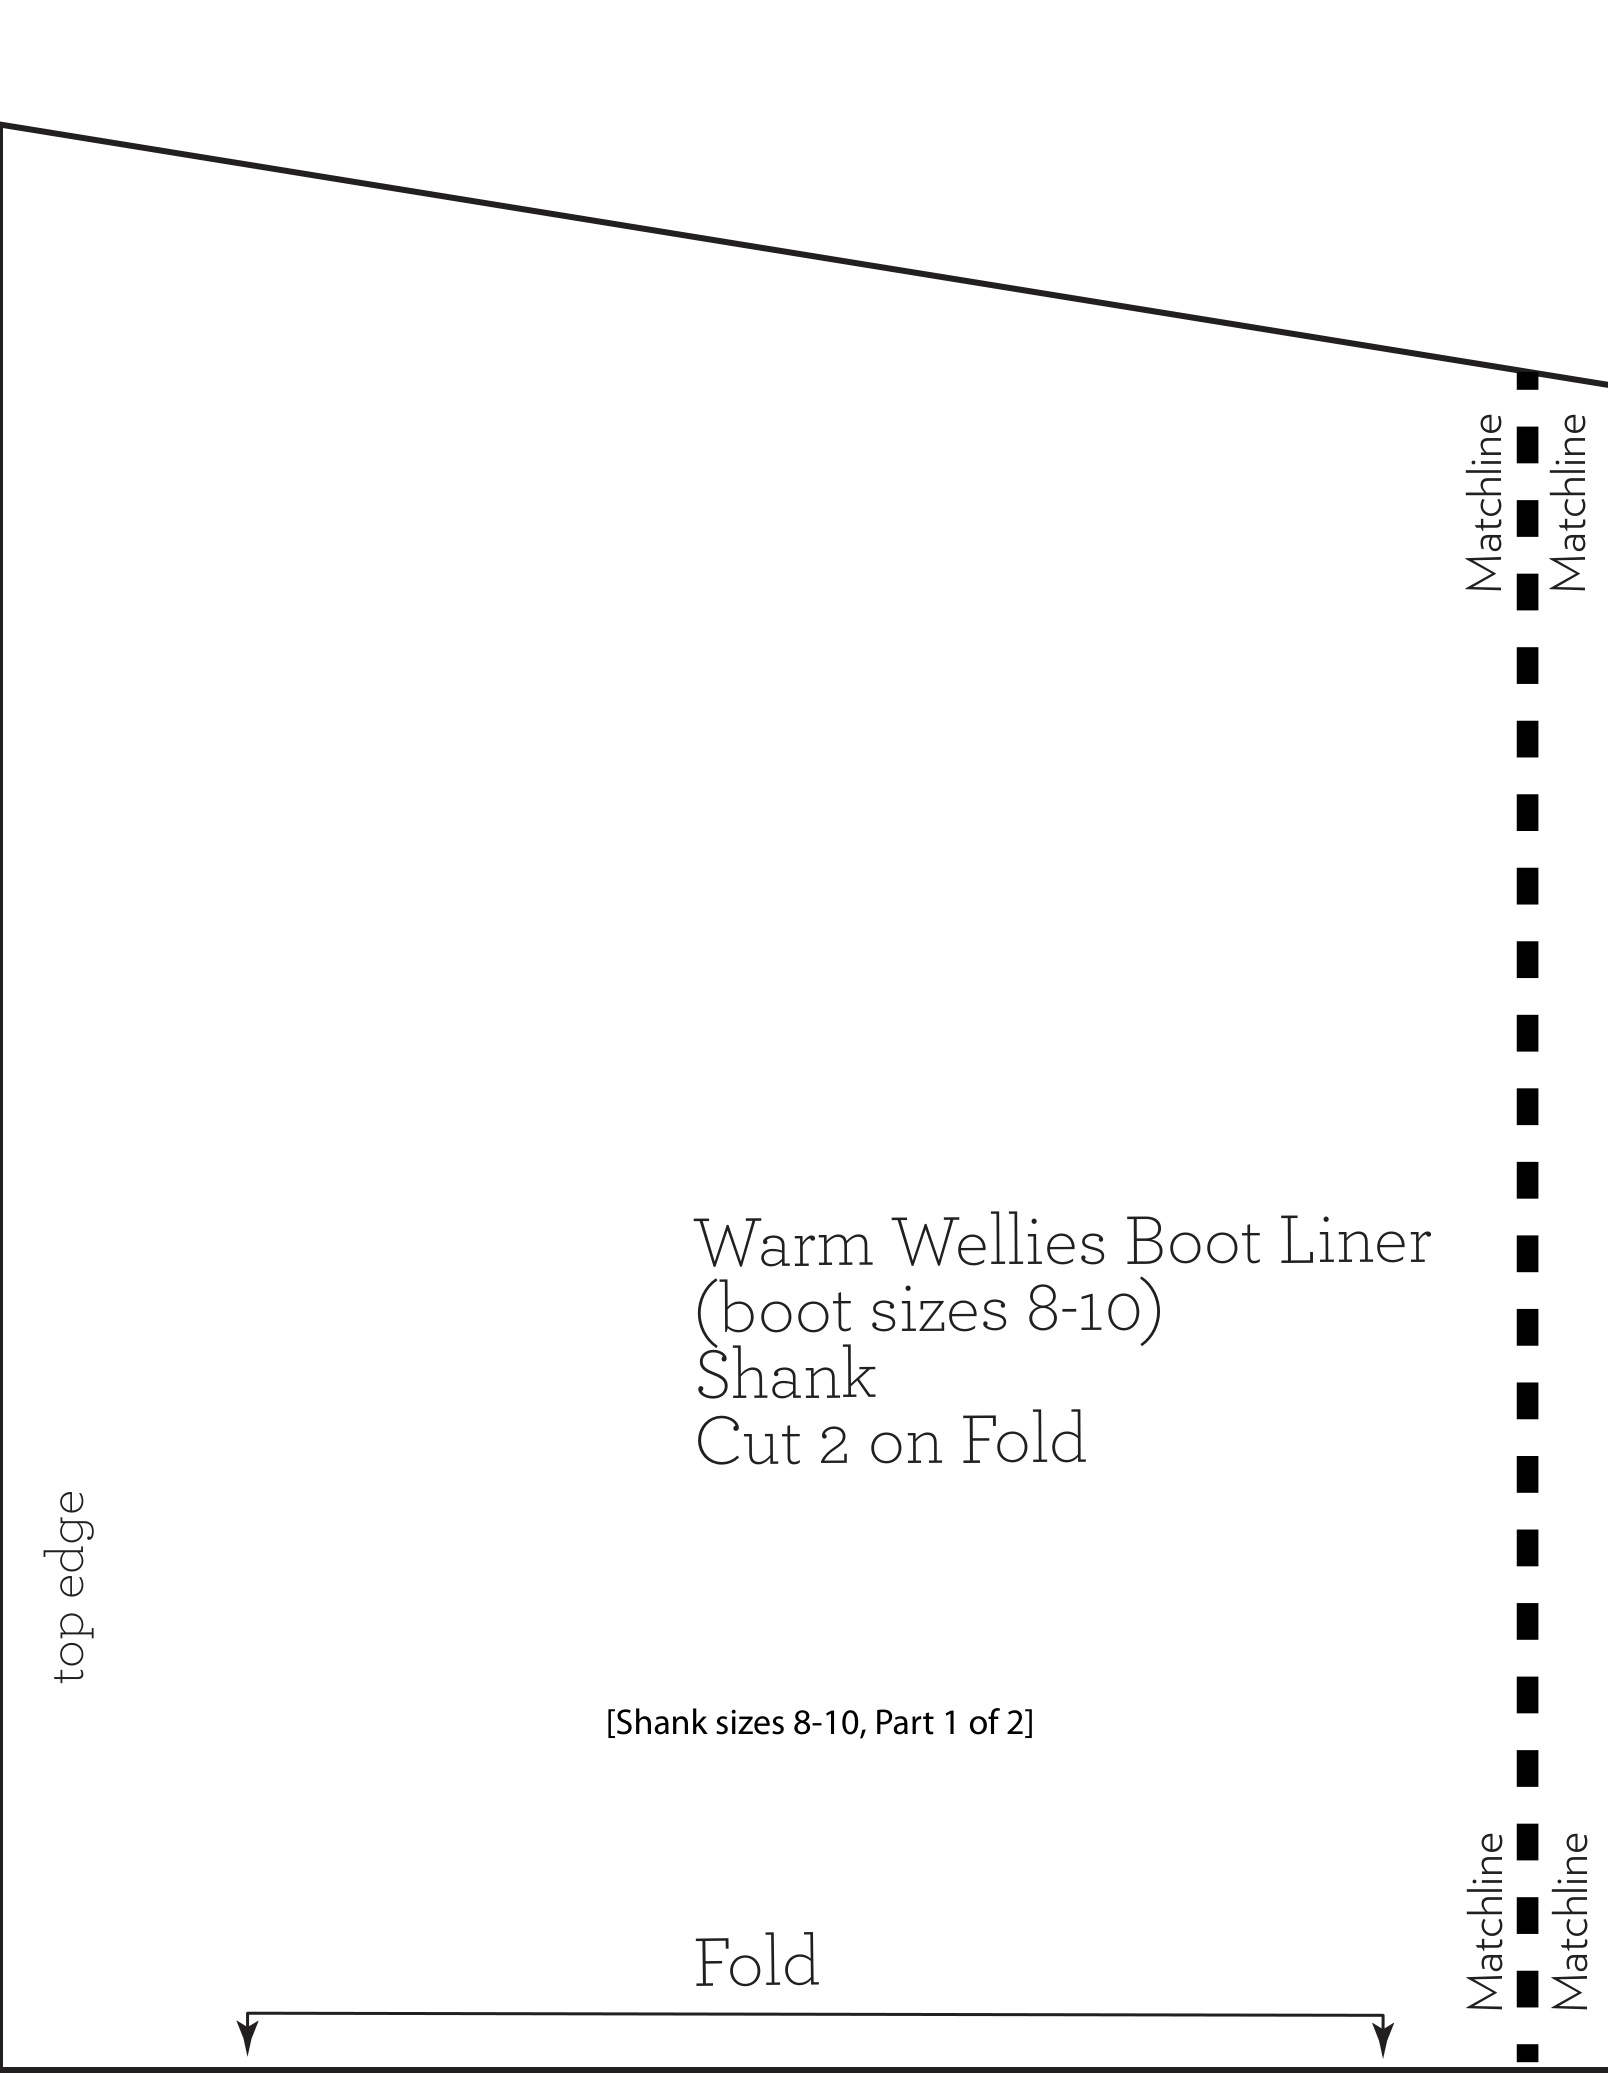
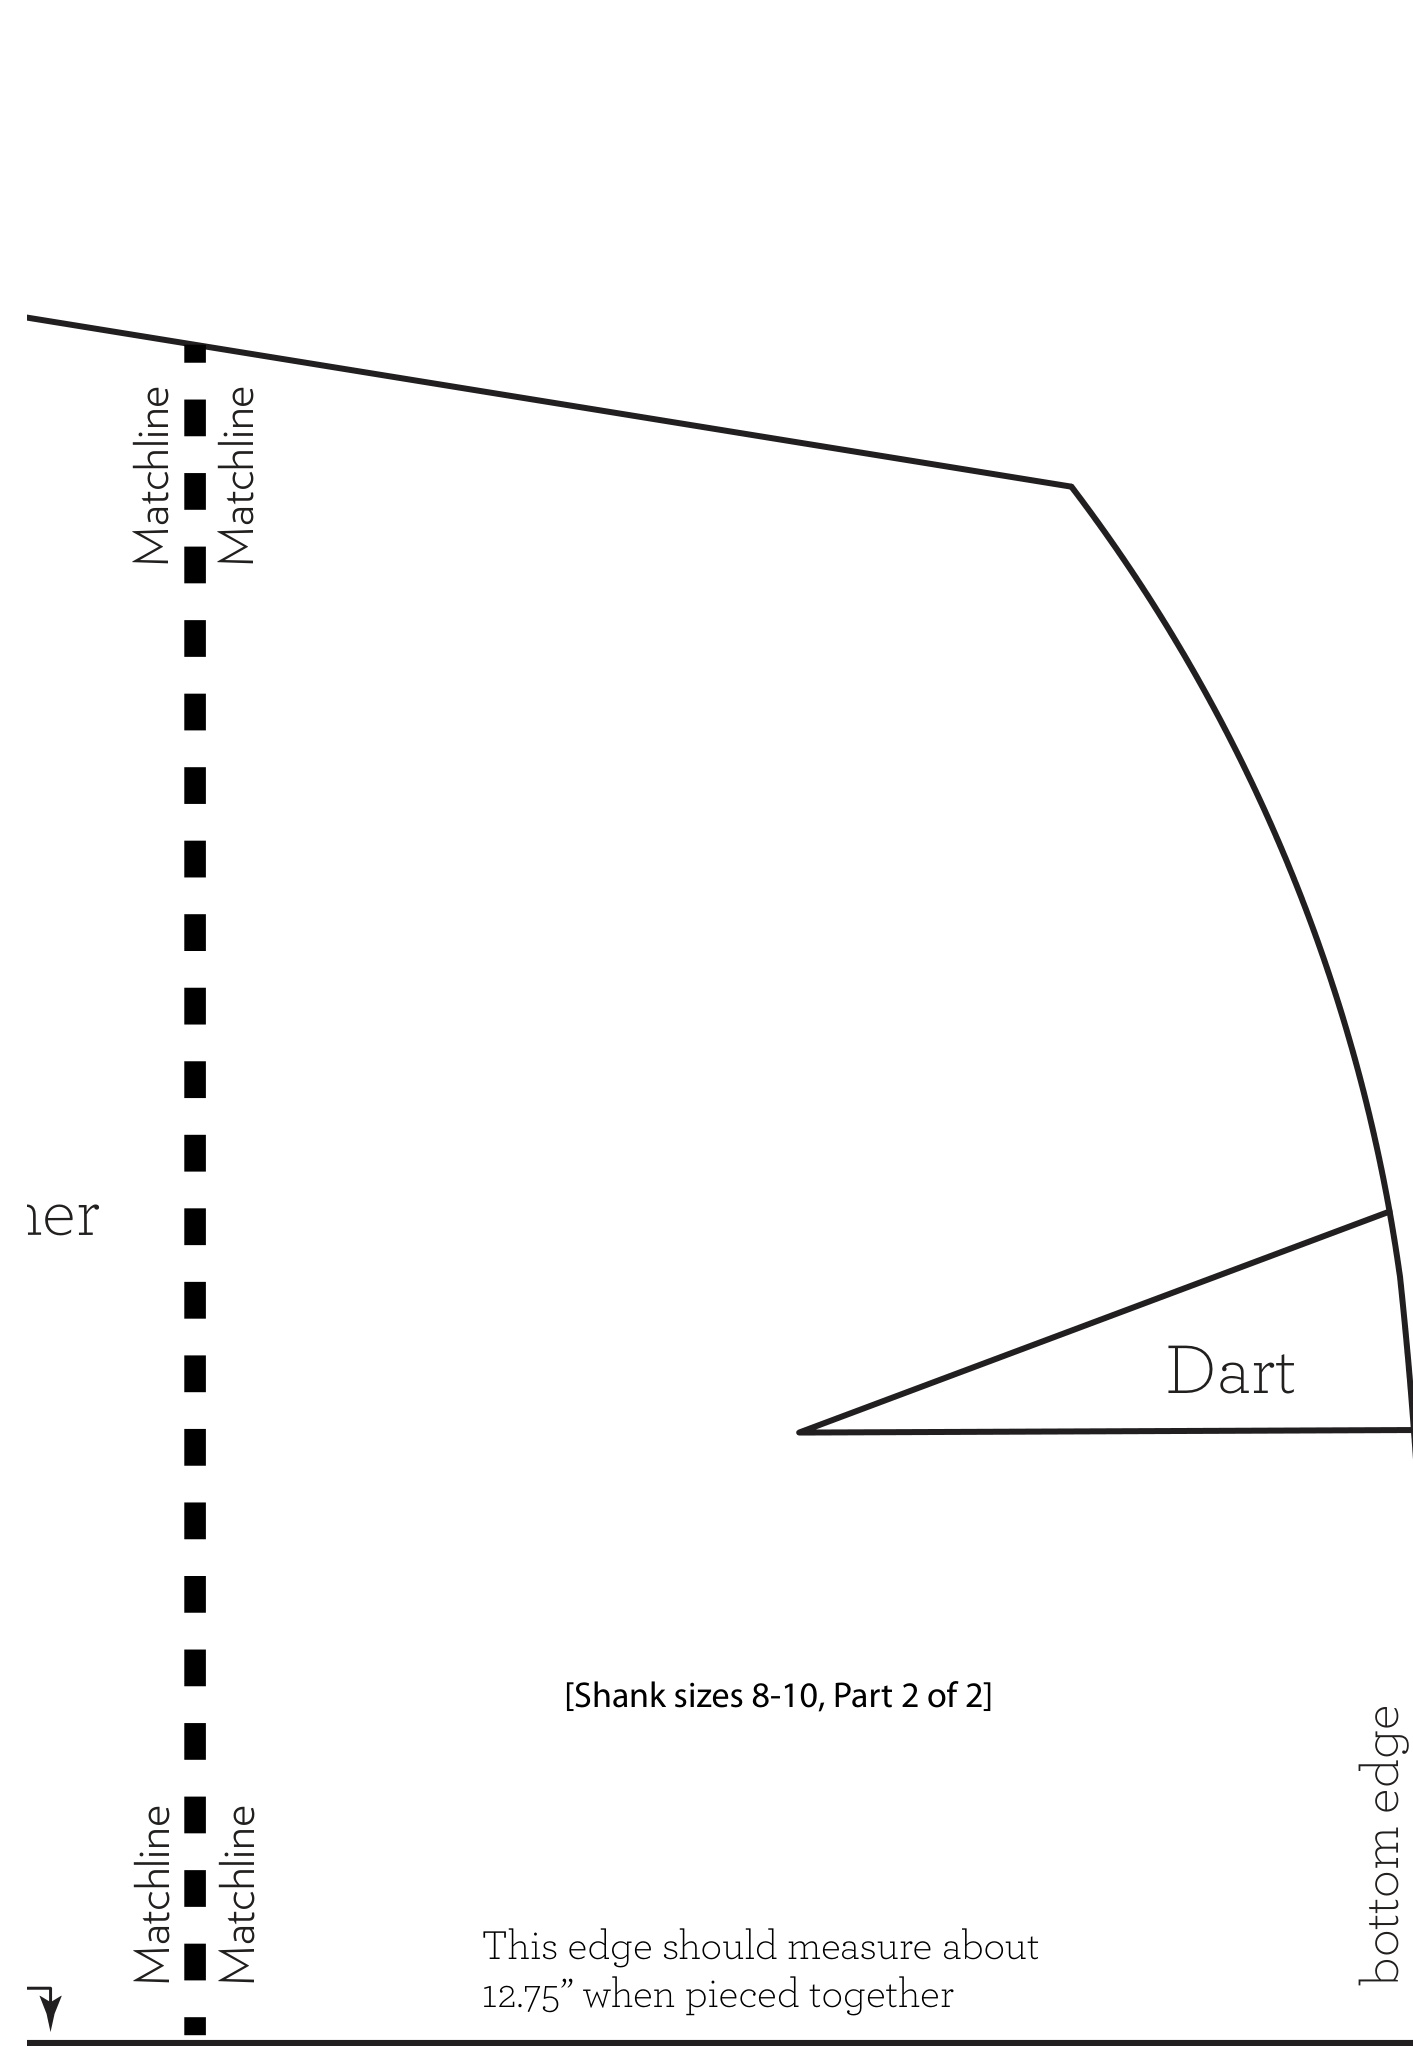
1/2 yard fleece Matching thread PDF pattern pieces\*\* (included below) \*\*Notes about printing out pattern pieces: + Make sure to print your PDF pattern pieces at actual size (select "no scaling" in the print dialogue box to ensure proper sizing). Use the gauge guide on the pattern to ensure accuracy of scale. + You will need to cut out the Shank pattern in two pieces and then tape together, using the Match Line as a reference point. + Ideally, you should cut the Shank and Upper pieces flat on the fabric, rather than on the fold, to avoid the bulk of the fleece throwing off the final dimensions of these pieces. To do this, cut out these pattern pieces on the fold of a large piece of paper (newspaper works well, then cut your fabric. See www.clevercharlotte.com/2012/02/warmwellies for additional explanation.
Knit the Cuffs
Gauge:
11 stitches per 2 inches in stockinette stitch on larger needles
Abbreviations:
K=Knit P =Purl KFB = Knit into the front and the back of the same stitch, increasing one. PFB = Purl into the front and the back of the same stitch, increasing one. C6B = Slip 3 stitches onto a cable needle, hold to the back of your work, knit the next three stitches, then knit the 3 stitches from the cableneedle.
To Knit in the Round:
On size 3 double pointed needles, Using the long tail cast on method, loosely cast on 90 stitches dividing stitches evenly onto 4 needles. Slip as to purl the first stitch from needle 1 onto needle 4 and slip the last stitch from needle 4 over the slipped stitch and onto needle 1 being careful not to twist stitches to form a smooth join. Ribbing Pattern: P1, K2, repeat around. Knit 5 rounds total in ribbing pattern. Next Round: P1, K2, PFB, K2, P1, K2, repeat around. (10 stitches increased, 100 stitches total) Switch to size 6 (or size needed to obtain gauge) needles. Begin Pattern: Rounds 1-4: P1, K6, P1, K2, repeat around. Round 5: P1, C6B, P1, K2, repeat around. Rounds 6-8: P1, K6, P1, K2, repeat around. Knit pattern rounds 1-8 three times total. Repeat rounds 1 and 2. Bind off in Pattern.
To Knit Flat:
On size 3 straight needles cast on 93 stitches. Ribbing: Row 1: P2, K2, \*P1, K2, repeat from \* until two stitches from end of row,P2. Row 2: K2, P2, \*K1, P2, repeat from \* until two stitches from end of row,K2. Repeat Rows 1 & 2 twice. Repeat Row 1. Next Row: K1, \*K1, P2, KFB, P2, K1, P2, repeat from \* until two stitches from end of row, K2. (10 stitches increased, 103 stitches total) Switch to Size 6 (or size needed to obtain gauge) needles. Begin Pattern: Row 1: P1, \*P1, K6, P1, K2, repeat from \* until two stitches from end of row, P2. Row 2: K1, \*K1, P2, K1, P6, repeat from \* until two stitches from end of row, K2. Row 3: Same as Row 1 Row 4: Same as Row 2 Row 5: P1, \*P1, C6B, P1, K2, repeat from \* until two stitches from end of row, P2. Row 6: Same as Row 2 Row 7: Same as Row 1 Row 8: Same as Row 2 Knit Pattern Rows 1-8 three times total. Repeat rows 1 and 2. Bind off in pattern. Fold work in half and sew up side seam using the tapestry needle and extra yarn.
Sew the Boot Liner
Note: all seam allowances are 1/2". Use a longer stitch length when sewing fleece (about 3.0 mm). You will repeat each of these steps for the second liner. Note: if you find the liner is too short or too tall for your boots, you can adjust the height of the Shank by shortening or lengthening the paper pattern at the Match Line (rather than adjusting the length at the the top of the Shank or adjusting the legth of the knitted cuff).
Cut and Mark Your Fabric
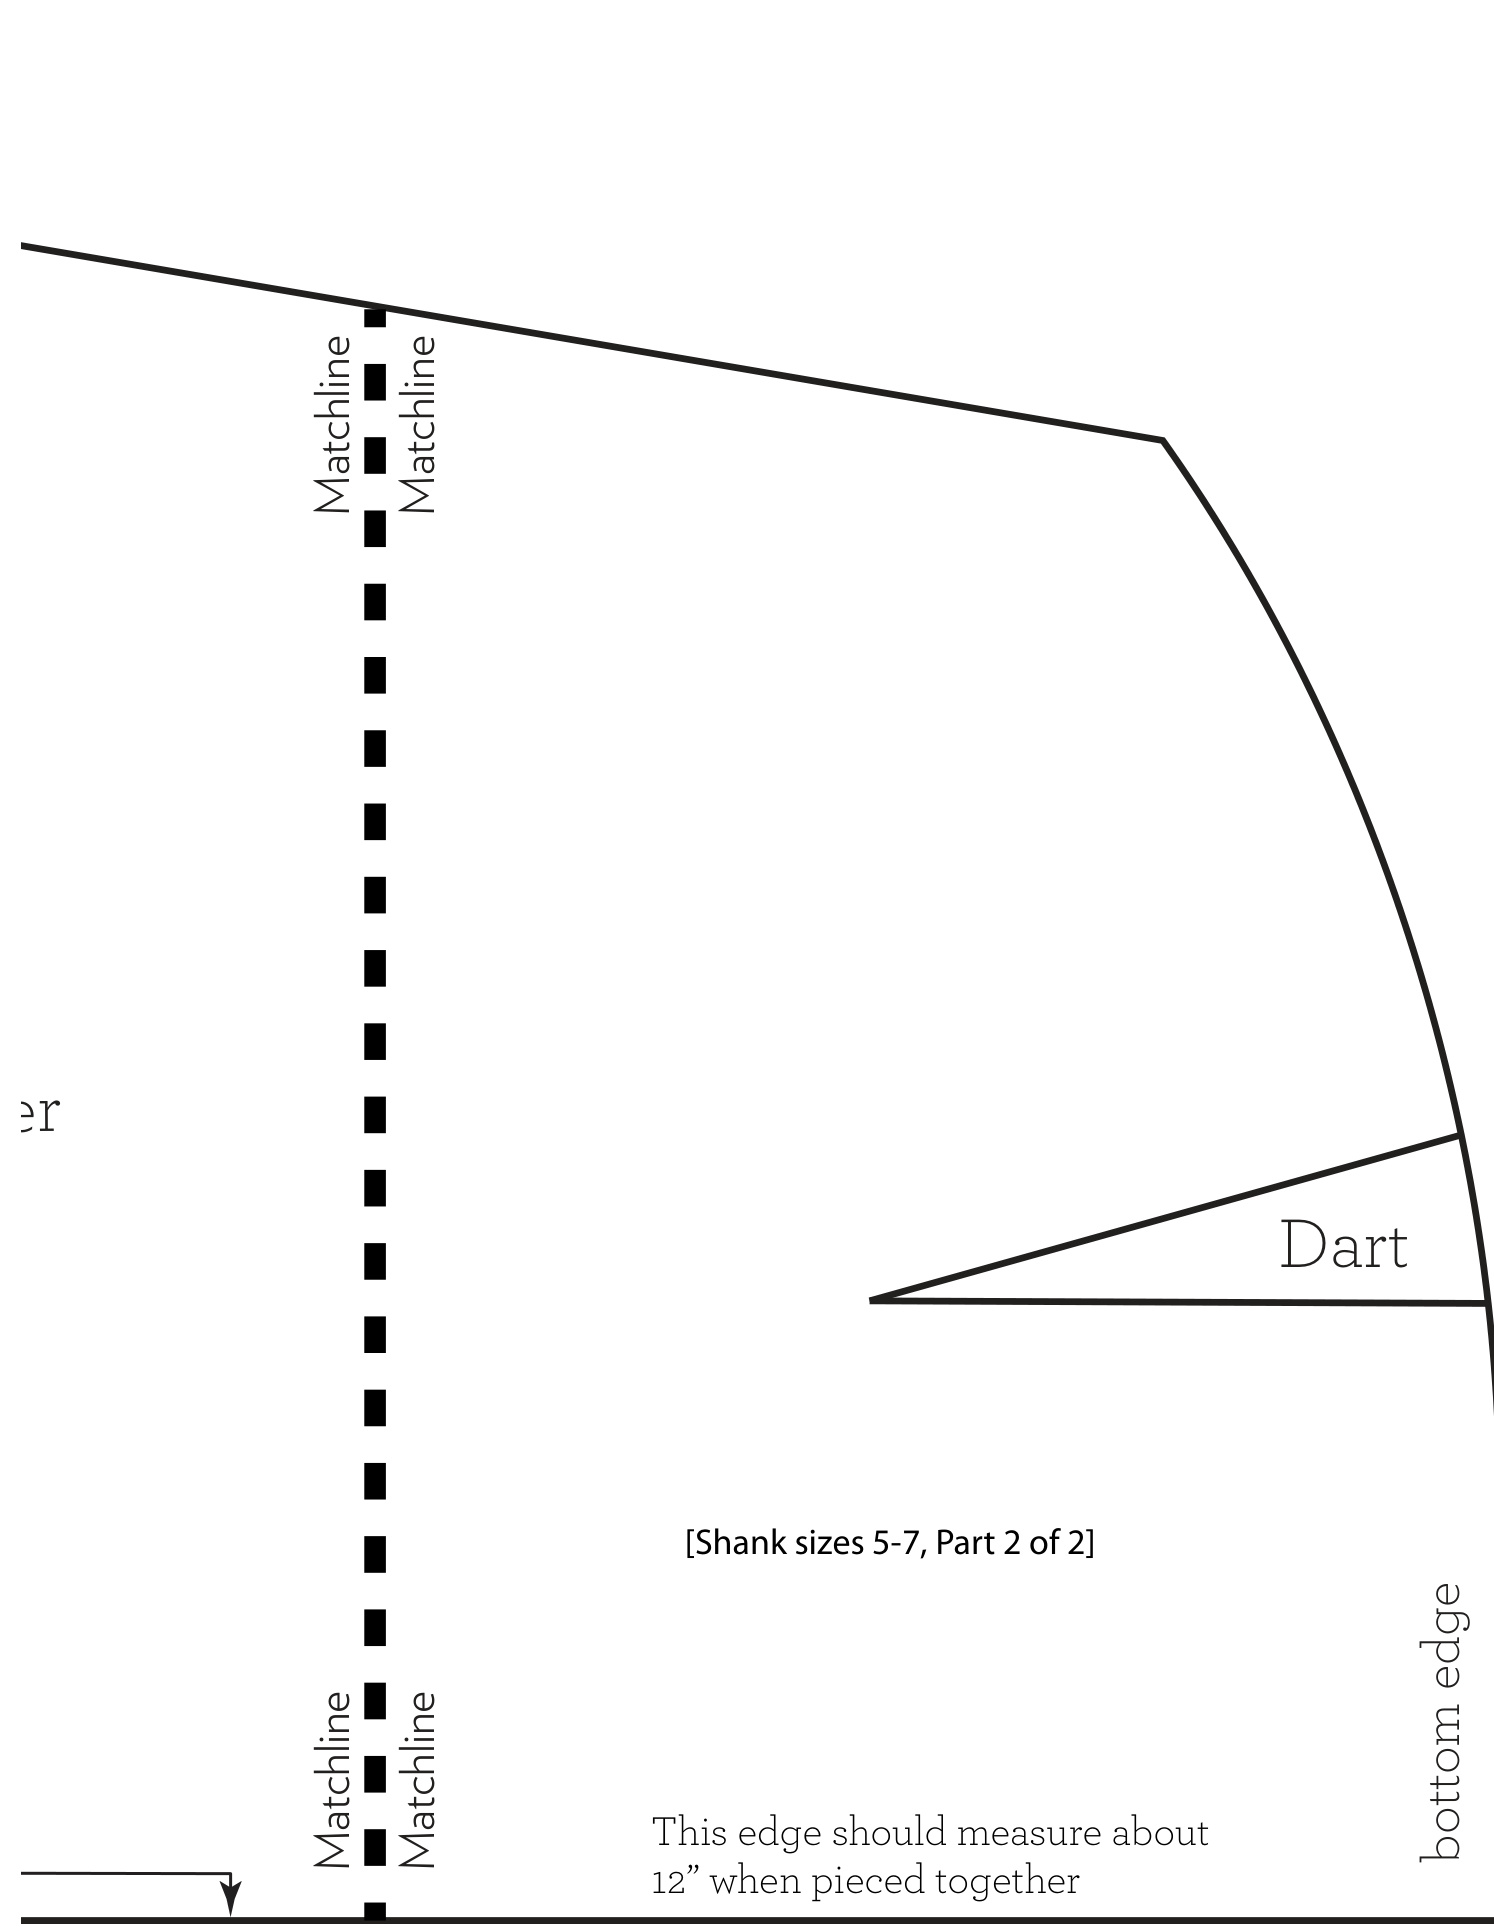
Cut out the three pattern pieces corresponding to your boot size. Due to their size, several of the pieces will require taping two parts together at the Match Line. Lay your pattern pieces on one layer of fleece fabric at a time, making sure the Shank and Upper pieces lay in the same direction on your fabric (e.g. with nap). Next, before removing the paper pattern from the cut Shank piece, transfer the two sets of dart lines. Here is one way to do this on fleece fabric: (1) to transfer the points where each of the dart lines intersects the cut line, make a small 1/4" cut into the seam allowance at those points. (2) to transfer the intersecting point at the bottom of the dart's “V", insert a sewing pin into the paper pattern perpendicular to the pattern/fabric through the fabric underneath. Carefully lift the pattern piece slightly and insert another pin on the wrong side fabric at the point where the first pin is inserted.
Sew the Darts
To sew the two darts on each liner, fold the fabric in half so that the right sides of your fabric are together, the two cut markings are aligned, and the straight pin marking the bottom of the “V" is at the edge of the fold. Sew a line from the cut markings to the straight pin, being sure to let your sewing machine needle run completely offthe folded edge of the fabric at the pin.
Sew the Upper to the Shank
With right sides together, pin the inside edge of the Upper to the bottom edge of the Shank. If you find that your fleece does not adequately stretch to allow the two edges to line up perfectly, you may need to clip the seam allowance of the inside edge of the Upper every 1" or so. This will permit the Upper piece to lengthen and curve around the Shank piece more smoothly. Once you have sewn this seam, flatten the seam allowances open. Working on the right side of the fabric, stitch two lines parallel to the seam 1/4" on either sides of the seam in order to keep the seam allowances flat on the inside of the liner. Trim the seam allowance to 1/8" from these sewn lines.
Sew the Back of the Shank/Upper
Fold the Shank/Upper piece in half along the center front with right sides together. Sew closed the center back seam of both pieces in one continuous seam. Flatten the seam allowances open. Sewing on the right side of the fabric, stitch two lines parallel to the seam 1/4" on both sides of the seam in order to keep the seam allowances flat on the inside of the liner. Trim the seam allowance to 1/8" from these sewn lines. [Note that this seam can be tricky to sew because the Shank is now a tube.}
Attach the Sole
With the liner inside out, pin the Sole to the outside edge of the Upper piece, with right sides together, taking care to match the Toe of the Sole to front of the Upper and the Heel of the Sole to back of the Upper. Sew around the perimeter of the Sole.
Attach the Knitted Cuffs
The last step is to sew the finished cuffs to the top of the fleece liners. With the fleece liner right side out, insert the finished cuff into the liner so that (1) the right side of the cuff is against the wrong side of the liner and (2) the cast off (non-ribbed) edge of the cuffis flush with the top of the liner. {Note, if you sewed the cuff on straight needles, line up the sewn seam with the liner's center back seam.} With the knit cuff face up, sew around the top edge of the liner. Turn the cuff to the right side of the liner and you're done!
Wearing Your Liner
The easiest way to wear your new boot iner is to insert your foot into the liner first, then slide your foot/liner into the boot. Turn down the cuff over the top of the boot and you are ready to go!