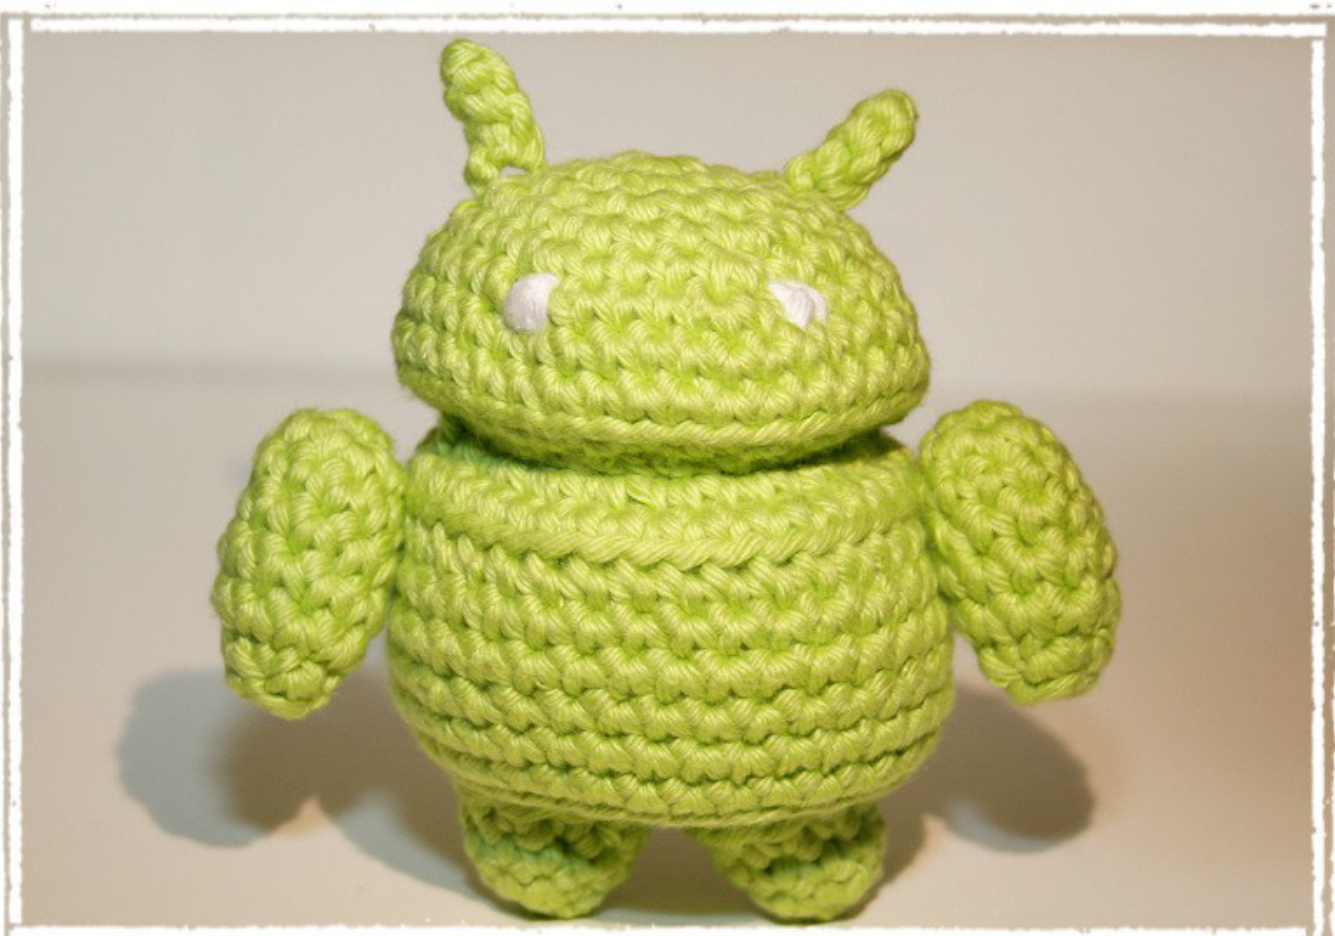
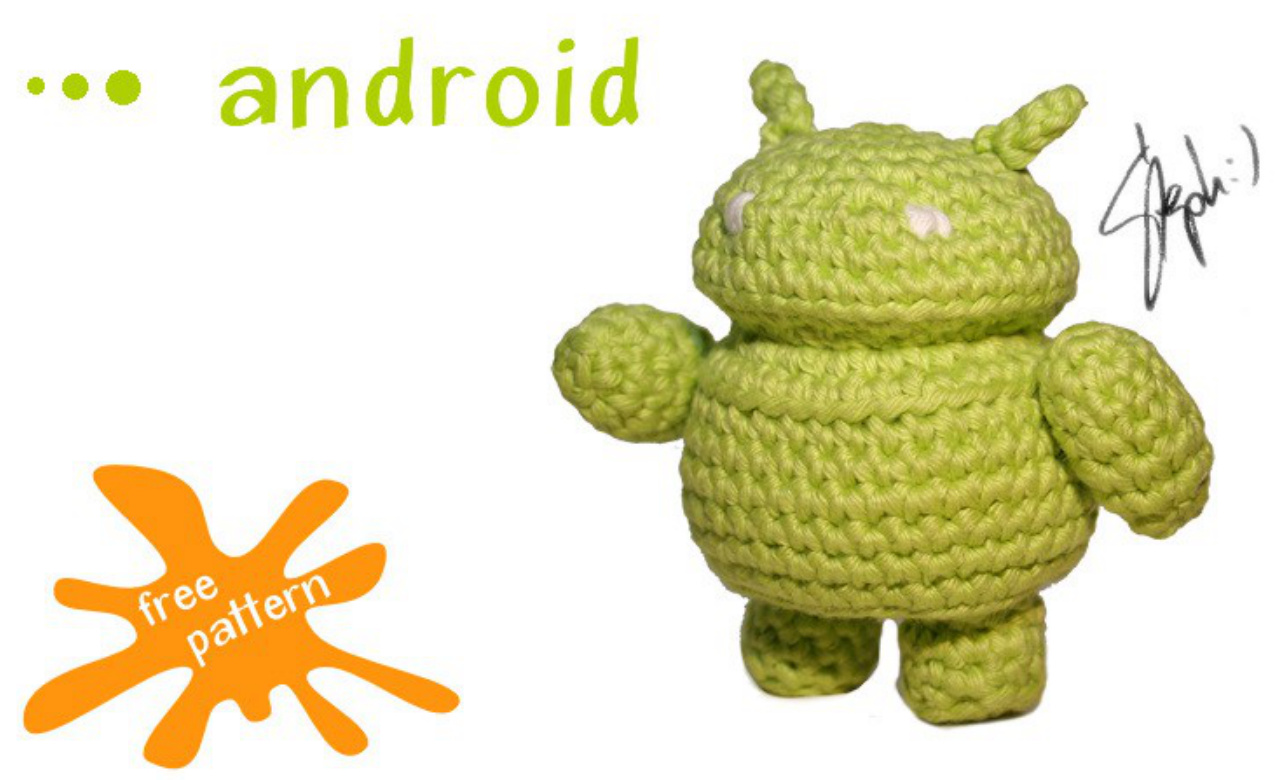
crochet pattern
Useful Things To Know
pages to print if you only need the pattern-instructions (without the step-by-step images) pages 4 to 7
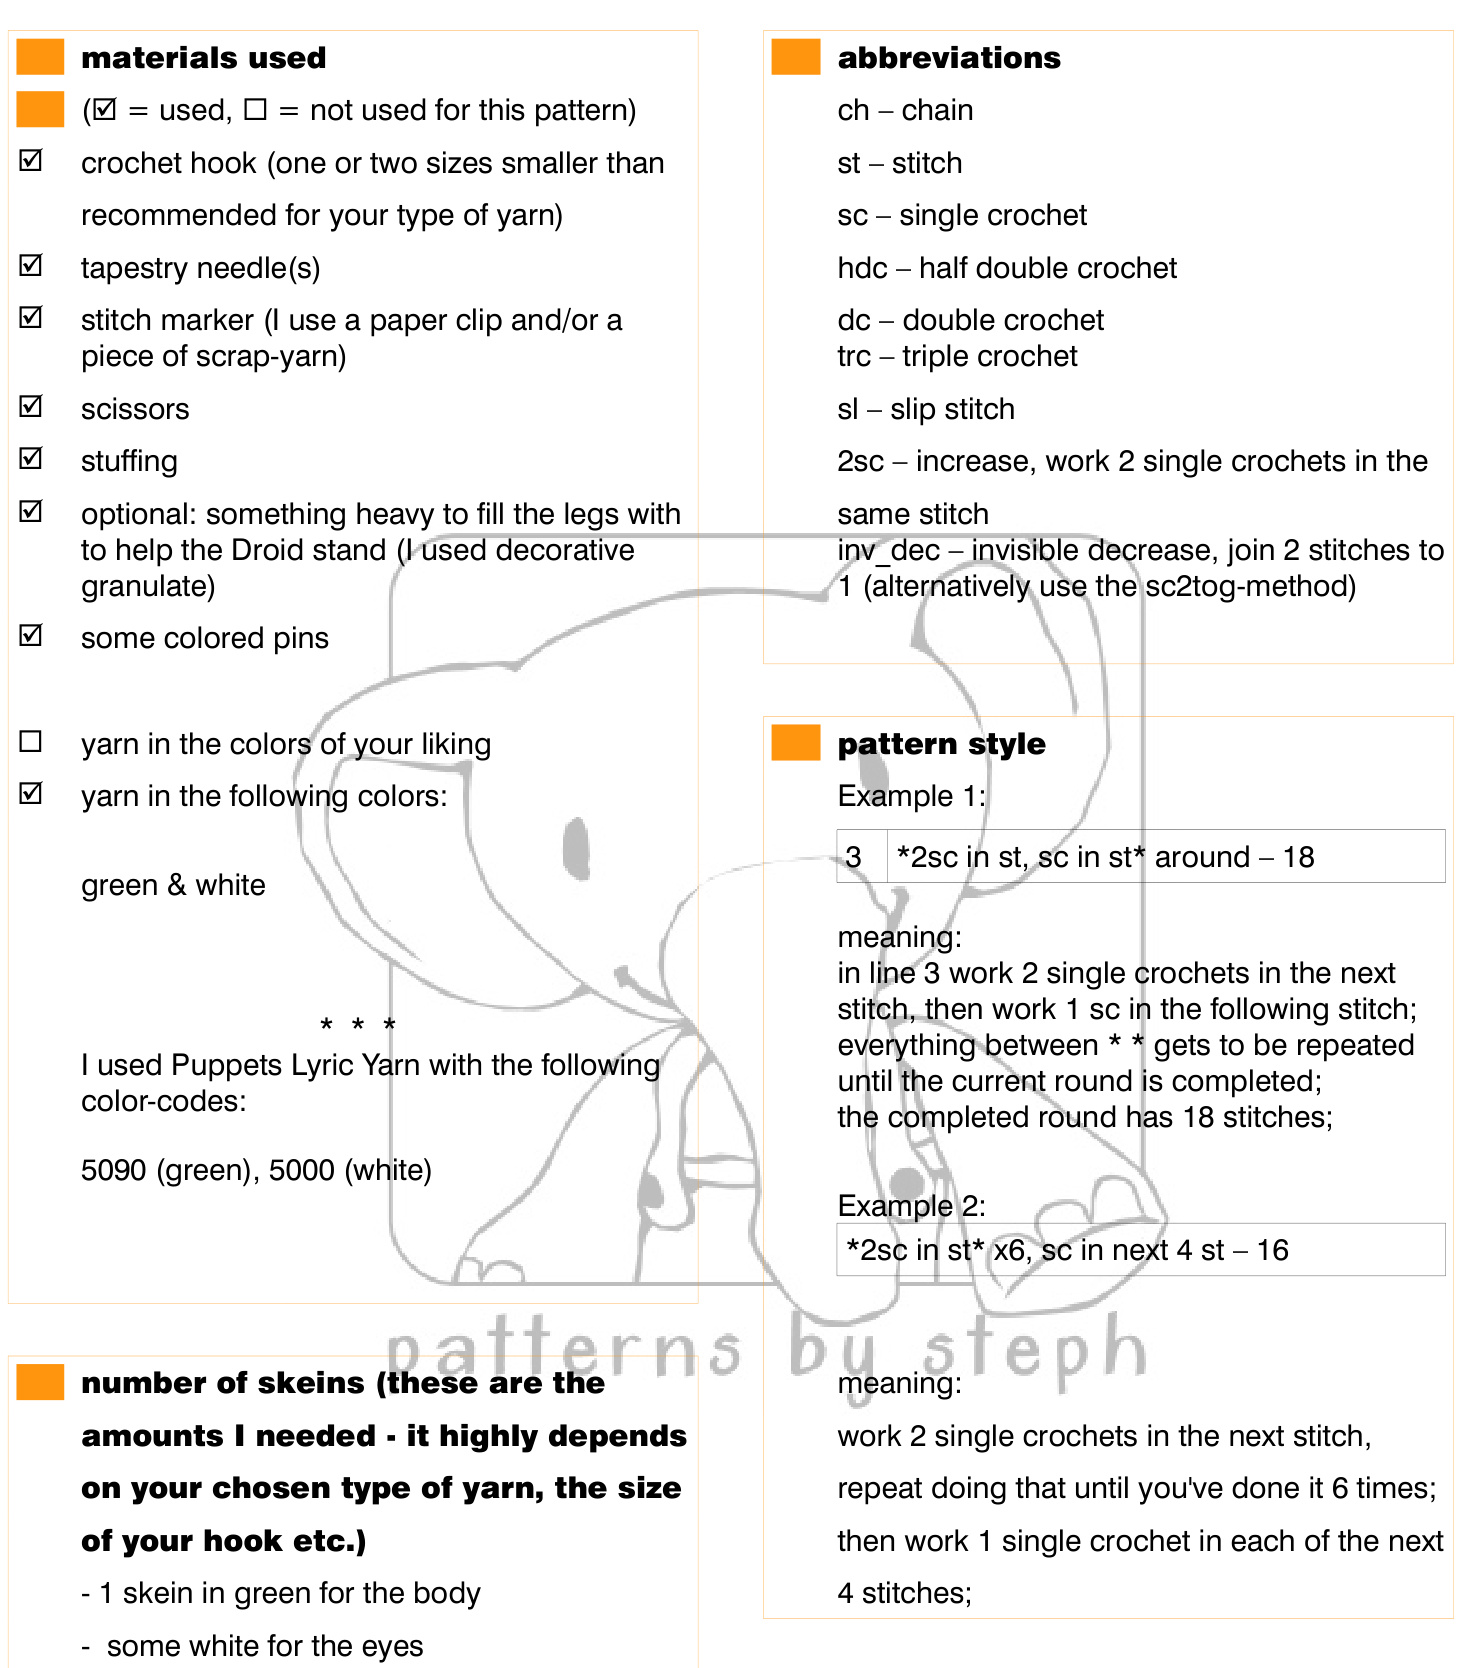
yarn-info
recommend washable yarn and stuffing you'remakingthi I also use Puppets Lyric yarn for embroidery. Feel free to use embroidery-thread instead. language english, US crochet therms skill level easy For the figures/items you see in this pattern I used Puppets Lyric Yarn (8/8, DK, Light Worsted) and a 3 mm hook. with Puppets Lyric Yarn and a 3 mm hook I got the following size(s) for the figures/items: 7.5 cm (without antennae) Just tight enough so the stuffing can't be seen/can't come out. It helps to use a crochet hook one or two sizes smaller than recommended for your chosen type of yarn.
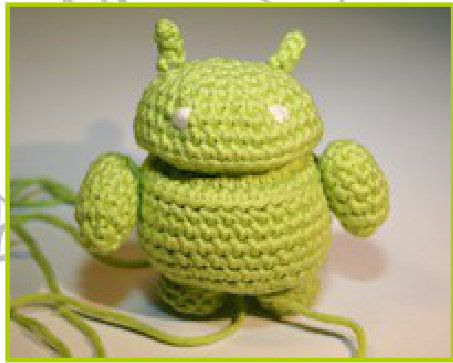
ANDROID - The Pattern
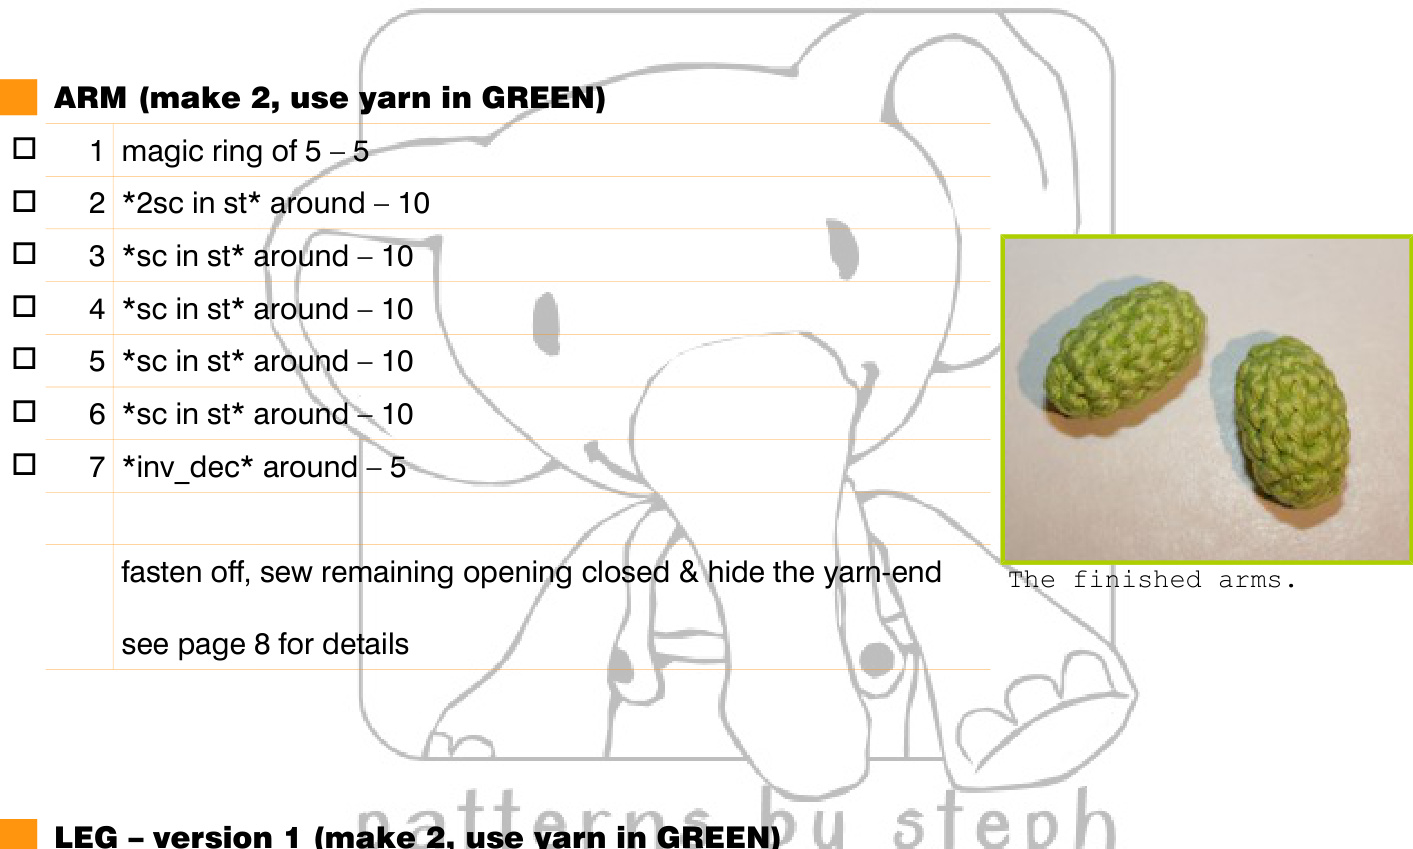
Info: Make the arms, legs and antennae first so that you have them at hand when you need them. In case you work with only one skein of green yarn and don't have another one at hand, take a long strand of yarn aside for sewing on the arms. And another strand of yarn for the optional step of sewing the notch between head and body closer/tighter (see page 14). Head and body are crocheted in one piece and you'll have to sew on the arms and antennae in between. You can sew them on after finishing the body, but it's easier doing it in between.
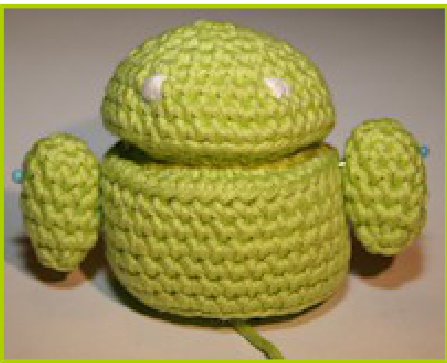
Info: This are the original legs, with rounded bottoms. Your Droid won't be able to stand on its own.
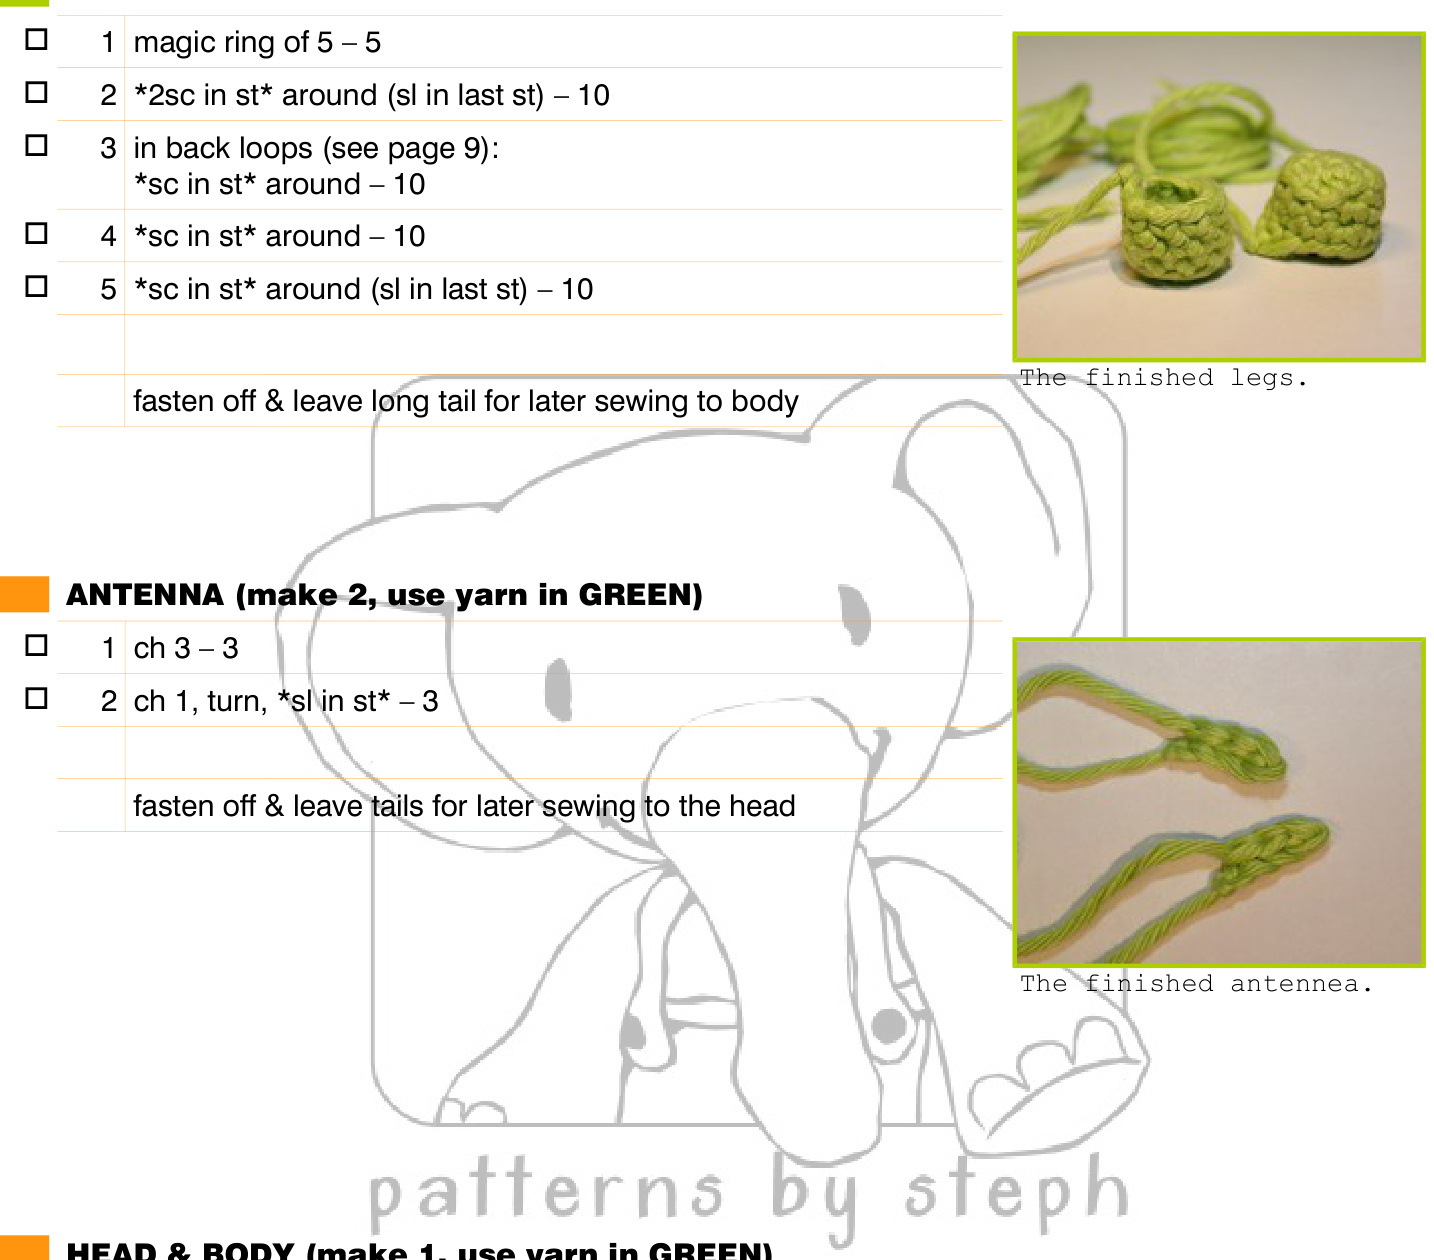
| 口 | 1 magic ring of 5 - 5 | |
| 2 | *2sc in st*around-10 | |
| 口 | 3 | *sc in st* around - 10 |
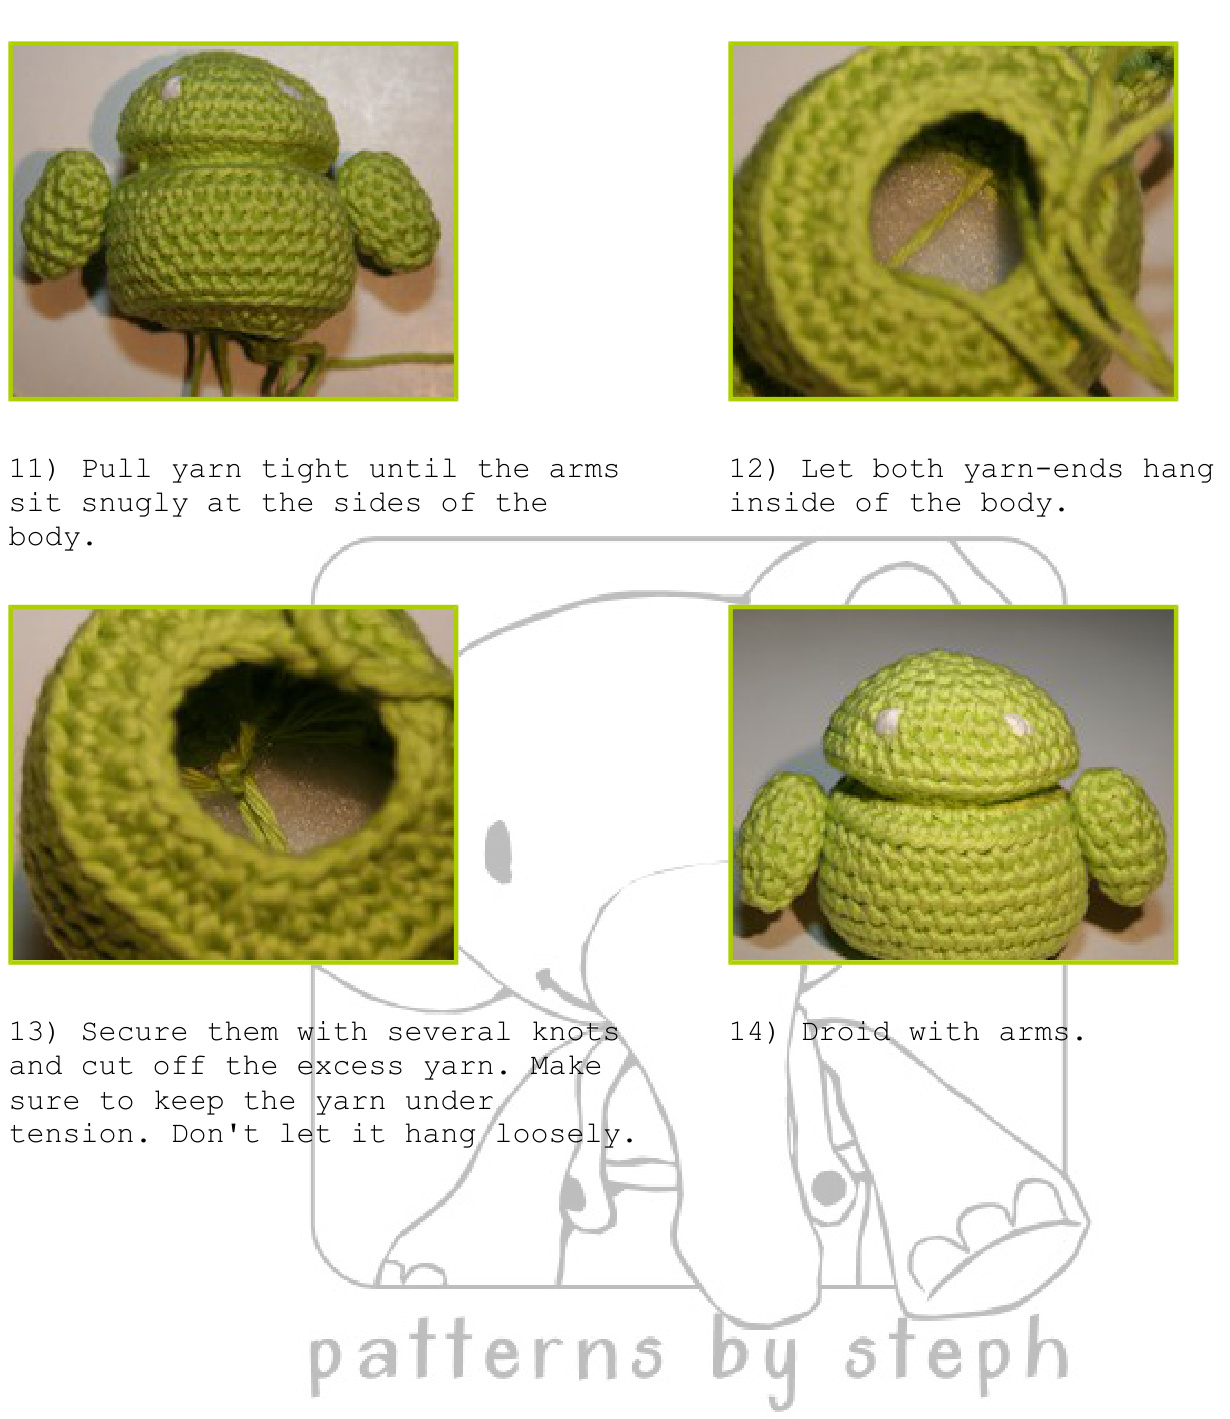
| 4 | *sc in st* around (sl in last st)- 10 | |
| fasten off & leavelong tail for later sewing tobody |
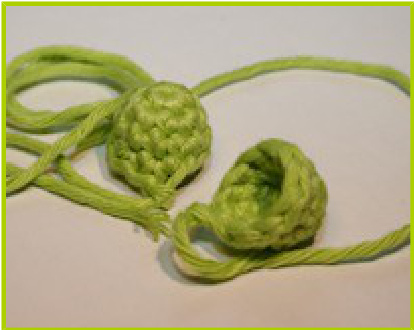
The finished legs.
LEG - version 2 (make 2, use yarn in GREEN)
Info: This are the modified legs with flat bottoms. The Droid will be able to stand on its own.
Info: HEAD and BODY are crocheted in one piece.
Some rounds are crocheted in either the back loop or the front loop to create the notch between head and body.
| ■ | 1 | magic ring of 6 - 6 |
| 口 | 2 | *2scinst*around-12 |
| 3 | *2sc in st, sc in st* around -18 | |
| 口 | 4 | *2sc in st, sc in next 2 st* around - 24 |
| 5 | *2sc in st,sc in next3 st* around-30 | |
| 6 | *2sc in st,sc in next 4 st*around-36 |

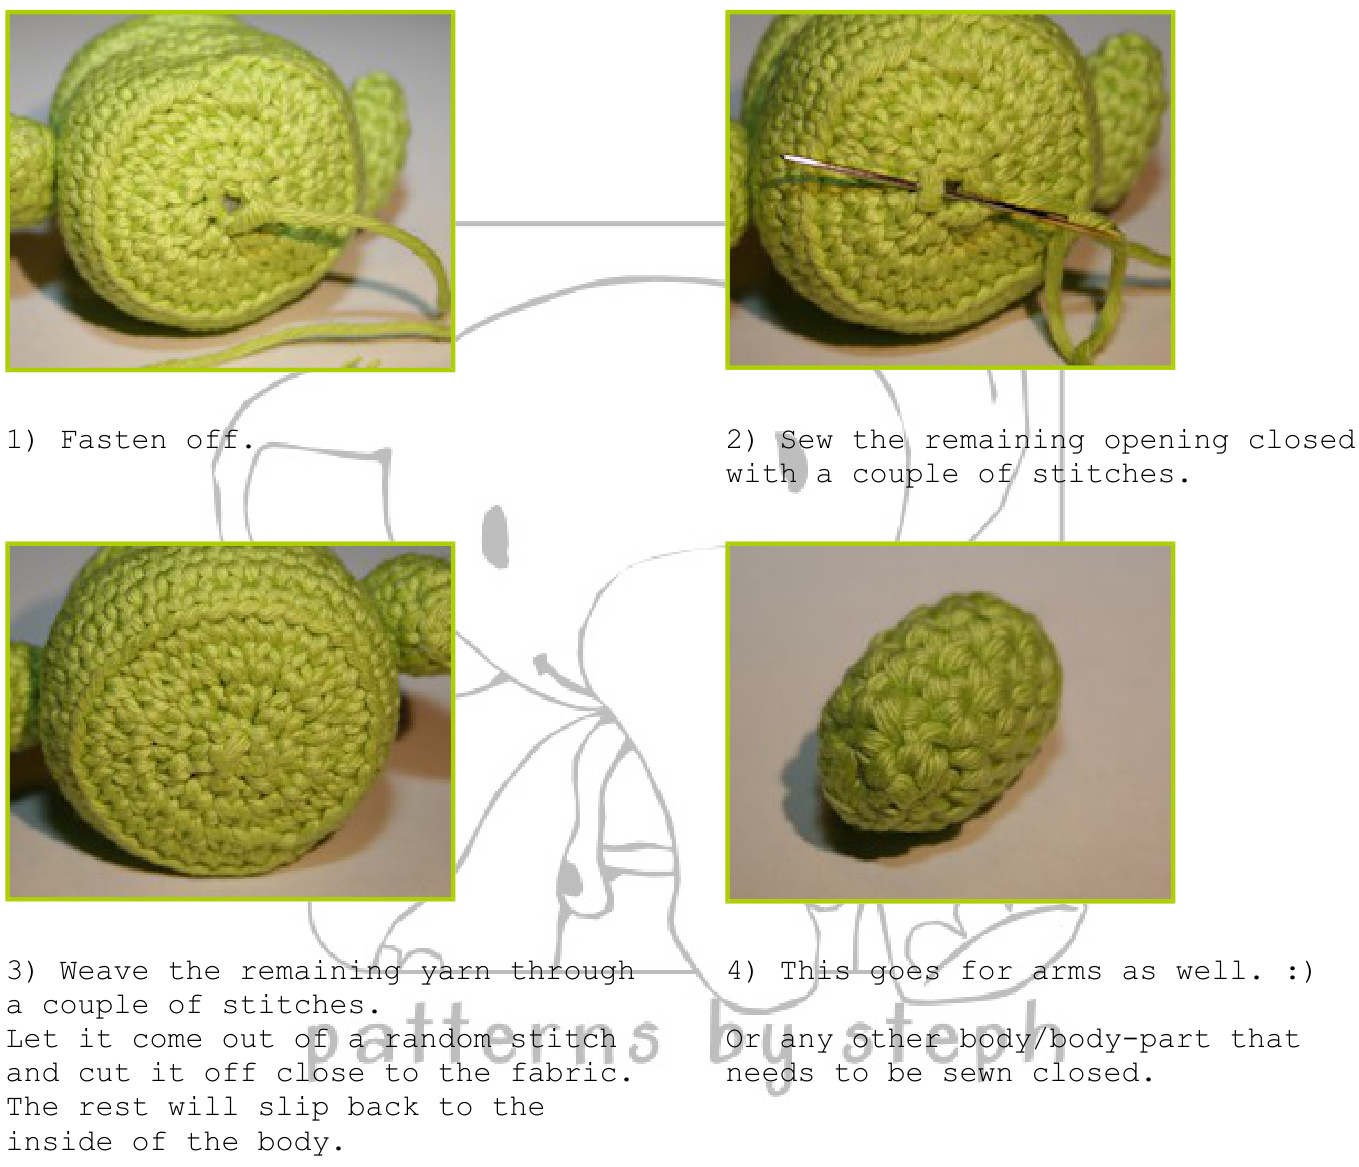
ANDROID - Step-by-Step Instructions
sewing remaining opening closed & hiding the yarn-end
Info: This goes for all openings that need to be sewn closed, like the body and the arms.
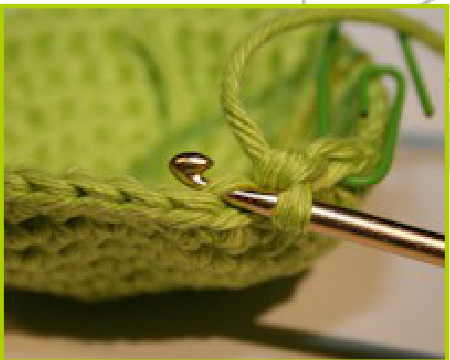
crocheting in back loops & front loops
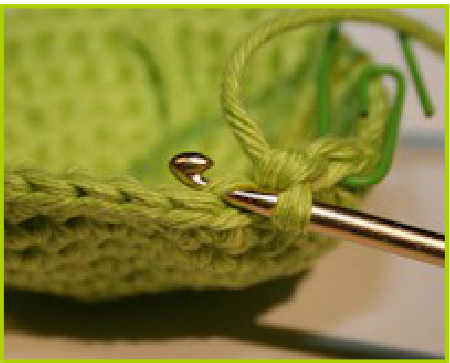

BACK LOOPS: A stitch consists of two loops. Insert your crochet hook between those two loops and guide it under the one farthest away from you (the back loop). Now grab your yarn, pull it through the loop and make a single crochet or whatever stitch is required. Increases are possible here as well. The loop closest to you is the front loop. Guide Your hook through the stitch like You normally would, but instead ofguiding it under both loops, let it come out between them. Now grab your yarn and crochet through that loop.Single crochets, increases and decreases are possible here.
crocheting the notch between head and body
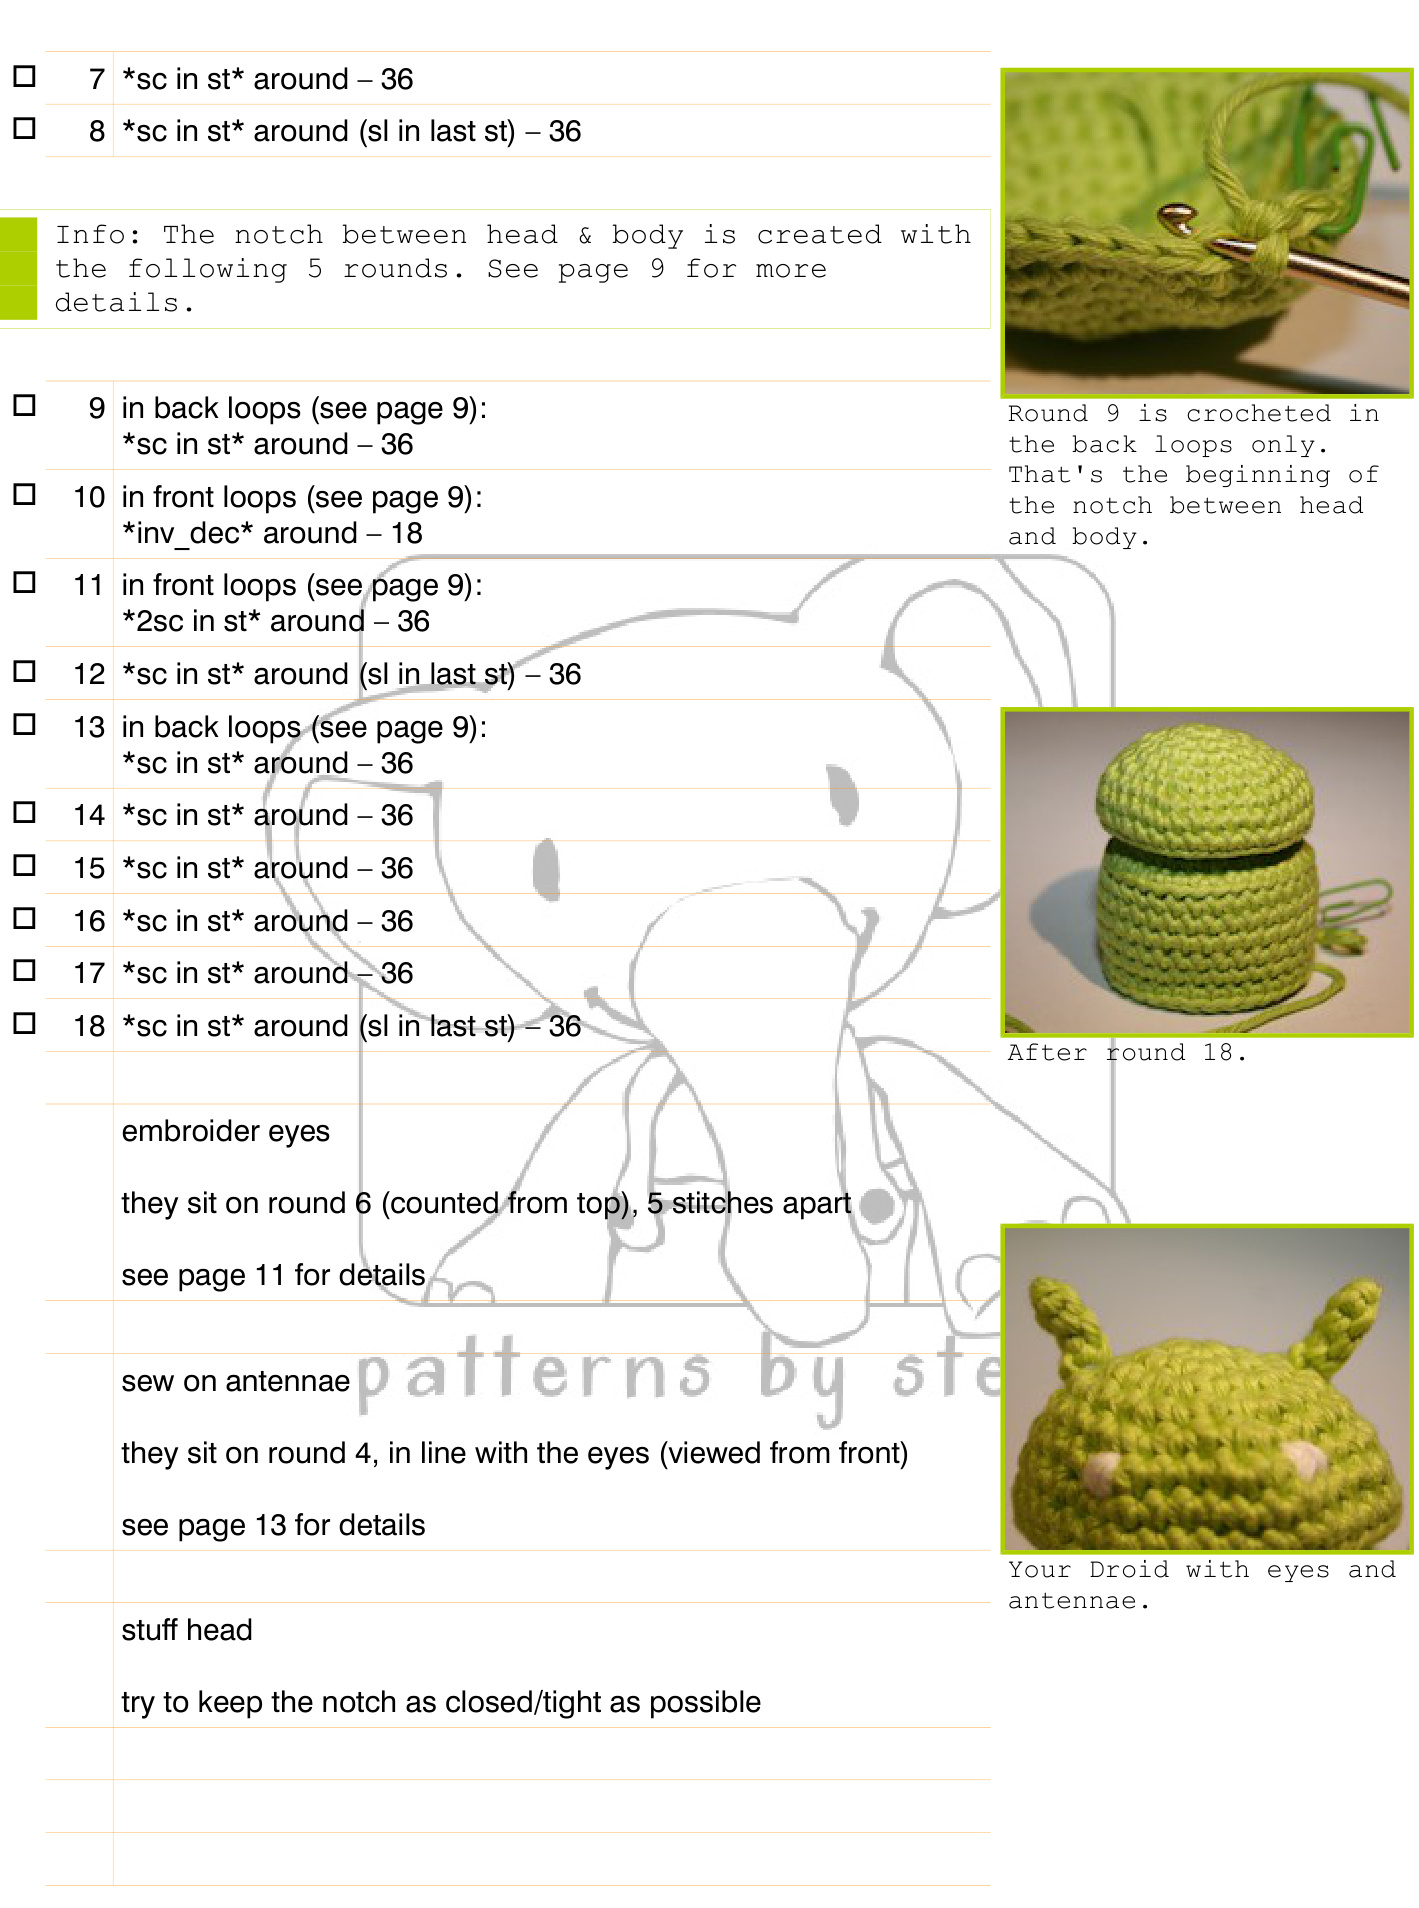
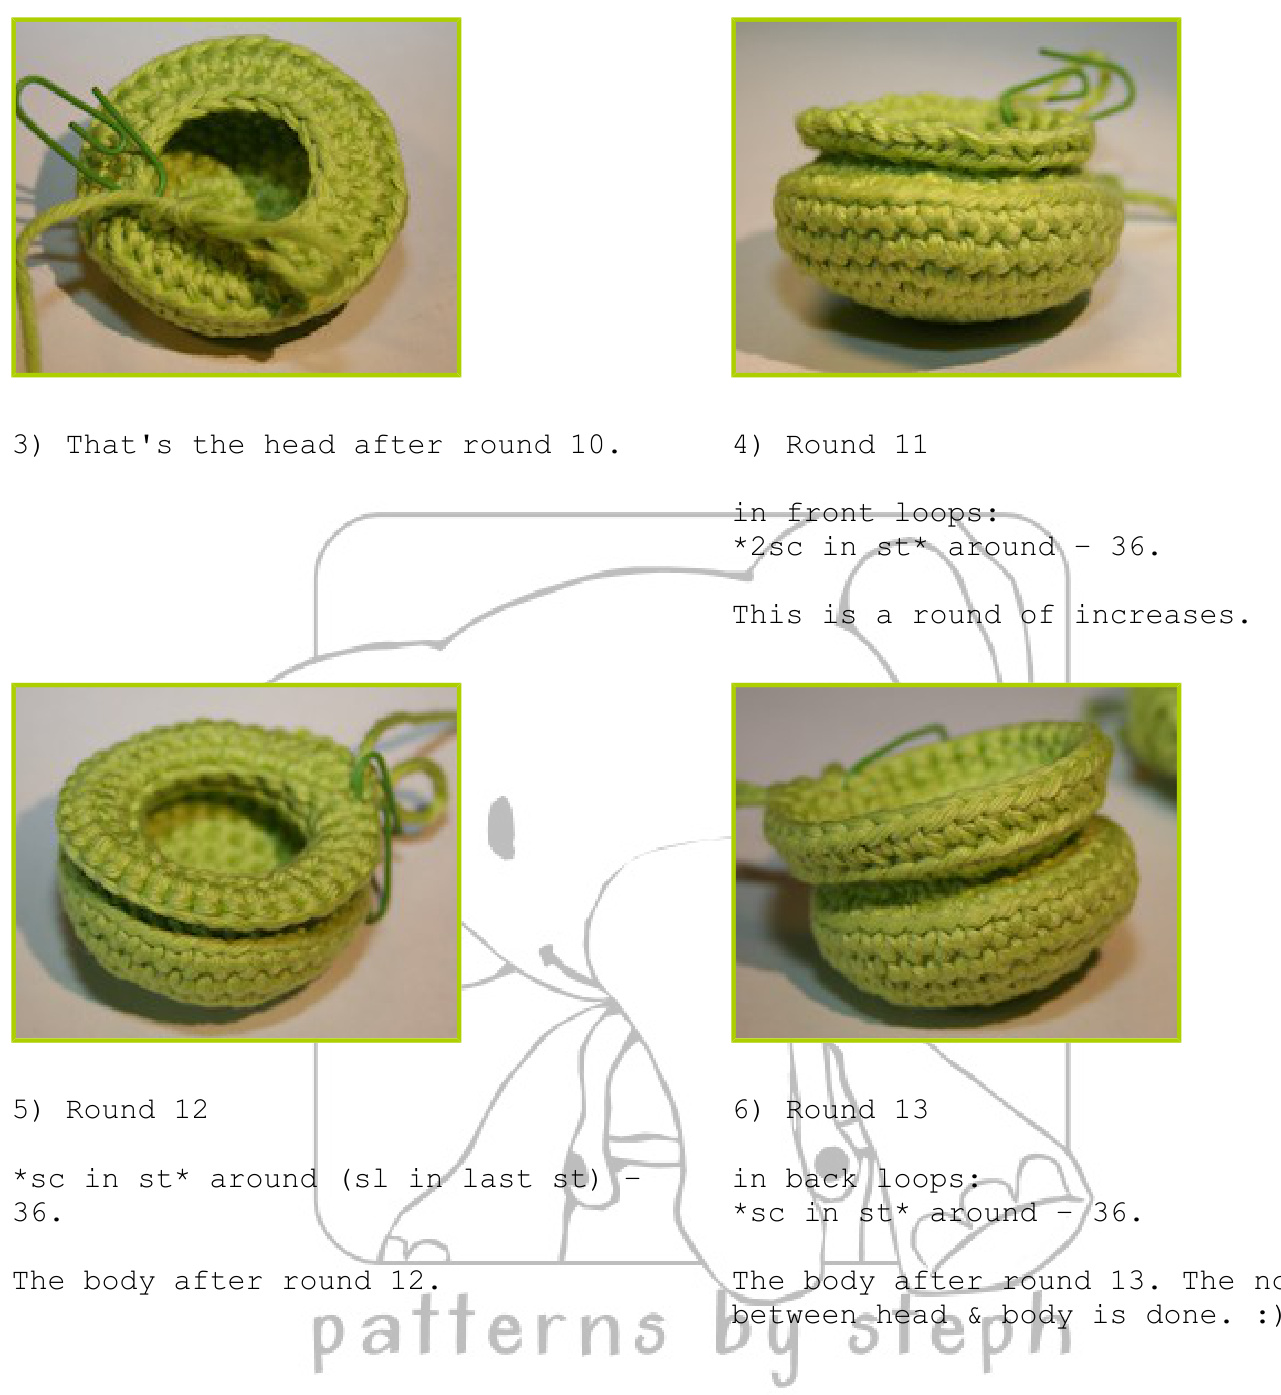
Info: The following steps/show rounds 9 to 13 in detail.
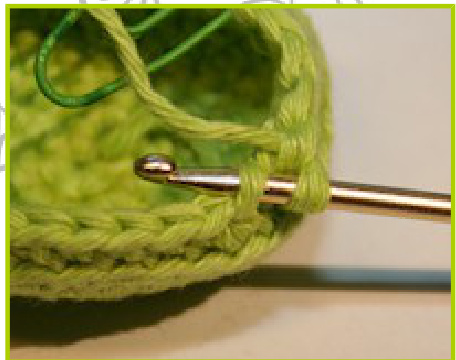
1) Round 9 2) Round 10 in back loops: \*sc in st\* around - 36. in front loops: \*inv_dec\* around - 18. The picture in step 2) shows the finished round 9. This is a round of decreases. See picture in step 3).
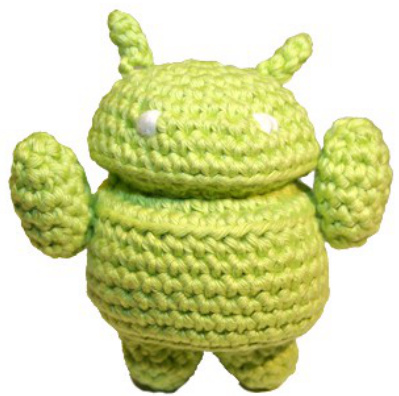
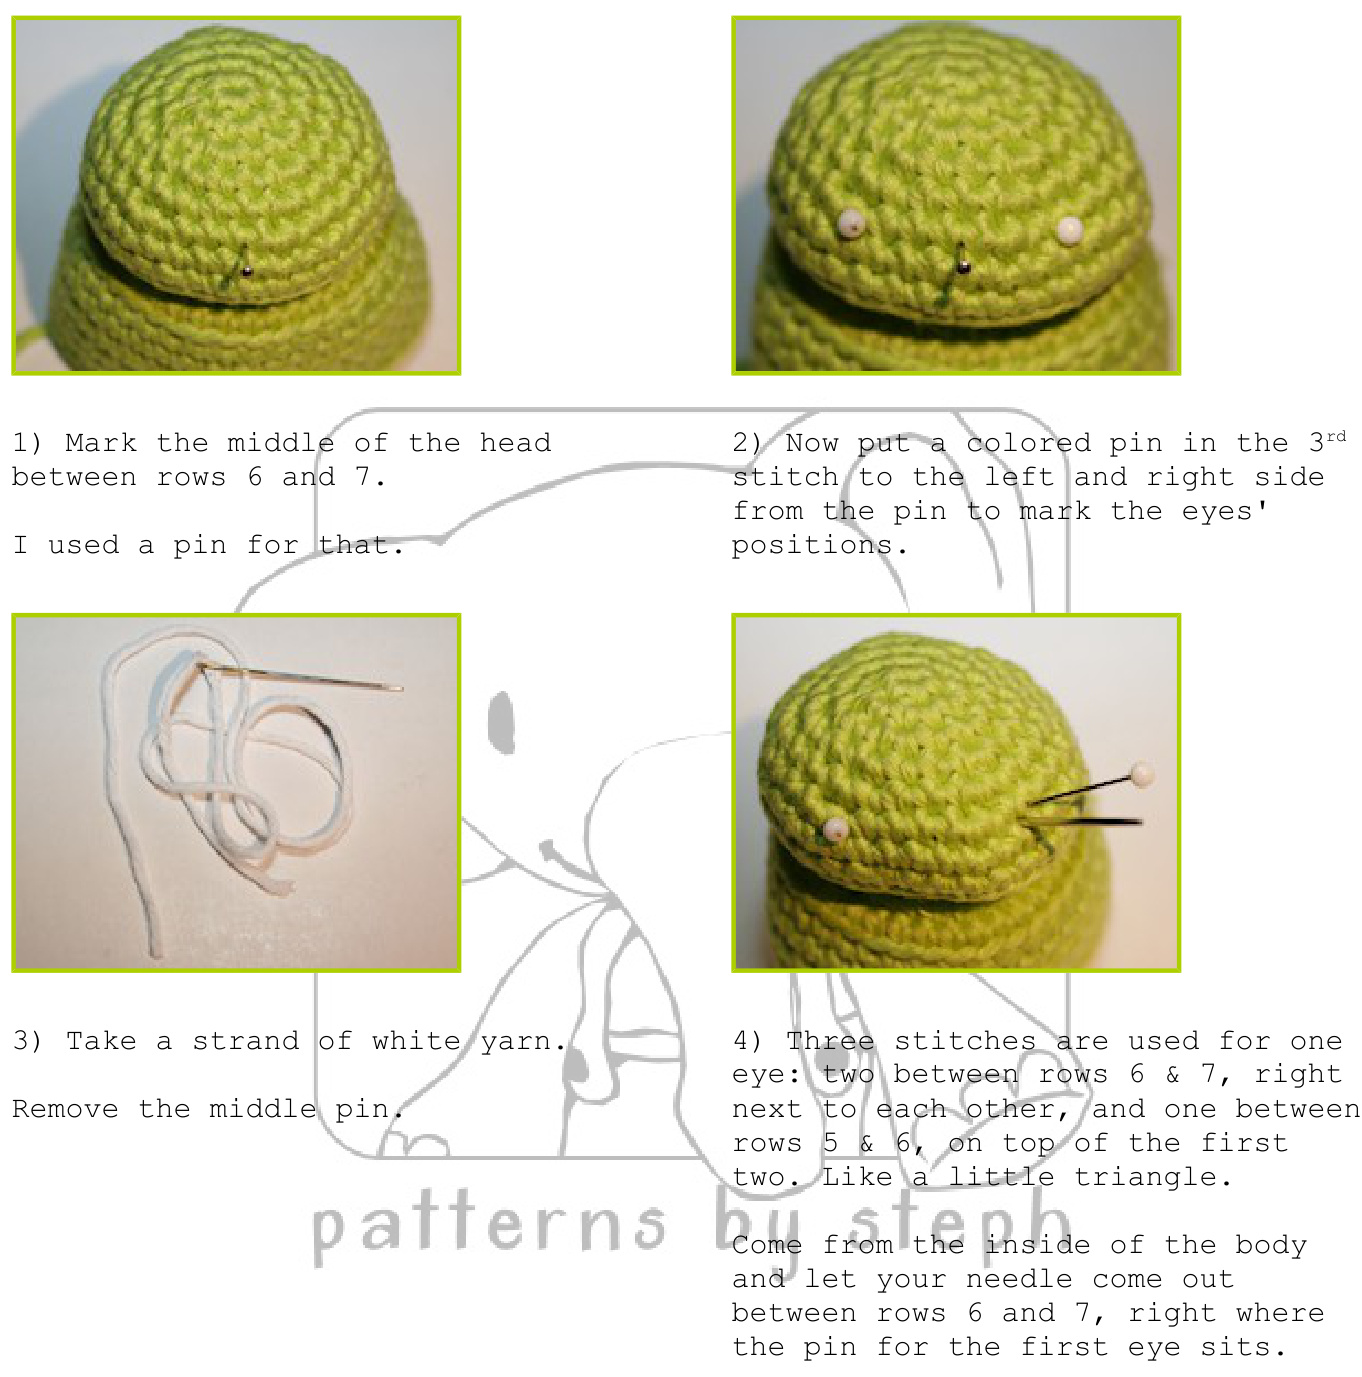
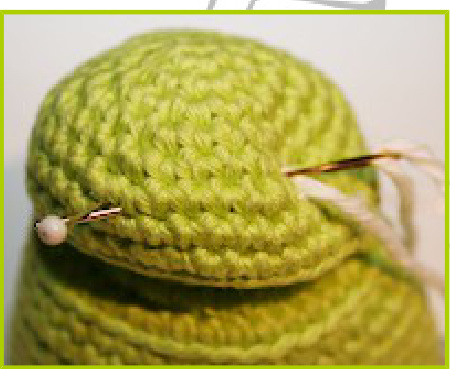
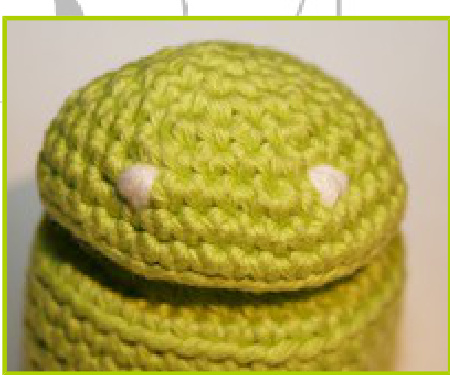
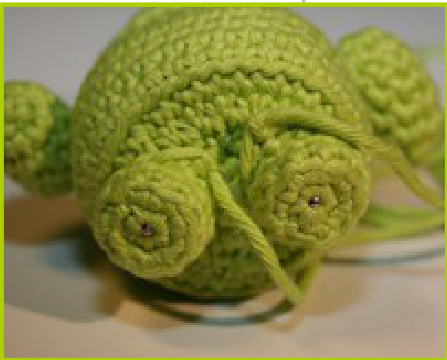
embroidering the eyes
: The eyes sit on round 6 (counted from top) and 5 stitches apart.
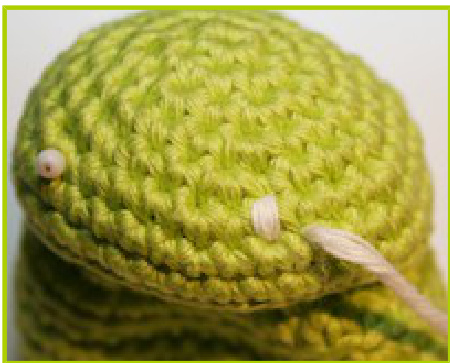
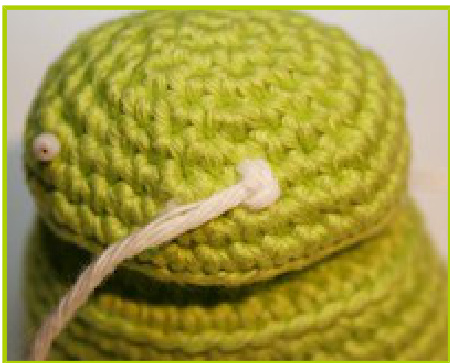
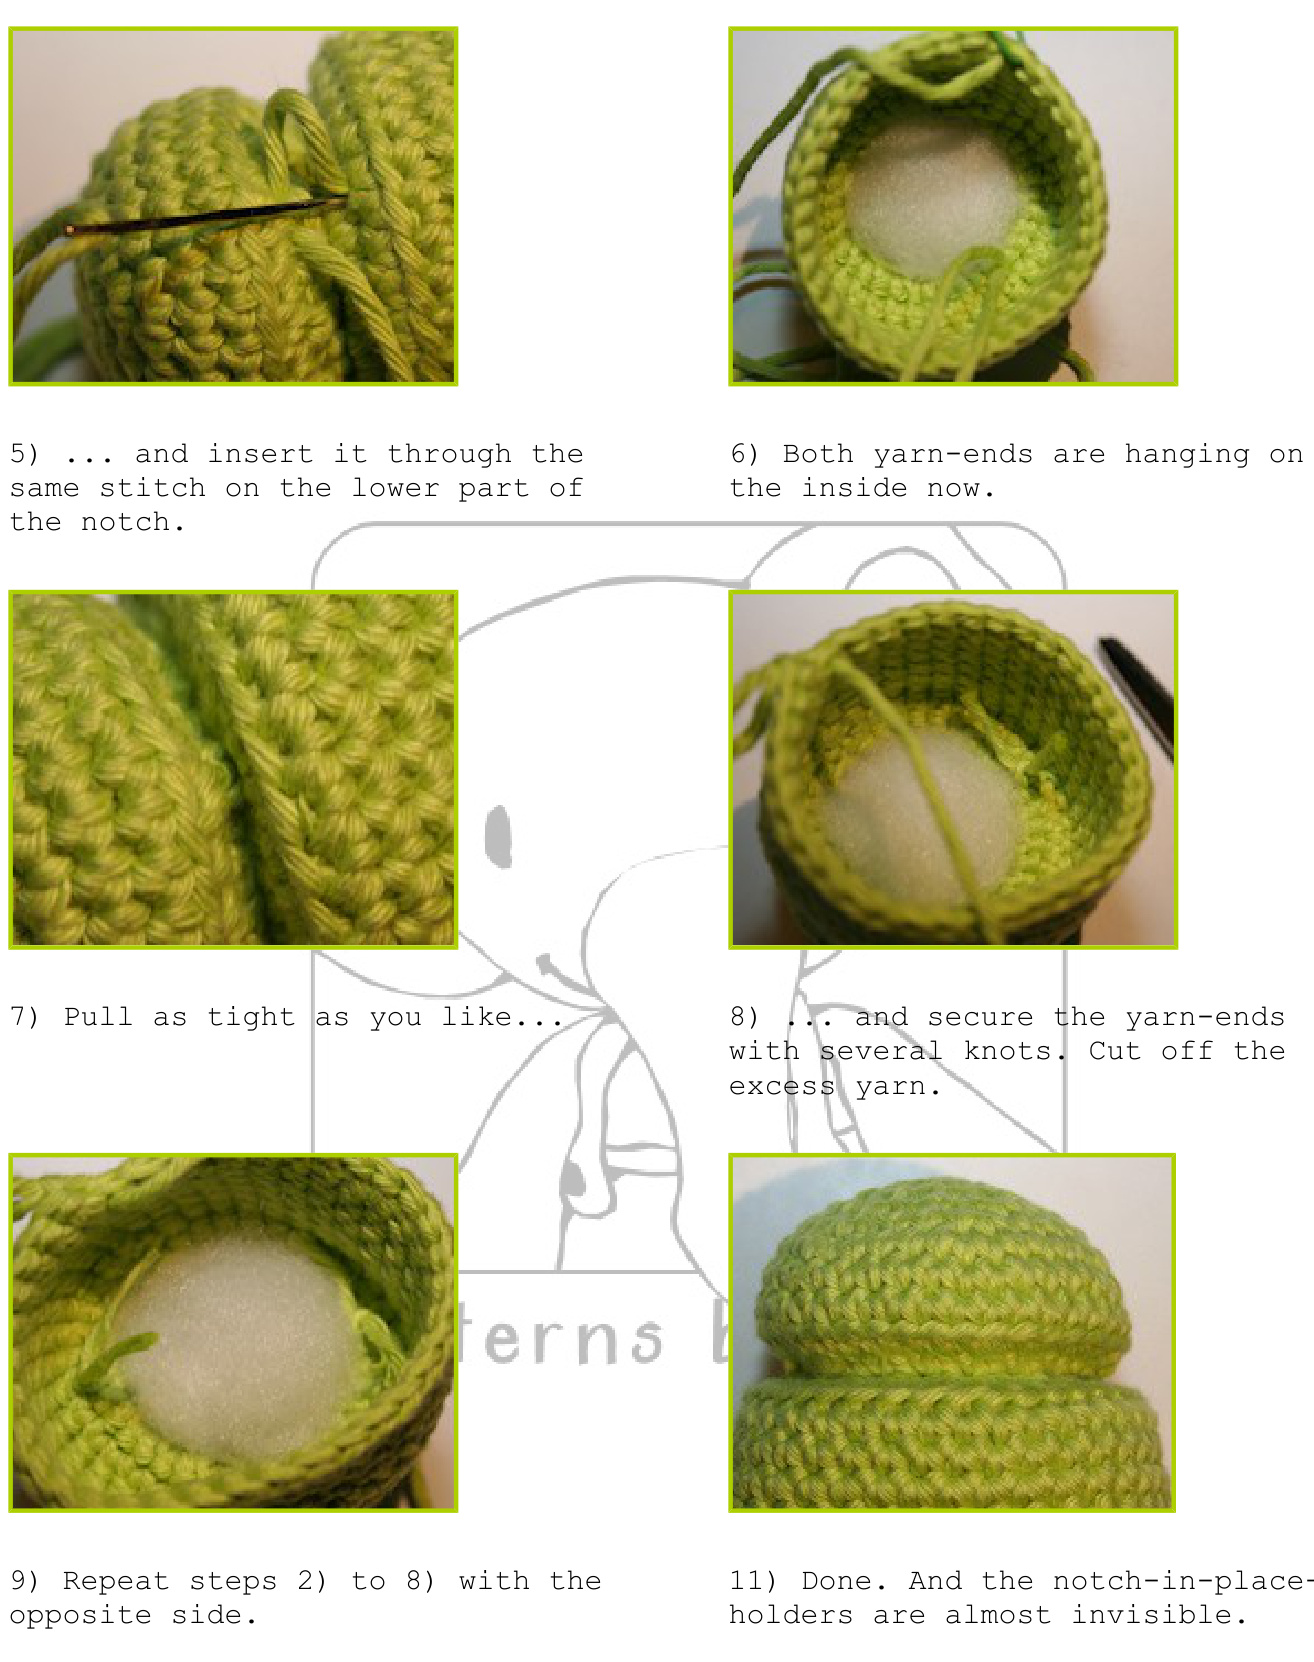
5) Guide your needle through the stitch right above the first one and pull yarn through. Let the needle come out of a stitch between rows 6 & 7 again,right next to the first one you used (see picture). 6) Insert your needle through the stitch between rows 5 & 6 again. Pull yarn through. Guide your needle through the stitch between rows 6/&7 again. Now fill the remaining gaps. always use a weaving technique to do that. Just do what 1ooks good. :)
7) When you're done with the first eye, guide your needle to the body's inside again and let it come out where the second pin sits.
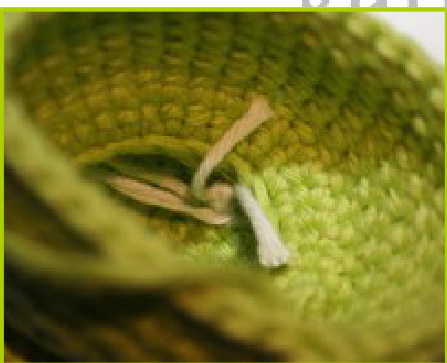
9) Secure the yarn-ends with several knots and cut off the excess yarn. 8) Embrdider the second eye like you did the first one. After thatl guide your yarn back to the inside of the body


sewing the notch closer/tighter
Info: This is optional. You only have to do this, if you think the notch between head and body is too big, or if it keeps opening up, etc.
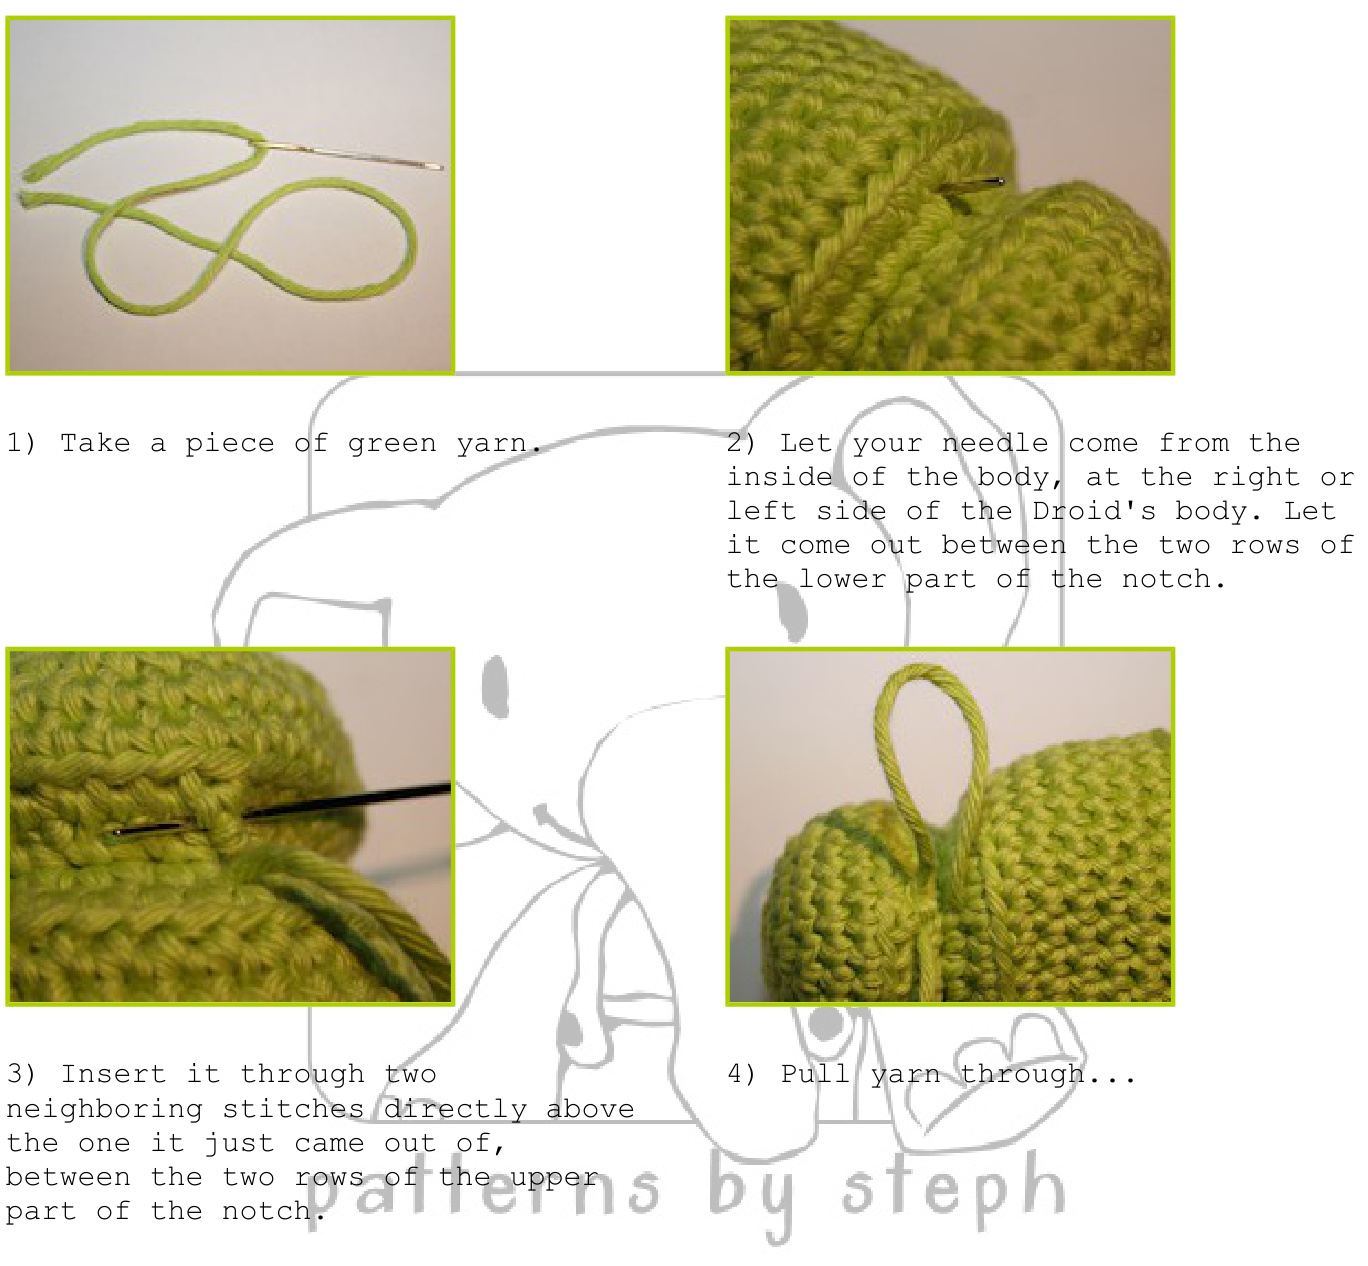
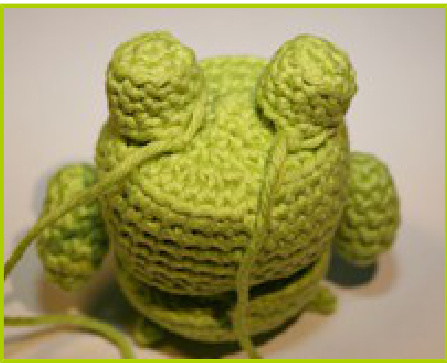
sewing on the arms

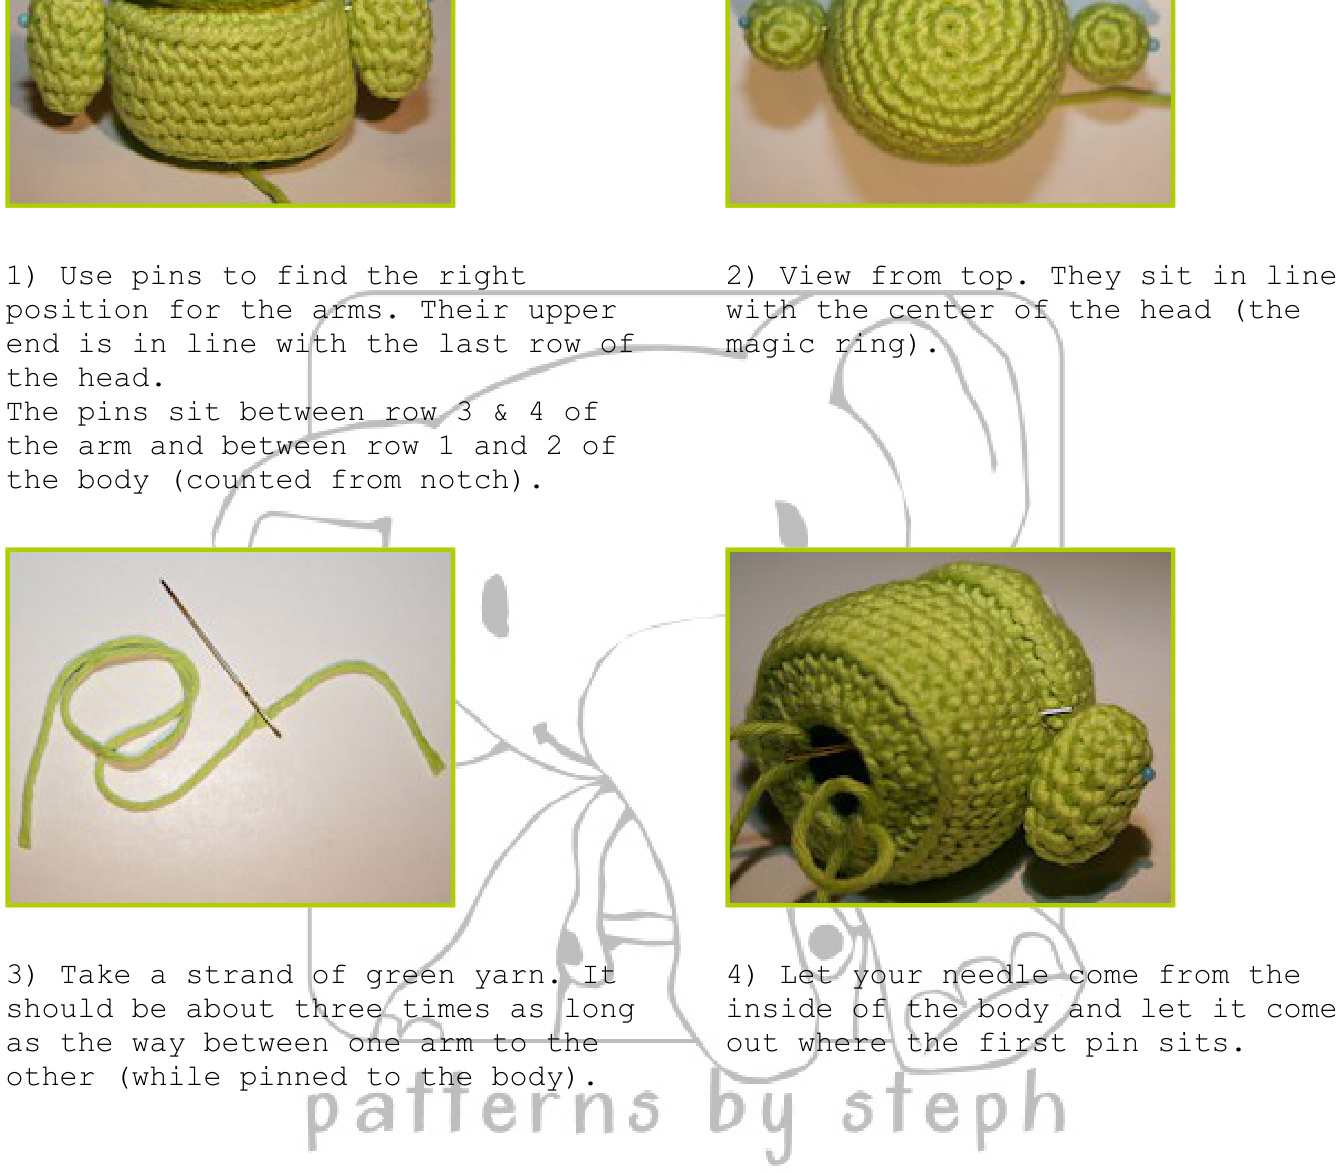
9) Let your needle come out of the other side of the Droid's body now. right where the second pin sits.
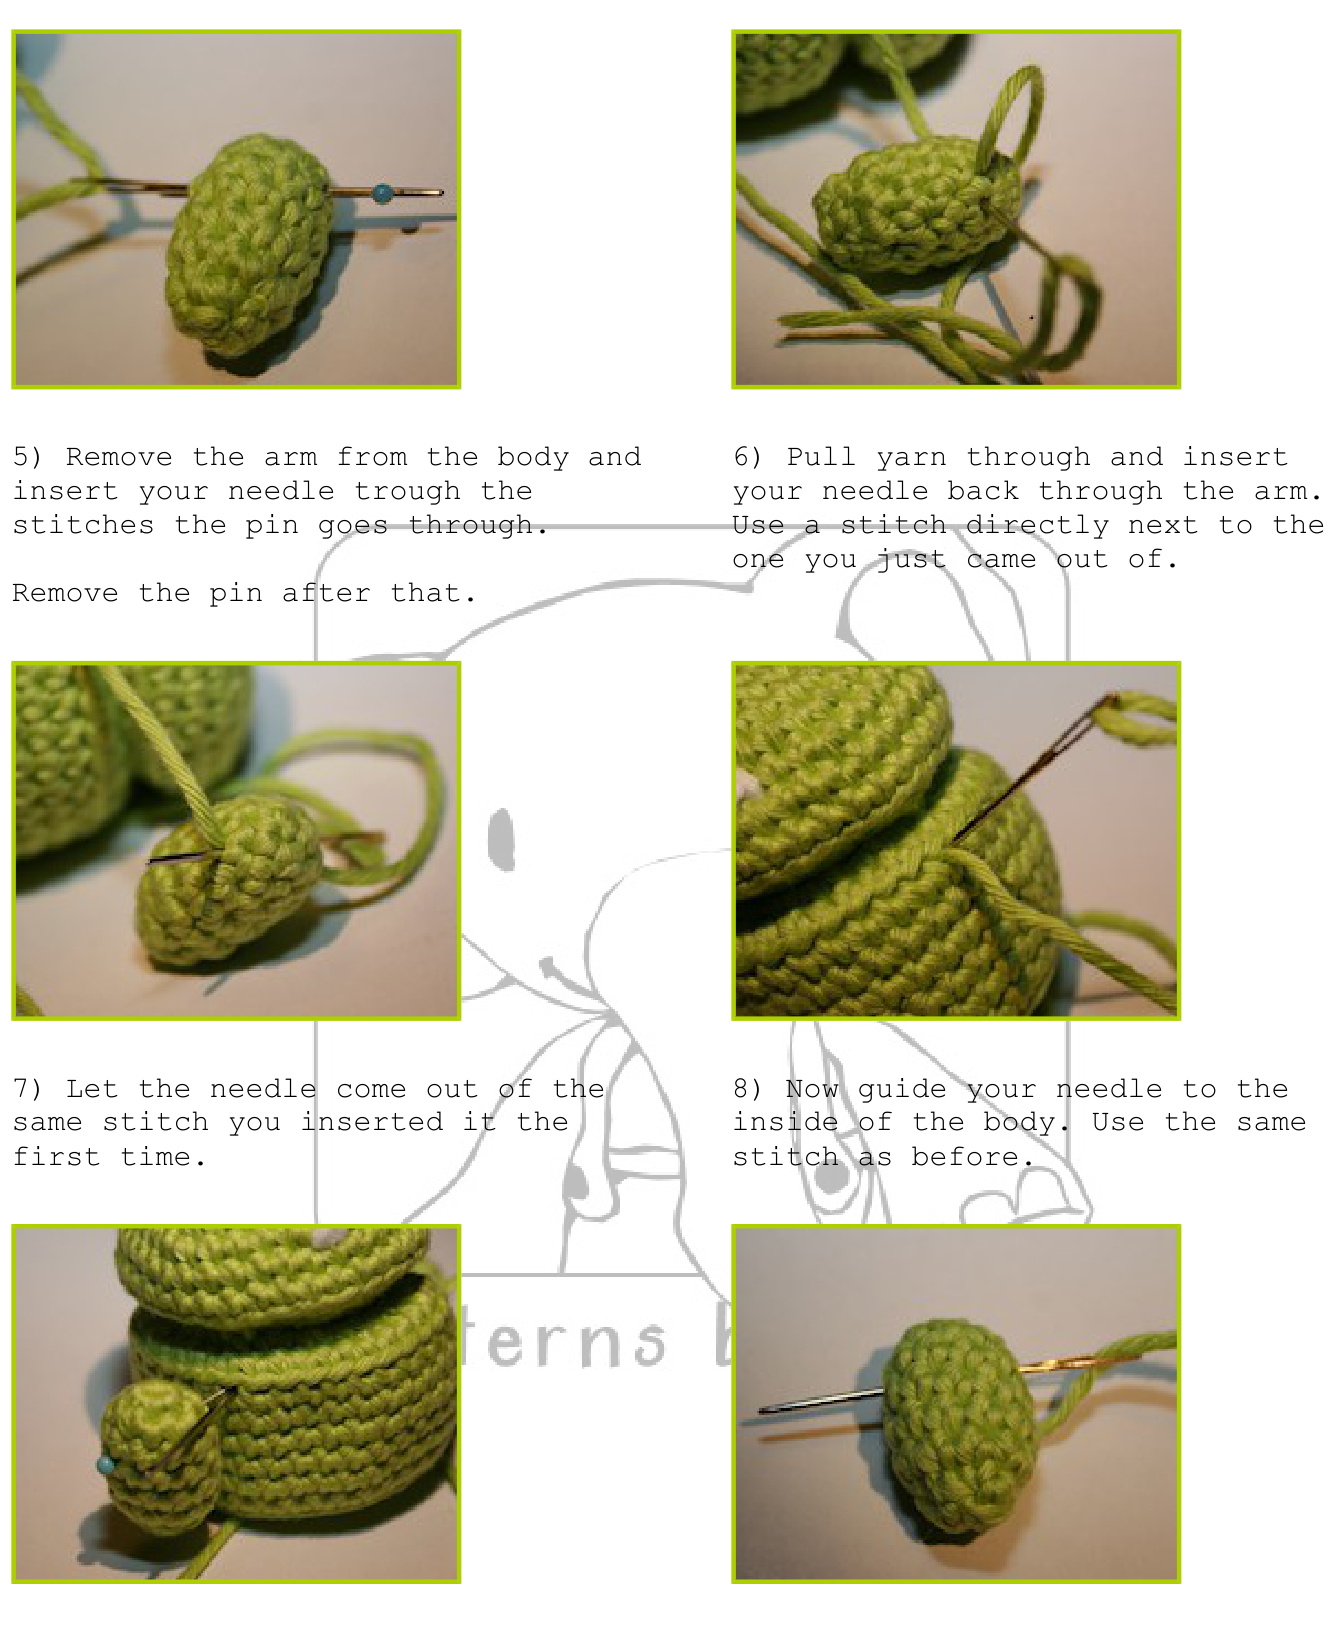
10) Guide it through the second arm just like you did with the first one. And sew it on.
sewing on the legs
Info: It doesn't matter if you made version l or 2 of the legs. The sewing process is the same. The pictures here show version 2 of the legs, with the flattened bottoms because if you want the Droid to stand, you'll have to place the legs a bit more carefully. If you made version 1 jump from the first part of step 1) to step 5).
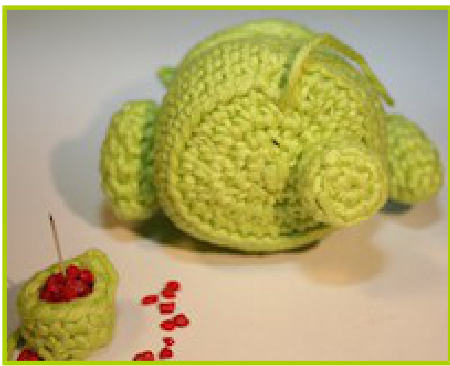
l) Position the legs on the underside of the Droid's body.
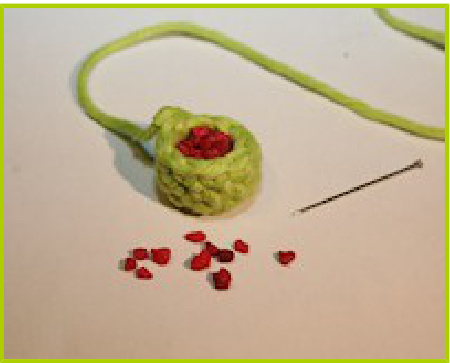
Fill them with stuffihg before sewing them on. To give the Droid a bit more stability I filled them with some decorative granulate instead. What also might /work: lentils, rice, small beads, a small marble, etc Takecare the Droid never gets wet if you use lentils or rice though... (that's why I decided against those) .
3) After filling the legs attach them to the body with pins (with a flat head).I put the pin right through the leg's magic ring and then up into the body.
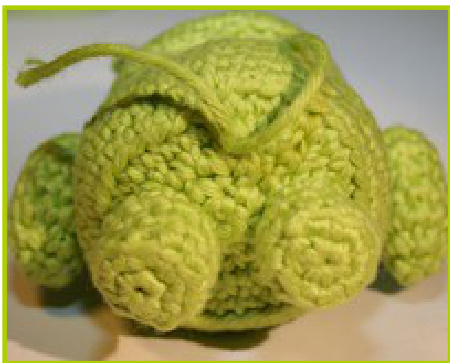
4) Change the placement and orientation of the legs until the Droid stands on its own. Push the flat bottom of the legs inwards a bit, it helps a lot.
5) Once you've found the perfect positions for the legs, sew them on.
6)Let the yarn-ends come out of the same stitch somewhere on the underside of the body. 7) Secure them with several knots, cut off the excess yarn and hide everything inside the body by pushing the knots back through the stitch they came out of. And now that you know what my patterns look like, check out my other ones. :) Perhaps there's something you'd like to crochet next.. Also visit me here: FACEBOOK: www.facebook.com/patternsbysteph WEBSITE: www.patternsbysteph.com And just in case you were wondering... You'llfind none of this shameless self-promotion in my patterns that are for sale. :)


