
Fuleco
Amifan Dutch You need the following materials
Materials
Catania schachenmayr - color yellow / gold. 100 gram for body, head, arms and legs; Catania schachenmayr - color brown. 40 gram for toes off hands and feeth; Catania schachenmayr Green, 40 gram, for shorts; Catania schachenmayr Wit, 50 gram, T-shirt, bal land eyes; Catania schachenmayr Blue, 50 gram, scales on head and back; Catania schachenmayr black, 30 gram, for bal land nose and eyes; Crochet needle 2,0 mm Fiberfill, 300 gram; Irion wire or chenille wire Sewing needle; Markerstiches. The name of the mascot for the 2014 World Cup in Brazil has been named Fuleco. The name is a combination of the words futebol (soccer) and Ecology (Ecology). One of the reasons it was chosen for the armadillo, because it is threatened with extinction. It is hoped that attention to the environment assists in the survival of the animal. Bron: http://www.meemetoranje.nl/9217-mascotte-wk-2014- heet-fuleco/
Copyrights
You are allowed to link to this pattern. Please do not copy or sell this pattern. Off course you can sell your finished items (based on this pattern) but please honor me as the designer. This pattern and other ones can be found at Raverly where my name is AmifanDutch and AmiFan Designs. You can also find me on my blog: cuteamigurumi.blogspot.nl If you have any questions or feedback regarding the pattern, please feel free to contact me. amifan01@gmail.com
Pattern
Here starts the pattern. It has 4 parts. This is part one. Photo's will explain some difficult parts.
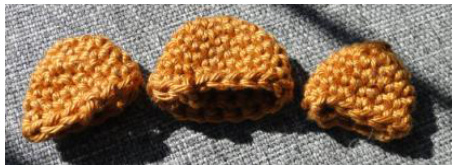
Nails.
Start with brown. The nails for hand and feeth are the same. Each hand / feeth need 2 small nails and 1 big nail. Nail (small) 8x R1. sc in magic circle (3) R2. \*2sc in st\* repeat 3x (6) R3. \*2sc in st, 1sc\* repeat 3x (9) R4. \*2sc in st, 2sc\* repeat 3x (12) R5 - 7. 12sc Fasten off, with slip stich. Nagel (groot) 4x R1. 4sc in magic cirkel (4) R2. \*2sc in st\* repeat 4x (8) R3. \*2sc in st, 1sc\* repeat 4x (12) R4. \*2sc in st, 2sc\* repeat 4x (16) R5 - 7. 16sc Fasten off, with slip stich.
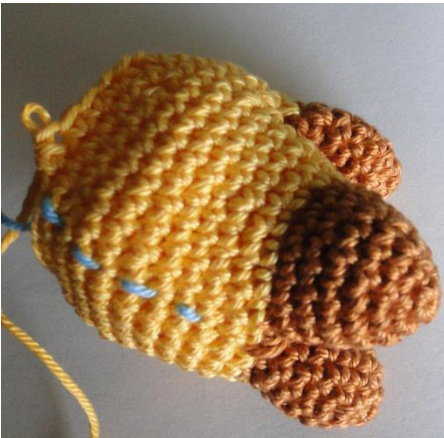
Hand
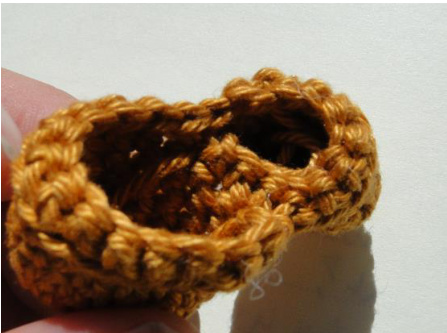
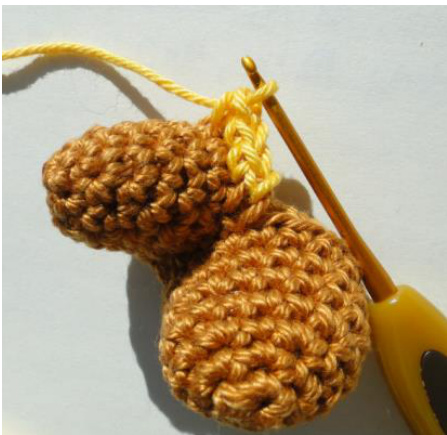
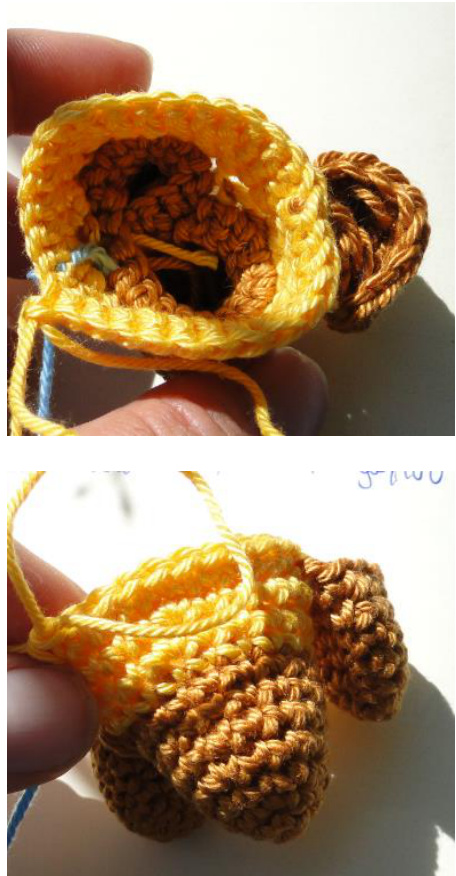
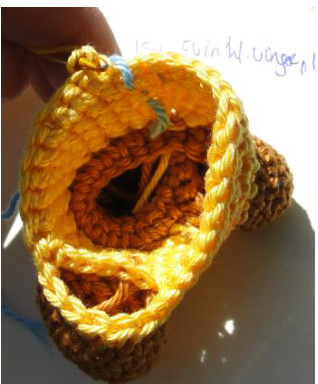
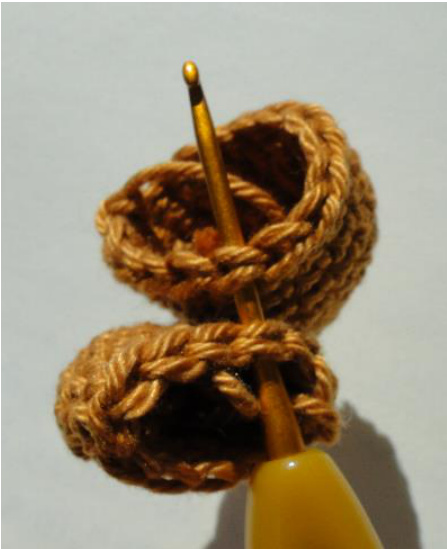
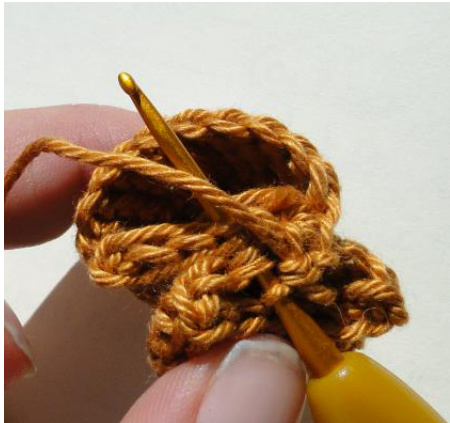
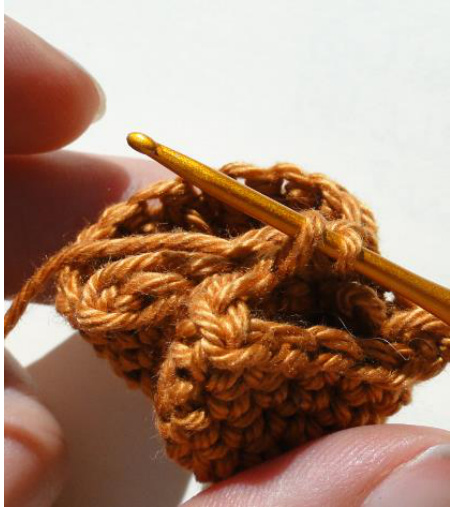
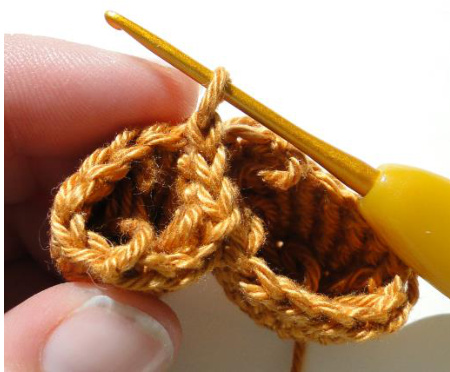
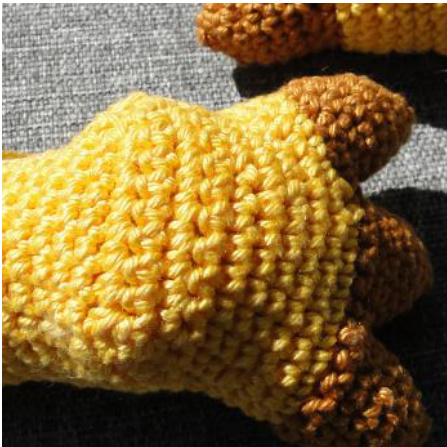
Use 1 big nail and 2 small nails . Start with 1 big and 1 little nail and crochet them with 4 sc together. ( see photo's)
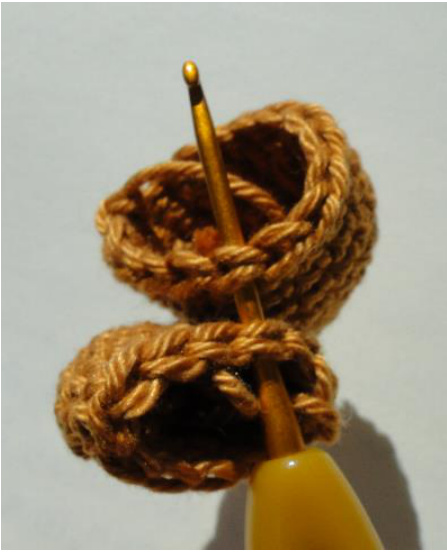
Crochet through 2 stiches
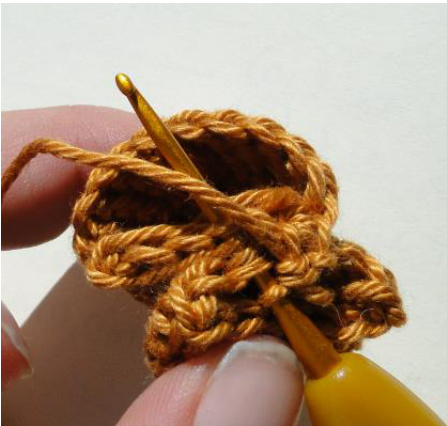
Turn thread over

Crochet like an sc.
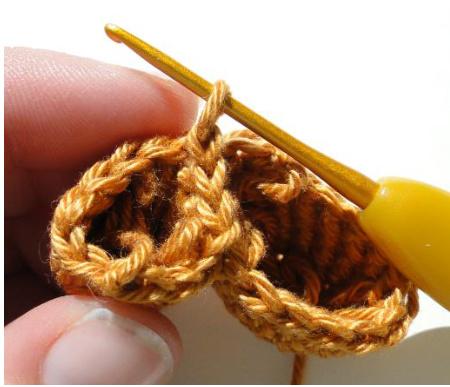
Here is your starting point of the first row. Outside it counts 20 stiches.
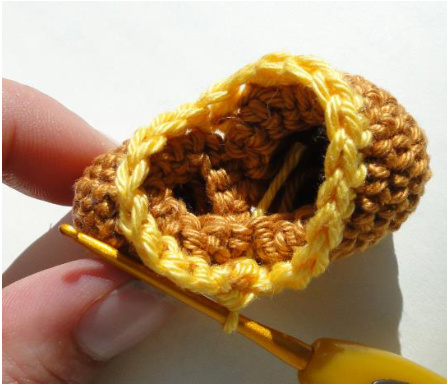
R1. Crochet 20 sc R1. Change color - yellow. 20 SC.
R2. \*2sc in st, 3sc\* repeat 5x. (25) R3. \*2sc in st, 4sc\* repeat 5x (30)
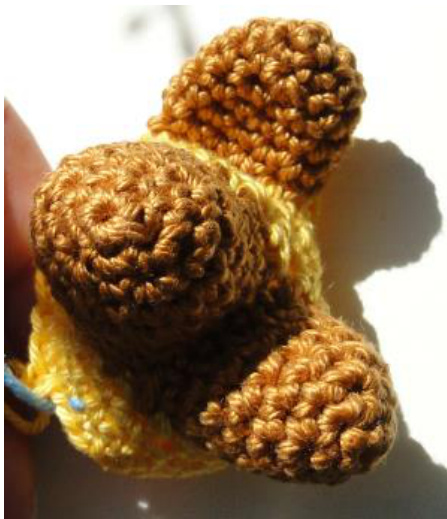
Get nail number 3 (small one). This is the thumb. Lef tand right hand are different - see green part.
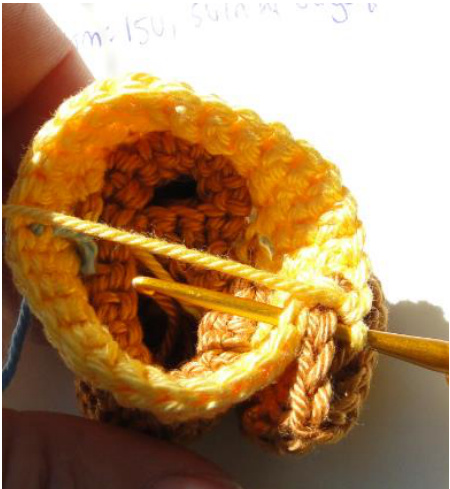
R4. 15sc, 5sc in small nail, 10sc
R5. 15sc in elke st, 7sc on the nail, 10 sc (32) Variant voor andere hand: R4.10sc, 5sc in small nail, 15sc R5.15sc in st, 7sc on the nail, 10 sc (32)
R6. \*7sc, 2sc in st\* repeat 4x (36) R7-8. 36sc R9. \*4sc, 2sc together\* repeat 6x (30) R10. 30sc R11. \*3sc, 2sc together\* repeat 6x (24) R12. \*2sc, 2sc together\* repeat 6x (18)
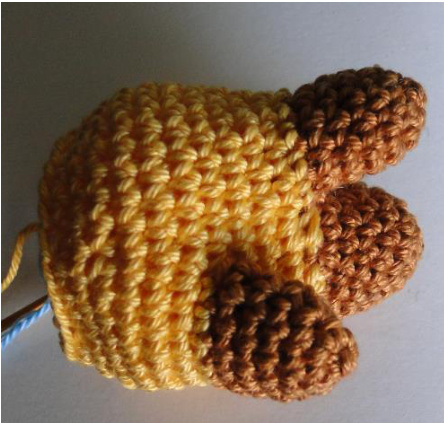
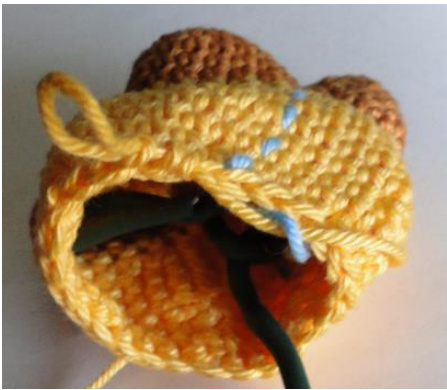
Get your wire.
If you like to bend your animal I used wire. If you use it for small childeren you better do not so. Shape of wire
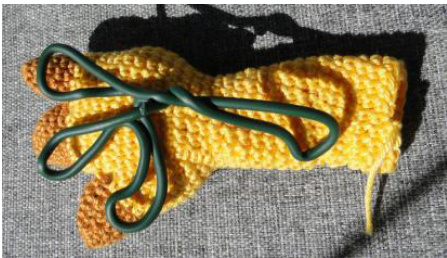
I put it in befor I made the arm. Also filling it up with fiberstuff. Especially the nails!
R13-21. 18sc. R22. 9sc, 9 slip stich (18) R23. 9sc, 9 slip stich (18) R24.18sc R25. 9sc, 9 slip stich (18) R26. 9sc, 9 slip stich (18) R27-30. 18sc. Fasten off. Fill up with fiberfill.
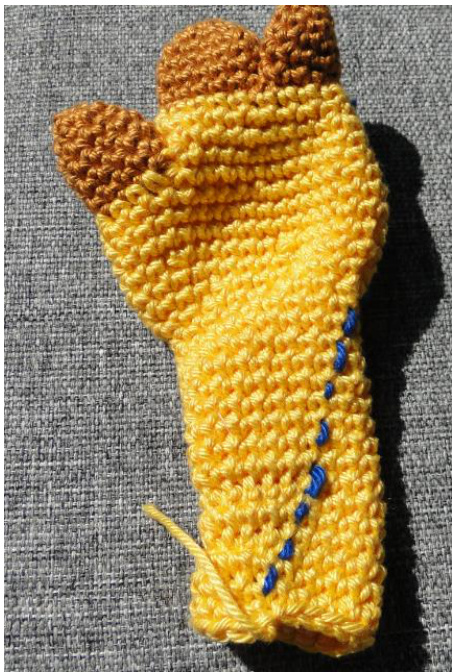
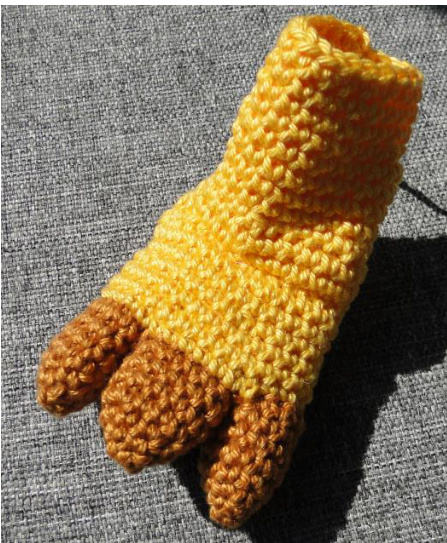
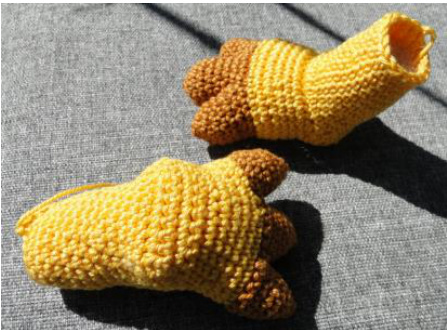
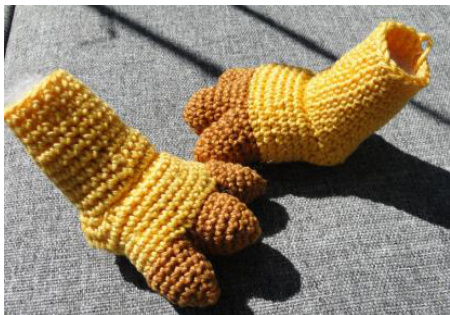
Feeth
Use 1 big nail and 2 small nails . Start with 1 big and 1 little nail and crochet them with 4 sc together. ( see photo's)
Crochet through 2 stiches
Trow thread over...
Finisch off like a sc
After 4sc crochet further on the BIG nail! Outside counts 30 sc. R1. Part A. 30 sc. R1. Part B. Change color yellow, 30sc R2. 14sc, 2sc in st, 14sc, 2sc in st (32) R3-4. 32 sC R5. \*2sc together, 6sc\* repeat dit 4x (28) R6. 28sc. Attention. Crochet in rows and not arround! You make a heel.
R7.1 chain, turn, 8sc R8. 1 chain, turn 10sc (go through on row 7 and row 6. This is allright!) R9. 1 chain, turn 12sc R10. 1 chain, turn, 2 sc together, 8sc, 2sc together (10) R11. 1 chain, turn, 2sc together, 6sc, 2sc together (8)
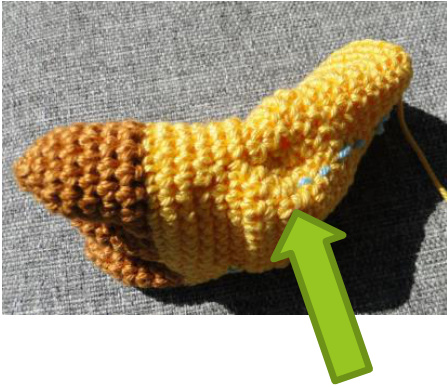
1 chain, turn. This is a new starting point. Make a stich marker here! (green arrow) R12. 8sc, 4sc on edge of heel, 16sc, 4sc on edge of heel (32) R13. 10sc, 2 sc together, 2sc together, 12 slip stich, 2sc together, 2sc together, 2sc (28) R14. 8sc, 2sc together, 2sc together, 12 slip stich, 2sc together, 2sc together, 1sc (24) R15-16. 24 sc R17. \*4sc, 2sc together\* repeat 4x (20) R18-21. 20sc R22. 4sc, 2sc together, 8sc, 2sc together, 4sc (18) R23-25. 18sc. Fasten off.
Next part 2...


