Fern Valley Linier Top
Designed by Sian Price-White
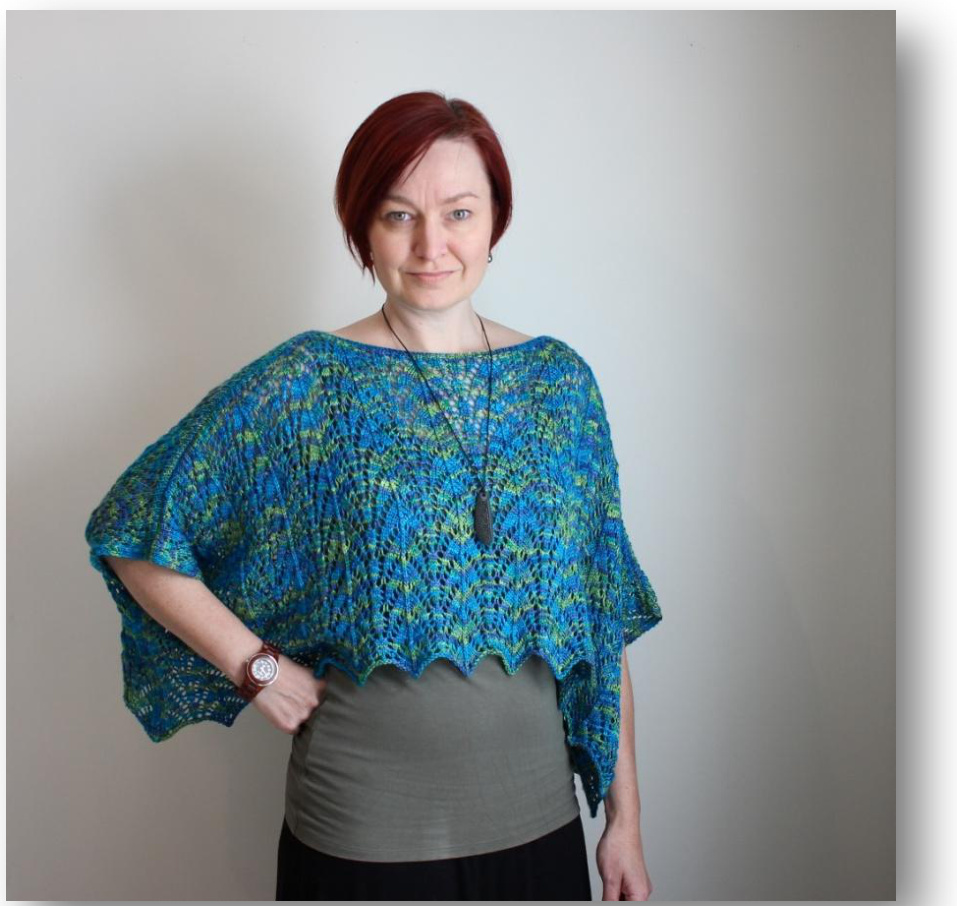
Delicate and drapey, this elegant top can add a soft sophistication to day or night-time dressing. Looking far more complicated to make than it actually is - it's just two rectangles! The size is easily adjustable and the pattern includes two shoulder options.
Yarn and Materials
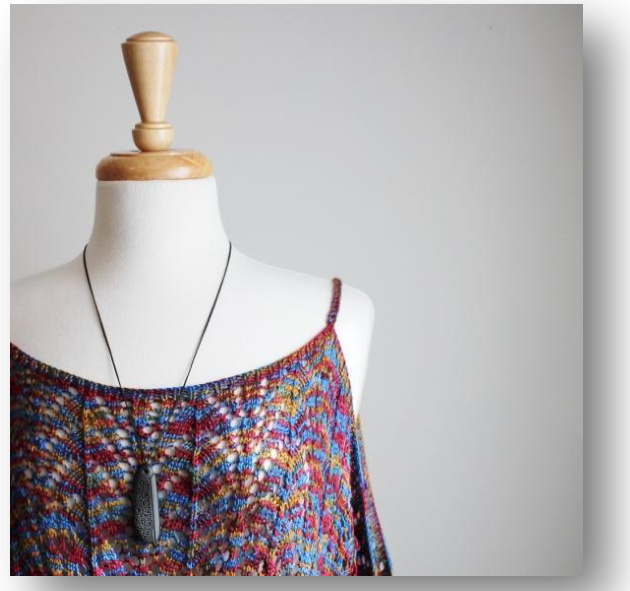
200g “Cloud Forest Yarns’ fingering weight / 4 ply yarn or similar: Samples use Merino/Silk in ‘Under 'da Sea’ and ‘Dark Cirque'. 4mm circular needle on 8Ocm cable, or long straights· > Yarn needle to sew in ends and seams?
Sizing
This top is very easily adjustable but is written in one size· As written, the sample is approx. 104cm wide and 44cm long when blocked.
Gauge
Approx· 24st X 30rows on 4mm needles in stocking stitch.
Abbreviations
St/Sts - Stitch / Stitches· RS / WS - right side / wrong side· Kl/P1 - Knit one stitch / Purl one stitch· Yo - yarn over - wrap yarn around right needle once to create extra stitch· Ssk - slip, slip, knit· Slip 1 st as if to knit,
Pattern Notes ·
This top is knitted in 2 flat pieces. To lengthen or shorten simply add or subtract number of repeats of pattern (approx 4cm per repeat:) To widen, add by increments of 16 sts (approx· 7cm per set·) There are two options for the shoulder and sleeves· One option has shoulder straps and an open sleeve which is joined at the ‘wrist'. The other option has a joined shoulder and sleeve·
Pattern
> PLEASE read through whole pattern before starting. That way you will understand where what you are doing fits into the scheme of things· (Really good tip for all patterns!) > Cast on 215 sts on 4mm needles. I like a long tail cast on but you can use any. >Knit the first 2 rows· > From here you will be knitting the Fern Valley lace pattern shown below.
Fern Valley Lace Pattern
\* Some areas are highlighted to help you see the repeated areas. R 2 (and every even row) - K7, P1, K7, P to last 3 sts, K7, P1, K7.


Once you have finished the 12th repeat of the pattern, end with row &. (lf you would like to lengthen the top, just add more repeats. Each repeat should add about4cm·)
If you are joining your sleeves
> Leave this piece on a spare cable or scrap yarn and cast on again and repeat so that you have 2 pieces the same· > There are 3 different ways that I'm going to explain how to cast off. Pick which suits your skill level and patience! > The 7st way is probably the simplest. Cast off all sts loosely (with a larger needle) from both sides. Pin the cast off edges together from sides towards the centre, leaving a section in the middle as your neck hole. Try it on the see how big you want the neckline· (The sample has a 68cm hole for the neck). Now hand sew the two sides together, making sure that your right sides are facing. The 2nd way is shown on the sample. On one side, k81, cast off 53sts, and then slip remaining 81 sts onto right needle· (lf you would like a wider or narrower neckline, adjust the st count accordingly·) On the other side, k81, cast off 53sts, and then slip the knitted sts from the right needle back onto the left needle· Now use the 3 needle bind off method to cast off both 'sleeves' separately. > The 3rd way takes a while but looks the nicest. Do the same as for the 2nd method, but instead of the 3 needle bind off, graft the sts together with the kitchener stitch method.
If you are attaching straps
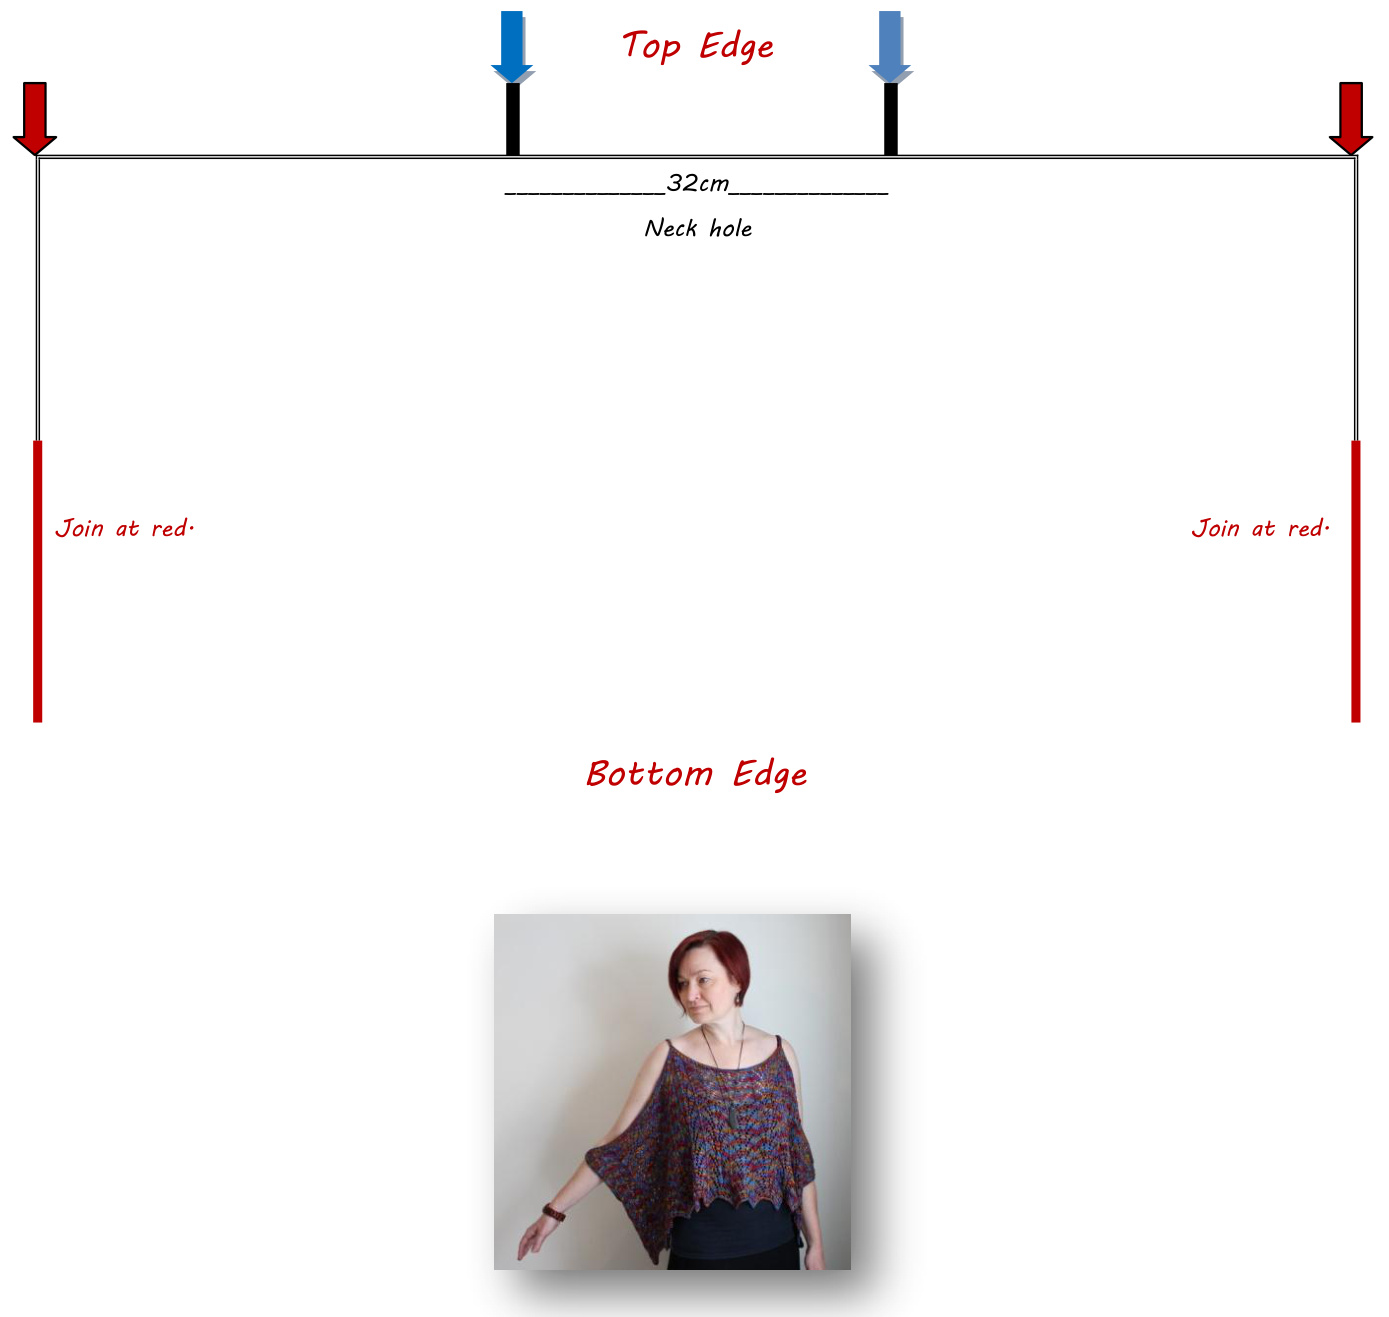
Complete 3 rows of 'K1, P1' rib. Cast off in rib pattern and sew in your ends· Yes, I know your top resembles an old string bag right now but with blocking, it will be transformed into the beautiful and elegant lace you see in the pattern· Trustme!! :Now cast on again and repeat so that you have 2 pieces the same· > Now make your straps. These can be anything - be creative. For the sample 1 plaited strands of my yarn together to make a braid. You could make some i-cord with your yarn or use ribbon or leather. Make them unique! Once you have finished your 2 sides and your straps, lay them face to face and with some yarn, tack the wrists together at the red arrows shown in diagram on nextpage· The blue arrows are where the straps are attached· (See picture below). These can be as long or as short as you'd like. The sample has straps that are 1Ocm long· You can place the shoulders narrower or broader if you like· > If you are not doing straps, just sew together the ‘sleeves’ between the red and blue arrows, leaving the same amount for your neck hole· > Now stitch the 'side seams’ together up about 2Ocm as shown below.
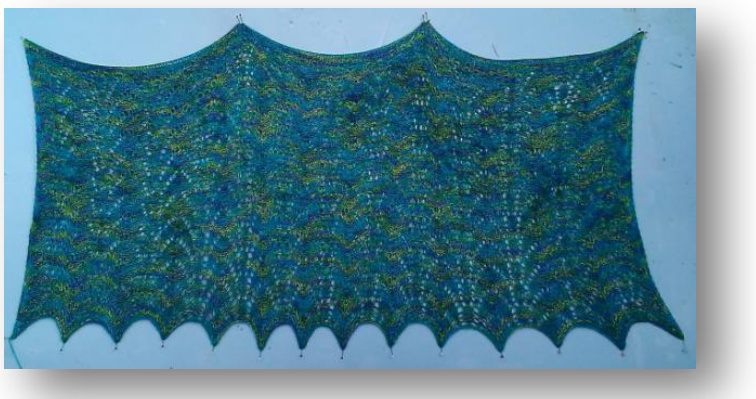
Blocking and finishing
> Now it's time to block. The blocking process is what will keep your lace stretched out so you can see the beautiful pattern. To block your garment, soak in room temp. water, very gently squeezing so that all the air bubbles come out. > Pop the garment in your washing machine on the spin cycle to remove the extra water. > Pin the piece out on cardboard, foam or a yoga mat (see below) stretching out the bottom points of the skirt so that they are nicely extended. Use pins for this. > Leave to dry completely. > Congratulations - you're finished!!