Sandra's Simple Socks By Sandra Frosst

New and even intermediate knitters can be intimidated by both the teeny tiny double pointed needles required for knitting with fine sock yarn as well as some of the new terminology. Some of my knitting students have been asking me for simple instructions to sock knitting and so I have come up with these basic patterns for worsted weight and DK weight socks. They use easy to find yarns, Patons Classic Wool in DK and Classic Wool Worsted. I specifically chose number 3 and 4 yarns and larger needles as they work up more quickly and seem lessintimidating. These are not fine and fancy socks, but will allow you to become familiar with the various parts of a sock - cuff, leg, heel flap, gusset, toe and finishing before you take on the task of finer yarns and needles. As you follow along with my instructions, you will be able to decide how big a cuff or how long a leg you want, what kind of heel (plain stockinette or slipped stitch) and whether or not you want a plain sock or one with a little extra pattern down the front. Once you have made a sock in number 4 and/or in number 3 weight, you will be able to take different elements from each of the socks shown here to make your own individual pattern! One last note about choice of yarn: Remember that wool or wool blends are always preferable for socks over acrylic as the elasticity and natural warmth of wool feel better against the skin. However, using acrylic yarn to learn on is just fine. As always, though, especially when learning, CHECK YOUR GAUGE!!! When you become more familiar with sock knitting, you can experiment with different needle and yarn sizes for different effects. Your options are limitless! So let's get started!
DK Weight (number 3) Sock
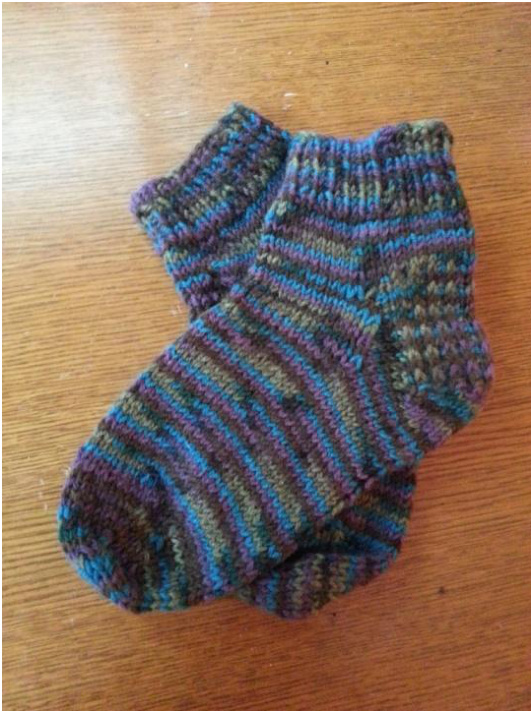
This is a plain stockinette stitch sock but I have used a Slipped Stitch Heel. You can also use a plain stockinette stitch heel and I will explain the difference when we get there. The picture shows a plain sock on top. The one hidden underneath has a Tulip Lace pattern that you can find on the internet. I did it just to see if it would change the gauge at all and it didn't. Adding a small pattern is an interesting alternative once you have learned the basics. It makes your project more fun and uniquely your own. Just remember to center your pattern over the number of instep stitches (22 in this pattern) and also, to knit your pattern "upside down" as you will be knitting it from the top down and not the bottom up as it is normally written! Confusing? If so, wait until you have made a couple of "plain" socks and then venture into the wacky wonderful world of design!
Size
Large Finished cuff circumference approx 7% inches or 19.5 cm
Materials
Patons Classic Wool DK Superwash 50g (1.75 oz), 114m (125 yds) - 1 ball for a pair of ankle socks,2 balls fol a pair of mid-calf or knee high socks 1 set of 5 double pointed needles size US 6 (4mm), or size of needle you need to match the gauge given 1 darningneedle Crochet hook, for picking up stitches dropped by mistake
Gauge
20 sts x 28 rows over 4 inches (10 cm) in stockinette (stocking stitch)
Special Stitches
Single Rib: K1, P1 around. Slipped Stitch: Row 1: (WS): Sl 1 p-wise, p to end. Row 2: (RS): Sl 1 k-wise, \*K1, Sl 1; rep from \* to end.
Cuff
Using the Cable Cast On for flexibility (or regular knit cast on VERY LOOSELY if you are not ready to learn the Cable Cast On), cast on 44 sts and join into a round on 3 needles (14,16,14), taking care not to twist stitches. Knit cuff in single rib as described in Special Stitches above for 12 rnds in total or desired length.
Leg
Continue in stockinette stitch (or in a special stitch on needle #2 only (such as a cable stitch or lace stitch) until cuff measures 3 inches (15 cm) or desired length from the beginning of work.
Heel Flap
Now you will need to divide your stitches so that some of them are put to one side for knitting the top of the foot (instep) later, and only part of your stitches will be used now to make the heel flap. Leave rem 22 sts on a stitch holder (or on 2 other needles if this is easier to manage) for working on the front of the foot later. Working only on the 22 heel stitches, work in either Stockinette Stitch or (Slipped Stitch as described in Special Stitches) to form a heel flap. Repeat this until the heel flap is 22 rows in length, ending on a RS row. The heel flap will look square. Note: The Slipped Stitch Heel is preferred by some as it is thicker and, therefore, lasts longer than the Stockinette Stitch Heel. It is not difficult to learn, but it is completely up to you if and when you wish to try it. If you choose to use a Stockinette Stitch heel, do the following: Row 1: Slip 1, knit to end. Row 2: Slip 1, purl to end. Repeat rows 1 and 2 until heel flap is 22 rows in length, ending on a RS row.
Turning the Heel
Now you will make the part of the heel that cups the bottom of your heel. You will be using a technique called short rowing, where you knit back and forth but don't go to the end of the row each time. It looks complicated, but once you have done it a couple of times, you will see the logic. Just trust the steps. Row 1 (wrong side): Purl across 12 stitches, purl 2 together, purl 1. Now TURN the work. Row 2 (right side): Slip 1, knit 3, SSK, knit 1, TURN. Row 3: Slip 1, purl 4, P2tog, purl 1, TURN. Row 4: Slip 1, knit 5, SSK, knit 1, TURN. Row 5: Slip 1, purl 6, P2tog purl 1, TURN. Row 6: Slip 1, knit 7, SSK, knit 1, TURN. Row 7: Slip 1, purl 8, P2tog purl 1, TURN. Row 8: Slip 1, knit 9, SSK, knit 1, TURN. Row 9: Slip 1, purl 10, P2tog, TURN. Row 10: Slip 1, knit 11, SSK, TURN. You should have 12 stitches left.
Making the Gusset
ith RS facing you, use an empty needle to pick up the right half of the heel st next needle, pick up and knit 11 stitches along the right edge of the heel flar Using another empty needle (now called needle #2), work across the instep stitches from the stitch holder (or needles) on which you have been holding them. On another needle (now called needle #3), pick up and knit 11 stitches along the left edge of the heel flap. Then, using this same needle, knit across the first half of the heel stitches. You will now have 3 needles, with 17 stitches on needles #1 and #2 and 22 stitches on needle #2. You should, therefore have a total of 56 stitches. Sandra's simple secret: If you are off by one stitch AND HAVE NOT DROPPED A STITCH, this is where you can knit 2 together or make a stitch on either needle #1 or #3 where it will be less likely to be noticed. This will remain between you and me...I promise!
Shaping the Gusset
Round 1: Needle #1: Knit to last 3 sts, k2tog, k1. Needle #2: Knit to end (or continue keeping in pattern). Needle #3: K1, SSK, knit to end of round. Round 2: Knit. Repeat rounds 1 and 2 until you have 44 stitches.
Foot
Continue working in the round on all stitches until foot is desired length less about 1 % inches. If you have chosen to work in a pattern stitch, you continue in that pattern, on the instep stitches only, down to the beginning of the toe shaping. You can be trying on the sock as you go for size. If it is easier, knit the 22 instep stitches over 2 needles. Change back to one needle before beginning the toe shaping. This is a good time to check your needles. #2 has 22 stitches and is the instep (top of the foot). #1 is the left back and #3 is the right back. Knit to the beginning of needle #1.
Toe shaping
Round 1: Needle #1: Knit to last 3 sts, k2tog, k1. Needle #2, k1, SSK, knit to last 3 sts, k2tog, k1. Needle #3: K1, SSK, knit to end. Round 2: Knit ounds, you will have decreased 4 stitches; therefore you will have 40 stitche: Repeat these two rounds 4 more times, resulting in 36, 32, 28 and 24 stitches. Now repeat round 1 twice and knit to the end of needle #1, placing the stitches on needle #3. You will now have 16 stitches on 2 needles. You are now ready to graft the remaining stitches using the Kitchener stitch. You can find several tutorials for this online. Some I suggest are knitty.com and craftsy.com. Before trying to do the Kitchener stitch on your new socks, I would suggest you knit two small swatches 10 stitches wide and at least 10 rows long, long enough to give you something to hold on to. Then you graft these two pieces together. Once you have successfully done this, you can go back to your sock. It seems weird to start with, but if you follow the directions word for word, it will turn out perfectly! And there you have it! Now on to the worsted weight (number 4) socks!
Worsted Weight (number 4) Sock - stockinette stitch
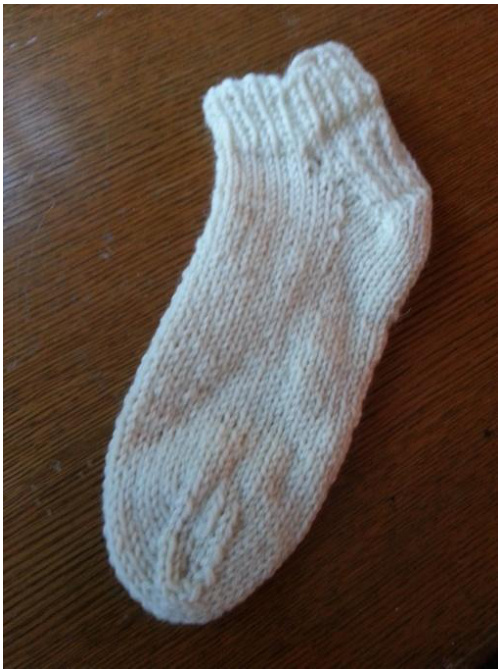
This is another plain stockinette stitch sock for which I have used a Slipped Stitch Heel. This pattern is for the plain stockinette stitch sock and is available in both Medium and Small sizes. The picture is for the sock in Small.
Size
Small (Large) Finished cuff circumference approx 6% (7%) inches or 16 (19.5) cm
Materials
Patons Classic Wool DK Superwash 50g (1.75 oz), 114m (125 yds) - 1 ball for a pair of ankle socks, 2 balls for a pair of mid-calf or knee high socks 1 set of 5 double pointed needles size US 6 (4mm), or size of needle you need to match the gauge given 1 darning needle Crochet hook, for picking up stitches dropped by mistake
Gauge
20 sts x 28 rows over 4 inches (10 cm) in stockinette (stocking stitch)
SpeciaL Stitches
Single Rib: K1, P1 around. Slipped Stitch: Row 1: (WS): SI 1 p-wise, p to end. Row 2: (RS): Sl 1 k-wise, \*K1, Sl 1; rep from \* to end.
Cuff
Using the Cable Cast On for flexibility (or regular knit cast on VERY LOOSELY if you are not ready to learn the Cable Cast On), cast on 34 (40) sts and join into a round on 3 needles- 12,12,10 (14,14,12), taking care not to twiststitches. rib as described in Special Stitches above for 8 rnds in total or desired length
Leg
Continue in stockinette stitch until cuff measures 3 inches (15 cm) or desired length from the beginning of Work.
Heel Flap
Now you will need to divide your stitches so that some of them are put to one side for knitting the top of the foot (instep) later, and only part of your stitches willbe used now to make the heel flap. From beg of rnd, knit 18 (20) sts. These stitches just worked are for the heel Leave rem 16 (20) sts on a stitch holder (or on 2 other needles if this is easier to manage) for working on the front of the foot later. Working only on the 18 (20) heel stitches, work in the Slipped Stitch as described in Special Stitches to form a heel flap. Repeat this until the heel flap is 14 (20) rows in length, ending on a RS row.
Turning the Heel
Now you will make the part of the heel that cups the bottom of your heel. You will be using a technique called short rowing, where you knit back and forth but don't go to the end of the row each time. It looks complicated, but once you have done it a couple of times, you will see the logic. Just trust the steps.
Medium:
Row 1 (wrong side): Purl across 10 stitches, purl 2 together, purl 1. Now TURN the work. Row 2 (right side): Slip 1, knit 1, SSK, knit 1, TURN. Row 3: Slip 1, purl 2, P2tog, purl 1, TURN. Row 4: Slip 1, knit 3, SSK, knit 1, TURN. Row 5: Slip 1, purl 4, P2tog purl 1, TURN. Row 6: Slip 1, knit 5, SSK, knit 1, TURN. Row 7: Slip 1, purl 6, P2tog purl 1, TURN. Row 8: Slip 1, knit 7, SSK, knit 1, TURN. You should have 10 stitches left. Row 1 (wrong side): Purl across 11 stitches, purl 2 together, purl 1. Now TURN the work. Row 2 (right side): Slip 1, knit 3, SSK, knit 1, TURN. Row 3: Slip 1, purl 4, P2tog, purl 1, TURN. Row 4: Slip 1, knit 5, SSK, knit 1, TURN. Row 5: Slip 1, purl 6, P2tog purl 1, TURN. Row 6: Slip 1, knit 7, SSK, knit 1, TURN. Row 7: Slip 1, purl 8, P2tog purl 1, TURN. Row 8: Slip 1, knit 9, SSK, knit 1, TURN. Row 9: Slip 1, purl 11, TURN. Row 10: Slip 1, knit 11, TURN. You should have 12 stitches left.
Making the Gusset
With RS facing you, use an empty needle to pick up the right half of the heel sts. Using the next needle, pick up and knit 7 (11) stitches along the right edge of the heel flap. Using another empty needle (now called needle #2), work across the instep stitches from the stitch holder (or needles) on which you have been holding them. On another needle (now called needle #3), pick up and knit 7 (11) stitches along the left edge of the heel flap. Then, using this same needle, knit across the first half of the heel stitches. You will now have 3 needles, with 12 (17) stitches on needles #1 and #2 and 16 (22) stitches on needle #2. You should, therefore have a total of 56 stitches. Sandra's simple secret: If you are off by one stitch AND HAVE NOT DROPPED A STITCH, this is where you can knit 2 together or make a stitch on either needle #1 or #3 where it will be less likely to be noticed. This will remain between you and me...I promise!
Shaping the Gusset
Round 1: Needle #1: Knit to last 3 sts, k2tog, k1. Needle #2: Knit to end (or continue keeping in pattern). Needle #3: K1, SSK, knit to end of round. Round 2: Knit. Repeat rounds 1 and 2 until you have 34 (40) stitches.
Foot
Continue working in the round on all stitches until foot is desired length less about 1 % inches. If you have chosen to work in a pattern stitch, you continue in that pattern, on the instep stitches only, down to the beginning of the toe shaping. You can be trying on the sock as you go for size. If it is easier, knit the instep stitches over 2 needles. Change back to one needle before beginning the toe shaping. This is a good time to check your needles. #2 has 16 (20) stitches and is the instep (top of the foot). #1 is the left back and #3 is the right back. Knit to the beginning of needle #1.
Toe shaping
Round 1: Needle #1: Knit to last 3 sts, k2tog, k1. Needle #2, k1, SSK, knit to last 3 sts, k2tog, k1. Needle #3: K1, SSK, knit to end. Round 2: Knit After these two rounds, you will have decreased 4 stitches; therefore you will have 30 (36) stitches. ese two rounds 3 more times, resulting in 26, 22, 18 (32, 28, and 24) stitches Now repeat round 1 once (twice) and knit to the end of needle #1, placing the stitches on needle #3. You will now have14 (16) stitches on 2 needles. You are now ready to graft the remaining stitches using the Kitchener stitch. You can find several tutorials for this online. Some I suggest are knitty.com, craftsy.com and DROPS you tube video. Before trying to do the Kitchener stitch on your new socks, I would suggest you knit two small swatches 10 stitches wide and at least 10 rows long, long enough to give you something to hold on to. Then you try to graft these two pieces together. Once you have successfully done this, you can go back to your sock. It seems weird to start with, but if you follow the directions word for word, it will turn out perfectly! And there you have it! Now, if you wish to make this sock with a little twist, pardon the pun, try the following with a small cable pattern down the instep (the part on top of the foot)..
Worsted Weight (number 4) Sock - stockinette stitch with 2x2 cable
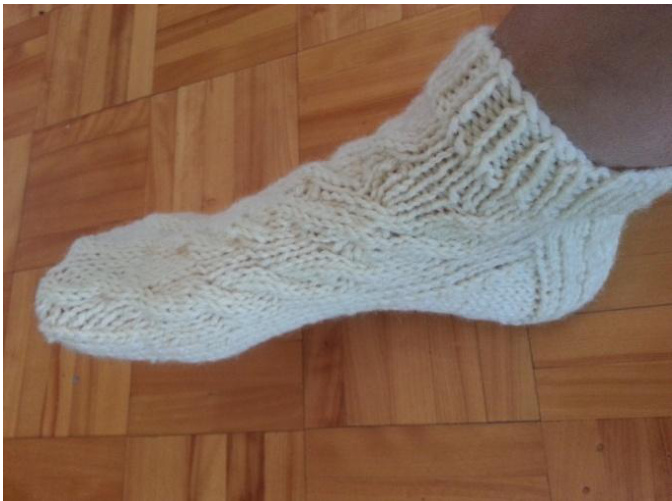
This is another plain stockinette stitch sock "with a twist". (1 have incorporated a random cable over the instep). In order to have to sock fit correctly, I have had to add 2 stitches to the overall width. This makes up for the tightening caused by the twist of the cable. Again, I have used a Slipped Stitch Heel which is my favorite. Feel free to use a regular Stockinette Stitch Heel that is described in the DK weight pattern above.
Size
Large Finished cuff circumference approx 7% inches or 19.5 cm
Materials
Patons Classic Wool DK Superwash 50g (1.75 oz), 114m (125 yds) - 2 balls for a pair of ankle socks, 3 ball: for a pair of mid-calf or knee high socks 1 set of 5 double pointed needles size US 6 (4mm), or size of needle you need to match the gauge given 1 darning needle Crochet hook, for picking up stitches dropped by mistake
Gauge
20 sts x 28 rows over 4 inches (10 cm) in stockinette (stocking stitch).
Special Stitches
· Single Rib: K1, P1 around. · Slipped Stitch: Row 1: (WS): Sl 1 p-wise, p to end. Row 2: (RS): Sl 1 k-wise, \*K1, Sl 1; rep from \* to end. ·C4B: 1. Slip the next 2 stitches on the left-hand needle to the cable needle and hold the cable needle to the back of thework. 2. Knit 2 stitches from the left-hand needle. 3. Knit 2 stitches from the cable needle.
Cuff
Using the Cable Cast On for flexibility (or regular knit cast on VERY LOOSELY if you are not ready to learn the Cable Cast On), cast on 42 sts and join into a round on 3 needles (14,14,14), taking care not to twist stitches. Knit cuff in single rib as described in Special Stitches above for 8 rnds in total or desired length.
Leg
Continue in stockinette stitch until cuff measures 3 inches (15 cm) or desired length from the beginning of work. However, in this pattern, you will be inserting a cable C4B (see special stitches) at random -I used one or two every 2nd row. You can use as many or as few as you wish!
Heel Flap
Now you will need to divide your stitches so that some of them are put to one side for knitting the top of the foot (instep) later, and only part of your stitches will be used now to make the heel flap. From beg of rnd, knit 20 sts. These stitches just worked are for the heel. Leave rem 22 sts on a stitch holder (or on 2 other needles if this is easier to manage) for working on the front of the foot later. Working only on the 20 heel stitches, work in the Slipped Stitch as described in Special Stitches to form a heel flap. Repeat this until the heel flap is 20 rows in length, ending on a RS row. The heel flap will look square.
Turning the Heel
Now you will make the part of the heel that cups the bottom of your heel. You will be using a technique called short rowing, where you knit back and forth but don't go to the end of the row each time. It looks complicated, but once you have done it a couple of times, you will see the logic. Just trust the steps. Row 1 (wrong side): Purl across 11 stitches, purl 2 together, purl 1. Now TURN the work. Row 2 (right side): Slip 1, knit 3, SSK, knit 1, TURN. Row 3: Slip 1, purl 4, P2tog, purl 1, TURN. Row 4: Slip 1, knit 5, SSK, knit 1, TURN. Row 5: Slip 1, purl 6, P2tog purl 1, TURN. Row 6: Slip 1, knit 7, SSK, knit 1, TURN. Row 7: Slip 1, purl 8, P2tog purl 1, TURN. Row 8: Slip 1, knit 9, SSK, knit 1, TURN. Row 9: Slip 1, purl 11, TURN. Row 10: Slip 1, knit 11, TURN. You should have 12 stitches left.
Making the Gusset
ith RS facing you, use an empty needle to pick up the right half of the heel st next needle, pick up and knit 11 stitches along the right edge of the heel flar Using another empty needle (now called needle #2), work across the instep stitches from the stitch holder (or needles) on which you have been holding them. On another needle (now called needle #3), pick up and knit 11 stitches along the left edge of the heel flap. Then, using this same needle, knit across the first half of the heel stitches. You will now have 3 needles, with 17 stitches on needles #1 and #2 and 22 stitches on needle #2. You should, therefore have a total of 56 stitches. Sandra's simple secret: If you are off by one stitch AND HAVE NOT DROPPED A STITCH, this is where you can knit 2 together or make a stitch on either needle #1 or #3 where it will be less likely to be noticed. This will remain between you and me...I promise!
Shaping the Gusset
Round 1: Needle #1: Knit to last 3 sts, k2tog, k1. Needle #2: Knit to end (or continue keeping in pattern). Needle #3: K1, SSK, knit to end of round. Round 2: Knit. Repeat rounds 1 and 2 until you have 42 stitches.
Foot
Continue working in the round on all stitches until foot is desired length less about 1 % inches. If you have chosen to work in a pattern stitch, you continue in that pattern, on the instep stitches only, down to the beginning of the toe shaping. You can be trying on the sock as you go for size. If it is easier, knit the 20 instep stitches over 2 needles. Change back to one needle before beginning the toe shaping. This is a good time to check your needles. #2 has 22 stitches and is the instep (top of the foot). #1 is the left back and #3 is the right back. Knit to the beginning of needle #1.
Toe shaping
Round 1: Needle #1: Knit to last 3 sts, k2tog, k1. Needle #2, k1, SSK, knit to last 3 sts, k2tog, k1. Needle #3: K1, SSK, knit to end. Round 2: Knit ounds, you will have decreased 4 stitches; therefore you will have 38 stitche: Repeat these two rounds 3 more times, resulting in 34, 30, and 26 stitches. Now repeat round 1 twice and knit to the end of needle #1, placing the stitches on needle #3. You will now have 18 stitches on 2 needles. You are now ready to graft the remaining stitches using the Kitchener stitch. You can find several tutorials for this online. Some I suggest are knitty.com, craftsy.com and DROPS you tube video. Before trying to do the Kitchener stitch on your new socks, I would suggest you knit two small swatches 10 stitches wide and at least 10 rows long, long enough to give you something to hold on to. Then you try to graft these two pieces together. Once you have successfully done this, you can go back to your sock. It seems weird to start with, but if you follow the directions word for word, it will turn out perfectly! And there you have it!
Abbreviations
Beg: Beginning Dpn: Double pointed needle K: Knit K2tog: Knit 2 together (decreases 1 stitch) K-wise: Knit wise LH: Left hand P-wise: Purl wise P: Purl Rem: Remaining RH: Right hand Rnd: Round Rep: Repeat RS: Right side SSK: Slip 1 k-wise, slip next st k-wise, then knit both slipped sts together by inserting tip of LH needle into sts then knitting off the RH needle (decreases 1 stitch) St st: stockinette (stocking stitch) St(s): stitch (es) WS: Wrong side


