The Wave by Leanne Brown
The Wave was created to use those little bits of sock yarn you have left over from other projects or mini skein swaps. One main color, solid or semi solid, is used with as many other contrast colors as you wish. Alternately, choose two colors! A fun, warm sock that you can create "off the cuff" (pun intended). Your sock should be governed by your Stash or your own preferences incolor. The Wave is a toe up sock with an after-thought heel. This keeps the wave pattern unbroken throughout the sock. Toe, heel and cuff are worked in the MC (or whatever you feel like using!) Check out this good YouTube video on stranded knitting if you would like some hints.
Finished Sizes (rounded to the nearest 1/2 inch):
7" (8, 8.5, 9) circumference. You can tweak the size or gauge if necessary\* Yarn: Fingering weight sock yarn (100g MC and 100g CC) Example, by Nadia Glaser; MC Three Irish Girls in Raspberry Cordial and CC Spud and Chloe Fine in Calypso Needles: Two circular US 1 needles (or size needed to get gauge) in a length comfortable to you. I like 24". Gauge: 34 sts/4" in stockinette stitch over pattern repeat. Work gauge swatch in the round. Making a gauge swatch will make you happier with your finished product so don't "just skip it." Wave Pattern Chart: Chart is read from right to left and bottom to top
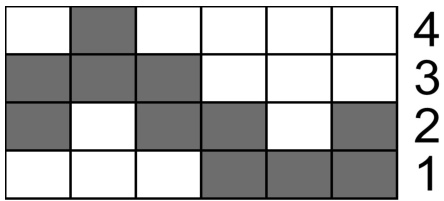
Key: BO = bind off CO = cast on P = purl K2tog = knit two together M1 = make one PM = place marker SSK = slip slip knit MC = main color CC= contrast colol N1(2) = needle one(two) ktbl = knit through the back loop K2togtbl = knit two together through the back loop
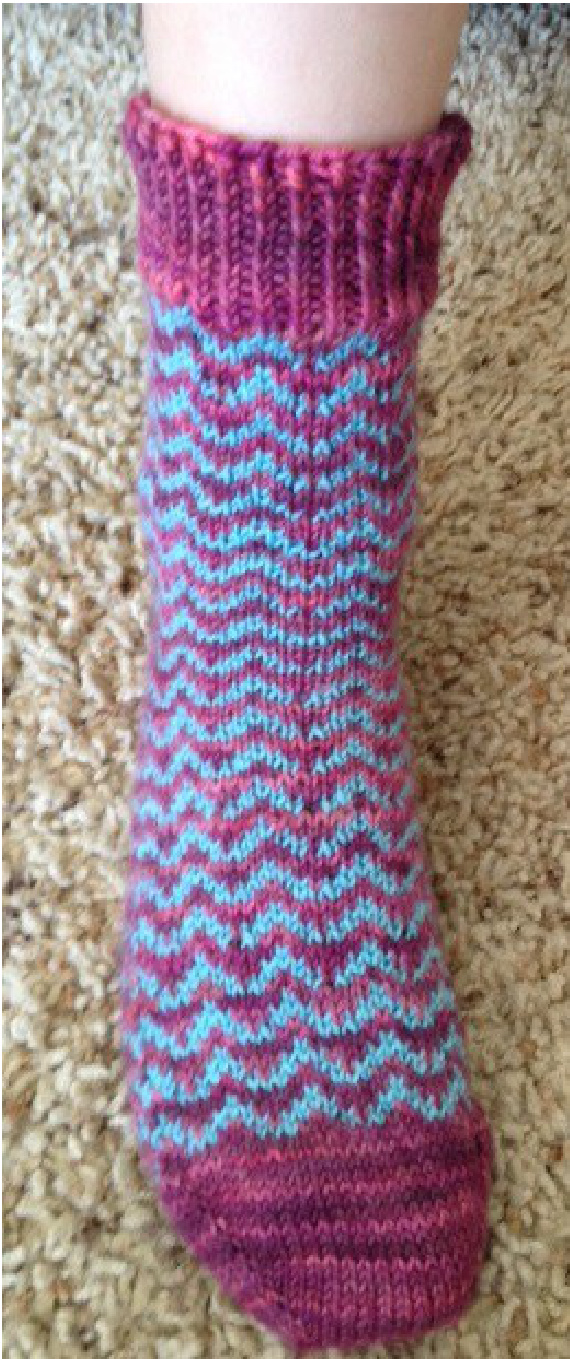
Photo by Nadia Glaser beg. = begin(ning) M = marker R = round K = knit St(s) = stitch(es) \* Say you prefer the fabric you get with 32 st/4" - 8 sts per inch (SPI. You need an 8.5" circumference (C). Multiply SPl and C (8 x 8.5 = 68 sts). Is this number divisible by 6 (stitch repeat)? You do more math; 68 divided by 6 is 11.33. Not divisible by 6. You can go down to 66 sts (8.25") or up to 72 sts (9"). You would rather your socks fit snuggly so you choose the 66 sts. You want to make a sock to fit your brother's 10" around foot. 8.5 x 10 = 85. Not divisible by 6. 84 sts = 9.88" Perfect! youll have to adjust other measurements in the pattern (like length), but you can do it! Toe: Using "Judy's Magic Cast On" (Knity.com Spring 2006) and MC, CO 24 (26, 28, 30) sts. R1: K even R2: On N1, (K2, M1, K to 2 sts before end, M1, K2) repeat with N2 R3: K even Repeat R2 and R3 untl you have 60 (66, 72, 78) sts. Foot: Add CC and beg.R1 of chart 10 (11, 12, 13) tmes. Work 6 st, 4 row repeat until foot measures 7" (7 1/2, 7 3/4, 8) from CO edge.+ +To customize thefoot length of your sock try this. Stand ona sheetof paper. Hold a pencil tightly against your foot and trace around it Measure the length from the tip of longest toe to your heel. Subtract 2 inches. This is the length you need.
Heel placement:
Left foot - drop working yarn, using waste yarn K across N1. Drop waste yarn. Go back to the beg. of N1, pick up working yarn and continue in pattern across N1. Complete R and continue with leg instructions. Right foot - Work across N1 in pattern. Drop working yarn, using waste yarn K across N2. Drop waste yarn. Go back to the beg. of N2, pick up working yarn and continue in pattern across N2. Continue with leg instructions.
Leg:
Continue working in patten untileg of sock is 6" from waste yarn, ending after R4. You can make the lg longer or shorter as you desire.
Cuff:
Cut contrast yarn. Using MC, K one R. Work in Twisted Rib; (K1tbl, P1) around, until cuffis 2" (2, 2.5, 2.5) long. You can make the cuff longer or shorter as you desire. Using Jeny's Surprisingly Stretchy Bind-Off (Knitty.com fall 2009), BO all stitches.
Heel++:
Using N1, pick up the right leg of each st in the R below the waste yarn. You wil have 30 (33, 36, 39) sts. Pullthe needle through until the sts rest on the cable. Using N2, pick up the right leg of each st in the R above the waste yarn. You will have 30 (33, 36, 39) sts. Pull the needle through until the sts rest on the cable. Carefully remove the waste yarn holding the heel sts. You willnow have 60 (66, 72, 78) live sts. Using MC, K to last st of N1. With this st and the first st of N2, K2togtbl. Continue across N2 until last st. With this st and the first st of N1, K2togtbl. You decreased 2 sts. R1: K around R2: (K2, SSK, K to last 4 sts, K2tog, K2) repeat Repeat these two rounds until there are 18 (20, 22, 24) sts left. 9, (10, 11, 12) per needle.
Finishing:
Use Kitchner Stitch (Knitty.com Summer 2004) to graft heel closed.
++ Note:
Vanessa Ewing Ehrig, gingerknit.com, made this helpful observation: "The top half of the pick up for the heel has some weird floats/loops but if the knitter makes sure the sts follow the color chart pattern (which in my case was 3 sts in mc, 3 sts in cc) and working those "float stitches" through the back loop, that should help them know all is well." So knitters, if you have weird float stitches don't panic. Just compare with your pattern chart and count to assure you have the number you need. Then follow Vanessa's advice and ktbl.
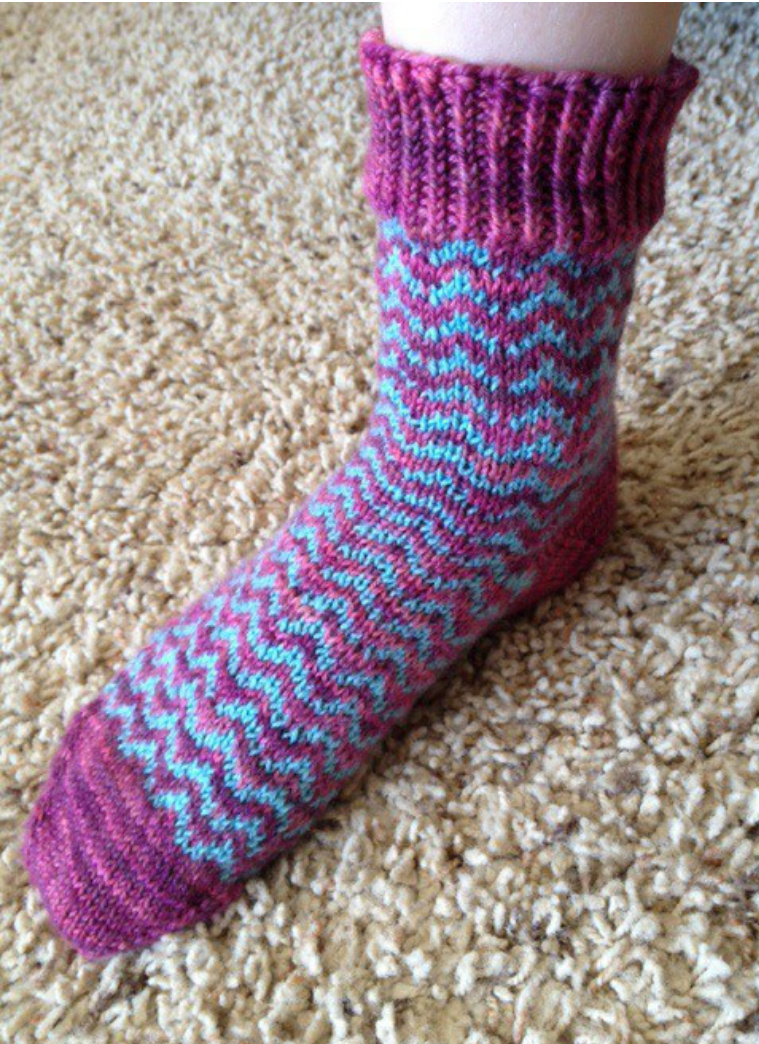
Photo by Nadia Glaser


