Knitted Moo! esiqns
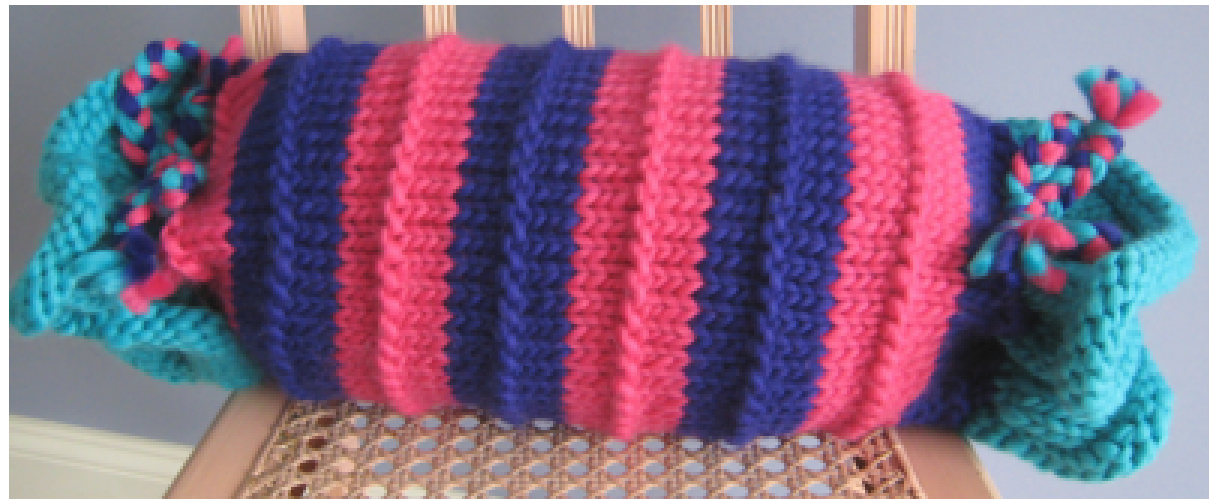
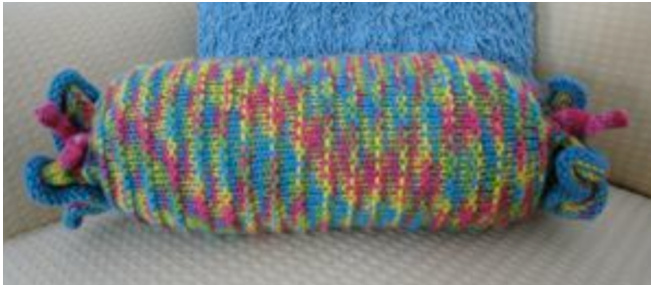
Candy Wrapper Pillow
The scoop: Add a little eye candy to a room and take a break from the standard square pillow projects at the same time. This bolster-style pillow is a good choice for neck support, too. Chunky yarn is easy to work with, knits up quickly, and the entire project is knit in the round, making finish work minimal- hooray! Choose your tie style, and whether or not to do a crochet edging- this is a good opportunity to practice some of the basics. Fits either $9\!\times\!19$ or $10\times20$ bolster inserts. Materials needed: 330 yards chunky or super chunky yarn (as shown: Classic Elite's Paintbox or Cascade's Magnum), US size 10-13 circular needle, blunt tapestry needle (for finishing), ribbon or cording, crochet hook, and a standard size bolster pillow insert. Gauge: 2-4 st/1 in (st. st), depending on the weight of the yarn you choose. You will have fewer sts per in. the chunkier your yarn is. You want to swatch it so you have firm stitches that aren't too loose. (If your gauge is looser than recommended, use a smaller size needle.) Note: If you need to adjust your numbers to fit the bolster that you want - the initial number you cast on is twice the number in the body. First, calculate the body size and number, then double it for your initial cast on.
Stitch Guide: Embossed Stripes
Rounds 1-4: Knit all sts. Round 5: Purl all sts. Rounds 6-9: Knit all sts. Repeat rounds 5-9. Instructions: CO 96 sts. Place a marker at the beginning and join sts.to knit in the round. Be careful not to twist sts. Begin ruffle: K 9 rounds. The ruffle should measure about $z"$ or a little more. Round 10: k2tog the entire round (48 sts). Round 11:K all sts. Round 12: Eyelet round $\star\mathsf{K}4$ , yO, k2tog, rep from \* all the way around. Body: Begin the embossed stripes and continue in the pattern until wrapper fits to the end of the pillow insert (approx. $20^{\prime\prime}$ 0. End with a round 5. End ruffle: K next 4 rows. Repeat eyelet round. K one more round. Next is the ruffle inc round: K into the front and back of each st. (96 sts.) K 9 rounds. BO loosely. Finishing: Using tapestry needle, weave in all loose ends. Make 2 cords (either using a rope maker if you have one or by knitting an I-cord), each approx. 12 in. long. Use the leftover pillow yarn by itself or combine it with an accent yarn. Braiding yarn, especially the chunkier weights, makes for a nice finished look as well. You may also choose to use ribbon instead. Thread through both eyelet rounds once- or twice, depending on the look you like and the length of your tie- and knot off ends. Pull cord tightly and tie in a bow or a knot to secure. Edging option: with the crochet hook and using an accent yarn, crochet a backwards single chain stitch around the outside edges of the ruffle. Care Instructions: Remove insert from pillow. Spot clean or launder as per fiber label instructions. Level of Difficulty: EASY Making the I-cord: (Change to double-pointed needles) Knit 3, then slide the stitches to the other end of the needle without turning so the first cast-on stitch is now the first stitch on the left needle. Use your right needle and insert it knitwise then bring the yarn from the bottom of the needle to the top. Wrap it around the right needle and knit in the usual way. Make sure the stitch is snug. Then knit remaining two stitches. Repeat for the desired length. Then cut a tail and draw the yarn through the stitches and knot. Weave in loose end.