Penguin Amigurumi Pattern by adorably kawaii
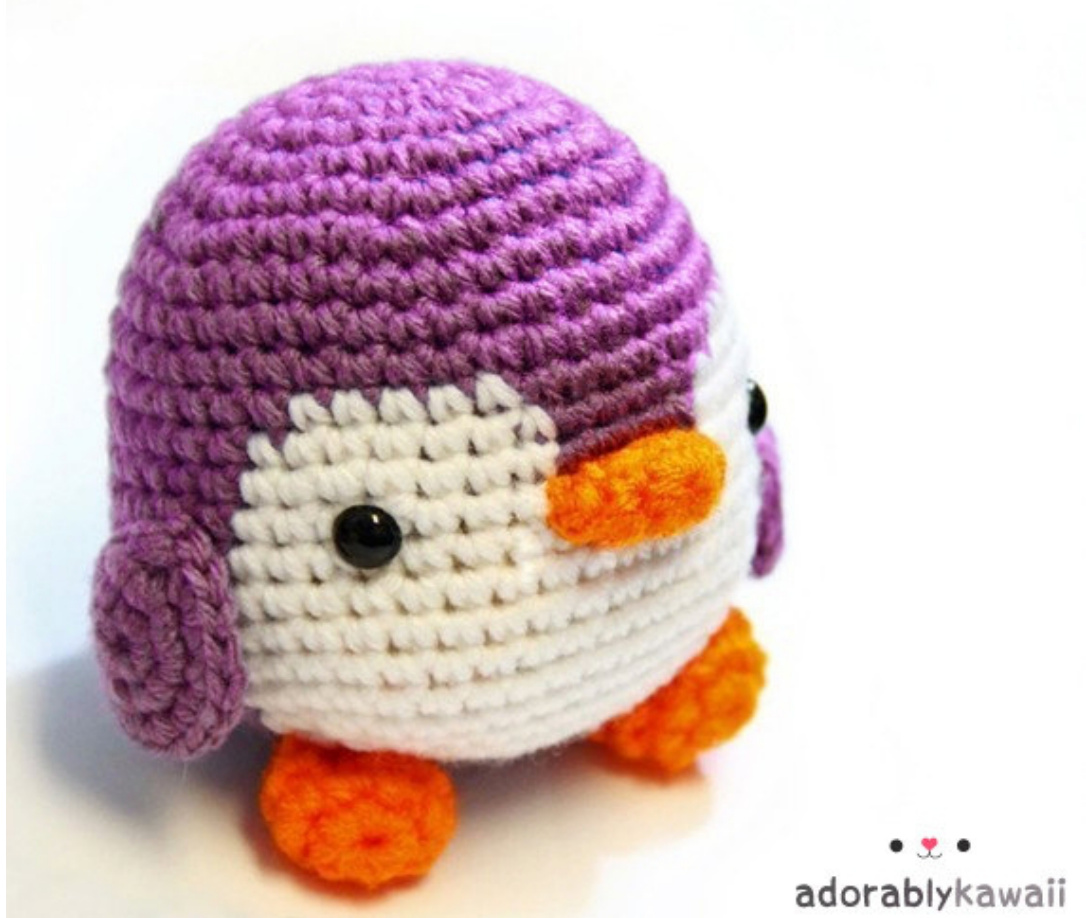
Please look over the pattern carefully before starting. When you change colors over a few stitches, you can drop the yarn and leave a short float (making sure it's not too tight) or crochet over it instead of fastening it off each time.
Materials:
. Worsted weight yarn in purple, white, and orange. (I used Red Heart Super Savers and Loops & Threads Impeccable) · Pair of 9mm safety eyes ·Stuffing Tools: ·E/3.5mm hook · Yarn needle
Size:
·Approximately 4” (10cm) tall. Results will vary depending on your tension and your yarn & hook choice.
Gauge:
It's important to make sure the hook size you're using is the appropriate size for your yarn and tension. Choose a size that makes the stitches tight enough so stuffing doesn't show through. Generally, you should use a hook that is about 2 sizes smaller than recommended On the yarn label.
Abbreviations:
Ch - Chain Sl st - Slip stitch Sc - Single crochet St(s) - Stitch(es) 2 sc - 2 single crochet increase R# - Round/Row # Sc2tog - 2 single crochet decreaseRep - Repeat Sk - Skip
Pattern Notes:
Pattern is written in US terms. All pieces are worked through both loops. If you crochet in the back loop only, the stitches will be taller and finished object will have different shapes and proportions. This pattern is worked in a continuous spiral. Use a stitch marker to mark the start or end of the round. · Increases are written with the number before the stitch such as “2 sc in st" or “3 dc in st" .
Magic Ring:
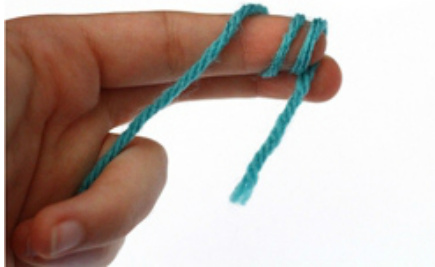
1. A few inches from the end of the yarn, wrap two loops over your finger。
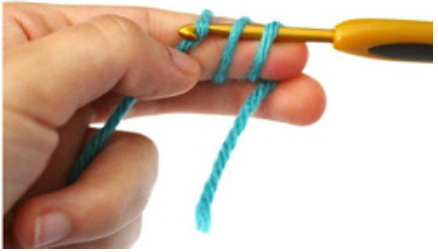
2. Insert the hook from right to left into the loops.
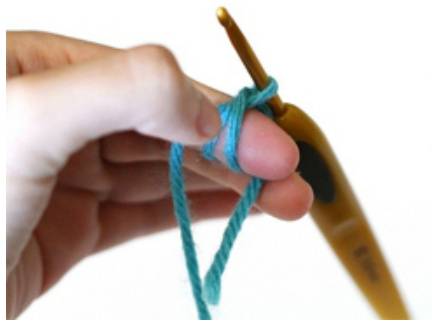
3. Pull the working yarn through.
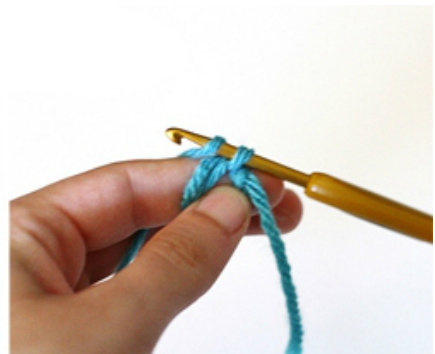
4. Carefully take the loops off your fingers and chain one. This doesn't count as the first stitch.
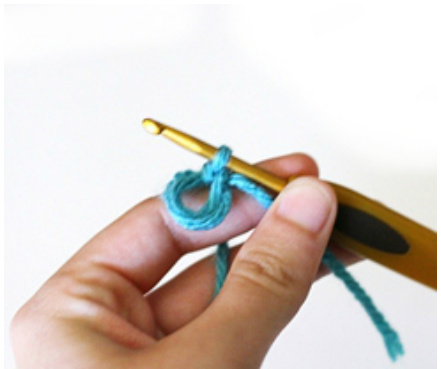
5. Insert the hook into the two loops again and pull up a loop. Yarn over and draw through both loops. This counts as the first single crochet stitch.
Color Char
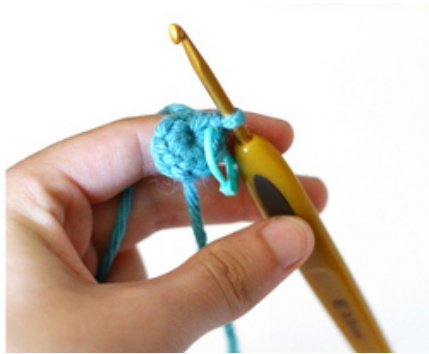
6. Continue for the rest of the stitches. Then pull the yarn tail to close the hole.
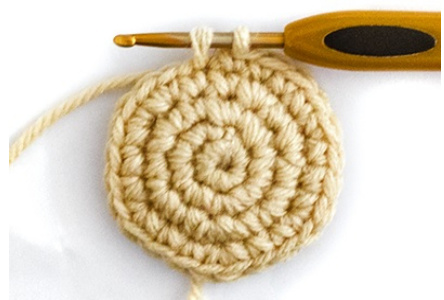
1. When you get to the last stitch in the current color, insert hook into the next stitch, yarn over, and draw up a loop.
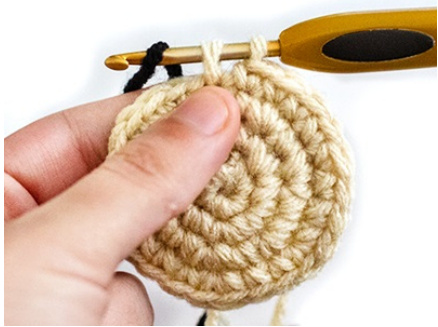
2. Yarn over with the new color.
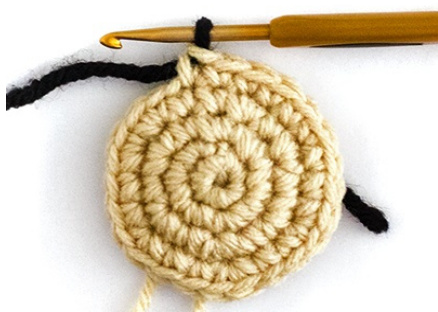
3. Draw through both loops on the hook.
Head & Body:
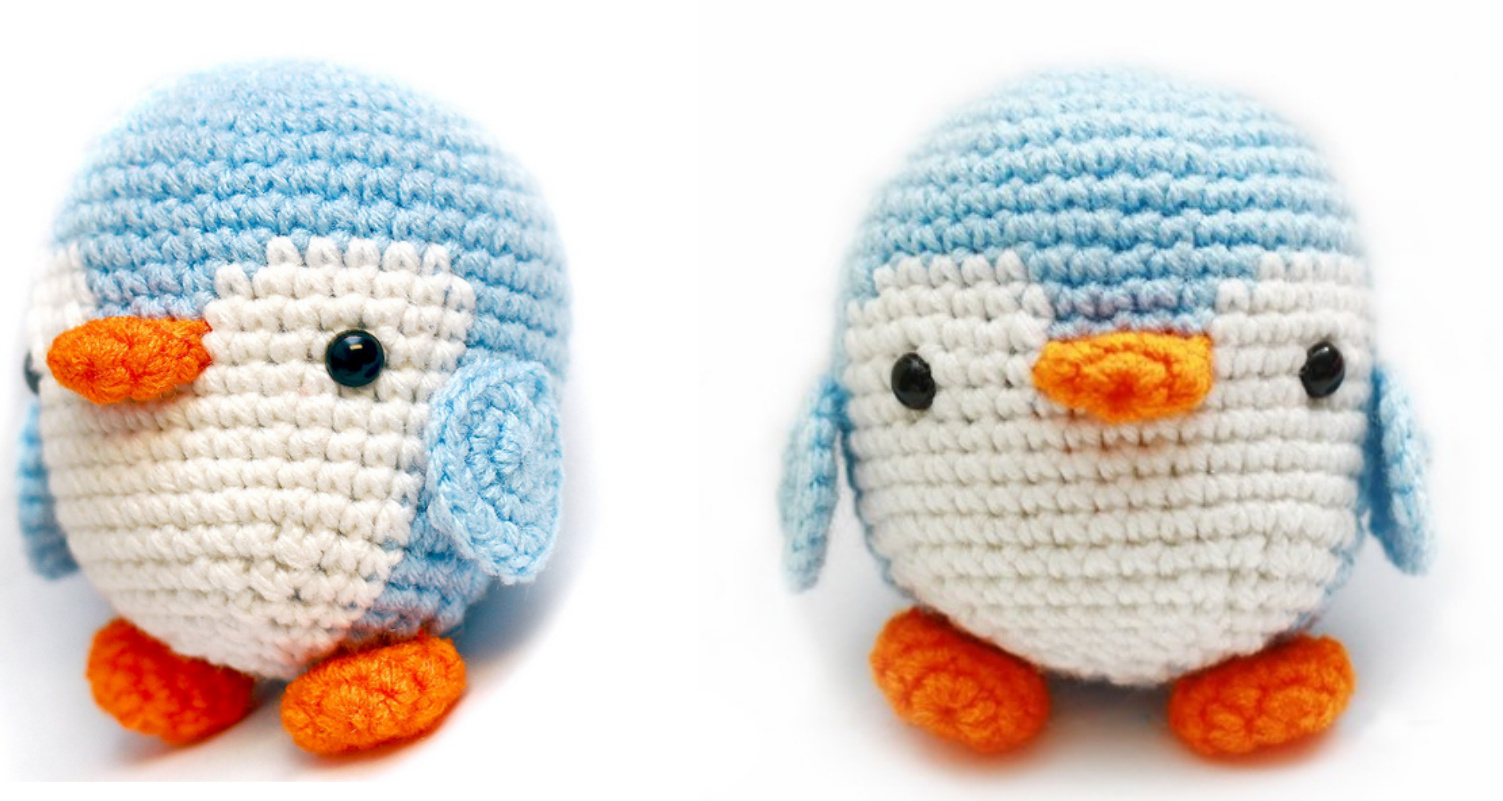
With purple yarn, R1: 6 sc into magic ring. (6 sts) R2: 2 sc in each st around. (12 sts) R3: \*2 sc in st, sc in next st\* rep to end. (18 sts) R4: \*2 sc in st, sc in next 2 sts\* rep to end. (24 sts) R5: \*2 sc in st, sc in next 3 sts\* rep to end. (30 sts) R6: \*2 sc in st, sc in next 4 sts\* rep to end. (36 sts) R7: \*2 sc in st, sc in next 5 sts\* rep to end. (42 ts)
R8-10: Sc in each st around. (42 sts, 3 rounds)
R11: Sc in next 13 sts. Change to white yarn, sc in 5 sts. Change to purple yarn, sc in next 6 sts. Change to white yarn, sc in 5 sts. Change to purple yarn, sc in next 13 sts. (42 sts) R12-14: Sc in next 12 sts. Change to white yarn, sc in 7 sts. Change to purple yarn, sc in next 4 sts. Change to white yarn, sc in 7 sts. Change to purple yarn, sc in next 12 sts. (42 sts, 3 rounds) R15-19: Sc in next 12 sts. Change to white yarn, sc in 18 sts. Change to purple yarn, sc in next 12 sts. (42 sts, 5 rounds) Put the safety eyes between R14 and R15, each one about 3 sts away from the outer edge. R20: Sc2to9, sc in 5 sts, sc2to9, sc in next 3 sts. Change to white yarn, sc in 2 sts, sc2tog, sc in next 10 sts, sc2tog, sc in 2 sts. Change to purple yarn, sc in next 3 sts, sc2tog, sc in 5 sts, sc2tog. (36 sts) R21: Sc2to9, sc in 4 sts, sc2to9, sc in next 2 sts. Change to white yarn, sc in 2 sts, sc2to9, sc in next 8 sts, sc2tog, sc in 2 sts. Change to purple yarn, sc in next 2 sts, sc2tog, sc in 4 sts, sc2tog. (30 sts) R22: Sc2to9, sc in 3 sts, sc2to9, sc in st. Change to white yarn, sc in 2 sts, sc2tog, sc in next 6 sts, sc2tog, sc in 2 sts. Change to purple yarn, sc in st, sc2tog, sc in 3 sts, sc2tog. Change to white yarn and fasten off purple yarn. (24 sts) Start stuffing. R23: \*Sc2tog, sc in next 2 sts\* rep to end. (18 sts) R24: \*Sc2tog, sc in next st\* rep to end. (12 sts) Finish stuffing.
R25: \*Sc2tog\* around. (6 sts)
Fasten off, leaving a tail. Thread yarn onto yarn needle and insert the needle through the front loop of each stitch. Pull the tail tight.
Beak:
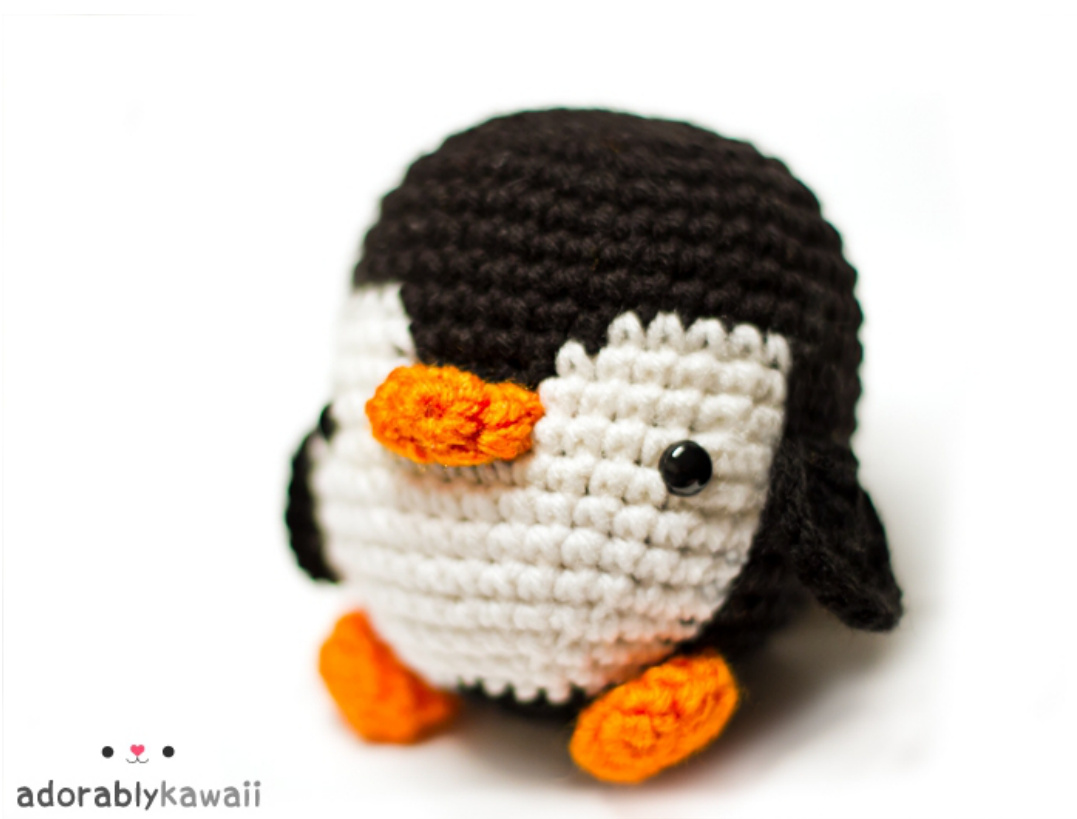
With orange yarn, R1: 6 sc into magic ring. (6 sts) R2: 2 sc in each st around. (12 sts) Sl st in next st. Don't stuff. Fasten off, leave a long tail for sewing. Flatten the piece so the edges meet and sew through both layers. Sew over the last round of the 4 sts of purple on R14 of the head & body.
Wings (Make 2):
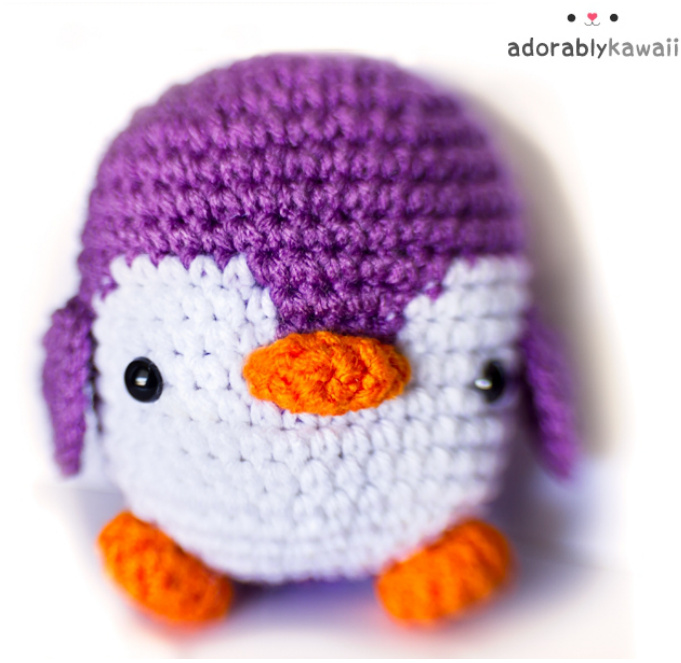
With purple yarn, R1: 6 sc into magic ring. (6 sts) Crochet over the beginning tail as you go along or weave it in at the end. R2: 2 sc in each st around. (12 sts) R3: \*2 sc in st, sc in next s+\* rep to end. (18 sts) Sl st in next st. Fasten off, leaving a long tail for sewing. Sew the top of the wing around eye level at about R14-15 of the head & body.
Feet (Make 2):
With orange yarn, R1: 6 sc into magic ring. (6 sts) R2: 2 sc in each st around. (12 sts) R3: Sc in each st around. (12 sts) R4: \*Sc2tog\* around. (6 sts) Sl st in next st. Fasten off, leaving a long tail for sewing. Flatten the piece so the edges meet and sew through both layers. Pin them onto the bottom sides of the body (on about R20-24 of the head & body). Then sew through both of the edge's stitches onto the body.
@ Adorably Kawaii. Pattern is for personal use only. Please don't redistribute/resell the pattern in any way or form. If you post the finished items you make online, my only request is that say something like “Pattern designed by Adorably Kawaii - www.adorablykawaii.com" Email: adorablykawaii@gmail.com Website: http:/ /www.adorablykawaii.com


