ampus Purse
I made this item for a friend about 10 years ago. At the time, we were both going to college and our biggest problem was having to drop the 40 pound back pack in order to rummage through for our wallets, and fish out the scan-able student ID for near every room we walked into (our schools version of attendance). Finding. keys after they spent their day migrating under the books was also a hassle but the worst was not having that pack of gum at the ready for when that really hot guy sitting at that desk across from us gets the courage to 'borrow a pencil'. Our requirements were pretty basic. For the bag to be secure from a random snatcher, to hold our basic supplies, and to fit under our back packs while keeping easy access through out the day without taking up valuable hand space. This is what I came up with and I hope you find it just as convenient when coming home with an arm full of groceries or juggling the diaper bag!
| Materials: 1 Skein Bernat SuperValueSolids F hookorhooktoobtain gauge 6Buttons (four-1.5 to 2 inch and two 1 to1.5 inch buttons) All the usual notions. | Stitches used Chain (or magic loop) DoubleCrochet t(DC) Slip Stich (SI) Single e Crochet (Sc) |
Gauge: 8dc and 4 rows per 2 inch. Ch5 and join with Sl (or magic loop) Ch2 (counts as first dc now and through entire pattern) DC in loop space, ch2. \*dc2, ch2\* three more times. Join to top of ch2 with a sl. (4 sections of 2dc and 4 spaces) You have now made a square with 'windows' at each of the corners and completed the first row! -Follow this method of increase for a total of 20 rows: Ch2, \*dc across to space, dc inside the window, ch2, dc inside the window\* Join to top of ch2 with a sl. This will add two stitches per side on this square. In the first row increase, you will have 4 dc on each side of the windows. The second row increase will have 6 dc on each side and so on until you reach 40 dc per side. After a round or two, the pattern becomes a littlebrainless,perfectforamoviesession! You are done with the basket!
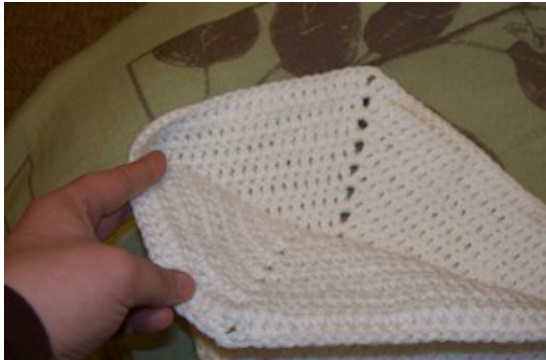
At the end of 20 total rows, Sl over to a window. Pattern copyright to Jessica Patrick, 2011: You are welcome to use this pattern to knit your own bag, as a gift or for charity. You may not sell the pattern itself or the finished goods made from this pattern, or give this pattern away to sell yarn without written permission. Contact me on Ravelry.com. User ID: Maiahmae Now we fold it. Match up the corners together so that the windows are aligned. When it's all set up, sc around both window spaces together to join the two sides, turn. This is the set up for the strap.
-Start strap
Ch2, \*dc across through both the front fabric and back fabric to make the base for your strap and to join the folded piece together.\* (21 stitches)
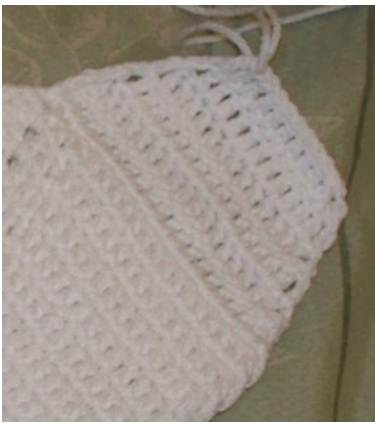
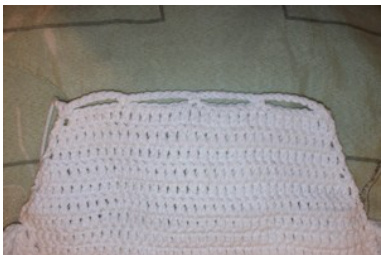
The ch2 is the first dc, therefore is taking up the “first” space. If you skip one, that's the second space. This is why we are using the third space. This also creates a moredefined slanton the end stitches instead of using the method of combining two stitches together. \*Ch2, turn. Dc in third stitch. Dc until the last two stitches, sk1, dc. \* Repeat until 11 stitches remain. You have 42 unmade stitches here. (40 in the row and 2 in each window). Join in the window, being sure to snag two of them, then Dc across that front lip (careful not to snag the back lip). Your last stitch inside the twowindows. Using the same decrease as we did for the straps, \*Ch2, turn. Dc in third stitch. Dc until the last two stitches, sk1, dc. \* Repeat until 30 stitches remain. Ok, here's where we put the button holes. Ch1, sc, ch7. \*Skip 7 stitches, sc.\* repeat three more times then sc1. Finish off.
-Attaching buttons
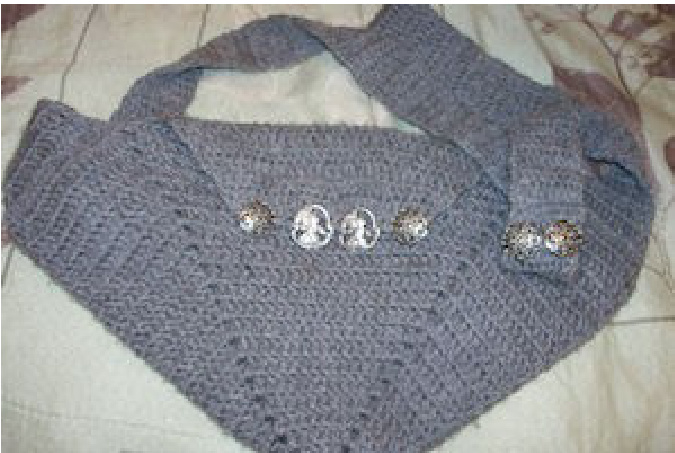
The straps are secured by overlapping them by a row or two and securing with 2 buttons evenly spaced. These bare a lot of weight and tugging, so it may be a good idea to sew (any old way) to each other first. \*Ch2, turn. Dc across.\* for 35 (40 for a longer strap) rows. Finish off. Second strap set up: Join yarn in one window. Fold as done on the other side, then follow directions from 'StartStrap"
-The Flap
Once the straps are done and finished off, now we start the flap. Pick a side you like as the front, (you may want to keep a marker here for a second), turn it over so that the back is facing you. To attach buttons to the flap, fold the flap to see where the holes line up. Go one row down from there and center each button to their respective hole. The top will wear out over time and it's best to plan for that which is why we are attaching the flap buttons one row lower then where the holes lay across. So wil the straps! These stitches will elongate about 4-6 inches after the first semester or two of use. You can block them to speed up the process if you'd like but blocking isn't really necessary for this pattern. That's it! Once any loose ends are weaved in, the project is complete. There are some modifications that can be done to make it extra special for yourself or your giftee. For instance, at the ends of the straps, you can add a shell pattern. Changing colors is always fun (maybe the straps and flaps are done in a different color then the basket portion). Stripes are easy to build into this. Also, a row of edging around the raw edges might be neat too. Play with it to customize it to your needs. Funky buttons and flair along the straps makes it casual and metallic/wooden buttons give it a more professional look. It's all up to you on how you dress it up. Pattern copyright to Jessica Patrick, 2011: You are welcome to use this pattern to knit your own bag, as a gift or for charity. You may not sell the pattern itself or the finished goods made from this pattern, or give this pattern away to sell yarn without written permission. Contact me on Ravelry.com. User ID: Maiahmae


