Flettepanneband i riller
Barn (dame)
Takk for at du valgte mitt monster. Ta gjerne kontakt dersom du lurer pa noe eller har tilbakemeldinger: christina.kristoffersen@gmail.com Tag gjerne pannebandet med #rilleflette dersom du legger ut bilde. Monster skrevet av/ pattern written by Christina Kristoffersen
Garnforbruk: 1o0 gram alle storrelser Garn: 10 x 10 cm = 17 masker x 22 rader Settepinner nr 4.5
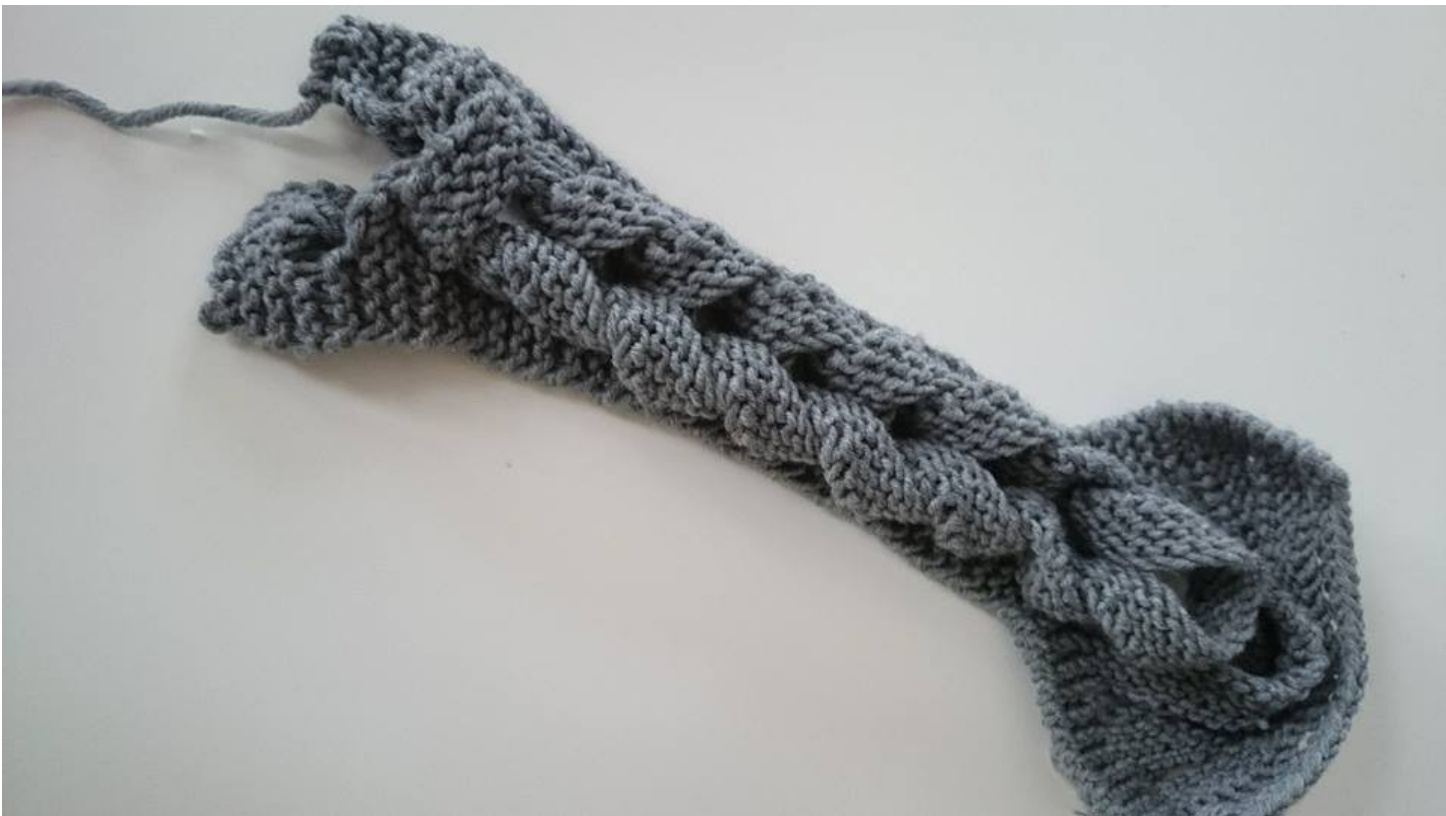
1 rille = 2 omg. Pannebandet strikkes frem og tilbake pa to settepinner. Legg opp 36 masker. Strikk 8 omg = 4 riller. Pa neste omgang strikkes de forste 8 maskene, fell de 20 neste maskene, strikk sa de 8 resterende maskene vanlig rett. Snu arbeidet og strikk forst de 8 forste maskene. Legg sa opp nye 20 masker (kast) hvor du felte sist omgang og strikk de 8 resterende maskene pa omgangen. Fortsett slik til arbeidet maler ca 48 (54 cm) eller onsket lengde. Det skal vaere 4 riller mellom hvert stykke hvor det felles. Det er for at fletten ikke skal bli sa tynn.

(Obs: pa bildet har jeg kun 4 masker i hver side, mens i oppskriften skal det vaere 8 masker i hver side) Monster skrevet av/ pattern written by Christina Kristoffersen
Montering:
Forste lokken skal vris. Deretter tar du neste lokke gjennom den du na har i handen. Og fortsett slik til du er gjennom alle lokkene.
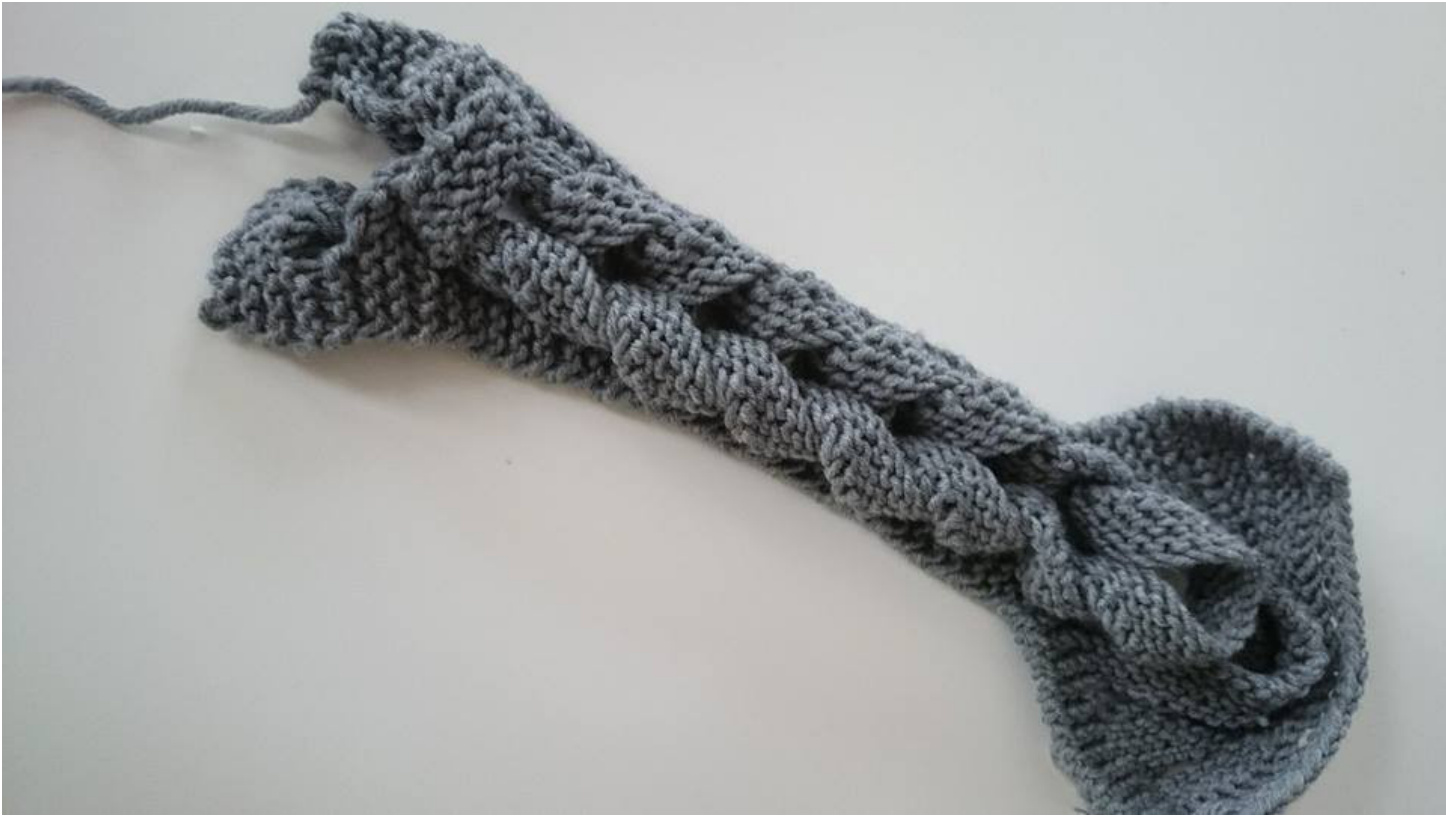
Na skal pannebandet sys sammen bak. Det sys sammen pa vrangen. Det kan vaere vanskelig a fa en fin kant bak. Men prov sa godt du kan a sy den siste lokken fast i pannebandet hvor endene motes. Pa bildet kan du se at det <mangler> en del nederst. Sy lokken fast slik at fletten ikke gar opp. Sy sa rillene pa endene sammen pa vrangen. Det anbefales ikke a dampe pannebandet siden der er en flette, men dersom du foler at det er veldig <klumpete> kan du dampe den forsiktig pa vrangen for du har sydd det sammen.
Headband - with grooves - Children (lady)
Thank you for choosing my pattern. Please contact us if you have any questions or feedback: christina.kristoffersen@gmail.com Tag happy headband with #rilleflette if you put out image. - Yarn Consumption: 100 grams all sizes Yarn: 10 x 10 cm = 17 stitches x 22 rows Pointed Needles No. 4.5 1 garter = 2 rounds. The headband back and forth on two sets sticks. Cast on 36 stitches. Knit 8 times back and forth = 4 grooves. On next round knit the first 8 stitches, bind off the next 20 stitches, knit so the 8 remaining stitches. Turn the work and knit first the first 8 stitches. Add that up new 20 stitches (roll) where you last round bound off and knit the 8 remaining stitches. Continue like this until headband measures approx 48 (54 cm) or in what length you need. There shall be four grooves between each slice.
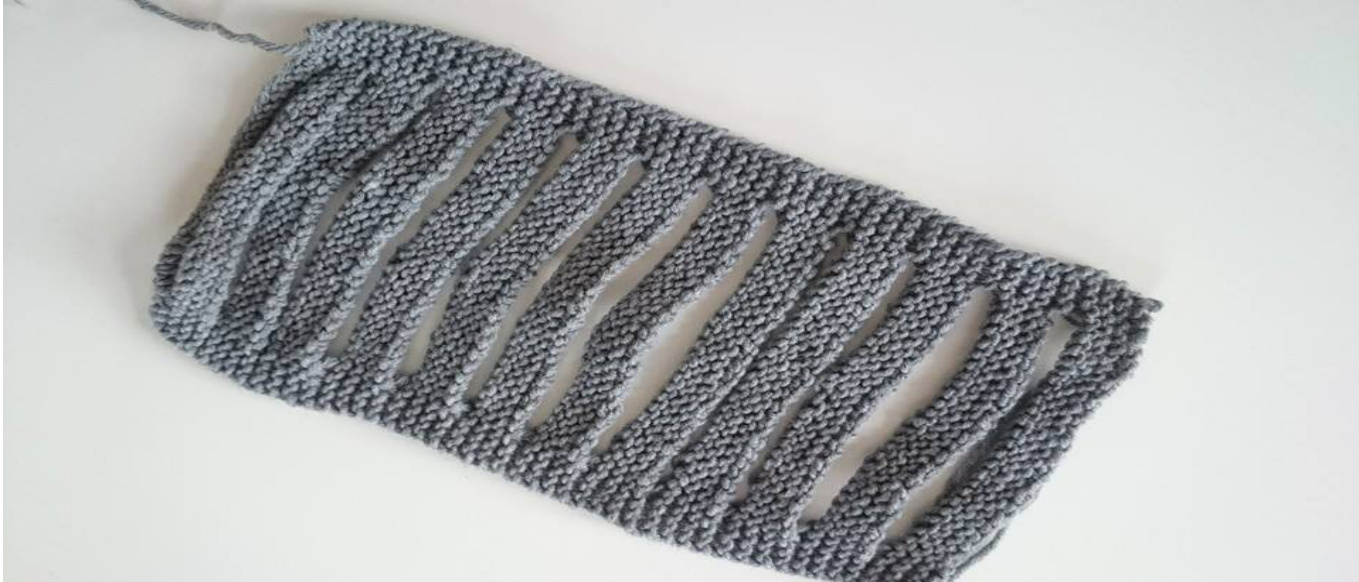
(Note: the picture the is only 4 stitches in each side, while in the pattern there is 8 stitches each side) Monster skrevet av/ pattern written by Christina Kristoffersen
How to make the braid:
First loop must be twisted. Then take the next loop through the you now have in your hand. And continue this way until you are through all the loops. Fasten threads.
Now sew the headband together inside out. It can be hard to get a nice edge behind. But try as best you can sew the last loop stuck in the headband where ends meet. In the picture you can see that the "missing" part at the bottom. Sew loop so that the braid doesnt get destroyed. Then sew the grooves on the ends together on ws. It is not recommended to steam headband since there is a merge, but if you think that it is very "lumpy" you can steam it gently inside out before sewing it together.


