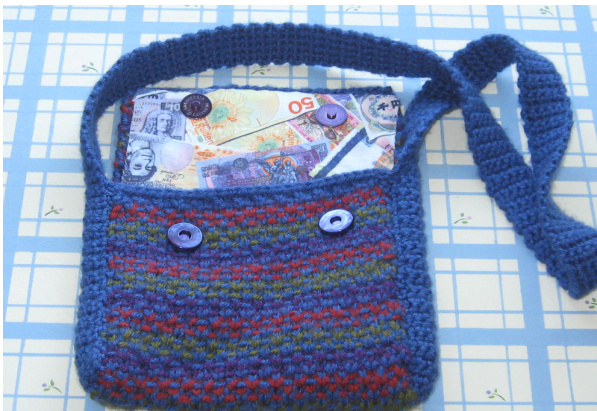
Tweed Stitch Stripe Bag Kristi Sweeney
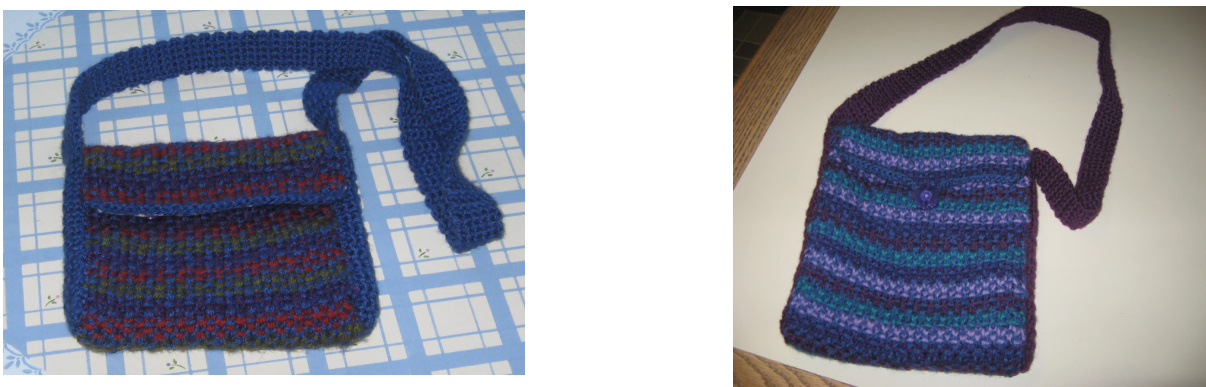
The bag is very versatile, very easy to adapt. Instructions are for 2 sizes: small - 6" wide by 6.5" tall and medium 8" wide x 9" tall (not including straps). Use three contrast colors or as many as you want. This can be a good stashbuster project! Materials: Lion Brand Vanna's Choice Solids & Twists or any worsted yarn 1 ball for main color (MC) 3 or more balls of contrast colors (CC) #7 needle G crochet hook for shoulder strap fabric for lining closures: Magnetic snaps or buttons Gauge: 5 stitches per inch in Tweed Stitch Tweed Stitch Row 1: with MC, K1, \*k1, slip 1 purlwise with yarn in front, rep from \* to last stitch, k1 Row 2: with MC, purl Row 3: with CC, k1, \*slip 1 purlwise with yarn in front, k1, rep from \* to last stitch, k1 Row 4: with CC, purl Please note: Row 1 and Row 3 and not the same; Row 1 Starts with 2 k1s and ends with 1 k1 whereas Row 3 starts with 1 k1 and ends with 2 k1s. Directions: CO 30 (34) stitches in MC Follow Tweed Stitch Pattern working the first 2 rows of every four in the MC and CC for the last 2 rows. Work in pattern until piece measures 15" (20") long, ending with Row 2 in MC. Bind off in Mc. Weave in ends. You can also tie the ends or carry up the yarn while you are knitting without cutting at the end of the rows. I did carry the main color. I find weaving the ends makes a cleaner edge.
Assembly
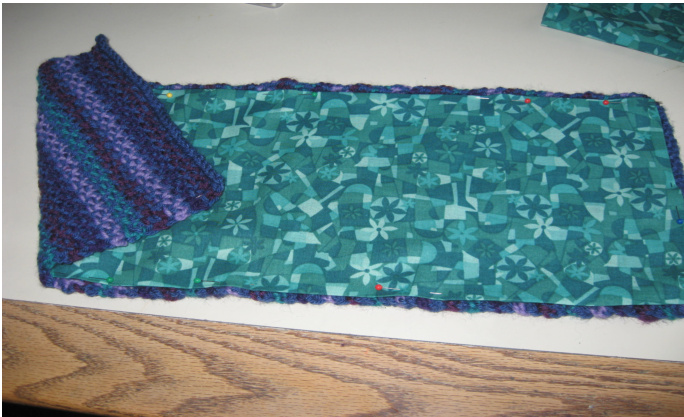
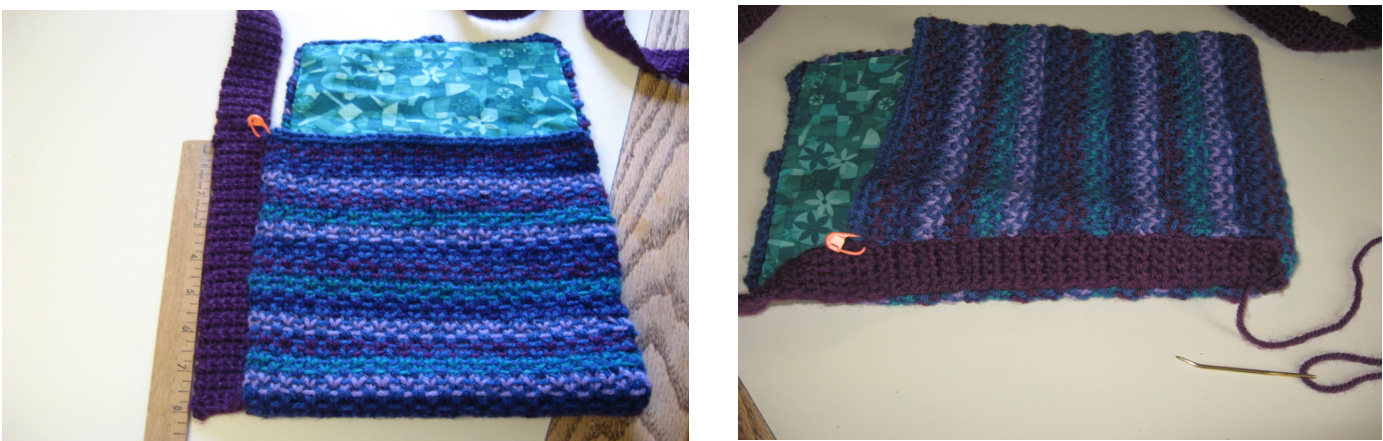
Lining: Measure finished rectangle, then cut fabric about the same size. Turn under and iron 1/4" around all edges. Hand sew lining to wrong side of knitted piece.
Crochet shoulder strap: with MC or any color you choose: ch 6, Row 1: sc in 2nd ch, 4 sc, turn Row 2: 5 sc, turn repeat Row 2 until your strap is 44" (50") Attaching strap to sides of bag: Place marker 6"(8") from bottom edge of strap. With lined bag right side facing you match marker on strap to top left side of bag. With yarn sew strap 6"(8") down side of bag, continue sewing bag across bottom of strap and then up 6"(8") leaving three inches for the top flap of bag. Cut yarn and secure end. Repeat opposite side making sure strap is not twisted.
Finishing options:
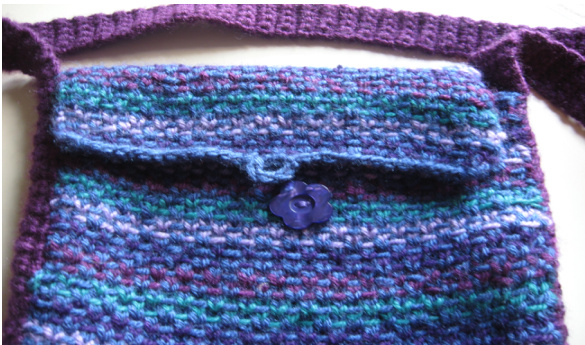
Button and loop - find the center point on binding on the front of flap, with crochet hook insert hook through stitch on right of center point, YO, pull though and ch 5 stitches and then slip stitch into 2nd stitch on the left to create a loop. Secure ends. Sew button on front to fit into loop.
Magnetic snaps - attach snaps to lining on inside flap and front of bag
And there you have it, a beautiful woven bag! \*This pattern is provided for free and neither the pattern nor the bag made from the pattern may be sold.


