Patterns & Instructions bySappy Patty Orochet
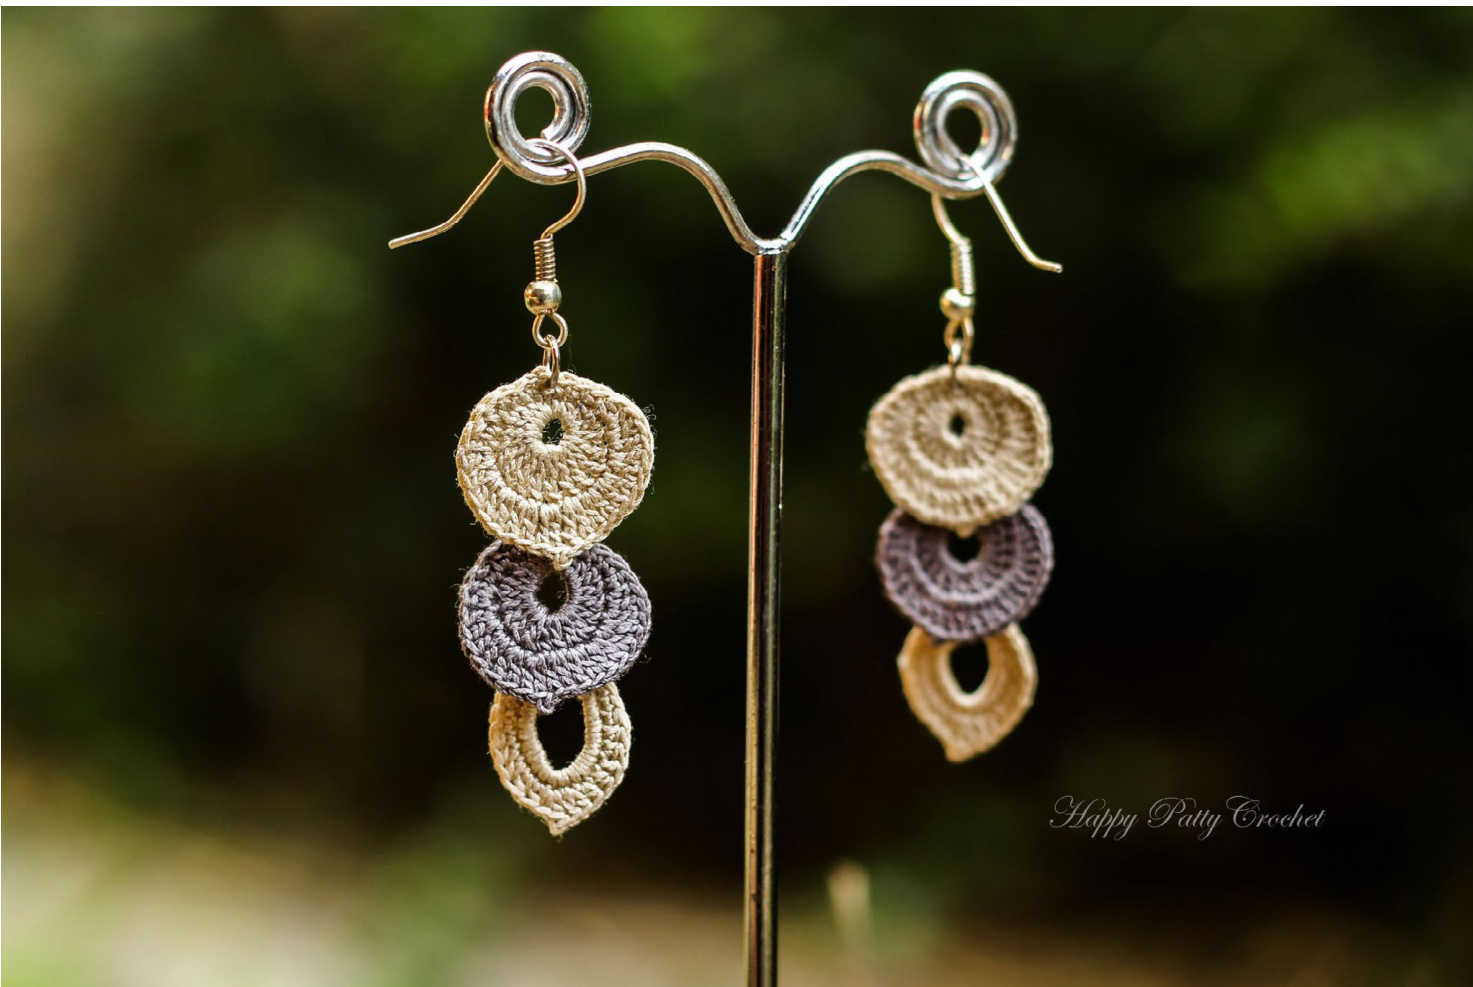
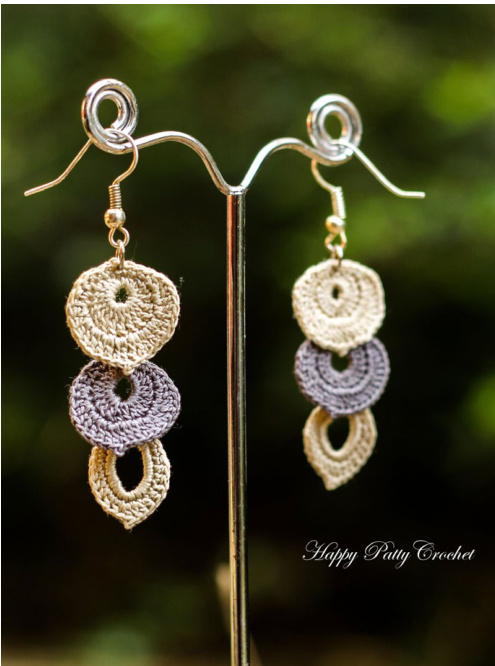
Drops Earring
Skill Level Beginner Skill Needed Crochet
Introduction
In here you will find pattern and instructions for an easy, quick and elegant earrings. Earrings are made of 3 elements that are connected together with either simple jump rings or by sewing. This earring's design is flexible and different feels can be achieved by using different color combinations, shaping, thread and adding or removing elements.
Materials
- Crochet Thread Size #40 in your choice of colors. - Crochet Hook Size 0.6mm / US size 12. - 2 x Earring Hooks. - 10 x Jump or Split Rings or, alternatively, a Tapestry needle.
Pattern notes
The e-book starts with pattern diagram and then the instructions follows (in American Standard Terms, See appendix for conversion to British).
Materials Note :
I recommend using a 100% mercerized cotton thread in Size #40. But, of course, any durable thread in size between #20 to #50 should work. I've used thread from "Venus" brand, but the more popular Lizbeth brand have size #40 thread that can be used and should be easier to find (or any other brand for that matter)
I've created a page in my Blog where I updated a list of recommended tested threads - see here. \* If you have problem finding the material needed, don't hesitate to contact me and Ill do my best to help.
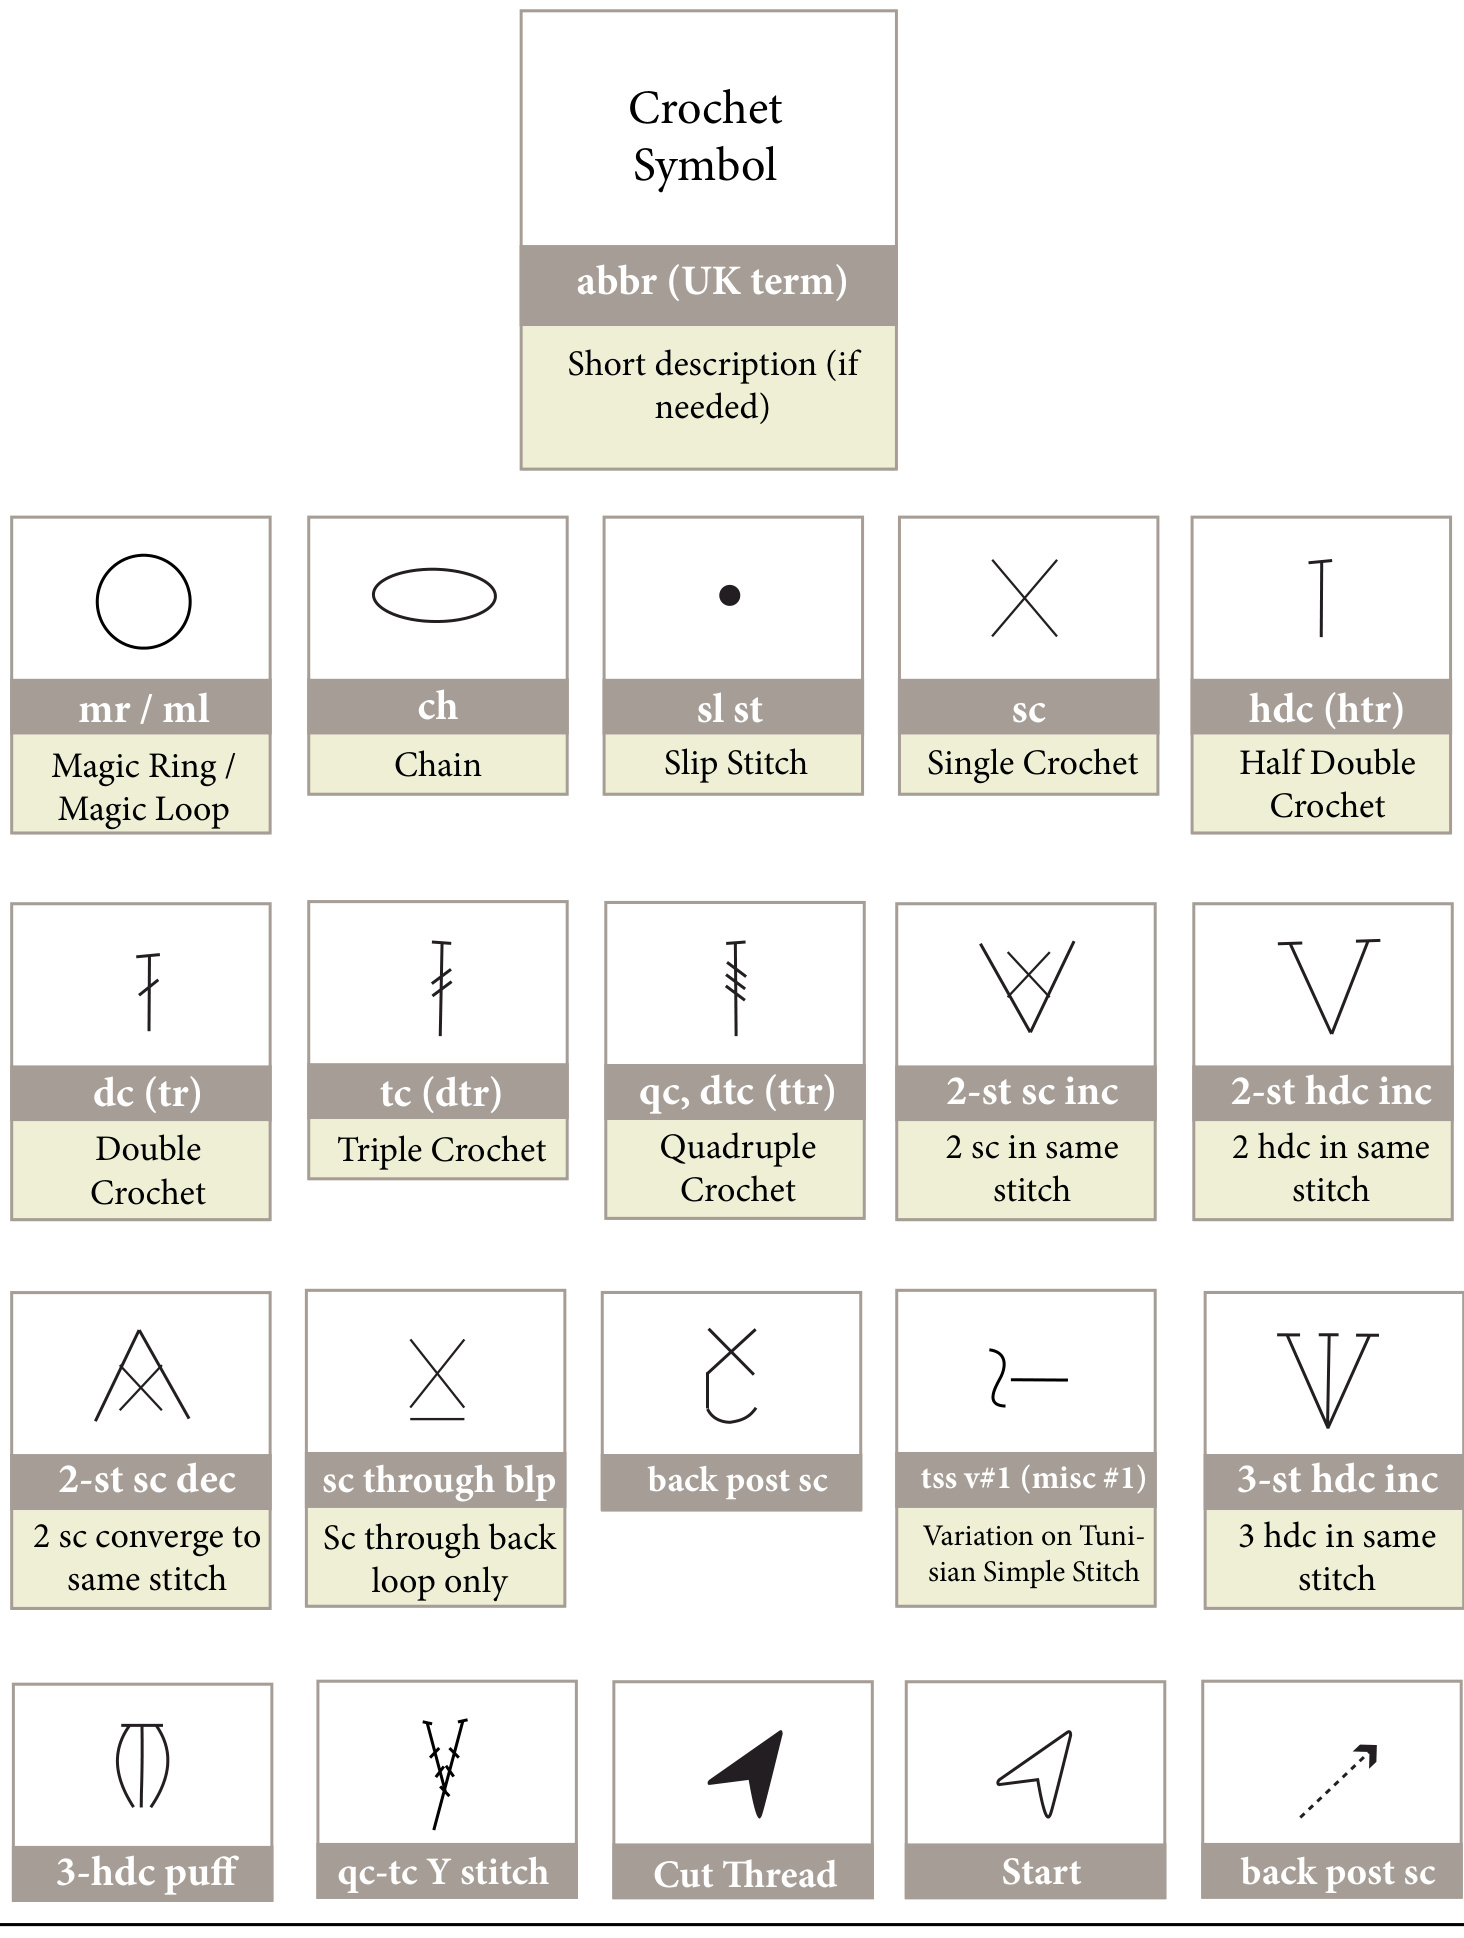
Abbreviations
sl-st - Slip Stitch ch - Chain sc - Single Crochet hdc - Half Double Crochet dc - Double Crochet 2-st dc inc - 2 Stitch dc Increase 2-st hdc-dc inc - hdc and then dc in same stitch yo - Yarn over sk - Skip beg - Beginning
Bottom Element - Pattern
Magic Loop : Make a large loop with yarn. Holding the loop with your fingers, insert hook into loop and pull working yarn through loop on hook. Continue to work indicated number of stitches into loop. Pull on yarn tail to close loop.
Stitch Key / Abbr.
X - Single Cr ochet (sc) - hdc then dc in same sti tch, - Chain (ch) (2-st hdc -dc inc) Half Double Cr ochet (hdc) Cut Th read
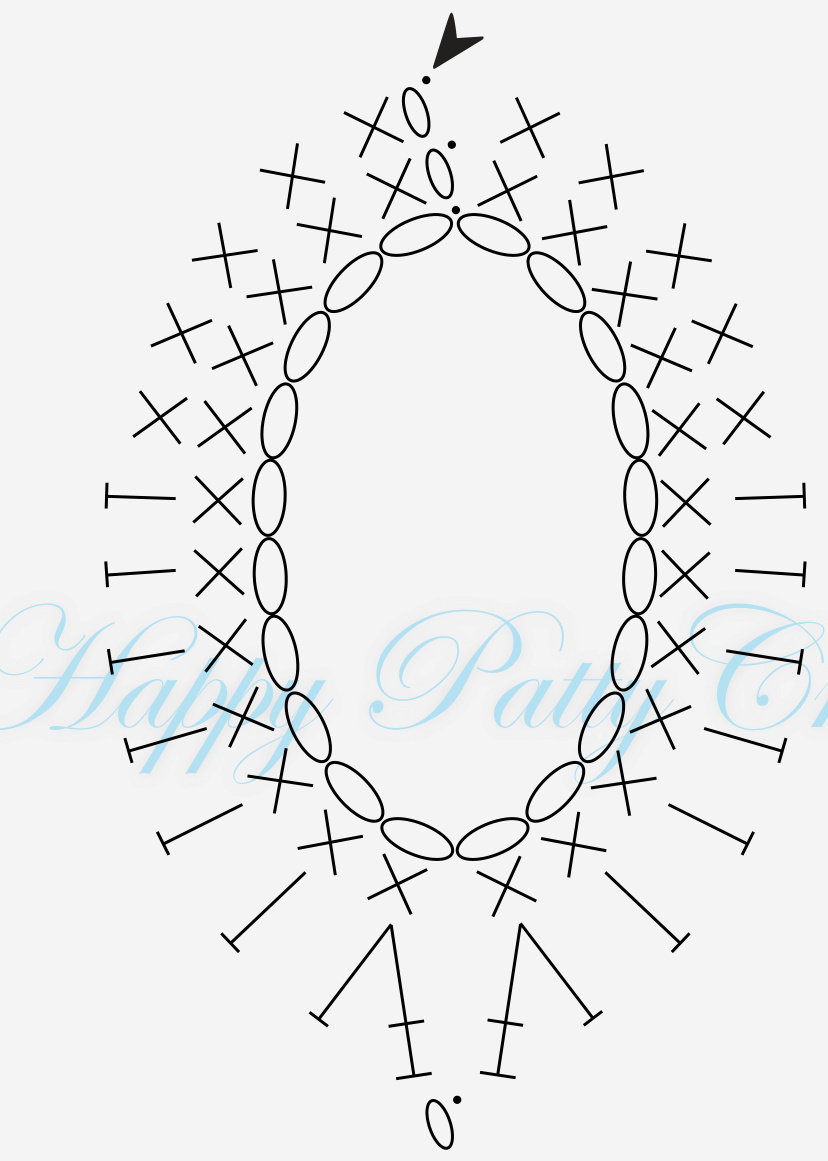
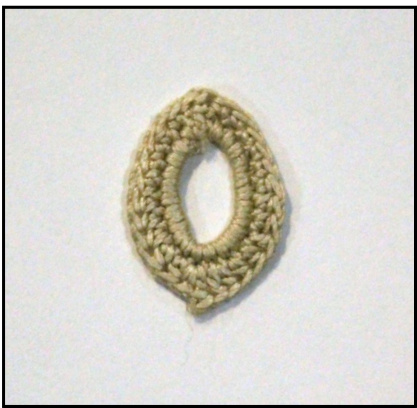
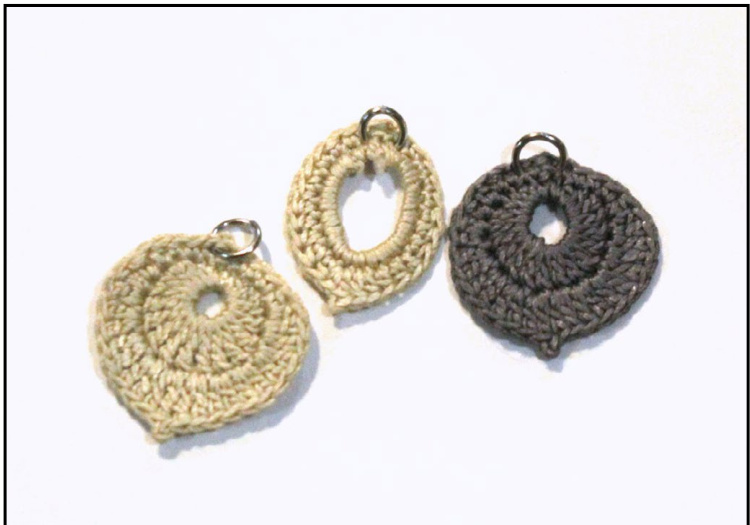
Top Element - Pattern
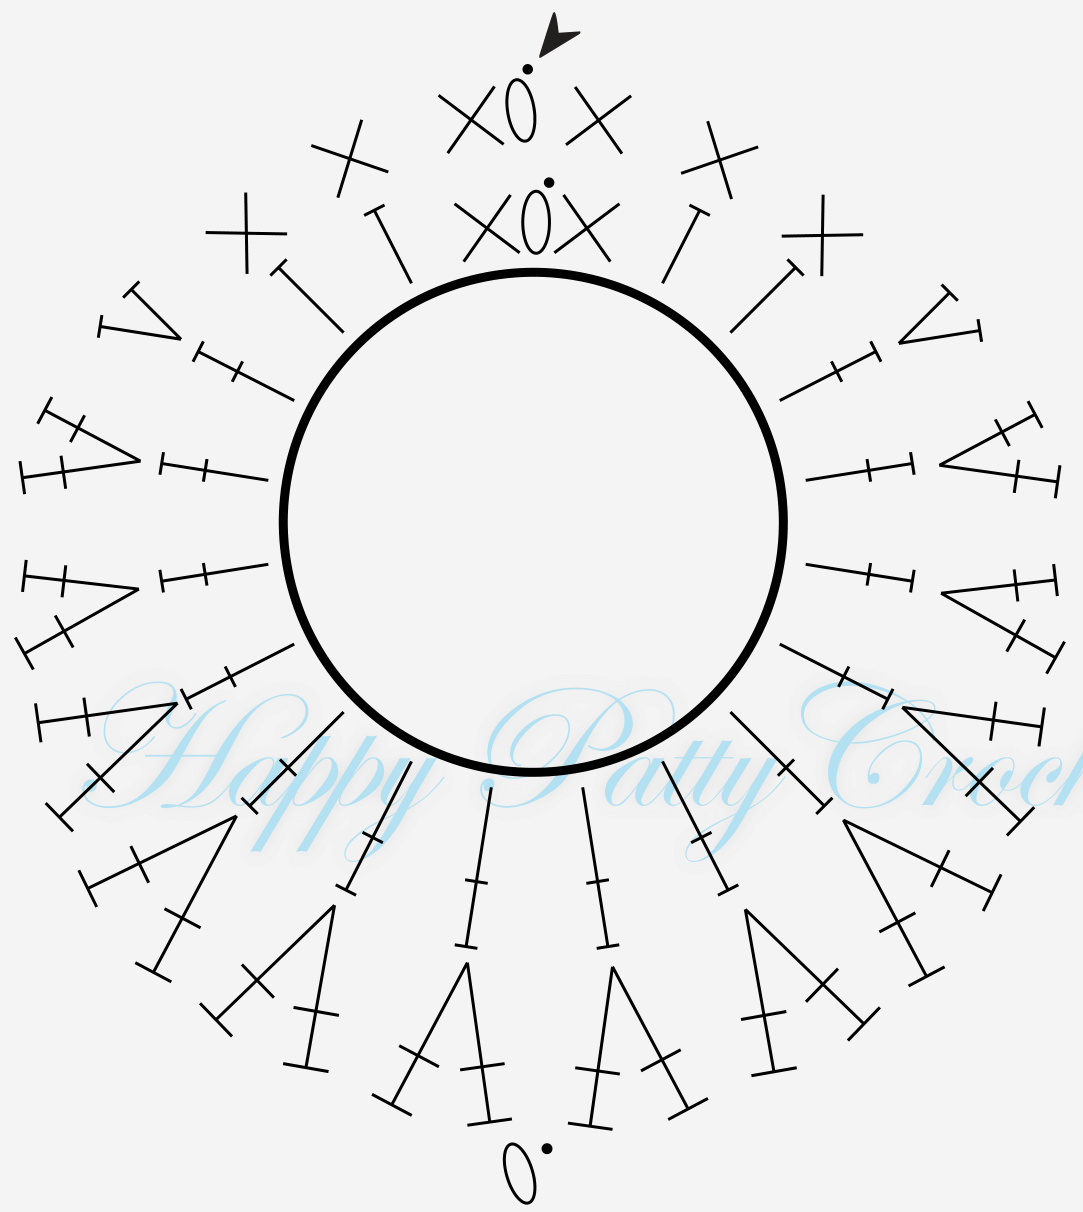
Stitch Key / Abbr.
- Single Crochet (sc) - Double Cr ochet (dc) - Cut Th read - Cha in (ch) -2 hdc in same st (2-st hdc inc) -Start - Half Double Cr ochet (hdc) f-2 dc in same st (2-st dc inc) - - Directions
Top Element - Instructions
Make 2 of this. Pay attention to shaping, you can modify the shaping on each of the top elements to create a different fel' to the earring. Size : \~0.75" x 0.75" (2 x 2cm) Rnd 1 (RS) : Magic ring, work in ring, ch 1, sc, hdc 2 times, dc 14 times, hdc 2 times, sc, sl-st to beg ch.
Rnd 2 : Work in each st, Ch 1,sc 3 times, 2-st hdc inc, 2-st dc inc 6 times, next we do the tip of the element with ch 1, sk 1, and sl-st to dc, 2-st dc inc 6 times, 2-st hdc inc, sc 3 times, join with sl st to beg ch. Fasten off.
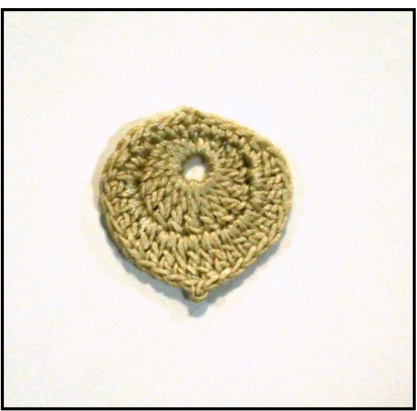
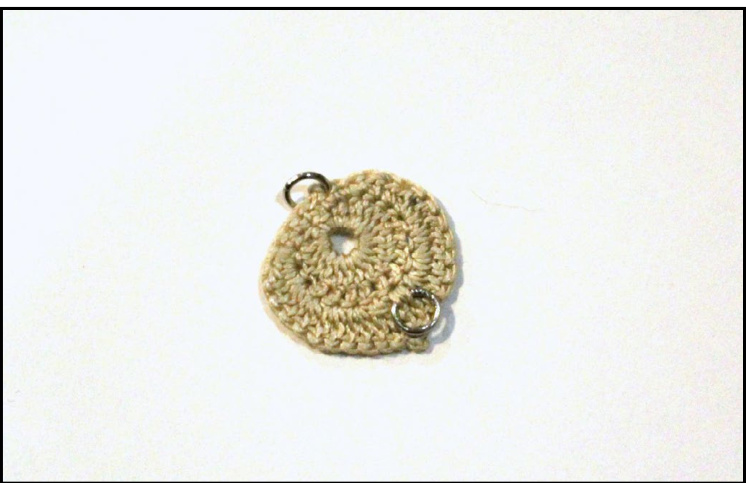
Bottom Element - Instructions
Make I of this. Size : \~0.75" x 0.55" (2 x 1.4cm) Rnd 1 : Do a ring with ch 20, close the ring with sl-st to beg ch.
Rnd 2 : Work in Ring, ch 1, sc 24 times, sl-st to beg ch. Rnd 3 : Work in each st, Ch 1, sc 5 times, hdc 6 times, 2-st hdc-dc inc, do the tip with ch 1, sk 1, sl-st to dc, and work your way back with 2-st dc-hdc inc, hdc 6 times, sc 5 times, sl-st to beg ch. Fasten off.
Bringing it all together
On top of the crocheted elements - yo leed an earring hook (any type would vork), and jump rings or split ring onnect all elements togethe You could connect the elements together by sewing, but I think the earring behaves better when all elements are connected using jump rings.
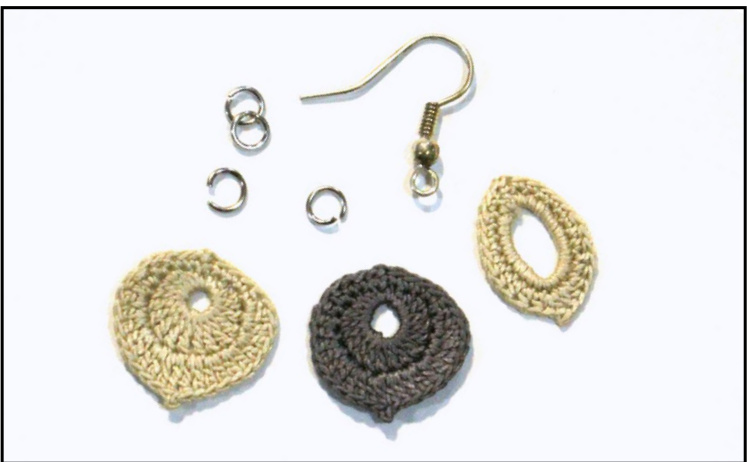
You'll need : \~13 blossoms, small leaf, large leaf, stem, hoop, glue and tweezer for arranging.
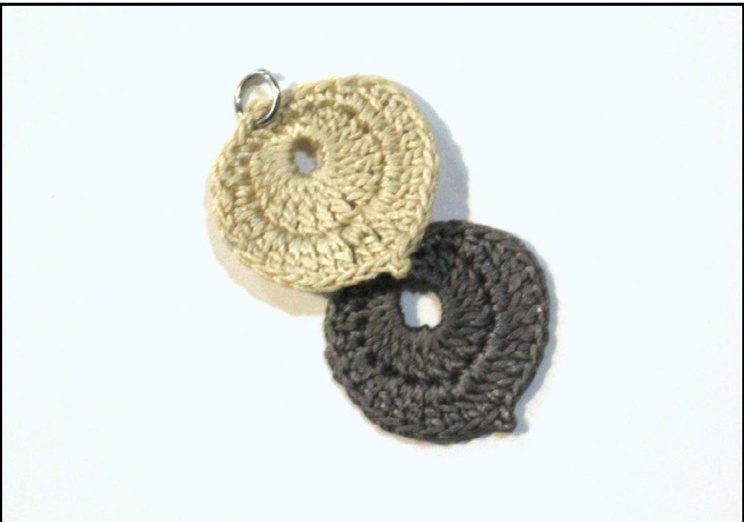
Step 1 - First, add a jump ring to each's element base (opposite side to its tip).
Step 2 - Next, add another jump ring to the top elements, below of each one's tip at the edge of round 1. Make sure you add the ring through the back of the element - that way the ring won't be too visible.
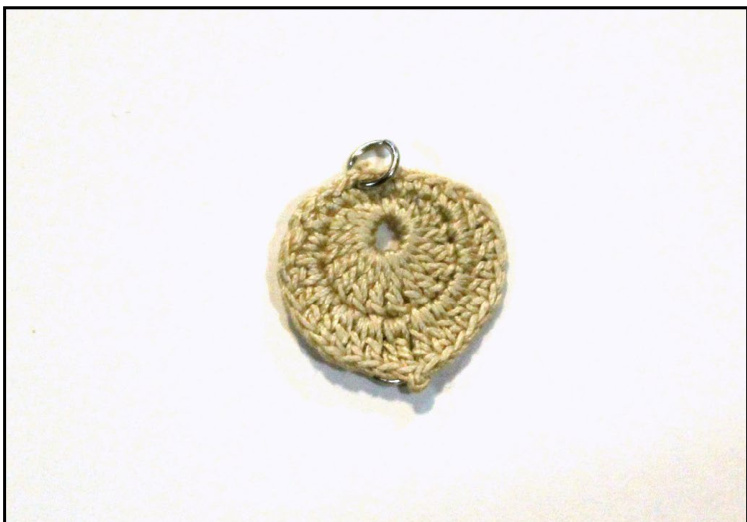
Step 3 - A front look of the element, as you can see, its difficult to notice the tip's ring.
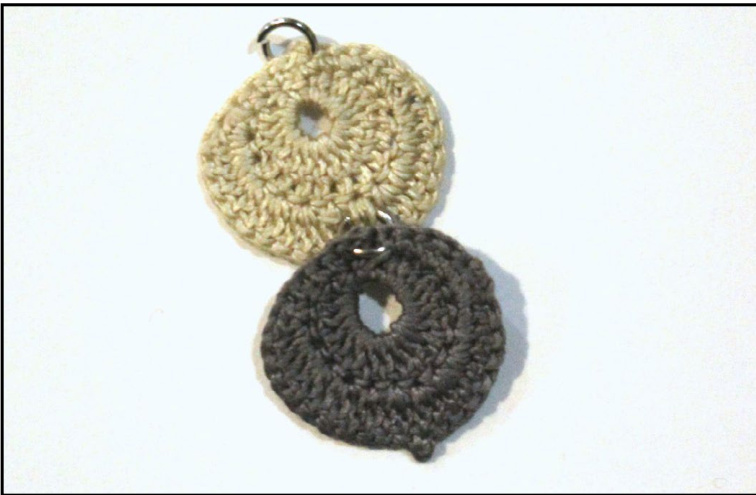
Step 4 - Now simply connect the tip's jump ring of an element with the base's ring of the element below it.
Bringing it all together
Step 5 - A front view of both elements.
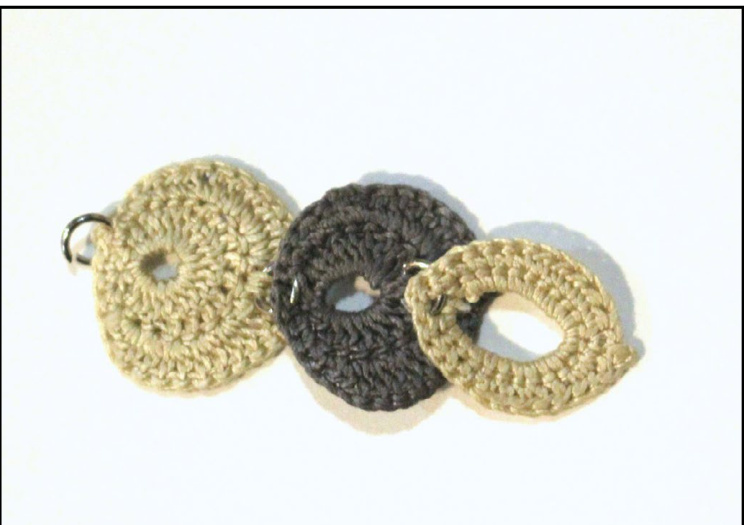
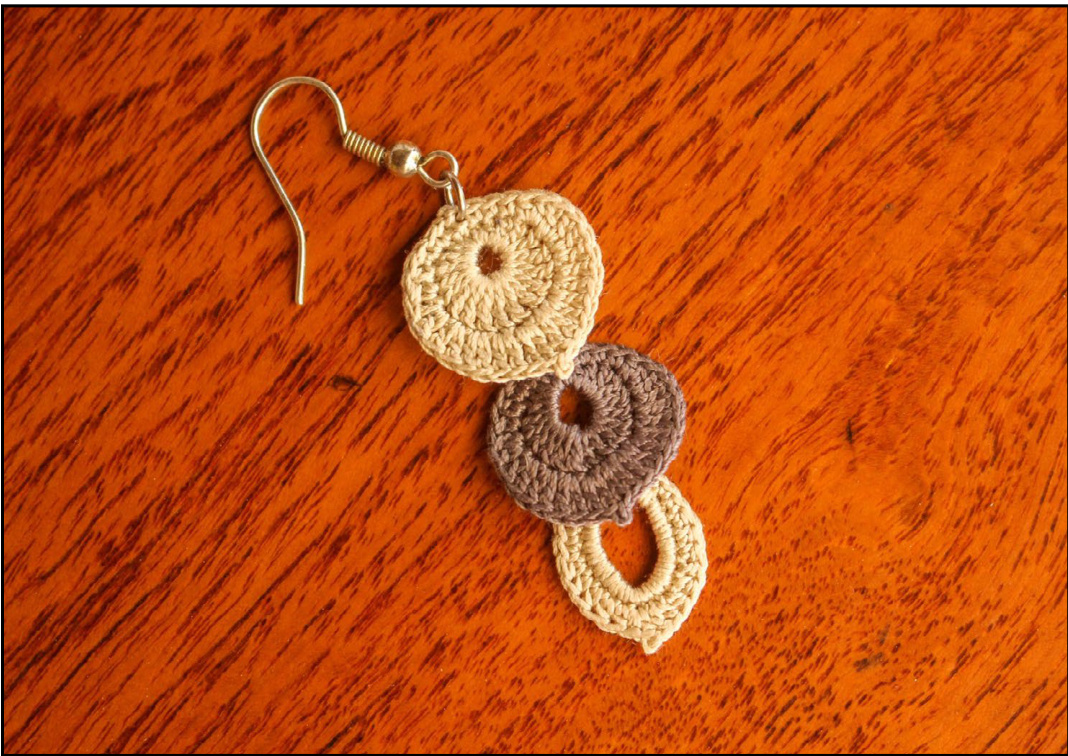
Step 6 - Repeat step 4 with the next element. Finish the earring by joining the bottom ring of the hook with the tip jump ring. and voila! the earring is finished. Finished size : \~1.85" x 0.75" (4.7x2cm)
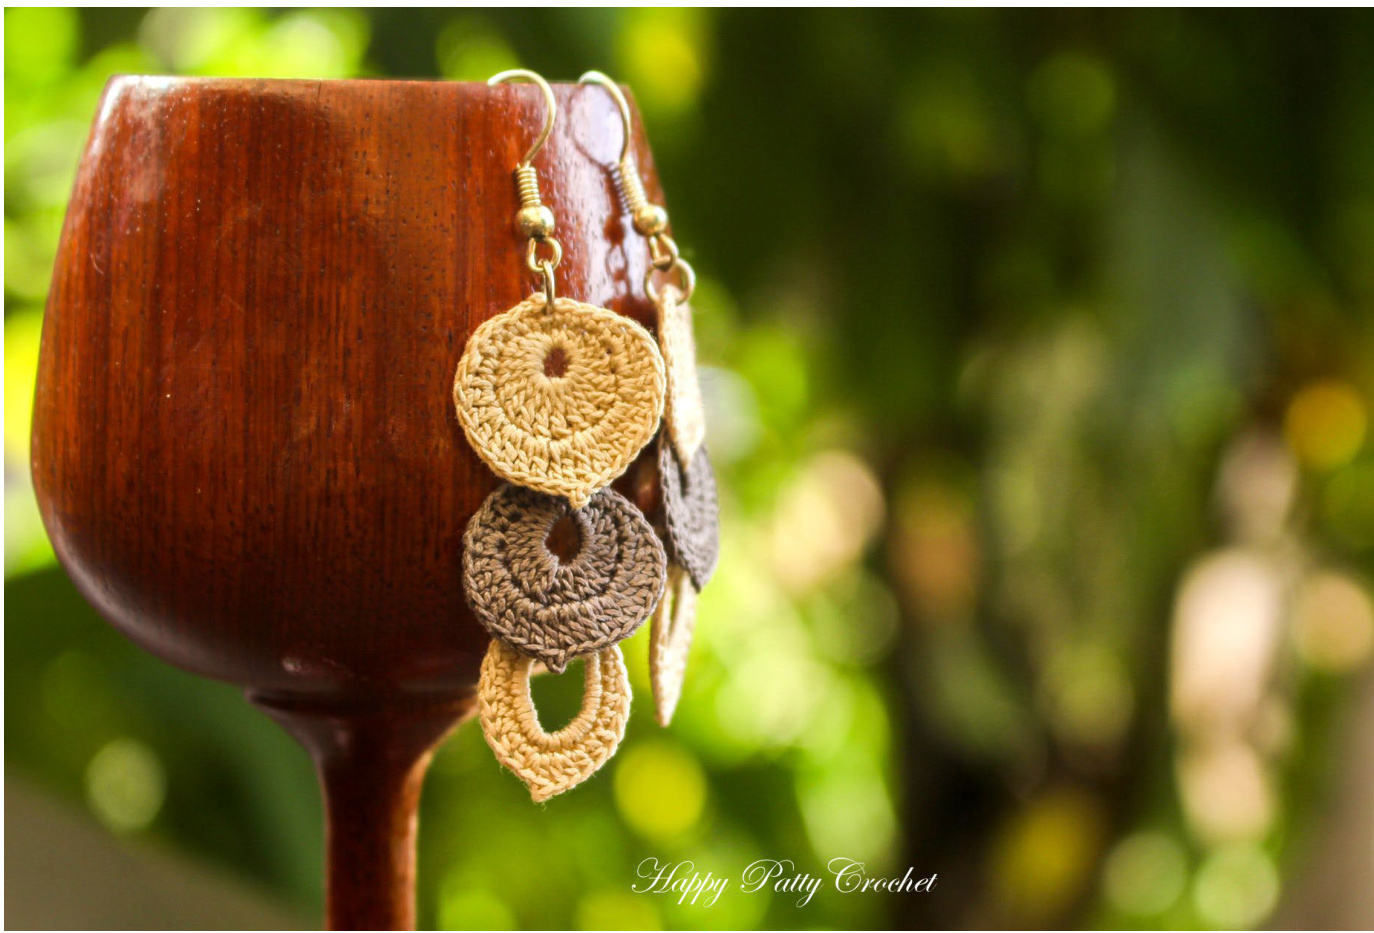
That's it :) Crochet in rainbow colors for a cute/springtime feel, in pastels or grey/creams for an elegant one. Use thicker thread for a larger earring - or apply different shaping to each top element to create a more dynamic feel.
I really hope you enjoyed making this earring. If you have any question, please let me know and I'll do my best to help. Thanks and enjoy crocheting! Happy Patty :)
Copyright Notice / Terms of Use
This Pattern is my original and unique design, please do not resell, redistribute, copy or rewrite this file, its text content or the included patterns/photos. Feel free to include the finished flower in any project that you want, either for private use or for sell. If you choose to sell the flower, please include a link to my shop and credit Happy Patty Crochet as the original designer. Thank you for understanding!
Appendix
Crochet Symbols and Abbreviations