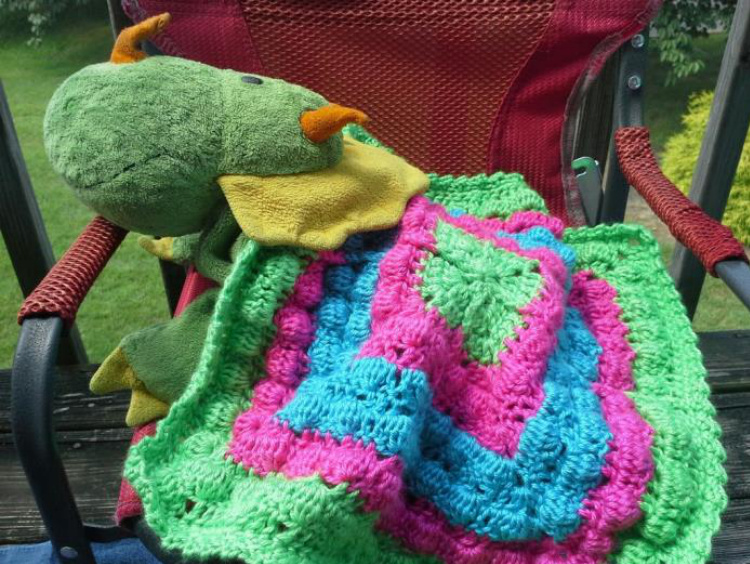
Trey's Blankie As part of the #AugCAL on Google+, we were challenged to make our own pattern and write it to share. My son's stuffed dinosaur (Trey) was in need of a blankie. After consulting with my clients, this is what was developed. The original is about 14" square, but the pattern can be repeated as often as desired and with whatever weight yarn or thread and appropriate hook.
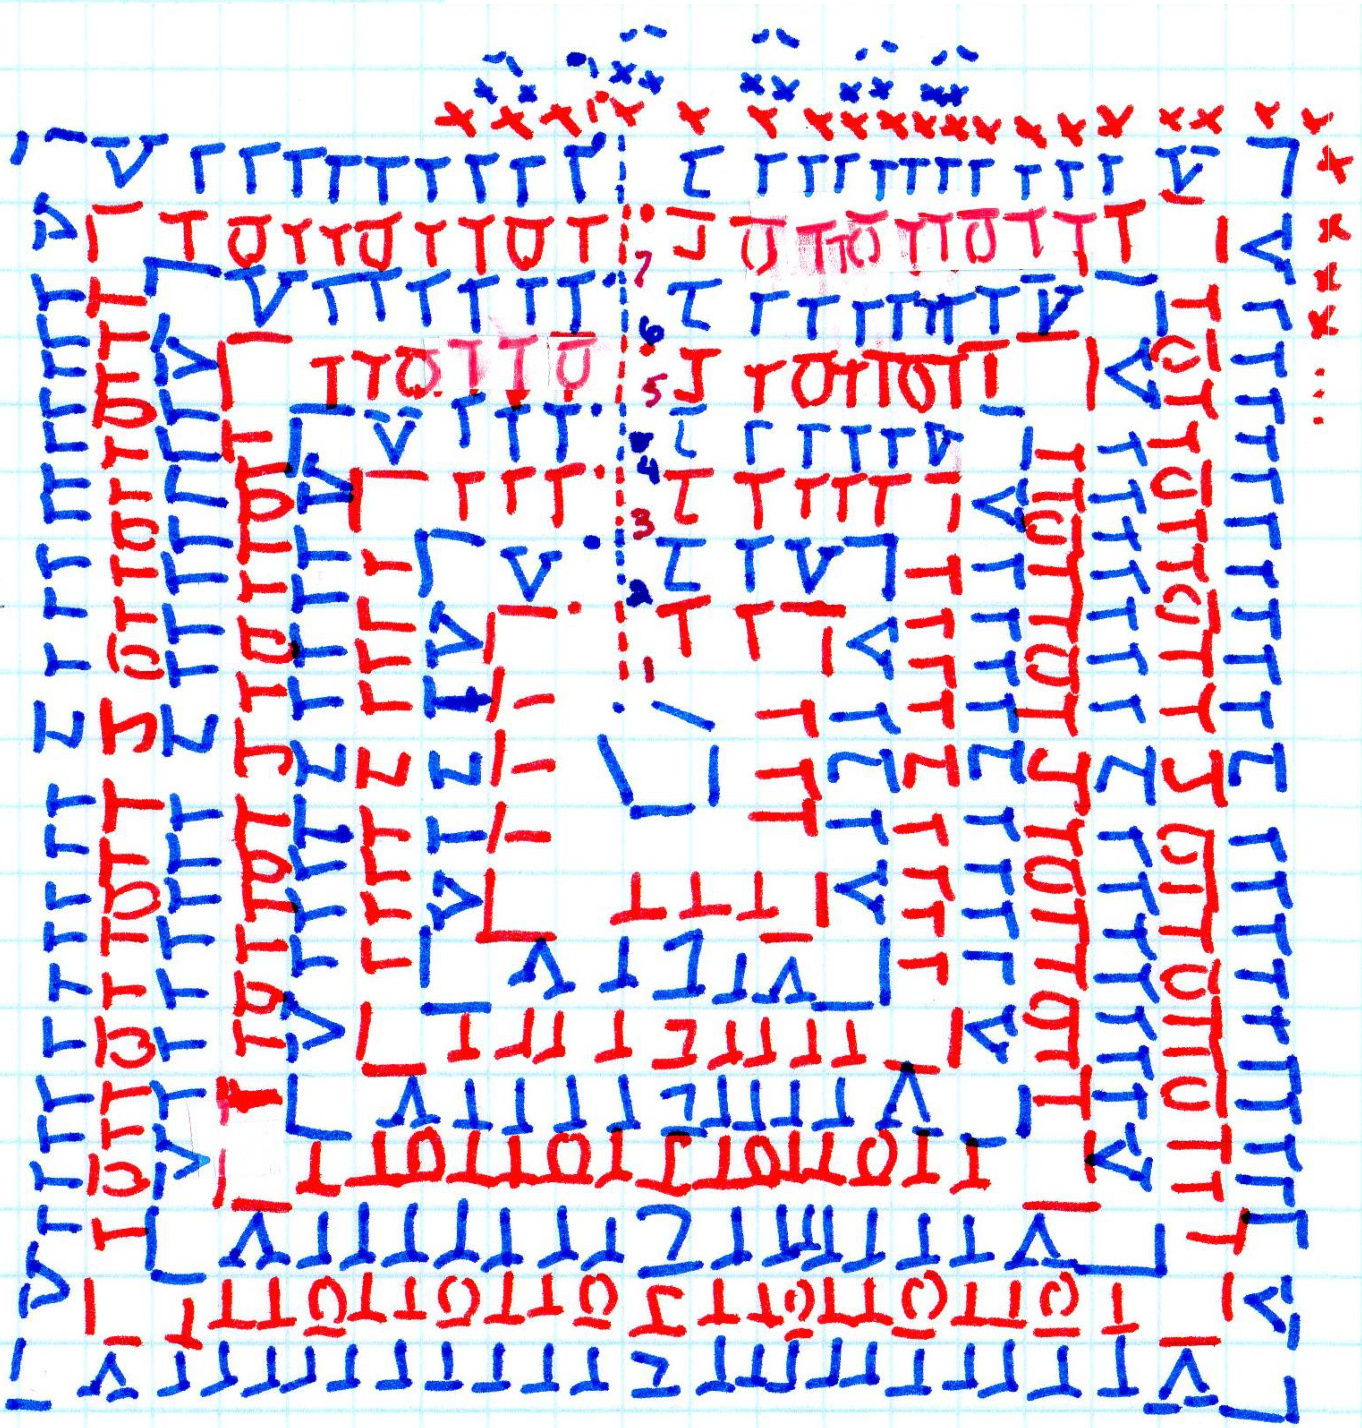
Approximately 6 oz Caron Simply Soft H Hook Special Sitches: DC Cluster : \* YO, insert hook in st indicated, YO and pullup a loop, (YO and draw through 2 loops on hook) twice; repeat from \* 4 times more, Y0 and draw through all 6 loops on hook Front Post Double Crochet (FPdc): YO, insert hook from front to back around post of stitch indicated, YO and complete dc as usual Back Post Double Crochet (BPdc): YO, insert hook from back to front around post of stitch indicated, YO and complete dc as usual Note: Beginning ch3 counts as dc throughout. Turn at the end of every round unless otherwise noted. The original used a stripe pattern of 3, 3, 3, 2, 3. Use this pattern or whatever pattern you like. Instructions: Use either magic loop or chain 4 and join with sl st to form a ring. Rnd 1: Ch 3, 2 dc in ring, ch 2 \*(3dc in ring, ch2) ; repeat from \* 2 more times. Join with sl st to first dc. Don't turn Rnd 2: Ch 3, FPdc around next dc, dc in next dc, (2 dc, ch2, 2dc) in ch 2 space {corner} \*dc in next dc, FPdc in next dc, dc in next dc, (2 dc, ch2, 2dc) in ch 2 space {corner}; repeat 2 more times, join with sl st in first dc. Don't turn Rnd 3: Ch 3, work FPdc around next FPdc, dc in next 3 dc, (dc, ch2, dc in corner), \* dc in next 3 dc, FPdc in next FPdc, dc in next 3 dc, (dc, ch2, dc in corner); repeat from \* 2 times. Join with sl st to first dc. Rnd 4: Ch 3, dc in each st to corner, (2dc, ch, 2dc) in corner, \*dc to next FPdc, FPdc in next st, dc in each st to corner, (2 dc, ch 2, dc) in corner; repeat from \* around, sl st in first dc Rnd 5: ch 3, dc cluster in next st, dc in next st, \*dc in next st, dc cluster in next st, dc in next st; repeat from \* to corner (dc, ch2, dc) in corner, {\*\*dc in next st, dc cluster in next st, dc in next st; repeat from \*\* to FPdc, BPdc in FPdc of previous row; repeat from \*\* to corner, (dc, ch 2, dc ) in corner} Repeat from { to } for remaining 2 corners, join with sl st in first sc. Rnd 6: Repeat round 4 Rnd 7: Rnd 5: ch 3, dc in next st, dc cluster in next st, \*dc in next 2 st, dc cluster in next st; repeat from \* to corner (dc, ch2, dc) in corner, {\*\*dc in next 2 st, dc cluster in next st; repeat from \*\* to FPdc, BPdc in FPdc of previous row; repeat from \*\* to corner, (dc, ch 2, dc ) in corner} Repeat from { to }for remaining 2 corners, join with sl st in first sc. Repeat round 4 through 7 until desired size is reached. Don't break yarn. Edging: Rnd 1: Ch 1, sc in each st around, 2 sc in corner, join with sl st in first sc. Rnd 2: Ch 1 (sc, ch 2, sc) in first st, \*sk st, (sc, ch 2, sc) in next st; repeat from \* around, join with sl st to first sc. Fasten off and weave in ends.