CRAFTS By AP
Crocheted Chili Pepper Ristra This pattern is for a Crocheted Red Chili Pepper Ristra.
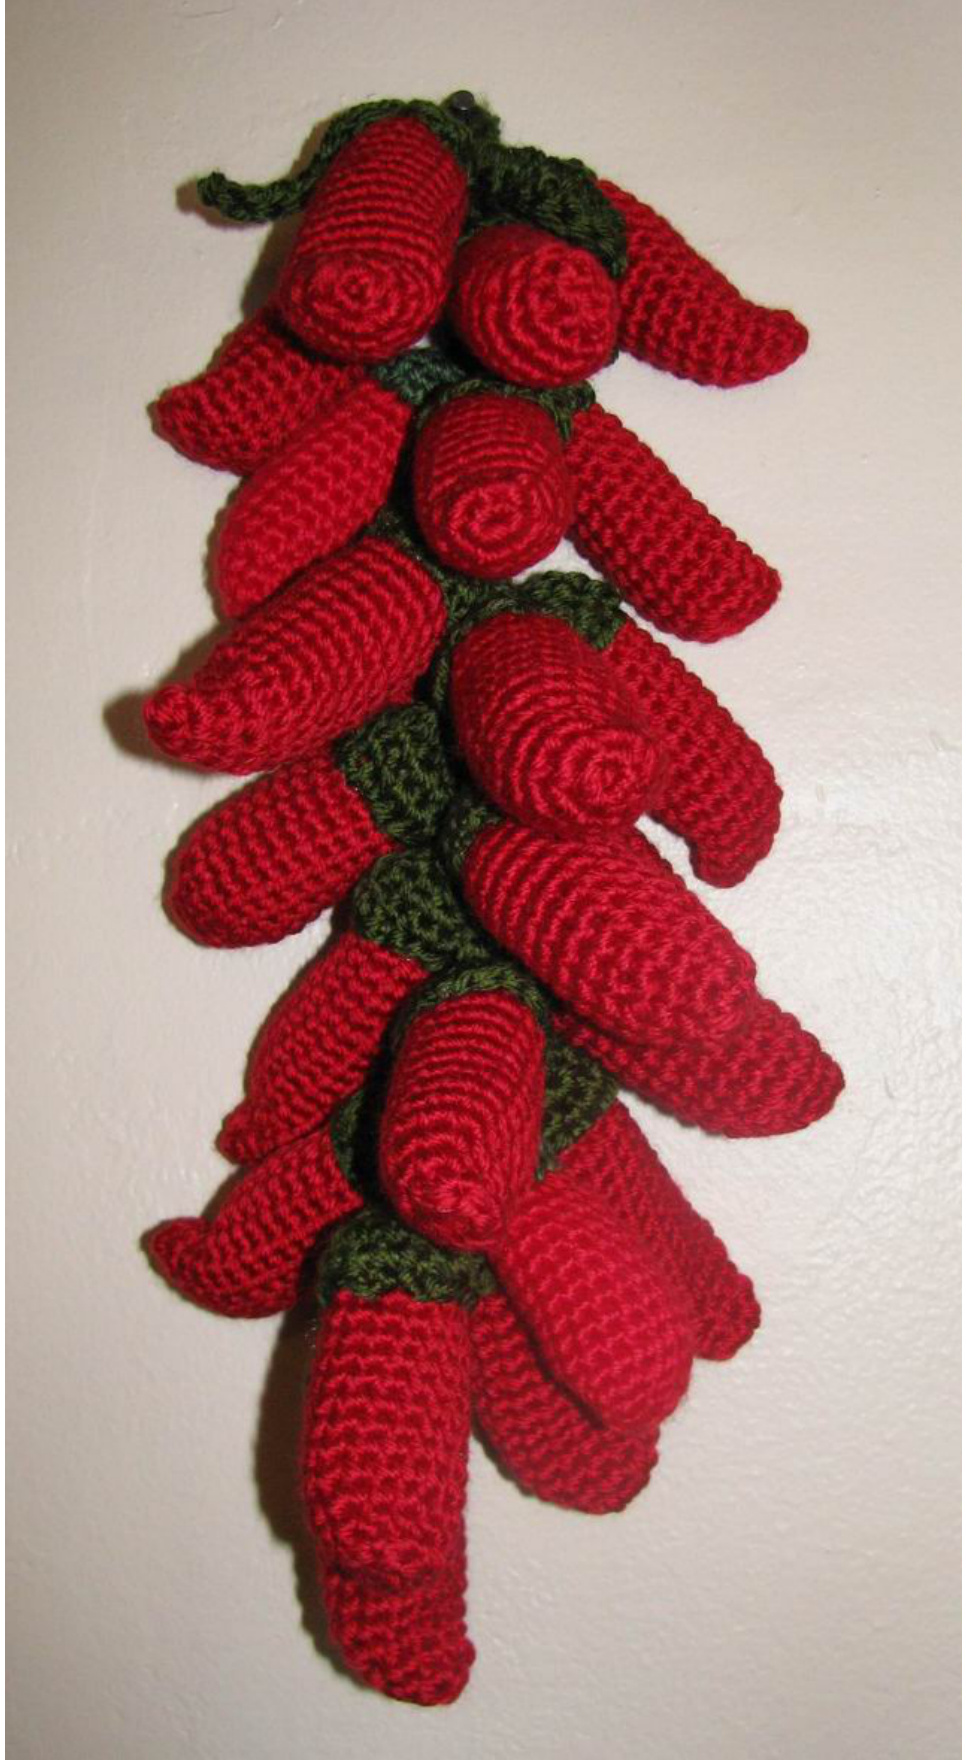
Ristras are arrangements or a string of dried chili pepper pods, garlic or onions. The purpose is to preserve or dry the items for later use. Ristras are not only for drying and preserving but used for decorative purposes as well. Ristras are also made in the shape of a wreath. TIP: Amigurumi is very pliable. To give the peppers its shape, bend the pepper slightly to curve. NOTE: Make your stitches tight so the stuffing won't show. Variation: This pattern is done with only red chili peppers. You can also include green chili peppers along with the red. Skill level for this pattern is EAsy - Basic Crochet Skills required. THIS WORK IS LICENSED UNDER THE CREATIVE COMMONS ATTRIBUTION-NONCOMMERCIAL-SHARE ALIKE 3.OUNITED STATES LICENSE. TO VIEW A COPY OF THIS LICENSE, VISIT HTTP://CREATIVECOMMONS.ORG/LICENSES/BY-NC-SA/3.O/US/ OR SEND A LETTER TO CREATIVE COMMONS, 171 SECOND STREET, SUITE 300, SAN FRANCISCO, CALIFORNIA, 94105, USA. Materials: Size US-F/.75mm Crochet Hook Red Heart Soft - Really Red (You will need 1 skein) Red Heart Soft - Dark Leaf Blunt Needle Polyester Fiberfill
Pattern Notes:
Worked in continuous rounds; do not join and do not turn unless specified. Use stitch marker to indicate beginning of rounds. · Yarn listed is what I used - size many vary with other yarns.
Abbreviations:
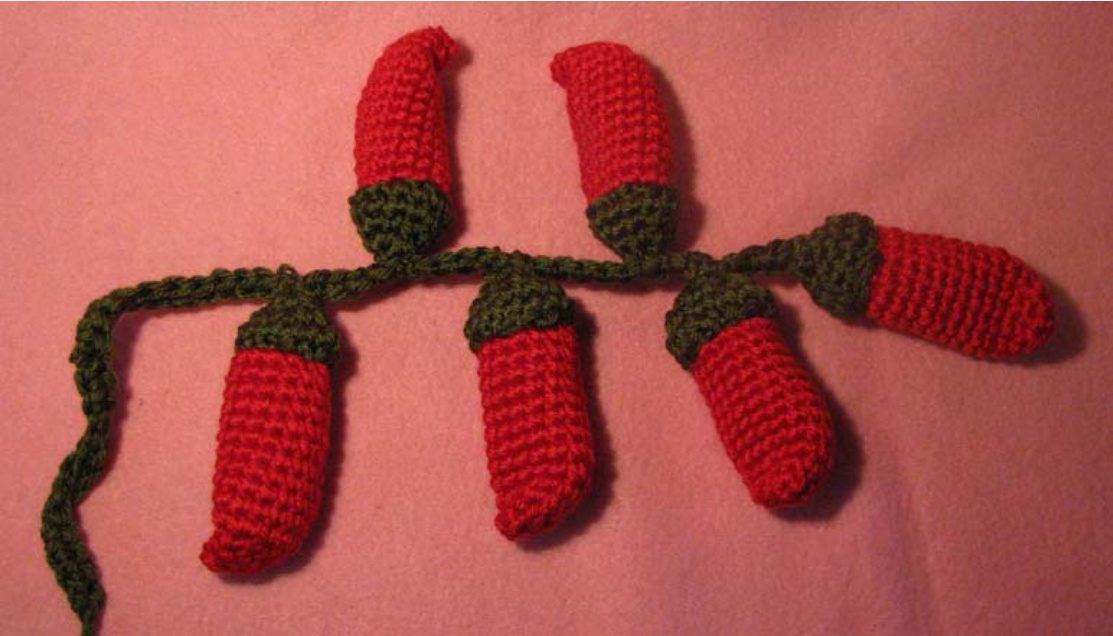
SC =Single Crochet HDC =Half Double Crochet DC Double Crochet TR Treble Crochet Ch Chain Rnd(s) = Round(s) Beg Beginning SL ST = Slip Stitch St(s) Stitch(es) 2tog Crochet 2 stitches together (decrease) Repeat stitches from \* to end of \* 2nd Second Chili Pepper: With Red Yarn, Ch 2 Rnd 1: Work 5 sc in 2nd ch from hook $\underline{{\underline{{\mathbf{\delta\pi}}}}}$ 5 sc Rnd 2: Work 2 sc in each sc $\underline{{\underline{{\mathbf{\delta\pi}}}}}$ 10 sc Rnd 3: Sc in each sc Rnd 4: $\star s c$ in first sc, 2 sc in 2nd $s c^{\star}$ , repeat from \* around $\underline{{\underline{{\mathbf{\delta\pi}}}}}$ 15 sc Rnds 5-14: Sc in each sc Fasten off. You do not need to leave a long tail for sewing. Stuff pepper lightly - do not stuff the tip. Do not sew the opening closed. Curve the pepper slightly, pinching the tip to curve. TIP: Stuff the yarn tail into the pepper while you are stuffing it. NOTE: You can make slender chili peppers - omit Rnd 4 and add 2 additional Rnds. Again, stuff the chili peppers lightly and do not stuff the tip. Pepper Top: With Green Yarn, Ch 2 Rnd 1: Work 5 sc in 2nd ch from hook $=5$ SC Rnd 2: Work 2 sc in each $s c=10$ SC Rnd 3: \*Sc in first sc, 2 sc in 2nd $s c^{\star}$ , repeat from \* around $\underline{{\underline{{\mathbf{\delta\pi}}}}}$ 15 sC Rnds 4: Sc in each sc Fasten off, leave a long enough for sewing. You will use this piece of yarn to sew the top onto the pepper and to sew the pepper on the strand. You will need 23 peppers to complete this Ristra. Each chili pepper measures $3{-}1/2"$ . Make equal number of peppers and pepper tops. Chili Pepper Assembly: 1. Turn the pepper top inside out. You do not need to stuff it. TIP: Turning the top inside out gives the top of the chili pepper a better shape. NOTE: Depending on the yarn you use, if you find the top is not holding its shape after you place it on the stuffed chili pepper, lightly stuff the top with fiberfill. With my yarn, I did not need to stuff it. 2. Place pepper top on the stuffed chili pepper opening. 3. Thread yarn piece onto needle and sew pepper top onto chili pepper opening. 4. Insert needle through last stitch and bring yarn out to pepper top. You will use this piece of yarn to sew the chili pepper onto the strand. Leaves: (Make 3 Leaves) With Green Yarn, Ch 11 Row 1. Sc in 2nd ch from hook Row 2: 1 TR in next 3 ch Row 3: 1 DC in next 2 ch Row 4: 1 HDC in next 2 ch Row 5: 1 sc in next ch Row 6: Sl st in last ch Fasten off, leave a tail long enough for sewing. For the Ristra Center Base: With Green Yarn, Ch 48 Row 1: Sc in 2nd ch from hook, sc across = 47 sc Fasten off, leave a tail long enough for sewing. (This will be the top of the centerbase).
Ristra Assembly:
1. Thread green yarn from pepper top through needle, and starting on the bottom end of the center base, sew the first chili pepper onto the Ristra center base. TIP: Weave in yarn as you are sewing the chili peppers. 2. For the second chili pepper, thread yarn through needle and sew 1" above the first chili pepper. 3. Continue sewing the chili peppers, spaced $1"$ apart, to $1"$ to top of center base. (The 1" top will be used to form the loop for hanging).
4. Now hold the Ristra up and see where the chili peppers fall. Mark by placing pins where the remaining chili peppers will be sewn. 5. Position and sew the remaining chili peppers on the center base, filling in the open spaces. Continue until all of the chili peppers are used. TIP: To check your placement of the chili peppers, hold the Ristra up and see where the chili peppers fall. You can determine where to place the remaining peppers. 6. Bring the $1"$ top and fold down to form a loop - you will use this loop to hang your Chili Pepper Ristra. Thread needle with long tail and sew the loop onto the center base to secure. 7. To finish, sew the leaves on top. 8. Weave in all loose yarn. Finished Ristra measures $14^{\prime\prime}$ long. Happy Crocheting!


