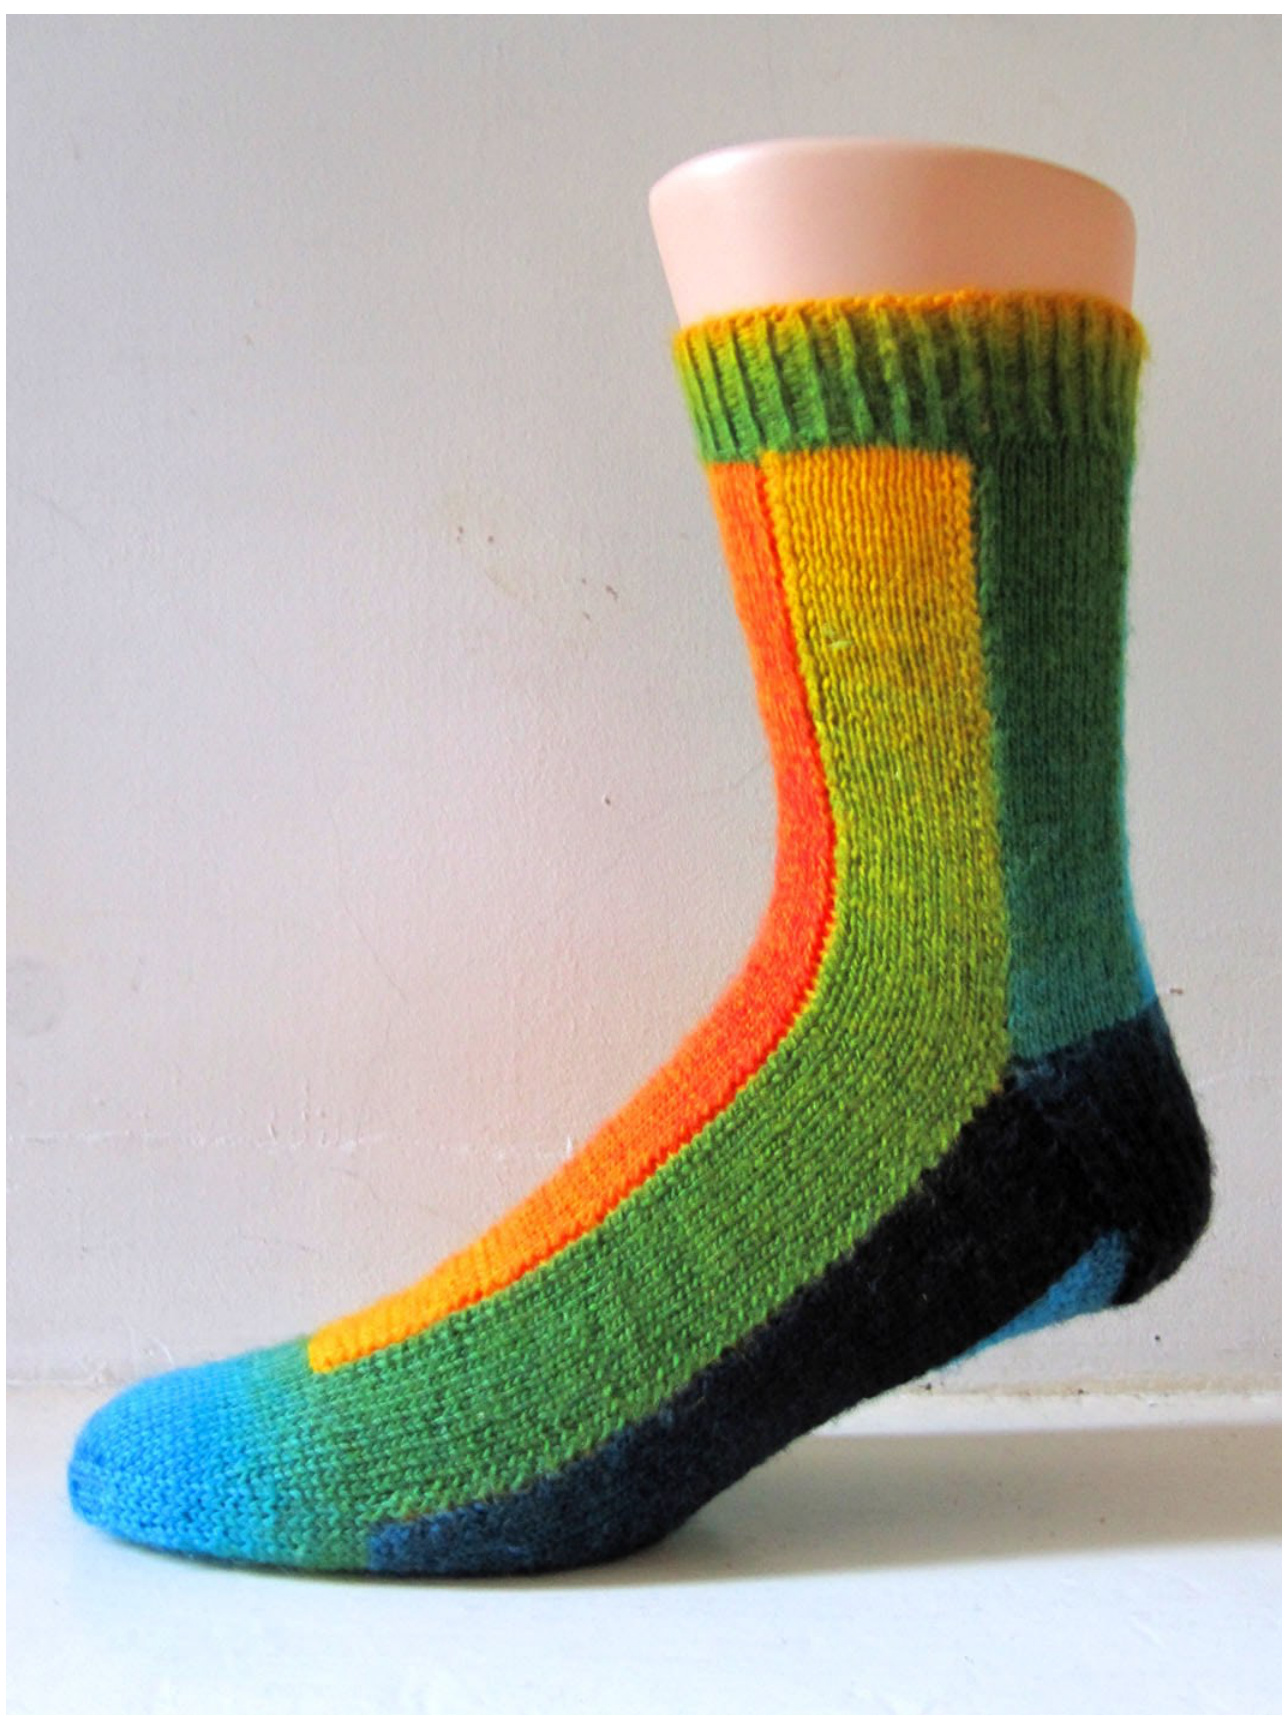
STRIPE TEASE
Size:
This pattern can be done in virtually any size, it is easiest if you start with the measurements of a plain sock that fits you well. Take the number of stitches needed and find the closest multiple of 6. In my example, I wear a 64 stitch plain sock, so I used 66 sts for this.
Materials:
about 100g sock yarn of your choice. You will need only marginally more than for a plain sock, and the usage will depend on your chosen leg length as well.
Needles:
whatever size works with your chosen yarn, personally, I prefer to do my socks on 2 2.5 circulars, but you will also need 2 DPNs in the same size. I would not suggest to do these completely on DPNs, because you are only doing the cuff and the toe in the round. There is one part where you will have around 150 stitches on one needle, and that is easier accomplished on a circular.
Before you start:
As I mentioned above, it is most convenient if you can use an existing plain sock as a guideline. You will knit the sock in 6 strips, so you will need to find the multiple of 6 that is closest to the number you would use for a plain sock. My example is done with 66 sts, as that is closest to my usual 64 sts, so my strips are 11 sts wide each. If your standard plain sock is done with 60 sts, your strips should be 10 sts wide and so on.
Cuff:
Take the number of stitches you have determined in the last step and add 6 to find the number to cast on. I my case, this is 66 + 6 = 72 sts. You have a certain flexibility with the cuff in terms of pattern and length. I have done a 1x1 twisted rib for 16 rows, but you could do a normal 1x1, or a 2x2, provided your number is a multiple of 4.
Back portion of leg:
Start to work the first strip as follows: the reason you have 6 sts more in total is that you will lose one stitch at each "seam", i.e. the slipped edge where you pick up stitches. Since the first strip will have two of these slipped edges, K across the next 13 sts (your strip width + 2). 1st row:Turn, sl1, P12 2nd row: Turn, sl1,K12 Repeating rows 1 and 2, work this strip for however many rows you would like your leg to be, I did 64 rows in total. Make sure you end with a K row, and make a note of how many rows you did. You should have half that number of slipped stitches along both sides of your strip (32 in my case). Second strip: Taking a circular needle, pick up and knit one stitch in every slipped stitch along the left side of your strip. With the same needle, K the next 12 stitches of the cuff (strip width + 1). In my example, I now have 44 sts on that needle (32 + 12). Turn, ready to work on the back of the fabric. Row 1 (Ws): Sl1, P10, P2tog (you are purling the last st of the strip together with the next st that was picked up along the side of the first strip, thus attaching the strips as you go along.) turn RoW 2 (RS):K12 Repeat these 2 rows until you have used up all the stitches you have picked up from the first strip, ending with a K row and 12 sts on this needle, and 13 sts on the needle you worked the first strip with. Park these 25 sts on a DPN for now. Third strip: work exactly like the second strip. Put the resulting 12 stitches on the same DPN as the sts from the previous 2 strips to give you 37 sts. (You should have 1 more st than half your original cast on number.)
Heel:
You could do a variety of heels here, but since I need a flap + gusset heel, that's the one I am describing in more detail. Firstly, the 37 sts on your needle still include 4 extra seam stitches, and while we need the two on the sides, we should get rid of two in the centre as follows: Turn, sl1, P10, P2tog, P10, P2tog, P12 to leave you with 35 sts. 1st row: \*sl1, K1, repeat from \* to last st, K1 2nd row: sl1, P34 Repeat these two rows until you have sufficient depth for your heel flap, I usually work 40 rows in total. Once again, you should have half that number in slipped stitches either side of your flap. Next, turn the heel as follows: 1st row: sl1, K17, ssk, K1, turn (with 14 sts unworked) 2nd row: sl1, P2, P2tog, P1, turn (again, with 14 sts unworked) 3rd row: sl1, K to 1 st before the gap, ssk, K1, turn 4th row: sl1, P to 1 st before gap, P2tog, P1, turn Repeat row 3 and 4 until all stitches have been worked. You should have 19 sts left on your needle, and do not turn at the end of the last P row.
Sole:
To follow the stripe principle of the rest of the design the sole of the sock is meant to be constructed in three strips as well, with the gusset decreases being worked along the sides of the central strip. However, for people with particularly sensitive feet or limited circulation this can be a problem, since they will feel the two resulting ridges under the foot, so I have included an alternative where the sole is worked in a single piece.
3 strip version:
Going down the right side of your flap, pick up and purl the first stitch, but then skip the next slipped stitch and pick up and purl the 3rd, then the 5th and so on, until you have 10 new sts on your needle, or a quarter of the rows worked for the flap. There should be one more slipped stitch left, pick up and purl that one and turn. Slip the first two sts, pick up and K the "empty" slipped stitch, slip the next st, pick up and K the next slipped stitch and so on until you have 13 sts on your right needle. On these 13 sts, work the first sole strip exactly like you did the first strip for the back leg: 1st row:Turn, sl1, P12 2nd row: Turn, sl1,K12 Repeating rows 1 and 2, work this strip until you reach your required foot length (minus the toe). Since this strip goes in a 90 degree angle to the rest of the sock, you can easily fold the heel flap in half and measure from edge to edge. Work until you have about 2 inches / 5 cms less than your total foot length. If in doubt, you should err on the side of caution, you can make the foot longer at the end, but you won't be able to make it shorter if you work too many rows at this stage. My sample sock had 80 rows here, but then again I wear a size 42/43. Make a note of the number of rows again for your record. With an empty circular needle, pick up and K a stitch in every slipped stitch down the left side of that strip, to give you half the number of rows in new sts, in my case 40 sts. Now I am afraid we will need to do a bit of maths. The next strip will contain the gusset decreases, so you will need to determine how many sts you should start out with. The total of your sole sts will be the amount after the heel turn (19 in this case) plus the number of rows for your heel flap (40 in my case, 20 either side of the flap). Your first strip will use up 13 sts (or your strip width + 2), and your last strip will use 12 sts (strip width + 1), so if you subtract these from your total it will give you the number of sts your centre strip will start out with. On my sample sock, this looks as follows: I have a total of 40 + 19 = 59 sts, take away 13 and 12, that leaves me with 34 sts for the centre strip. To get these sts onto your needle, slip the next st (that you picked up from the edge already in the previous step), pick up and K 1 st in the next empty edge st, slip the next one and so on until you reach the 19 sts from the heel turn. You should end with slipping a stitch, and in my example, I now have 7 sts added on the right needle. K across the 19 heel turn sts, then pick up and K 8 sts in the first 8 slipped edge sts down the left side of the heel flap. This gives you the 34 sts for the middle strip, turn. 1st row: sl1, P32, P2tog, turn 2nd row: K1, ssk, K to last 4 sts, k2tog, K2, turn 3rd row: sl1, P to last st before gap, P2tog, turn Repeat row 2 and 3 until you have decreased your strip to a total of 12 sts. Continue straight as for the previous strips until all edge sts have been used up, ending with a K row. Add the 12 sts on your right needle to the same DPN that holds the 13 sts from the first sole strip, and with the empty circular needle, pick up and K 40 sts down the left side of the middle strip, and then pick up and K the remaining 12 slipped edge sts from the heel flap. Work this third sole strip exactly the same way you worked the second and third strip on the back leg: 1st row: sl1, p10, P2tog, turn 2nd row: K12 Repeat these rows until this strip is finished, ending with a K row. You are now ready to work the top of the foot/front of the leg.
One piece version:
As before, going down the right side of your flap, pick up and purl the first slipped stitch, but then skip the next slipped stitch and pick up and purl the 3rd, then the 5th and so on, until you have 10 new sts on your needle (on a 40 row heel flap), or a quarter of the rows worked for the flap. There should be one more slipped stitch left, pick up and purl that one and turn. Slip the first two sts, pick up and K the "empty" slipped stitch, slip the next st, pick up and K the next slipped stitch and so on until you have 20 sts on your needle (half the number of rows for your flap) and have reached the top end of the flap again. K across the 19 sts of the heel turn. Going down the left side of the heel flap, pick up and K a stitch in every slipped st along the edge until you have reached the bottom of the heel flap. You should have picked up the same number of sts as on the other side. In my case, this was another 20 sts to get me to a total of 59 sts on the needle.Turn. Row 1 (WS): Sl1, purl to end. Turn Row 2 (RS): Sl1, SSK, K to 3 sts before end, K2tog, k1.Turn Repeat these two rows until you have reduced your number of sts back to the amount you had at the start of the heel flap, in my case 35. (half your total number +2). Now work the rest of the sole plain without decreases until you have about 2 inches / 5 cms less than your total foot length. If in doubt, you should err on the side of caution, you can make the foot longer at the end, but you won't be able to make it shorter if you work too many rows at this stage. Make a note of the number of rows again for your record.
Front of leg:
Pick up and K 1 st in every slipped edge st all the way back to the cuff. You should have a total of the sum of the sts you picked up for the sole strips plus the sts you picked up for the back leg strips. In my example, this is 40 + 32 = 72 sts. K across the next 12 cuff sts, and work the first front leg strip exactly like you worked the last sole strip. Repeat this exactly for the second front leg strip. Once this is finished, again pick up and K the required number of sts (72 for me), K across the last 11 cuff sts and now pick up and K 1 st in every other slipped edge st up the right edge of the sole. You should reach the top (the toe end) when you have half the number of sts you have on the other side (36 sts in my case). Turn and work your way back down, now slipping the picked up sts and picking up and P the sts in between. When you reach the cuff end, you should have a total of 71 sts on that needle, i.e. one less than on the other side. This is the point where I said at the beginning that a circular needle really is more advisable than DPNs, since you now have 72 +11+71 sts on your needle. Still facing the wrong side, start the last stripasfollows: 1st row: P10, P2tog, turn 2nd row: K10, K2tog tbl (or SSK if you prefer), turn Repeat these until you have decreased all the picked up sts from both sides and you are left with the 11 sts of the strip only. Your last row should be a P row. Turn.
Toe:
You should now be back to having the same amount of sts on your needles that you originally cast on, in my example 72 sts. Since these still include the 6 sts for the seam allowance, you will need to decrease these 6 sts in the next row. Do this as follows: K10, SSK, K11, k2tog, [K10, K2tog] 4 times. You will now have 66 sts, and you will be 1 st further than where you started from. K26, this is the centre back and willbe the new start of the round for the toe, re-arrange your sts on your needles so you have 33 sts on each needle. NOTE: If you have worked the sole in one piece, you will already have 2 sts less on the sole part of the sock, so only decrease 4 sts to bring you to the amount needed. This is now the moment to measure the length of the sock and add extra plain rows if necessary. The toe I am using will take up roughly 5 cm / 2 inches; if you prefer a different variation you may have to calculate differently to reach the desired length. 1st round: [K14, k2tog, K1,place marker, K1, SSK, K13] twice, once on each needle K 3 rounds 5th round: [K to 3 sts before marker, K2tog, K1, sl marker, K1, SSK, Kto end of needle] twice, once on each needle K2 rounds Repeat 5th round K2 rounds Repeat 5th round K1 round Repeat 5th round K1 round Repeat 5th round K1 round Repeat 5th round until you have 18 sts in total, 9 on each needle. K to 1st marker with an empty DPN, put the remaining 4 sts and the first 5 sts on the 2nd needle on another DPN, and slip the last 4 sts from the 2nd needle onto the first DPN. Cut the yarn with a tail of at least 25 cm / 10 inches, thread into a tapestry needle and Kitchener stitch the seam closed. One sock done, one to go.
Possible variations:
You could, of course, work a different number of strips; 4 would work well, and you could even only do 2 strips, one for the front, one for the back of the leg. 8 strips would also work, but it would get quite fiddly, and I certainly would not advise working more than that. This would be an ideal project to use up leftovers, simply work each strip in a different colour, or just alternate 2 or 3 colours around the leg. The strips do not need to be worked in plain stocking stitch, although I find this emphasises the colour changes best. But it could look quite spectacular to have a cable in some of the strips.
Abbreviations:
St, sts stitch, stitches K knit P purl K2tog knit 2 stitches together P2tog purl 2 stitches together SSK slip, slip, knit Tbl through the back loop SI slip
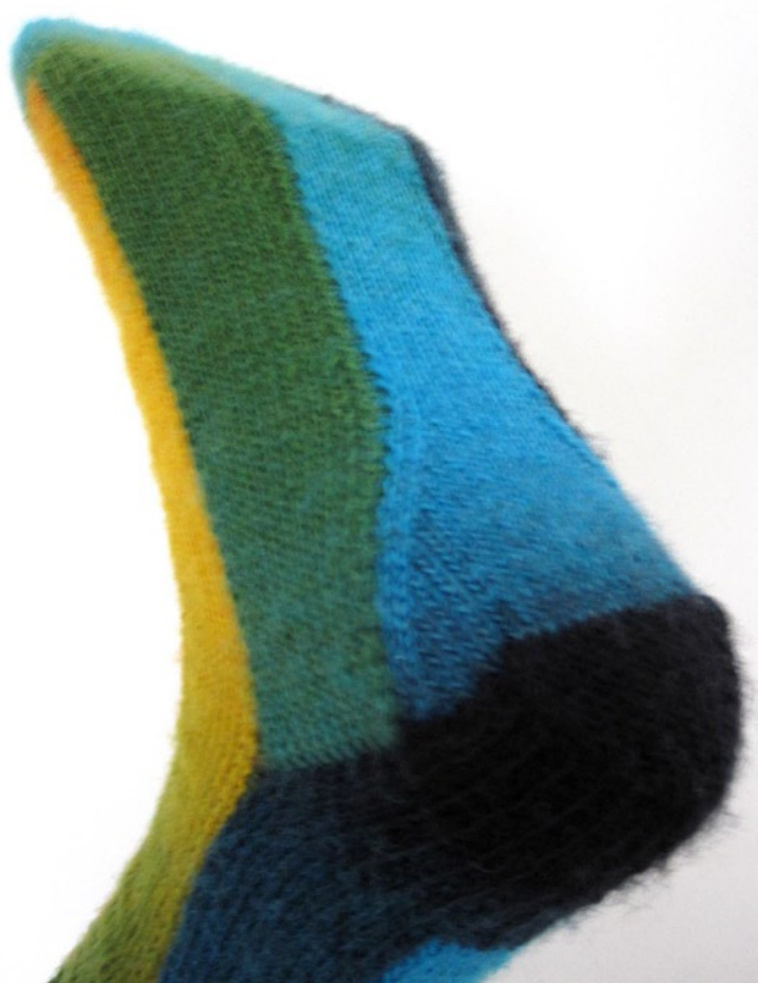
(picture shows sole portion worked in three strips)


