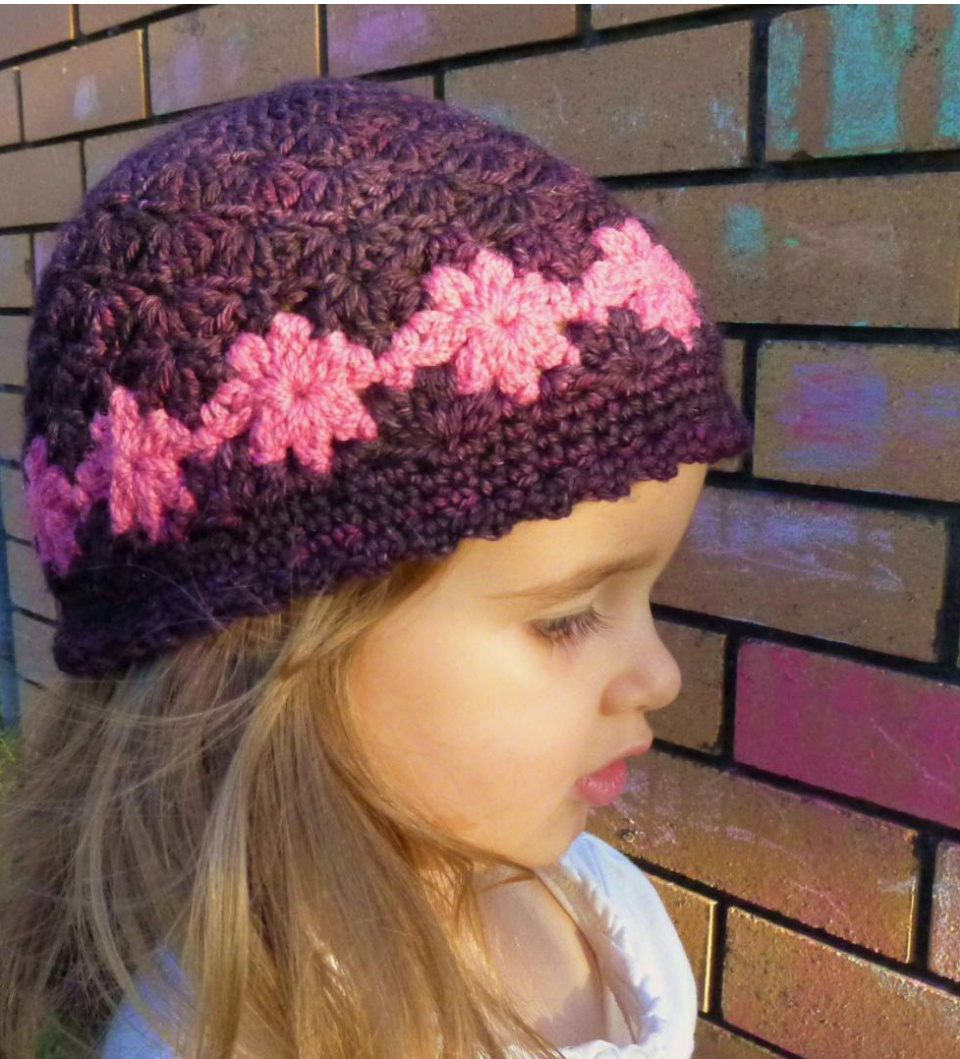
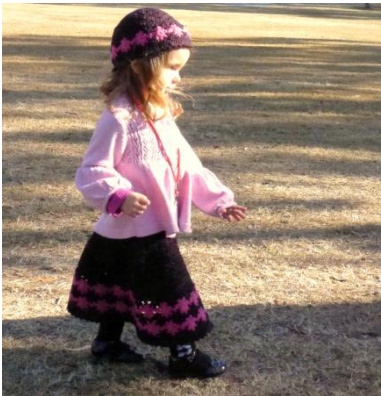
Perenni
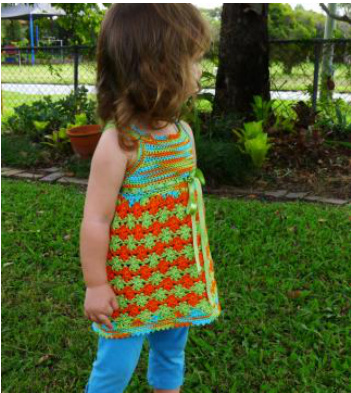
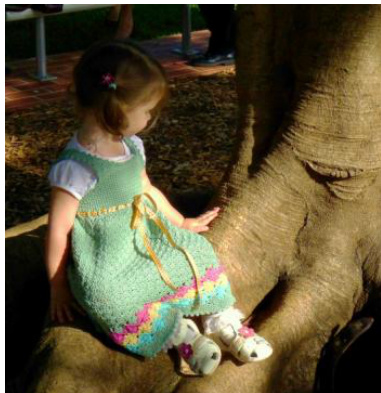
Nn original crochet design by Nddydae Designs Perenni has been designed to be a matching accgssory for the garments featured in the Month of Flowers e-book: the Floreali dress, the Florgala skirt, and the origina1 Floreal top, tunic and dress. Liven up a cool day with this bright and cheery floral-inspired design. A note about this pattern: Sometime ago, I came across the most wonderful pattern that shows you how to create the perfect fitting beanie. The "Skater Beanie" pattern, (designed by Arianne Donoghue and available On her website kookykatkreations.wordpress.com) demonstrates how by taking a few simple measurements, you can make a custom fit beanie for anyone, newborn to adult. It is with Arianne's generous permission that I am able to share this design, created using her truly genius method.
Materials
Any fingering weight/4ply, DK/8ply or worsted weight/10ply yarn may be used for this pattern. Heavy worsted isnotrecommended.
Yardage Requirements
Exact yardage will depend on the yarn chosen and the size required. As a guide, you will need between 65 and 220 yards (60 and 200m) of DK/8ply. You will need a bit less if using worsted/10ply, and more for fingering weight/4ply.
Gauge
There is no set gauge for this pattern. All of the work is done using measurements. Simply choose the hook size best suited to your yarn and crochet style. About 1 inch/2.5cm of negative ease is factored in to the pattern for a nice fitting beanie, so you just want a nice amount of spring to the fabric of it, therefore you will need to take into account the amount of stretch in thefibre chosen.
Skill Level:EASY toINTERMEDIATE
This is a project created using basic stitches, simple colour changes and minimal shaping and finishing. It incorporates a repetitive pattern using basic crochet stitches but may require some skill to master. Not recommended for absolute beginners.
Glossary:
st/s stitch/es beg beginning yo yarn over rem remaining RS right side WS wrong side Stitches Used: (American terminology) ch chain SC single crochet hdc Half double crochet dc double crochet
Pattern stitches:
3dc fan work 3 dc into stitch indicated 5dc fan work 5 dc into stitch indicated sc inc work 2 sc into the stitch indicated dc inc work 2 dc into the stitch indicated dc2tog yo, insert hook and pull up a loop, yo and draw through 2 loops (2 loops left on hook), yo, insert hook and pull up a loop, yo and draw through 2 loops, yo and draw through remaining 3 loops to close cluster. When instruction is given at the beginning of a round to "ch 1, sc in same st" this means to ch 1, then work a sc in the same stitch that the ch 1 originated from, not into the chain itself.
Before you begin
If you are able to take measurements from the intended wearer, please note the following: Measure around the widest part of the wearer's head, then subtract approximately 1.5 - 2.5 inches (4 - 6.5cm) depending on how snug you would like the fit. Write the subtracted figure at Measurement A. (The flower pattern stitch does allow quite a lot of stretch, so I would not recommend subtracting any less than 2.5inches from the actual head measurement for the newborn - 6 month sizes, or your beanie may end up toobig.) ·Grab your calculator and divide Measurement A by 3.142. Note this as Measurement B. · Calculate the length required by measuring from the crown of your head to somewhere just above the eyebrows. Note this as Measurement C. Measurement A: Measurement B: Measurement C: Trust me, this works. For a more detailed explanation of the calculations and why they work, check out Arianne's Skater Beanie pattern. Like I said, genius. If you don't have the intended wearer handy, the following table has been provided as a guide. It might not be as perfect a fit, but hopefully will be close enough!
| Age Range | MeasurementB | MeasurementC |
| Newborn-3months | 3.5 inches/9cm | 5 inches/13cm |
| Newborn-6months | 4 inches/10cm | 5.5 inches/14cm |
| 6-18 months | 4.75 inches/12cm | 6inches/15.5cm |
| 18 months - 3 years | 5.25 inches/13.5cm | 7 inches/18cm |
| 2-6 years | 5.75inches/14.5cm | 7.5 inches/19cm |
| 3-8years | 6 inches/15.5cm | 7.75inches/19.5cm |
| 8 -16 years | 6.5inches/16.5cm | 8.5inches/21.5cm |
| 16years-smalladult | 6.75inches/17cm | 8.75inches/22cm |
| Mediumadult | 7 inches/18cm | 9 inches/23cm |
Ok, now we can get started.
Part 1: The crown
ou only need to do as many rounds as it takes for your work to reach Measurement B in diametel Round 1: Using MC and your chosen hook, form a magic ring, chain 2, and work 12 dc into the ring. Pull the ring closed and join by working a sl st into the top of the first dc - not into the top of the begch2.(12dc) Note: the Ch 2 at the beginning of each round for the crown is not counted as a stitch. Be sure at the end of each round that you sl st into the top of the first dc. For a video of the magic ring technique, check out: http://www.howcast.com/videos/134192-How-To-Do-the-Magic-Circle-Loop Alternatively, Ch 4, join with a sl st to form a ring. Ch 2, work 12 dc into the centre of the ring. Join with a sl st totopofbegdc. Round 2: Ch 2, 2 dc in same st and every dc around. (24dc) Round 3: Ch 2, 1 dc in same st, \*2dc in next dc, 1dc in next dc; Repeat from \* around. Join with a sl st to top of beg dc. (36dc) Round 4: Ch 2, 1 dc in same st, 1 dc in next dc, 2dc in next dc, \*1 dc in next 2 dc, 2 dc in next dc; Repeat from \* around. Join with a sl st to top of beg dc. (48dc) Round 5: Ch 2, 1 dc in same st, 1 dc in next 2 dc, 2dc in next dc, \*1 dc in next 3 dc, 2 dc in next dc; Repeat from \* around. Join with a sl st to top of beg dc. (60dc) Rounds 6 +: Continue increasing 12dc per round by working one extra dc between each dc inc until your work reaches a diameter of Measurement B. You may find that you cannot quite make it to Measurement B because adding another round will make it too big. The lacy nature of this design means that there is quite a bit of give in this pattern where the flower motifs are located. Therefore adding an extra row of dc will quite likely make the beanie too big. This may be more likely to happen if making a small size with worsted weight which creates greater row height. You may need to try a few yarn and hook combinations to get the crown section as close to Measurement B as possible. If you have opted not to work an extra round but are concerned about the body of the beanie being too small, you could always try going up a hook size for the body section of the beanie. Another suggestion is to work a round of sc, but this time only increasing 6 stitches evenly around the row (ie working 2sc into the same stitch 6 times throughout the round.) This can be risky especially when using heavier yarns as each 6-stitch increase adds an extra flower motif to the circumference. There is no set way of getting it exact, but as long as you get pretty close to your Measurement B figure, the fit will befine.
Part 2: The body
Round 1: Ch 1, 1 sc in same st, \*skip 2 dc, work a 5dc fan in next dc, skip 2 dc, 1 sc in next dc; Repeat from \* around. Join with a sl st to beg sc. Round 2: Ch 3 (counts as dc), 4dc in same sc, \*skip 2dc, 1 sc in next dc, skip 2 dc, 5dc fan in next sc; Repeat from \* around. Join with a sl st to top of beg ch3. Round 3: Sl st into centre dc of 5dc fan, ch 1, sc in same stitch, \* skip 2 dc, work a 5dc fan in next sc, skip 2dc, sc in centre dc of 5dc fan; Repeat from \* around. Join with a sl st to beg sc. Repeat Rounds 2 and 3 until your work measures 2 inches/5cm (for fingering weight/4ply) or 2.5 inches/6.5cm (for DK/8ply and worsted/10ply) LESS than Measurement C, ending with a Round 3. This is measured from the beginning of yourwork. DO NOT fasten/bind off. Continue with Flower Pattern.
Part 3: Flower pattern
Round 1:
Ch 1, 2 sc in same st, \* ch 2, skip 2 dc, [dc2tog, ch 2] 3 times in next dc, skip 2 dc, 2 sc in next sc; Repeat from \* to last sc. Join with a sl st. Fasten/Bind off.If you are only planning one line of flowers, do not bind off your Mc. Simply leave the live loop at the back of your work and after completing rounds 2 and 3, discreetly slip stitch behind the flower motif to where you need to start the next round and continue the Mc from there. Yay - fewer loose ends to weave in!
Round 2:
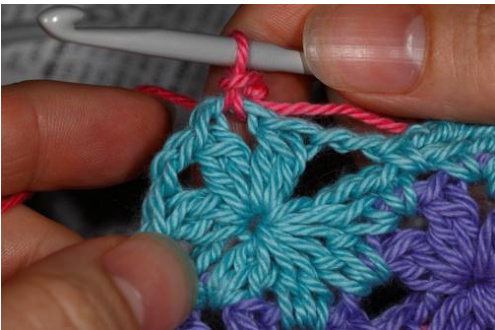
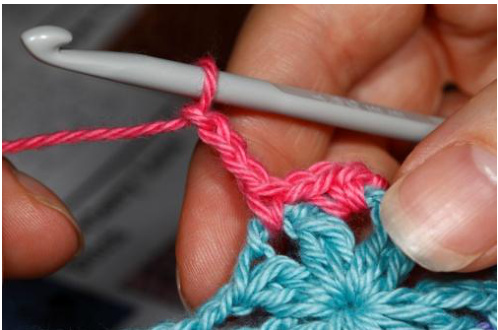
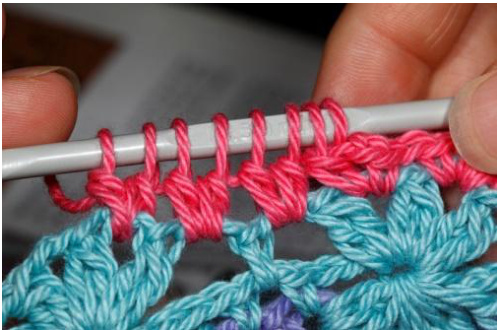
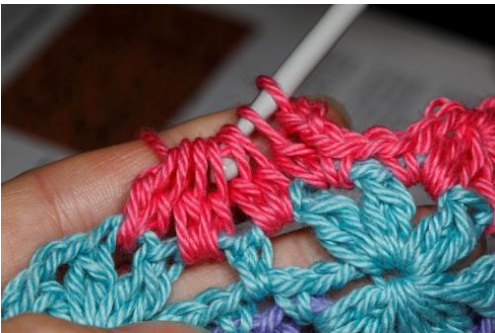
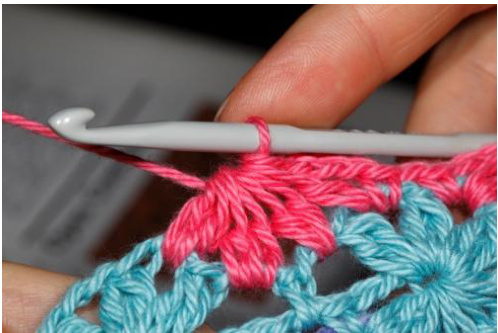
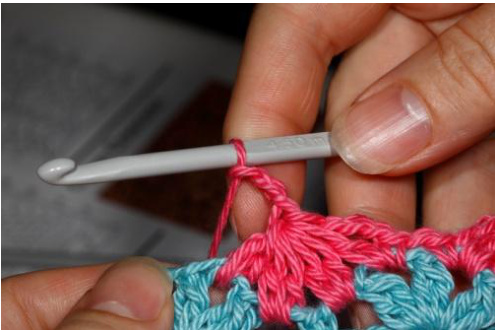
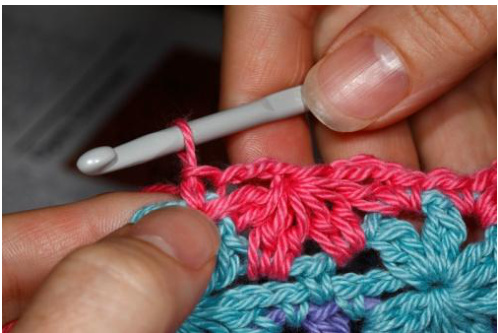
With contrasting colour, join with a sl st to 2nd 2ch space of previous round (This is between the first and second “petals"of the half-flower design formed in the previous round.) See appendix for photo tutorial on page 6. Ch 1, sc in same 2ch space, \* ch 1, skip 2dc, 1 sc in next 2ch space, ch 3, work a cluster of [1 dc in same 2ch space, 2 dc in each of next 3 2ch spaces of "flower" - working all stitches excluding final yo till last dc. Yo and draw thru 8 loops on hook to finish cluster], ch 3, sc in same 2ch space as last dc of cluster; Repeat from \* around till final cluster, ch 3 and join with a sl st to first sc of round.
Round 3:
Sl st into next 1ch space, ch 1, sc in same 1ch space, \* ch 2, [dc2tog, ch 2] 3 times in loop that closed cluster in previous round, \*\* sc in next 1ch space; Repeat from \* around ending last repeat at \*\*. Join with sl st to first sc of round. Fasten/Bind off.
Part 4: Edging
Round 1: With MC, repeat Round 2 of Flower Pattern. Round 2: Ch 1, 1 sc in same st, work 1 sc in each stitch around as follows: work 1 sc in each sc, work 2sc across each 3ch space, and work 1 sc in the loop that closes the cluster or previous round. Join with a sl st to first sc. You may wish to go down a hook size for this and subsequent rounds after the looser stitching of the flower pattern if you find the edging is fanning out too much. Round 3: Ch 1, 1 sc in same st, work 1 sc in each sc around. Join with a sl st. Round 4: Repeat round 3. Round 5 Picot Edge: Ch 1, [sc, ch3, sc] in same st, skip 1 sc, \* [sc, ch 3, sc] in next sc, skip 1 st; Repeat from \* around. Join with a sl st to beg sc. Fasten/Bind off.
Finishing:
Using a tapestry needle, secure magic ring (if used) and weave in all loose ends. Would you like something to mateh your Perenni? For more Nddydae Designs, go to www.addydae.com
Appendix: Instructions for the flower pattern round 2:
1. Start here: 2.
3. Begin cluster
4.
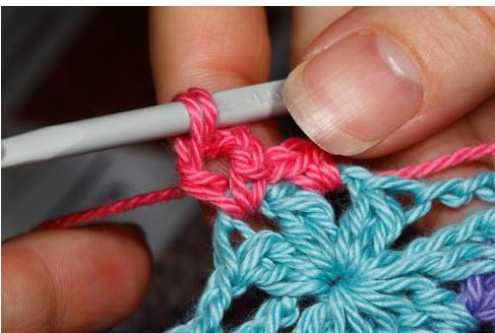
5. Close cluster
6.
7.
8. "half" flower complete
COpyRIGtT This pattern is for your personal use only. Please be respeetful of the designers' rights to this pattern. No portion (text or images) may be reproduced, transmitted or distributed by any means whether for free or for sale. Items made using this pattern are not to be sold for profit without written permission from the author Deanne Ramsay. If you are interested in obtaining a cottage licenee to sell items made from this pattern, please submit a request via email. Thank you. deanne@addydag.com


