Maokai Sapling Pattern By “Black" Jack Chelaque
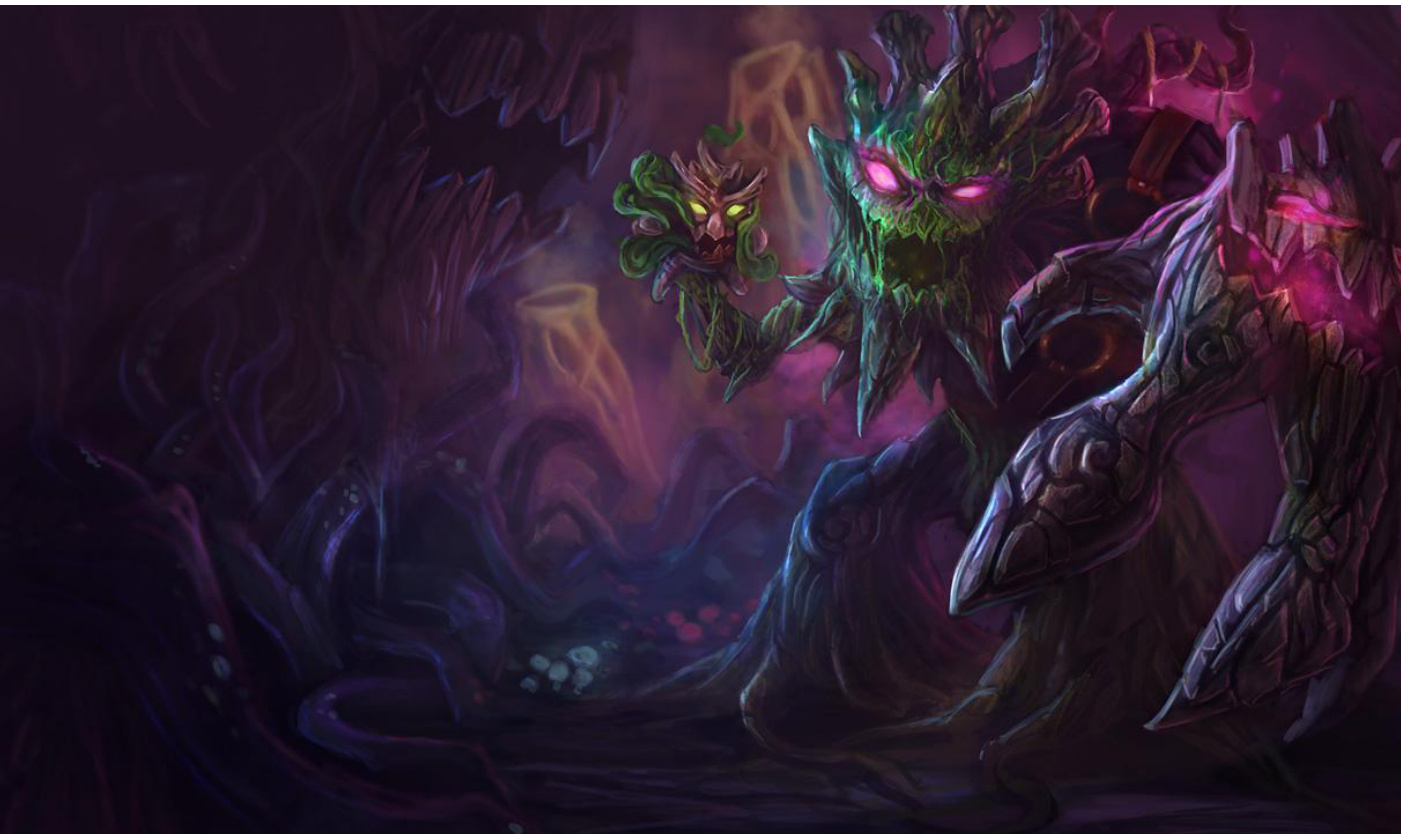
TABLE OFCONTENTS
INTRODUCTION EVERYTHINGYOUNEED MAKINGTHE BODY MAKINGTHELEAVES ADDING THE FACE APPENDIXA:ABBREVIATIONS APPENDIX B: THE MAGIC CIRCLE APPENDIX C: THE POPCORN STITCH Note: The designer is left-handed, all pictures have been inverted to help those of you who are not as lucky!
INTRODUCTION
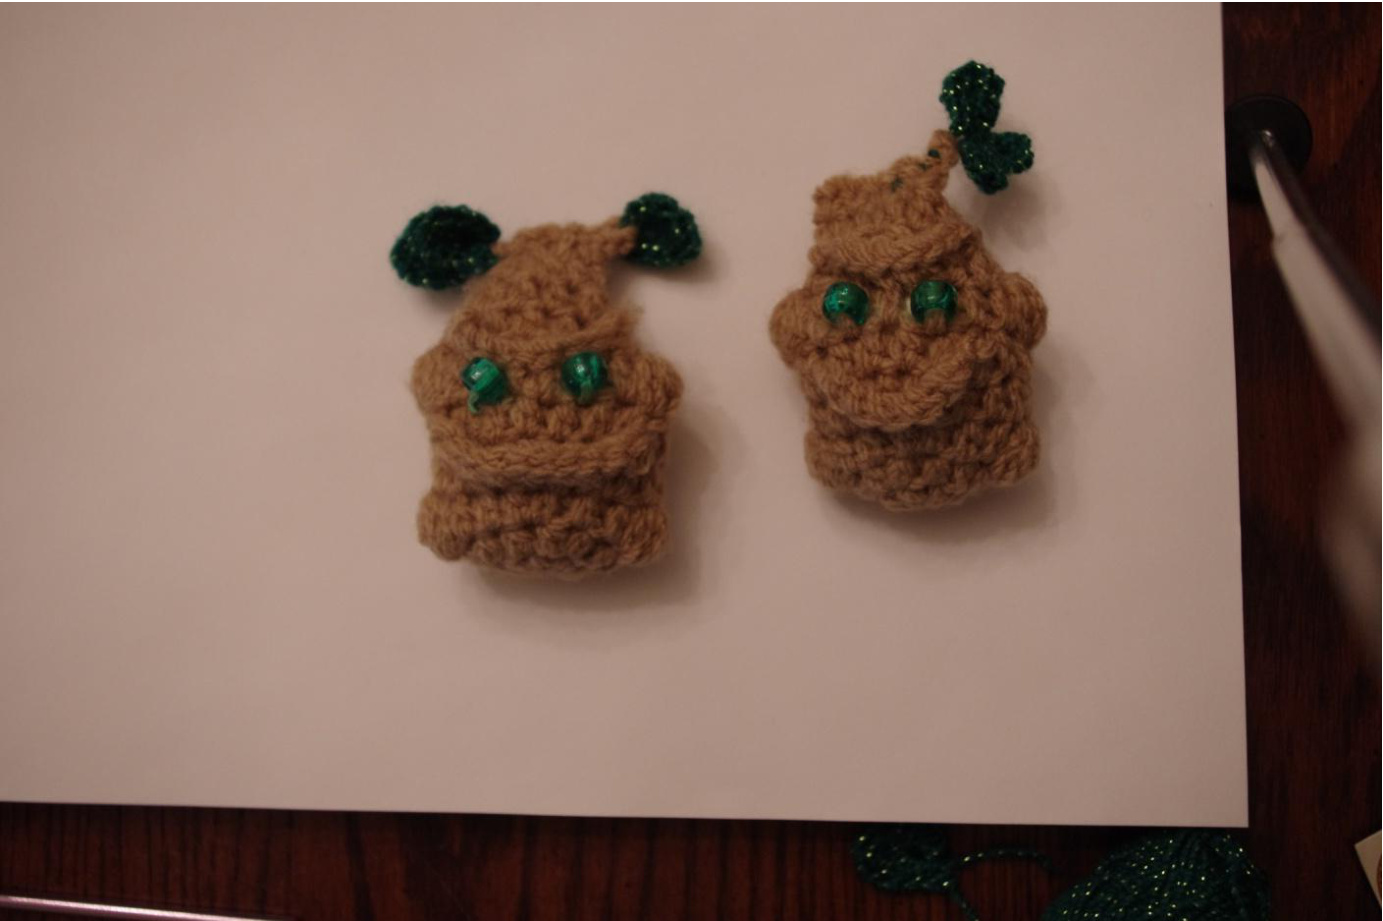
Hello everyone! This is my first pattern writing attempt, so I hope you like it. Maokai is one of my favorite League of Legends characters (designed and produced by RlOT games) and his sapling toss is what he is best known for. When thrown, they do damage to the surrounding area where they land, and then either go dormant if there aren't any enemies close, or if there are, they charge directly at them and explode on contact. Who doesn't love a homing grenade that laughs and squeals with delight as it chases down your enemies? Anyway, on to the important part, making one of your own!
EVERYTHINGYOU NEED
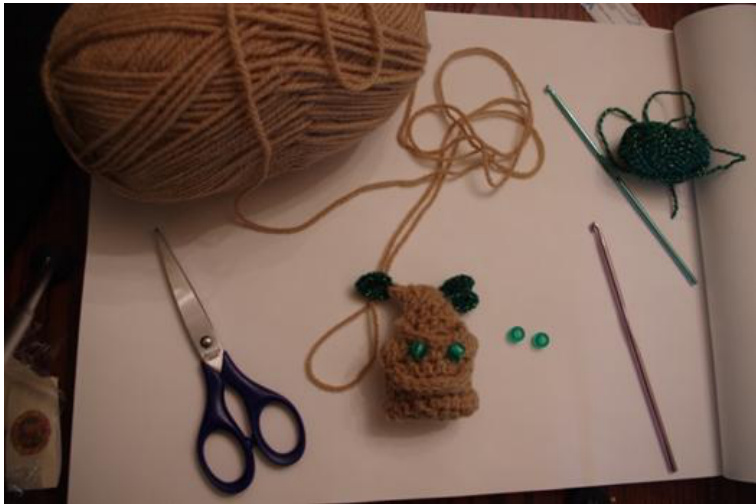
I used two types of yarn for the sapling, a sport weight coyote (or light) brown for the body and a fingering weight dark green for the leaves. The body was made with a G-6 hook, and the leaves with an E-4. I used some slightly larger than pony beads for the eyes. A darning needle and some good scissors, and you should be set! MAKING THE BODY
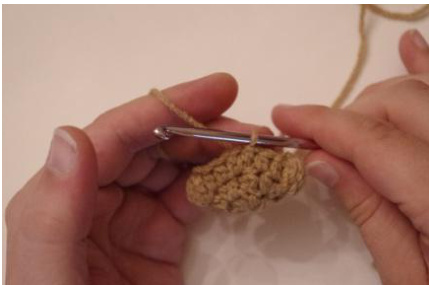
ROW 1 MC(8 HDC), SS to close MC stands for Magic Circle, and if you have never done one before, or want to see the technique I use, ROW 2 CH X 2, HDC X 8 with increases every other stitch. SS to close.
POP(5), HDC X 2, SS to close. POP(5) is a popcorn stitch with five stitches in it, and this is shown step by step in Appendix C. ROW 4 CH X 2, HDC X 14, increase every fourth stitch, SS to close. (This row will end without finishing the pattern of increases, don't worry.) ROW 5 CH X 2, HDC X 17, decrease every fourth stitch, SS to close. (Again, this one will end between decreases.)
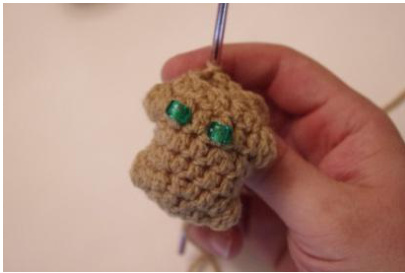
ROW 6 CH X 2, HDC X 2, HDCDEC, HDC, POP(5), HDC X 2, HDC with bead, HDC, HDC with bead, HDC, POP(5), HDCDEC, HDC, SS to close. Here's how I add the beads: Start the HDC as you normally would, yarn over, put your hook through the stitch, yarn over and pull out. At this point STOP. Take the loop you just created off your hook, and give yourself some slack on it.Slide the bead over the entire loop, and then put your hook back in, and finish the stitch.
ROW 7 CH X 2, HDC X 12
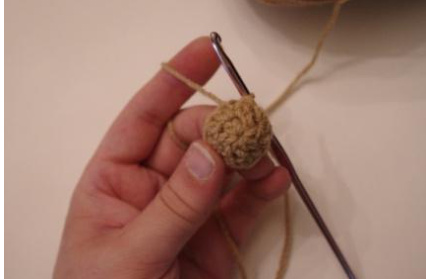
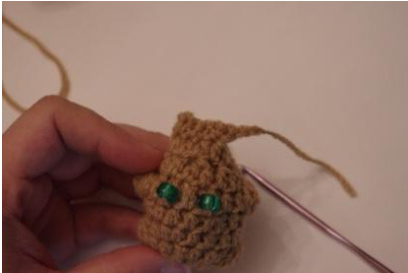
This row is where the individualization of the pattern starts to kick in. half of your HDC will be decrease stitches, but where you put them is up to you. If you want a nice, even progression to the top, then put them in every other stitch. If you want the top of your sapling to be bumpy, put them in randomly. I prefer an asymmetrical design, and put them all on one side, in this case on the right side of the sapling. This is also the point where you will want to start stuffing. I prefer to make these as bean bags, otherwise, they are so small, they have hardly any weight. I fill mine to the top of row 7 with beans and then stuff the last bit with a little polyester filling. ROW 8 CH X 2, HDC X 8 with two stitches being decrease stitches. For the one I did, I put them in to the right side again. ROW 9 CH X 1, SC X 4 through both the front and the back sets of loops, closing the head. To make the branch off the head, do an additional SC and three CH, then cut and tie off. That's the body!
MAKING THE LEAVES
Start with a slipknot, CH X 2, then stitch SC X2, HDC, DC, TC X 2, DC, HDC, SC X 2 all into the original CH, and tie off. Watch your tension, as the tighter you work this part, the less point you will have to your leaf. You can change this part in any number of ways to make different shapes, multiple leaves, etc. so have fun with it! Just make sure that you have enough yarn on the tail and on your working end when you cut and tie off that
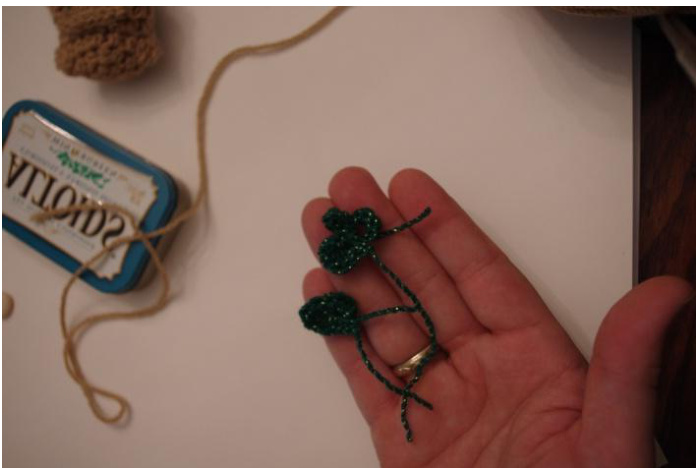
you can easily sew the leaves on to the sapling. If you want to eliminate the hole in the center of the leaf, pull your tail into the stitches as you place them, then pull taut and tie to the working end when you're done. I used a three leaf variant on the sapling I made while recording the pattern, the original sports three separate leaves made with the above instructions.
ADDING THE FACE
For the brows and the mouth, SC into the surface of your sapling, create the lines that will define the face, then SS back through the top of the SC, to add volume to your stitches. A myriad of expressions are possible, s0 go wild! One trick that I like is to CH X 2 or 3 off of the end of the eyebrows, then SS back, giving you a "branch" kind of look.
And that's it! Hope you enjoyed the pattern, if you did, please share it with your friends! I give permission for its non-commercial use, however, as this pattern is based on a character created and owned by RlOT games, commercial use is prohibited. I would love to see your creations as well, so feel free to link my project page on Ravelry.com at: http://www.ravelry.com/projects/BlackJackChelaque/maokai-sapling-with-pattern/edit?prepared=true Wherever you post pictures of this, please do give credit where it's due, and don't claim the apttern as your own. Thanks, and happy crocheting! And that's it! Hope you enjoyed the pattern, if you did, please share it with your friends!

APPENDIXA:ABBREVIATIONS
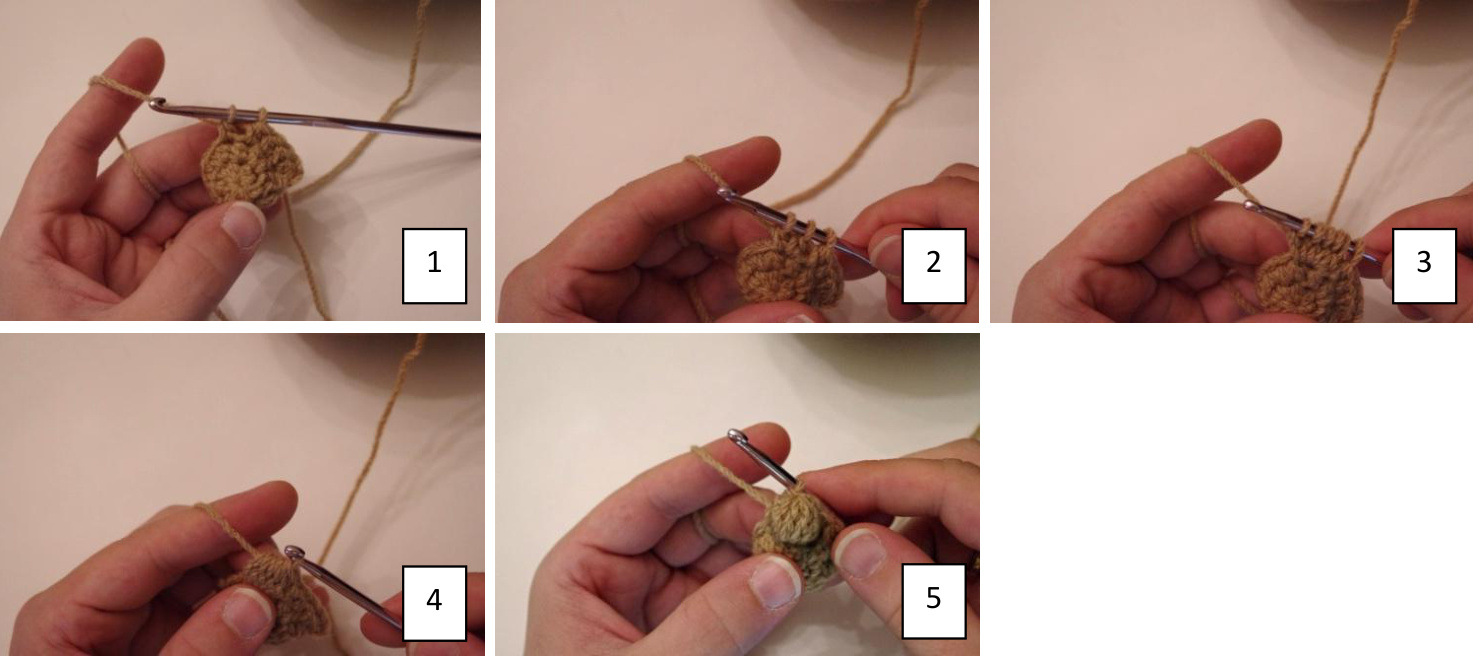
Here's all the abbreviations used in the pattern, in case I used something that is not the same as the standard abbreviations. CH Chain SS Slip Stitch SC Single Crochet HDC Half Double Crochet DC Double Crochet TC Triple Crochet \*\*\*INC Increase Stitch, as in HDCINC is a Half Double Crochet with an increase \*\*\*DEC Decrease Stitch MC(#) Magic Circle with # amount of stitches in it. For more on this, see Appendix B POP(#) Popcorn Stitch with # number of stitches in it. For more on this, see Appendix C The technique here is one I learned from http://busymomdesigns.com/blog/2011/05/12/magiccircle/ Their tutorial is excellent, hopefully mine is at least as good as theirs. Start with the yarn laying across your hand from your pinky to your index finger in your non-hook hand. Wrap it twice around your index and middle finger, so that there are three lines of yarn across your fingers. I pinch the tail with my index and thumb, but to make it easier to see in the pictures, I pulled my thumb back to snap the photos. Slide your hook underneath all three lines (the space between fingers works well for this) and pull a loop of the line closest to your palm under the other two. Yarn over and pull through. Slide the whole thing off your fingers, being careful not to undo all your hard work. Depending on what stitch you want to make the circle in, you will chain out a set number of chains: SC = 1, HDC = 2, DC =3, TC = 5, QC = 7. For everything except SC, the chains count as your first stitch, and you then stitch the appropriate number of stitches for your circle through the center. For the sapling, that means CH X 2, HDC X 7.
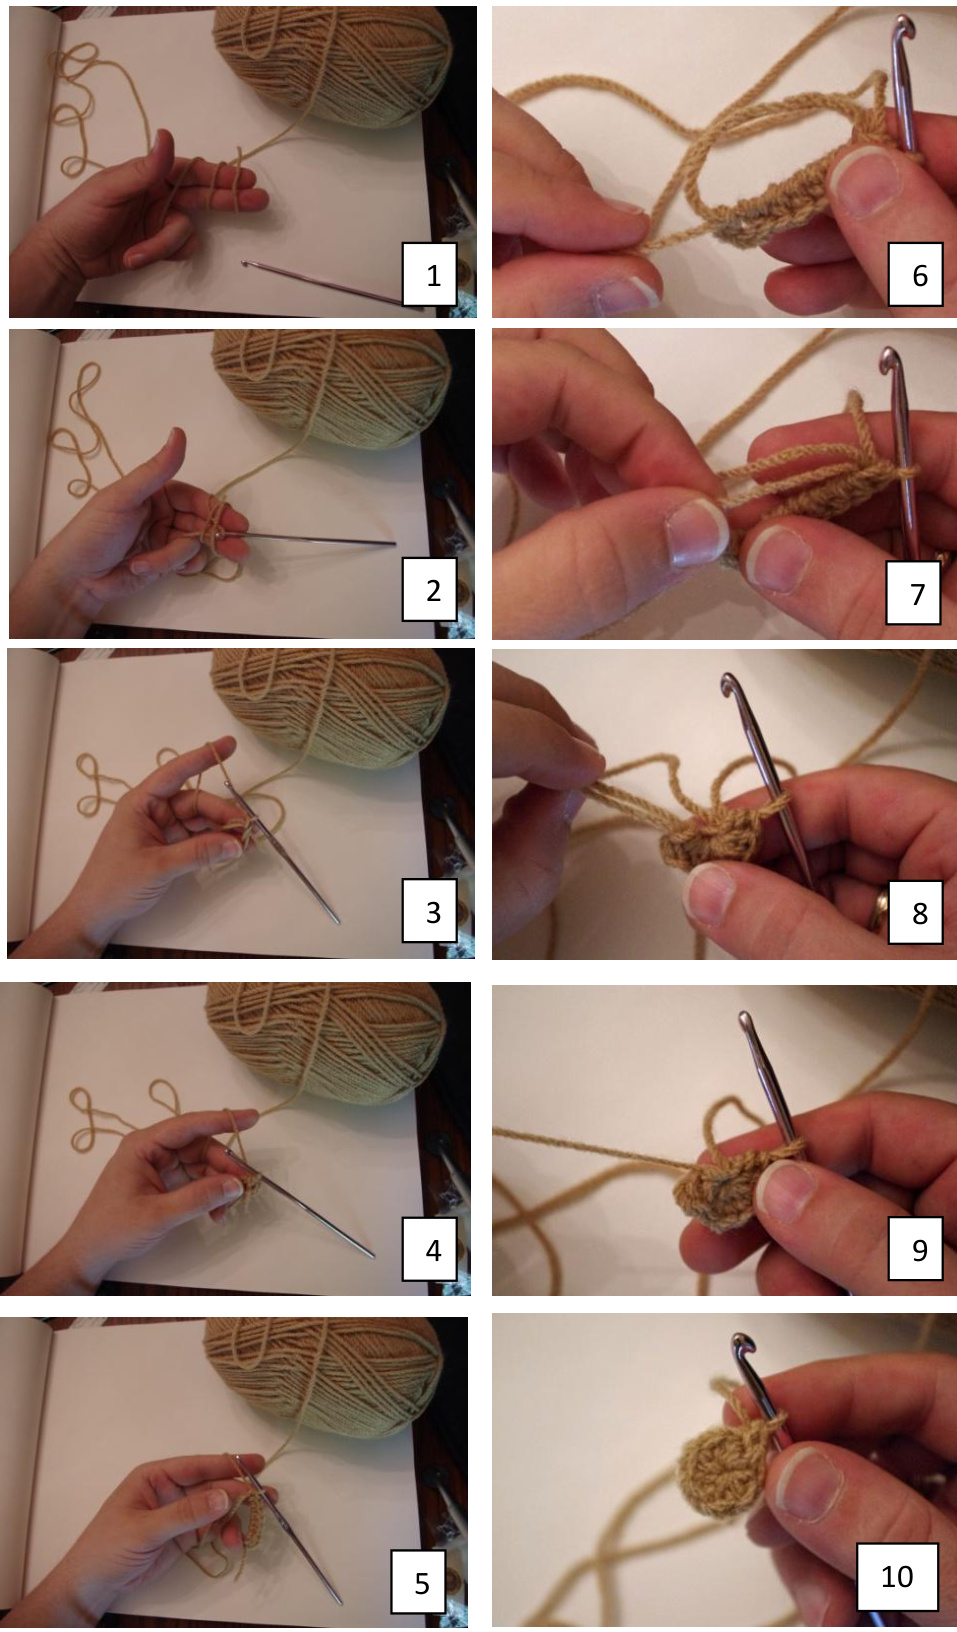
Now, holding the circle like I have it here in the picture, you are going to gently pull on the tail, until one of the two loops starts to tighten a little. That loop is the one that you need to pull on, on the same side as the tail, to take all the slack from the other loop. Then pull the tail until both loops are gone, and you have an open magic circle. If your pattern calls for it (and the sapling does) SS into the first stitch of your circle to close it. There you go, one magic circle. I use MC (6-8) for amigurumi and MC (10-12) for hats and other flatter projects. The popcorn stitch is a simple way to add a bulge in your pattern. For amigurumi, it's great for snouts, stubby appendages, and other bumps, and for large projects, putting them side by side gives you a great textural element. Here's how I do it for HDC and DC: Start with the standard beginning to a HDC or DC stitch, yarn over, go into the loop, yarn over, pull out. Yarn over and pull through the first two loops only. You should have two loops left on your hook, like in DC. Yarn over and go back into the same loop in the project, yarn over and pull out. Yarn over and pull through the first two loops again. At this point you should have three loops on your hook. Keep repeating these steps until you get the desired number of stitches made. I keep track by counting the number of loops on my hook, as you will have one more loop on your hook than your stitch count. Once you have the desired number of stitches, yarn over and pull through all the loops. In order to anchor the popcorn stitch, you will need to do the next stitch in the pattern, and try to keep tension on the line while you do, as the popcorn stitch has a tendency to leave a loose loop at the top otherwise.