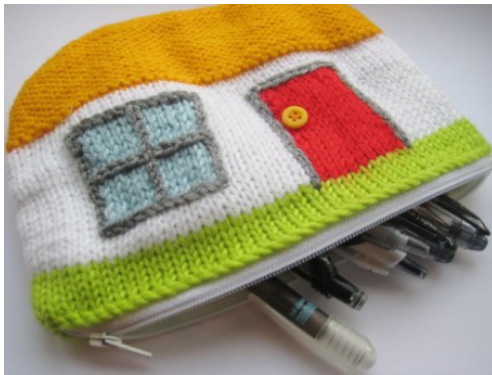
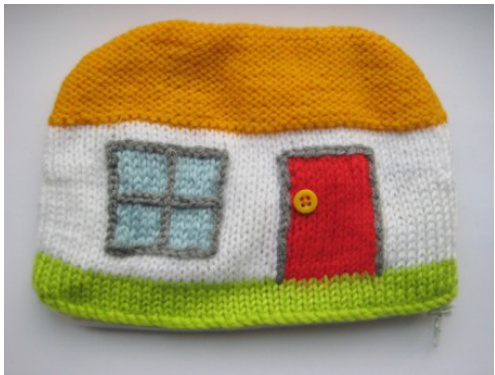
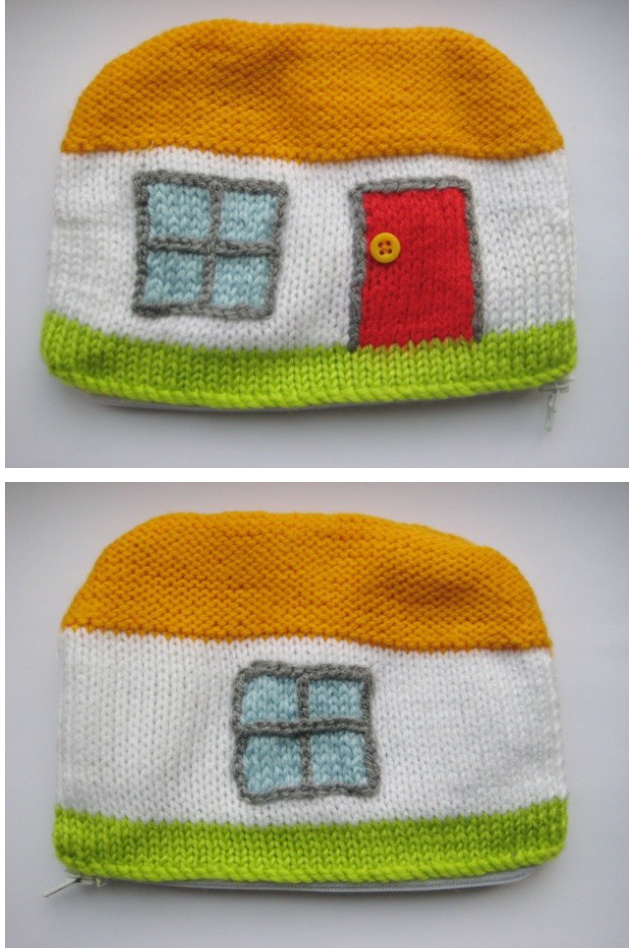
Thatched Cottage Pencil Case
fluff and fuzz knitting pattern Design by Amanda Berry
Finished size ...
Approximately 18.5 cm wide and 14 cm high The finished size will depend on the choice of yarn and needle size.
Wool ...
25g wool - light green for grass 25g wool - light blue for windows ?20g wool - red for doors 25g wool - yellow for roof 30g wool - white for cottage 25g wool - grey for embroidery This is an approximate amount, but should be sufficient to knit all the pieces and sew the cottage together. I have used double knit acrylic wool.
Needle size ...
4mm straight needles. (UK size 8, US 6)
Other materials ...
?Tapestry needle (to sew the pieces together). Small button for door handle 1 x 18cm zipper (7 inches), sewing needle and thread Optional : cotton fabric 25cm wide x 35cm high for lining
Copyright information ..
Copyright @ 2012 to 2013 Amanda Berry All patterns offered by fluff and fuzz (designed by Amanda Berry) are protected by international copyright laws. Any unauthorised copying will constitute an infringement of copyright. All rights reserved. I have no objection if you wish to sell the finished cases made from this knitting pattern, however, please do credit fluff and fuzz as the pattern designer in your product details/listing information. These patterns are intended for personal use, so you are not authorised to sell the pattern itself.1 encourage items knitted from my patterns to be sold for charity fundraising purposes Knitting Abbreviations ..
| cO | Cast on |
| K | Knit |
| P | Purl |
| P2TOG | (Decrease)-Purl two stitches together |
| [...] | Repeat the stitches in square brackets by the number indicated. |
| (...) | The number in round brackets indicates the number of stitches per row. |
| (blue) | The colour in round brackets indicates the colour to use for the required number of stitches to make the cottage pattern. |
Knitting Needle Size Chart ..
| Metric | X | sn |
| 2.75 mm | 12 | 2 |
| 3.0 mm | 11 | |
| 3.25 mm | 10 | 3 |
| 3.5 mm | _ | 4 |
| 3.75 mm | 9 | 5 |
| 4.0 mm | 8 | 6 |
About the patterns ...
If you are making this case for a small child, please ensure you have no loose parts (loose threads, buttons, etc) which can be potential choking hazards. Also be cautious about the type of yarn, as fluffy brushed mohair yarns can have small fibres that can be swallowed by children. Change colours using either the intarsia method or carrying strands of the unused colours at the back of the work.
fluff & fuzz
About the author ..
My name is Amanda Berry and I love knitting, sewing and anything crafty! I started designing my own toys as fluff and fuzz in 2010, and my knitting and sewing patterns have been featured in Handmade Living, Craftseller, and Let's Get Crafting Magazines. For my free patterns and crafting tutorials, please pop over to my blog at http://fluffandfuzzknitting.wordpress.com/
Knitting patterns ..
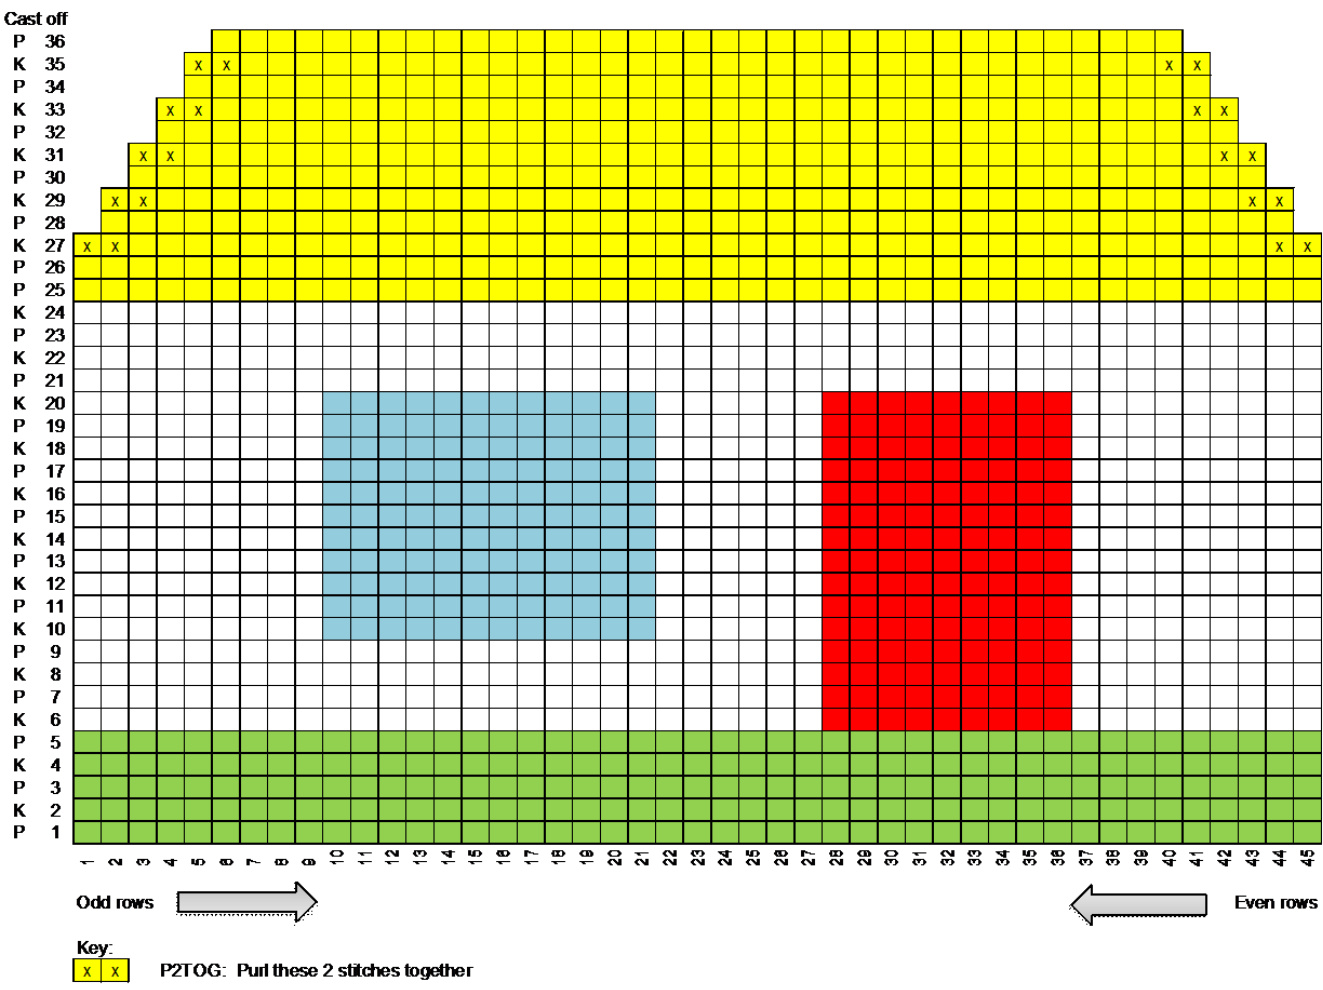
If you prefer, the knitting pattern charts are provided on the last page

Make 1 CO 45 in light green The knitted piece should be should be approximately 19.5cm wide at its widest to accommodate an 18cm zipper. 1. P (45) 2. K 3. P 4. K 5. P 6.Change to white at the beginning of the row: (white) K9, (red) K9, (white) K27 7.(white) P27, (red) P9, (white) P9 8. (white) K9, (red) K9, (white) K27 9.(white) P27, (red) P9, (white) P9 10. (white) K9, (red) K9, (white) K6, (blue) K12, (white) K9 11. (white) P9, (blue) P12, (white) P6, (red) P9, (white) P9 12. (white) K9, (red) K9, (white) K6, (blue) K12, (white) K9 13. (white) P9, (blue) P12, (white) P6, (red) P9, (white) P9 14. (white) K9, (red) K9, (white) K6, (blue) K12, (white) K9 15. (white) P9, (blue) P12, (white) P6, (red) P9, (white) P9 16. (white) K9, (red) K9, (white) K6, (blue) K12, (white) K9 (45) 17. (white) P9, (blue) P12, (white) P6, (red) P9, (white) P9 18. (white) K9, (red) K9, (white) K6, (blue) K12, (white) K9 (45) 19. (white) P9, (blue) P12, (white) P6, (red) P9, (white) P9 20. (white) K9, (red) K9, (white) K6, (blue) K12, (white) K9 (45) 21. (white) P (45) 22. (white) K 23. (white) P 24. (white) K 25. (yellow) P 26. (yellow) P 27. (yellow) K 28. (yellow) P 29. (yellow) K 30. (yellow) P 31. (yellow) K (45) 32. (yellow) P2TOG, P to last 2 stitches, P2TOC (43) 33. (yellow) K (43) 34. (yellow) P2TOG, P to last 2stitches, P2TOC (41) 35. (yellow) K (41) 36. (yellow) P2TOG, P to last 2 stitches, P2TOC (39) 37. (yellow) K (39) 38. (yellow) P2TOG, P to last 2 stitches, P2TOG (37) 39. (yellow) K (37) 40. (yellow) P2TOG, P to last 2 stitches, P2TOG (35) Cast off all stitches

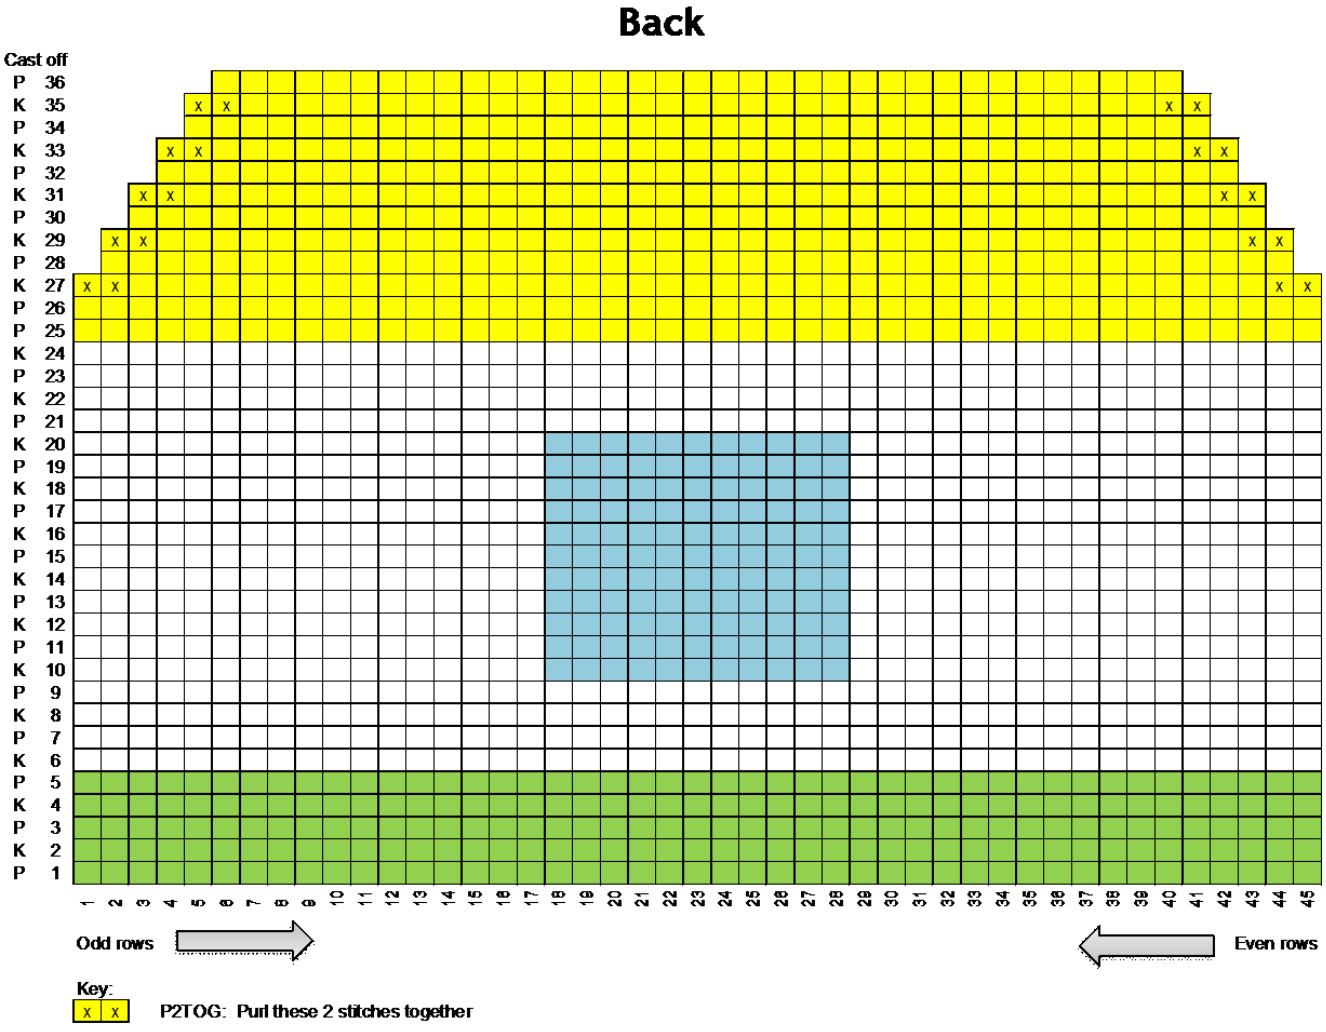
Make 1
CO 45 (approximately 19.5cm wide) in light green
1. P 2. K 3. P 4. K 5. P 6. Change to white at the beginning of the row: (white) K45 7. (white) P45 8. (white) K45 9. (white) P45 10. (white) K17, (blue) K11, (white) K17 (45) 11. (white) P17, (blue) P11, (white) P17 (45) 12. (white) K17, (blue) K11, (white) K17 (45) 13. (white) P17, (blue) P11, (white) P17 (45) 14. (white) K17, (blue) K11, (white) K17 (45) 15. (white) P17, (blue) P11, (white) P17 (45) 16. (white) K17, (blue) K11, (white) K17 (45) 17. (white) P17, (blue) P11, (white) P17 (45) 18. (white) K17, (blue) K11,(white) K17 (45) 19. (white) P17, (blue) P11, (white) P17 (45) 20. (white) K17, (blue) K11, (white) K17 (45) 21. (white)P (45) 22. (white)K 23. (white) P 24. (white)K 25. (yellow) P 26. (yellow) P 27. (yellow) K 28. (yellow) P 29. (yellow) K 30. (yellow) P 31. (yellow) K (45) 32. (yellow) P2TOG, P to last 2 stitches, P2TOG (43) 33. (yellow) K (43) 34. (yellow) P2TOG, P to last 2 stitches, P2TOG (41) 35. (yellow) K (41) 36. (yellow) P2TOG, P to last 2 stitches, P2TOG (39) 37. (yellow) K (39) 38. (yellow) P2TOG, P to last 2 stitches, P2TOG (37) 39. (yellow) K (37) 40. (yellow) P2TOG, P to last 2 stitches, P2TOG (35) Cast off all stitches Making up ...
Make the case
Embroider the window and door frames in grey wool using chain stitch. Sew a small yellow button on to the door front to make thehandle. Sew the around the edges of the two knitted pieces, leaving the green cast on edges open at the top.
Insert the zipper
Work with the right sides of the case facing outwards. Position the zipper inside the top of the case and fold under the ends of the zipper tape. Pin the zipper into place, then sew the zipper tape to the cast on edges of the knitted pieces. Sew using a sewing needle and cotton thread, and use a small running back stitch (you can sew by machine if you prefer). Ensure that the knitted edge is 4mm clear of the zipper teeth so that the zipper can run freely without catching the knitting,
Optional Lining
If you want to line the case, add a lining before sewing the knitted pieces to the zipper. Make a pattern piece template from one of the knitted pieces by placing flat on a sheet of paper and drawing around the edge. Add a 1cm seam allowance on all sides. Cut two pieces of cotton fabric from this template. Sew the cotton lining to the zipper tape with a 1cm seam allowance approximately 4mm from the zipper teeth. Sew around the edges of the cotton pieces and press the raw edges back. Then proceed to sew the knitted pieces to the zippertape.
Front