Double Cross Beanie
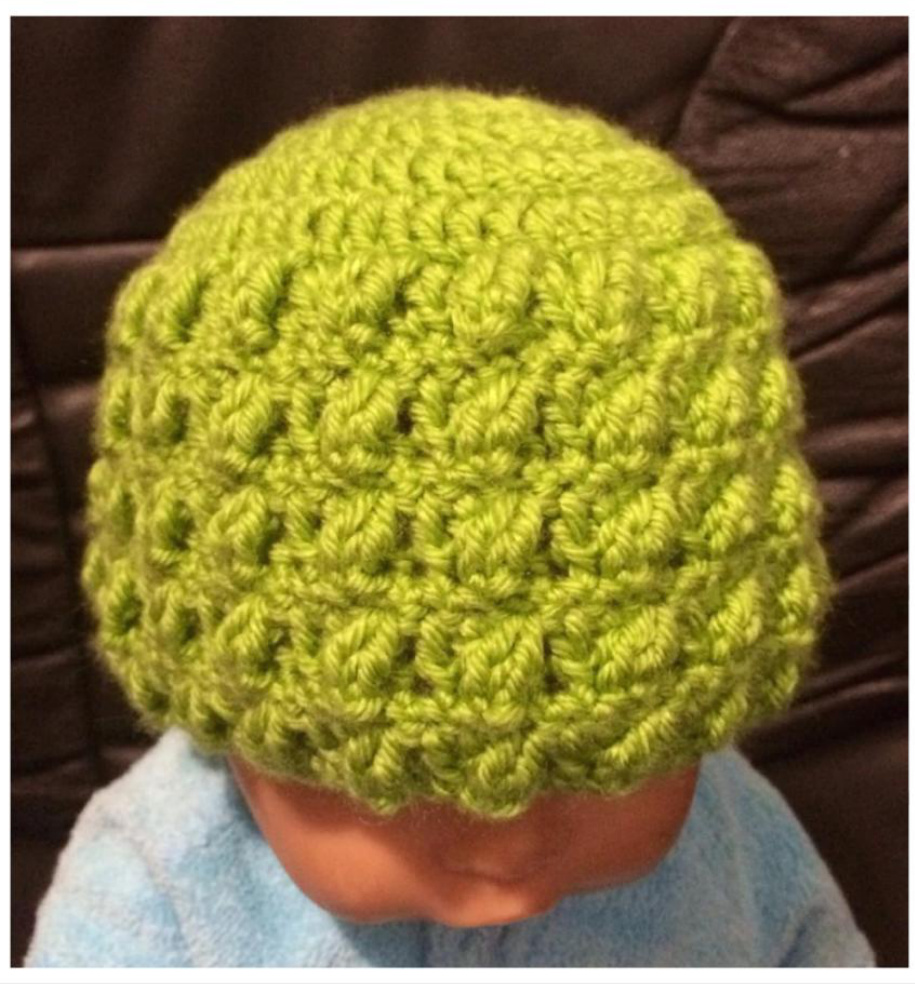
Materials needed: Any size yarn Hook appropriate for yarn you pick Measuring tape Yarn needle This pattern can be made in any weight yarn and to any size head. It is based on measurements and not number of stitches and rows. To figure out what measurements you are going to need we use the mathematical formula Pi (3.14) Step 1: Take a tape measure and measure the person head. Write this number here_ (61cm) Step 2: We then divide that number by Pi (3.14) you can round to the nearest number. Write your answer here_—_ (61÷3.14=19) Now we subtract 1inch (or 2.5cm) from that number to make it a nice snug fit. Write that number here__(19-2.5=16.5) Christie from Criddy Creations using the stitch designed by Miki from Miki's Crafty Corne That is the measurement which the crown of your hat needs to be for the perfect fit. (So I will keep crocheting until the crown of my hat measured 16.5cm) To work out how long your hat needs to be (from the top of the crown to the bottom the ears) your going to take the number from step 1 and divide it by 10 and then multiply it by 4. Write that number here___(61÷10x4=24.5) That is the measurement which your hat needs to be.If you wish to have a bit to fold up then add another inch or 2. To do the Margaret's Double Cross Stitch (MDx) Skip one stitch, 2DC, and then going behind the 2DC just made make 2DC into the skipped stitch. Start with a Magic Ring or Ch 5 and join with a slip stitch. 1. Ch3, 11DC into MR or Ch space, join with a slip stitch (12) 2. Ch3, DC in same stitch, 2DC in each stitch around, join with a slip stitch (24) 3. Ch3, 2DC in next stitch \*DC in next, 2DC in next \* Repeat from \*to\* till end, slip stitch to join (36) 4. Ch3, DC in next stitch \*2DC in next, 1DC in next 2\* Repeat from \*to\* till end, slip stitch to join (48) 5. Ch3, 2DC in next stitch \*DC in next3, 2DC in next \* Repeat from \*to\* till end, slip stitch to join (60) 6. Keep increasing by 12 stitches each row until the crown of your hat is the right measurement. 7. Ch3, MDX over the next 2 stitches, \*DC in next stitch, MDX over the next 2 stitches\* Repeat \*to\* till end, join with a slip stitch and turn your work (this is the first time you willturn your work and you will do so each round fromnowon) 8. Ch1 SC into same stitch, 1 SC in next 2 stitches \*skip 2 stitches, SC in next 3\* Repeat \*to\* allthe way around, join to 1st SC with a slip stitch and turn. 9. Continue with rows 7 & 8 until hat reaches the desired length. 10. As an optional finish do a row of Crab Stitch (reverse SC) 11. Fasten off and sew in the ends. Christie from Criddy Creations using the stitch designed by Miki from Miki's Crafty Corne


