mad hatter hat
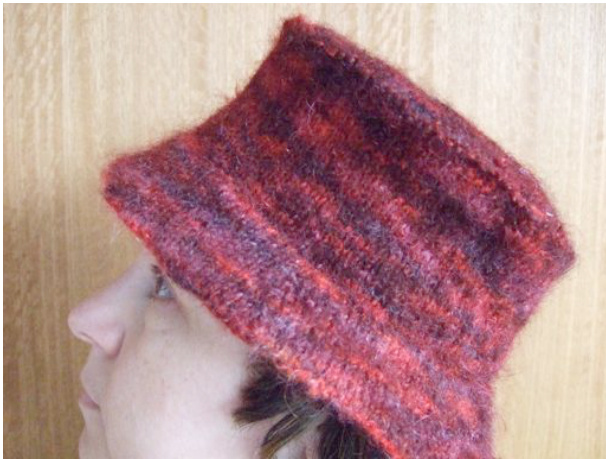
by sooz - www.soozs.blogspot.com I wanted a bucket hat with a slight twist. Something a bit less floppy, something with curves and a flat top and ever so slightly felted. Something I could perhaps wear to a tea party along with a few other mad hatters.
Materials
115gms of handspun (something in the vicinity of an 8ply or DK weight) wool. Make sure it isn't superwash or a non-felting fibre. 4mm 60cm circular needle plus 4mm dpns for the crown decrease Stitch markers Scrap yarn and crochet hook for provisional cast on Scissors and yarn needle
Gauge

18.5 stitches to 10cm/4inches - it should be relatively dense at this gauge.
Size
Approx 55cm head - you have some discretion over sizing at the felting stage
Notes
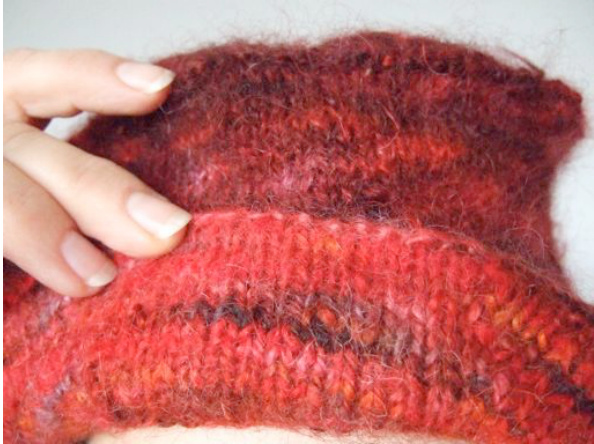
I dyed the yarn for this hat in two lots, I used a small amount of brighter red yarn to cast on and knit the underside of the brim, then switched to a darker plumier version to knit the top side. You could of course use two contrasting colours or do it all in one colour.
To alter the size or shape you could cast on extra stitches to fit a larger head (in multiples of 8), do extra knit and increase rows before row 17 to widen the brim (with the same in decreases after row 17), add extra increase rows between the brim and the crown to exaggerate the flare of the top, or knit extra rows before the crown to make it taller (rows 35-57)。 The felting process also allows you to change the size of the hat (felt more for smaller, felt less for bigger) or make the hat denser and stiffer by knitting the hat bigger and felting it more. Instructions Using provisional cast on, cast on 104 stitches. Place marker and join in the round being careful not to twist. Row 1,2 - Knit Row 3 - Increase row - \*knit 12 stitches, knit into the front and back of the 13th stitch\* repeat 7 more times (total 112 stitches). You may find it easier to mark each increase point with a stitch marker. Repeat rows 1-3 4 more times, increasing the number of stitches between each increase in row 3 each time by 1 (total 144 stitches).
Row 16 - Knit Row 17 - Purl (this forms the turning row for the outer edge of the brim). If you are using two different coloured yarns, switch colours here. Repeat rows 1-16 in reverse to decrease the number of stitches back to the original 104. (ie, row 18 knit, row 19 knit first 16 stitches then SSK decrease stitches 17 and 18 together etc). Slide the stitches from the provisional cast on to a separate circular needle. Row 34 - knit the stitches from the two circular needles together by folding the brim in half and holding the two needles together. Put the tip of the right needle into the first stitch from the main needle and then the first stitch from the second (cast on stitches) needle and then knit the two stitches together. Repeat for all stitches. This completes the brim. Rows 35-41 - knit Row 42 -lncrease row - \*knit 12 stitches, knit into the front and back of the 13th stitch\* repeat 7 more times (total 112 stitches) Rows 42-48 - knit Row 49 - Increase row - \*knit 13 stitches, knit into the front and back of the 14th stitch\* repeat 7 more times (total 120 stitches) Rows 50-55 - knit Row 56 - Increase row - \*knit 14 stitches, knit into the front and back of the 15th stitch\* repeat 7 more times (total 128 stitches) Row 57 - Purl. This row forms the ridge to start the crown. Row 58 - \*knit 14 stitches, SSK stitches 15 and $16^{*}$ repeat 7 more times. Row 59 - knit Repeat row 58 and 59, decreasing the number of stitches between each decrease by 1 each time until 8 stitches remain. Break yarn, thread onto a needle and thread remaining stitches onto yarn. Gather up tight and sew in end. Felting Hand wash hat in hottest possible soapy water, agitating vigorously. Rinse in very cold water. Check for size and repeat if required until hat is desired size. Roll up a small towel to form a head sized cylinder and dry hat held in shape. Please let me know if you find any errors or have questions about this pattern soozs.com@gmail.com


