Stitchy n Crafty is ME
Vinnie the deliriously happy Bunny Wabbit-An Amigurumi Pattern
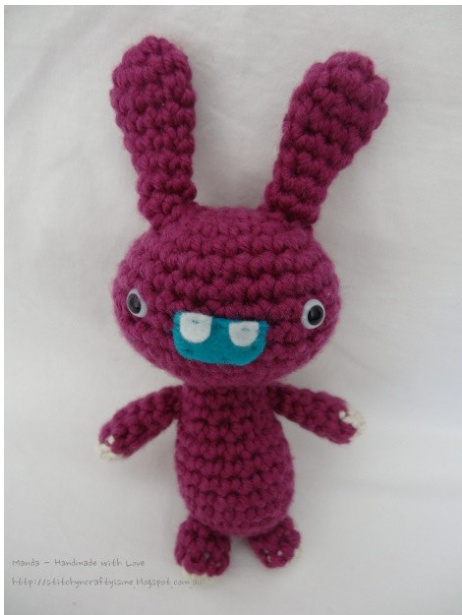
FINISHEDMEASUREMENTS
| Part | Measurement |
| Top of Ears to Toe | 16cm/ 614 inches |
| Ears | 2cm/3/4incheswidestpart 4cm/7% inchestall |
| Head | 18cm/7inchescircumference |
| Body | 12cm/ 43/4 inches around belly 6cm/ 2% inches long |
| Arms | 4cm/7% 2inches long |
| Legs | 1.5cm/ %2 inches long |
| Tail | 1cm/3/4inchesdiameter |
WHAT YOU NEED
Around 50 grams of yarn for the main colour (sample made with 10ply bulky 100% merino wool) Around 5 grams of yarn in contrasting colour for the paws Toystuffing One pair of plastic safety eyes Felt scraps for the mouth and teeth and matching embroidery threads (l used DMC cotton perle 8) TOOLS 4.5mm crochet hook or as recommended for the yarn (the biger the yarn, the biger the finished size will be) Stitch markers to keep track of the number of rounds (you can also use the yarn tail - check out my bloq for a short tutorial) Tapestryneedle TECHNIQUESUSED Magic circle cast on (MC) Single crochet (X) Increase (V) Invisible decrease (^) Bind off Whipstitch (seams together)
INSTRUCTIONS:
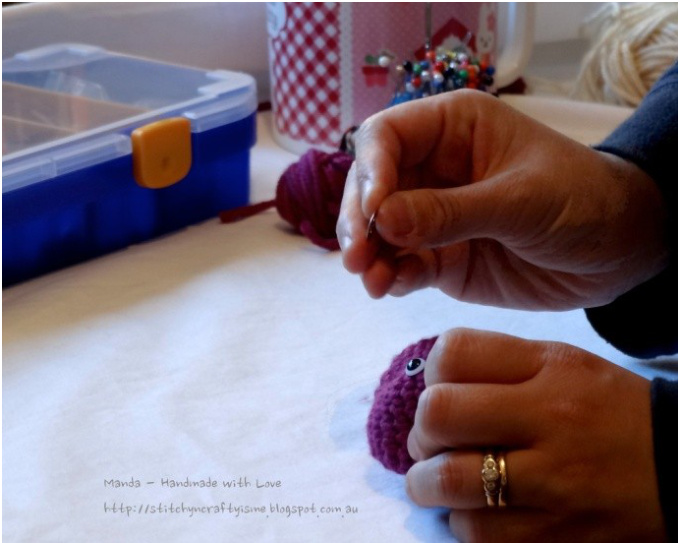
Head - make 1 Round 7: MC 6 chains, place stitch marker to keep track of the start of the round Round 2: 6 V = 72X Round 3: (Vx) 6 times = 18X Round 4: (V2X) 6 times = 24X Round 5: (V3X) 6 times = 30x Place stitch marker to keep track of the number of rounds Rounds 6 to 10: 30X If you are using plastic safety eyes, insert them between rows 7 & 8. Insert one eye between the 5th and 6th single crochet stitches. Then & stitches across, place the second eye between the 14th and 15th single crochet stitches· Stand back and take a look. If you are happy with their positions, lock them in place with the washers that come with thesafety eyes·

Round 11: (^3X) 6 times = 24X Round 12: (7X^) 6 times = 18X Round 13: (6X^) 6 times = 12x Bind off and leave a tail long enough to sew onto the body with, approximately 2Ocm (8 inch)
Ears - make 2
Round 7: Mc 5 chains, place stitch marker to keep track of the start of the round Round 2: 5V = 10 X Round 3: 10 X Round 4: (^3X) 2 times = 8X Round 5: 8X Round 6: (^2X) 2 times = 6X Rounds 7 to8: 6 X Bind off and leave a tail long enough to sew onto the head with, approximately 2Ocm (8 inch) Body - make 1 Round 1: Mc 6 chains, place stitch marker to keep track of the start of the round Round 2: 6 V = 72X Round 3: (VX) 6 times = 18 X Place stitch marker to keep track of the number of rounds Rounds 4 to 9: 18 X Round 10: (^x) 6 times = 12 X Rounds 71 to 14: 72 X Bind off and weave in end
Arms - make 2
Start with the paw colour yarn Round 1: MC 6 chains, place stitch marker to keep track of the start of the round Changeto main colour yarn Round 2: 6 X Place stitch marker to keep track of the number of rounds Rounds 3 to 6: 6 X Bind off and leave a tail long enough to sew onto the body with, approximately 2Ocm (8 inch) Legs-make2 Start with the paw colour yarn Round 7: MC 6 chains, place stitch marker to keep track of the start of the round Change to main colour yarn Round 2: 6 X Place stitch marker to keep track of the number of rounds Rounds 3 to 4: 6 X Bind off and leave a tail long enough to sew onto the body with, approximately 2Ocm (8 inch)
Tail - make 1
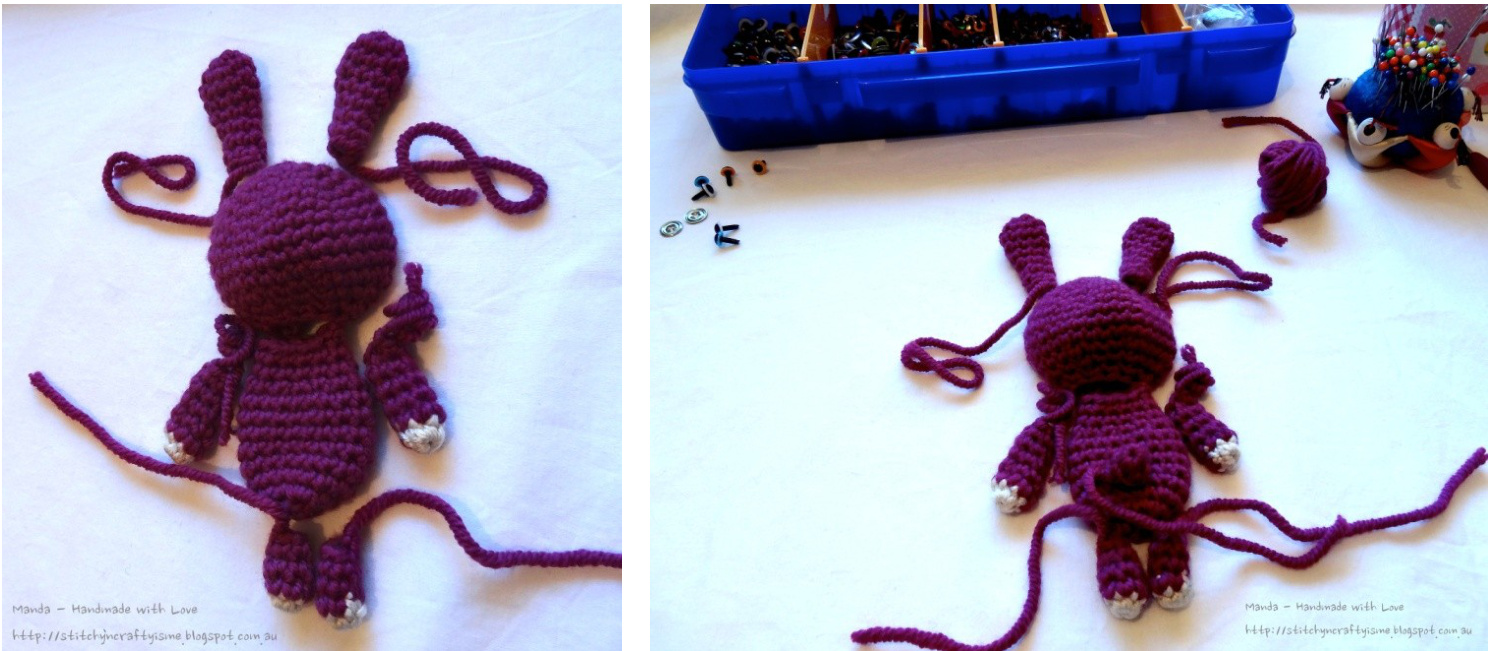
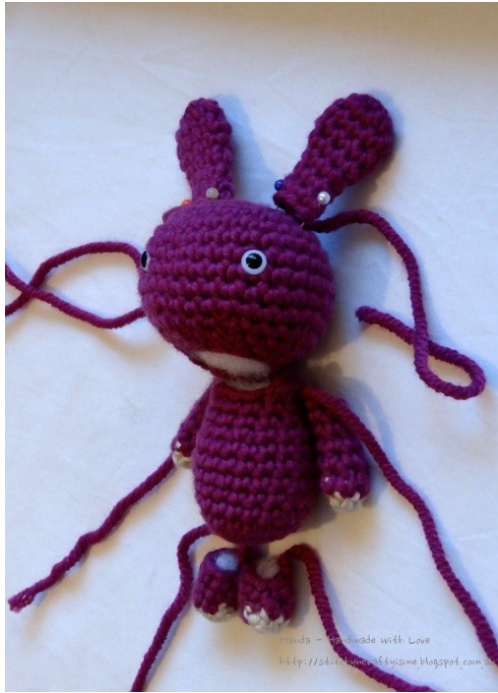
Round 1: MC 5 chains, place stitch marker to keep track of the start of the round Round2:5X Bind off and leave a tail long enough to sew onto the body with, approximately 2Ocm (8 inch) NOW LET'S PUTIT TOGETHER - here is where you can be creative! 1. Lay out all the parts so you can decide how they should be placed
2. If you hadn't inserted the plastic safety eyes earlier, do it now. Insert them between rows 7 & 8 from the top of the head· Insert one eye between the 5th and 6th single crochet stitches. Then & stitches across, place the second eye between the 14th and 15th single crochet stitches· Stand back and to take a look. If you are happy with their positions, lock them in place with the washers that come with the safety eyes.
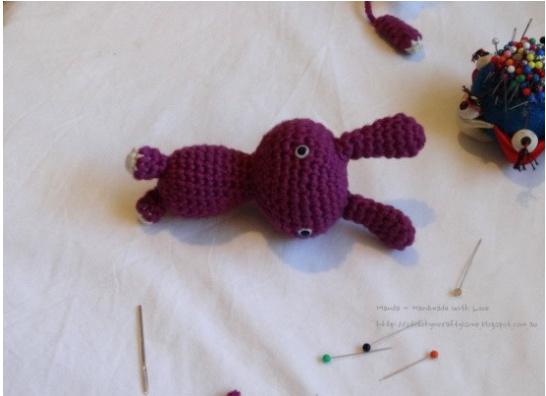
3. Stuff head with toy stuffing. Don't skimp, you want this stuffed firmly 4. Position the ears. Pin them down first, make sure you are happy with them before stitching them on the head using thewhipstitch.
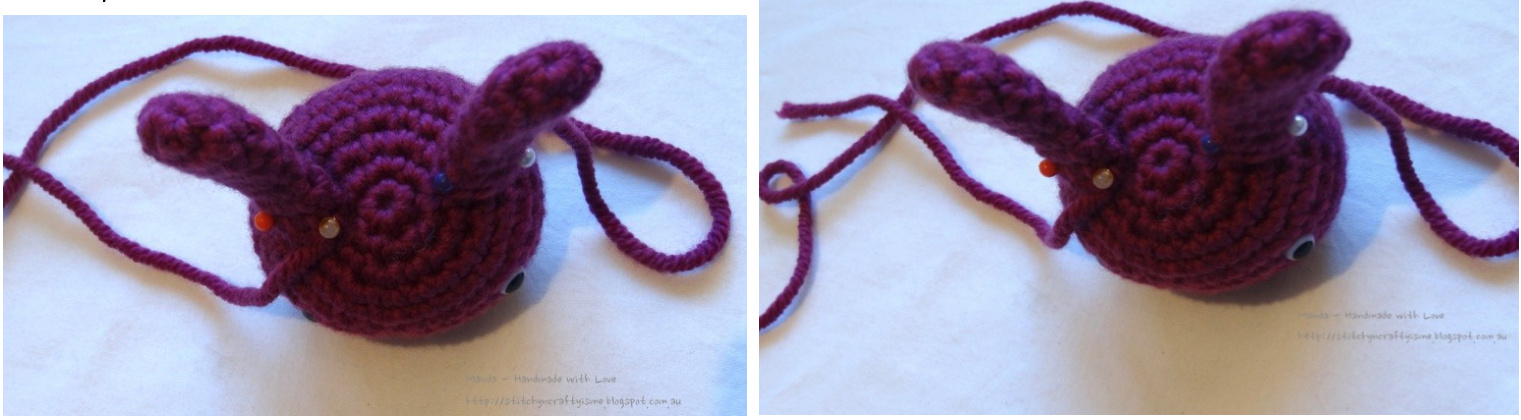
Tip: I like to also lay the head with the ears pinned in with the stuffed body and limps to check their positions as well. They don't both have to be straight up, one can be slightly off centered to get the inquisitive look
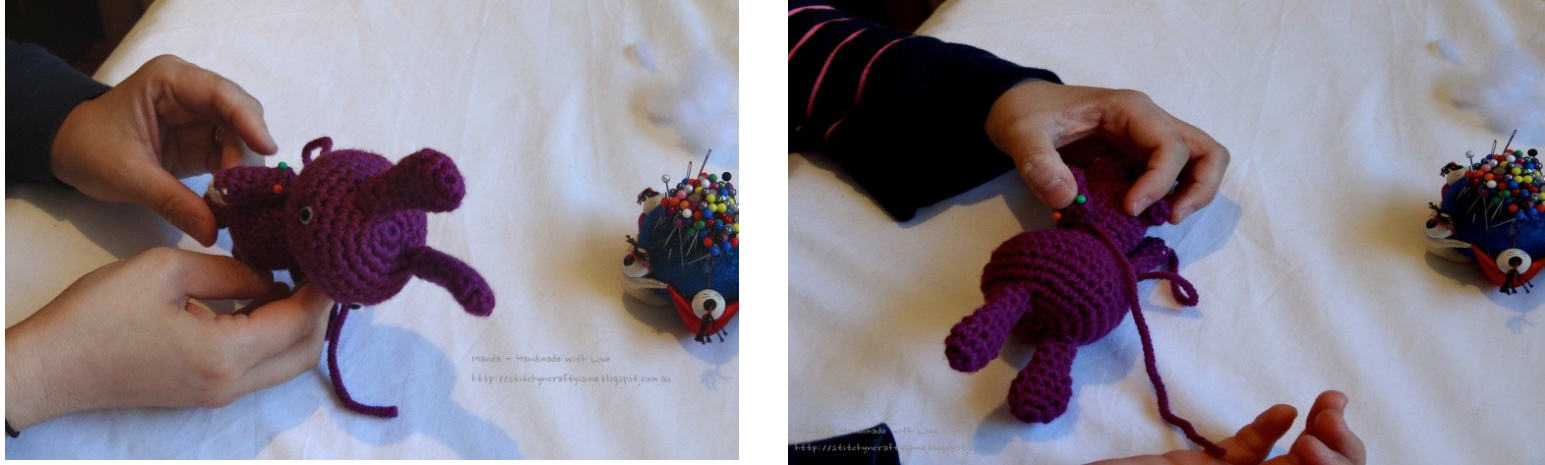
5. Stuff the body firmly then tuck the tail in. Stitch head onto body using the whipstitch with the tail from the head bindoff. 6· Stuff the legs firmly; position them onto the bottom of the body with pins before stitching them on·
7. Now the arms If you stuff them firmly, you will get the stiff arms look. If you just stuff the paws and leave most of the arms empty, you will get a more natural hanging by the side of the body look. For this design, I want the arms to just hang by the side so I slightly stuffed both arms to give this bunny wabbit a more carefree attitude·
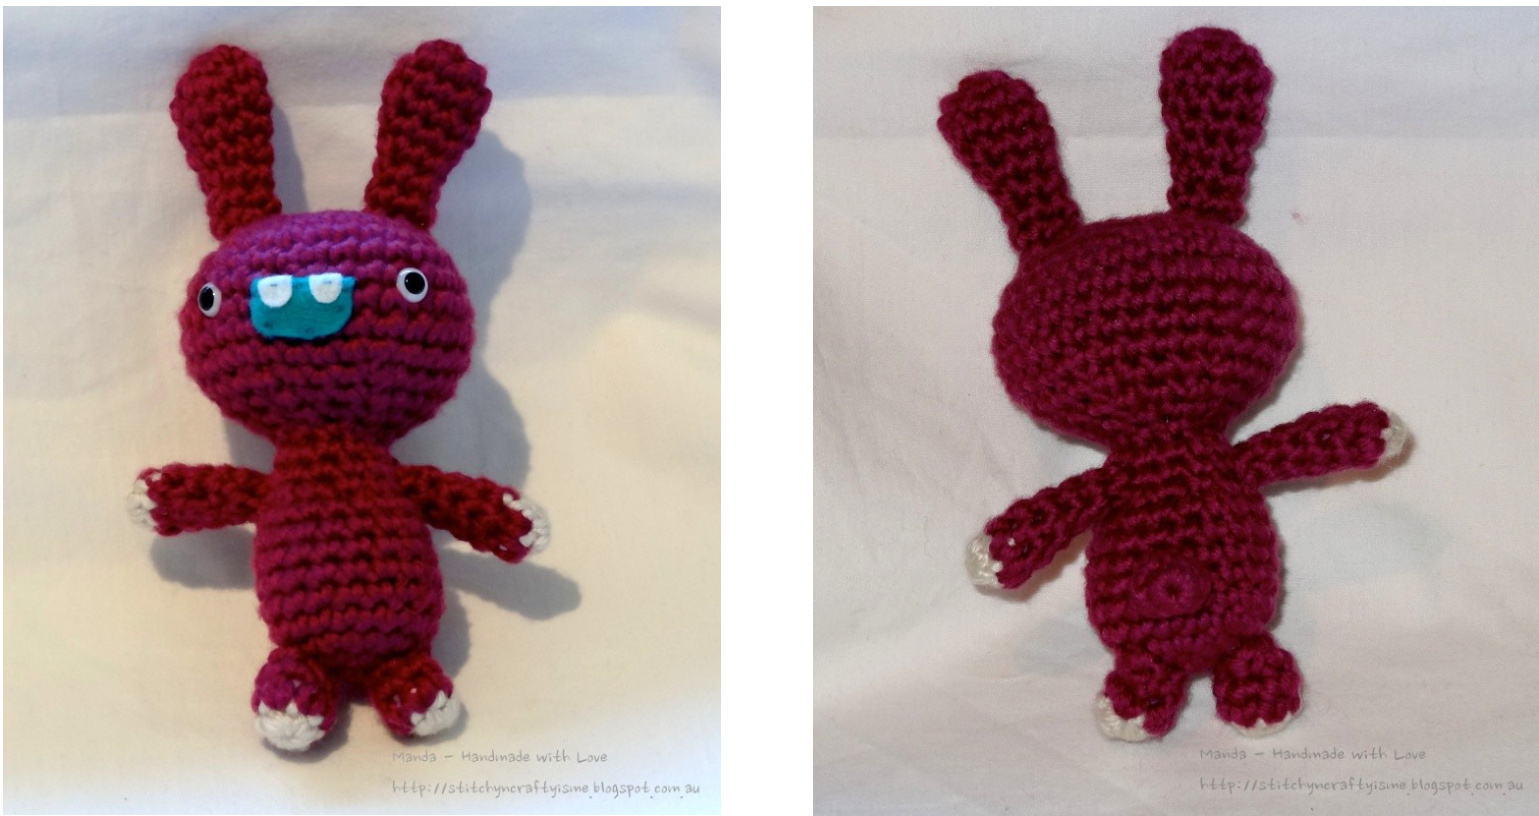
8. Slightly stuff the tail, stitch it onto the back roughly one third of the way up from the bottom. 9. Now the deliriously happy smile. Cut the mouth using some felt in a contrasting colour, the brighter the better! Cut a tooth (or two) out of white felt pieces. \* Go get a cuppa or take a rest before proceeding as the next part can be tricky because of the small pieces involved This pattern is for personal use only, feel free to make this for yourself or as gifts. Please don't republish or distribute this pattern for any commercial purposes. I am also not a professional designer and with no proper training in pattern writing. Should there be any mistakes, please email me (stitchymanda@gmail.com) and I will correct whereneeded. 10·Stitch the teeth (or tooth) onto the mouth first with embroidery threads. Don't cut the thread cause you will continue using it to stitch the mouth on the face· 11. Position the mouth between the eyes at the same level, cause that's how a deliriously happy bunny wabbit looks when they smile like that! Pick up the thread used to stitch the teeth (or tooth) and sew the mouth on the face using some evenly placed stitches?
Now you are done! TA DAH!
DESIGNED BY: Manda - Handmade with Love WEBSITE: http://stitchyncraftyisme.blogspot.com.au FACEBOOK: https://www.facebook.com/MandaHandmadeWithLove EMAIL: stitchymanda@gmail.com Thank you for trying my pattern design. If you've made your own deliriously happy bunny wabbit, I would love to see it! Please share a picture of two on my Facebook page... I am also keen to hear about what you think of this pattern, if you have any questions or comments, please feel free to email me.


