BRAIDY CAT Design by Amy E. Anderson @
Pullover with All-Over Cable Texture Intermediate Skill Level 3 Sizes: Finished Chest Dimensions 44", 48", 52" Worsted Weight Wool Yarn
BRAIDY CAT?
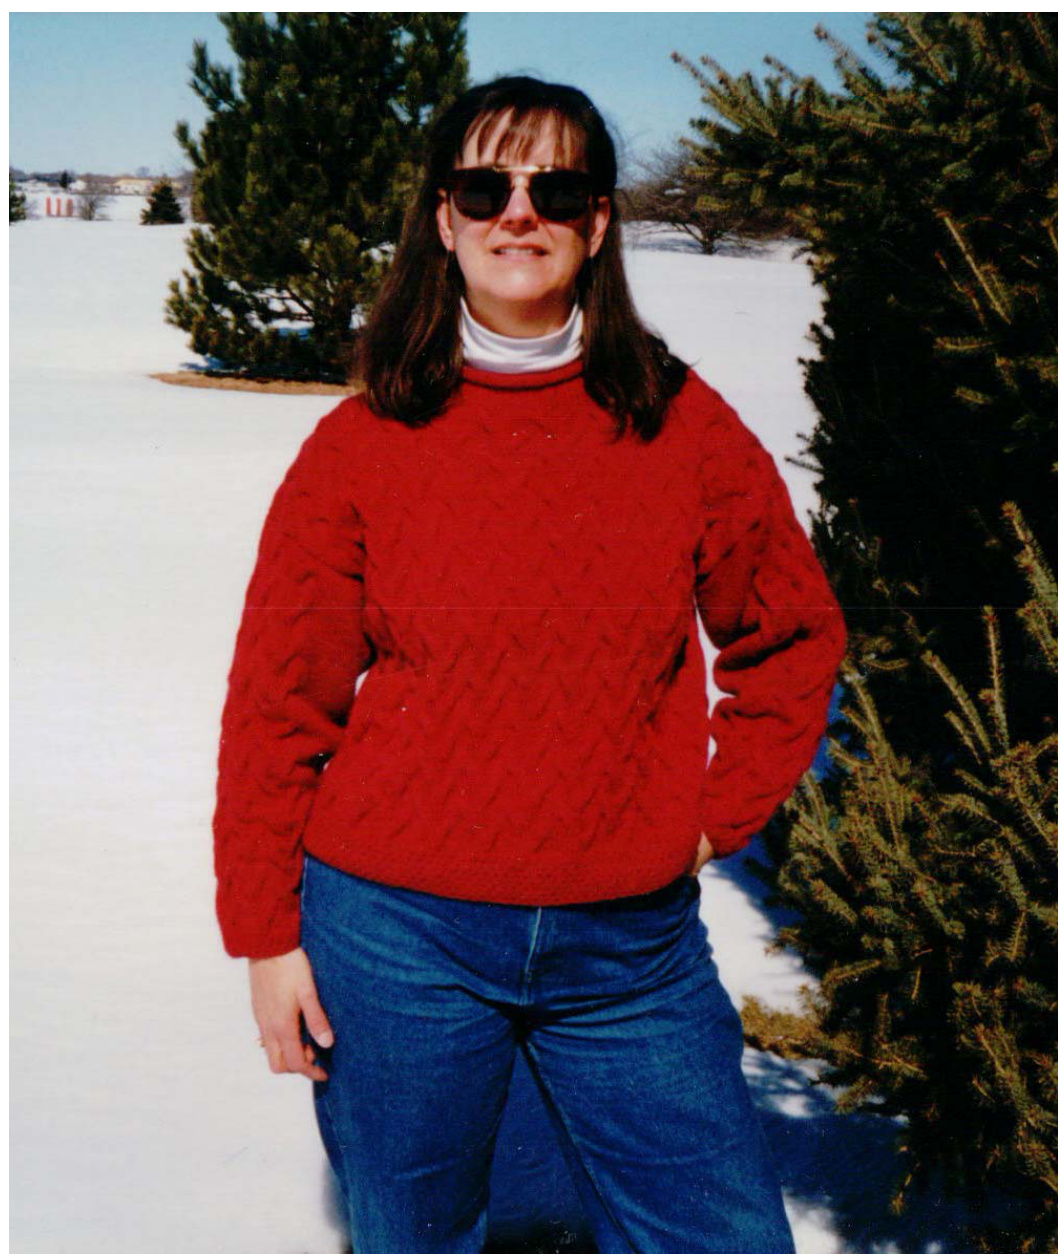
design by Amy E. Anderson Braidy Cat is one of my favorites because it looks complicated, but it's actuall very quick and easy to knit. Five out of every six rows are worked in plain old stockinette! On the sixth row, you twist half the cables. That's all it takes to create this luxurious textured sweater. I chose Blackberry Ridge wool & mohair yarn because its deep, rich colors compliment this design perfectly. Directions are given for three sizes. If only one number is given, it applies to all sizes. Read chart from right to left on RS rows, and left to right on WS rows. Materials: Blackberry Ridge, Wool & Mohair 6 (7, 7) skeins Needles: Size 4 and 6, and size 4, 16"circular or size needed to obtain gauge. Gauge: 21 sts $=4^{\ast}$ in Moss Stitch, on smaller needles. Finished Dimensions: Chest at Underarm: 44" (48", 52") Length: 23" (24", 25") Body length to armholes: $14\%^{\ast}(15^{\ast},\;15\%^{\ast})$ Sleeve Length: $18^{\prime\prime}(18\%^{,\prime\prime},\;19^{,\prime\prime})$ Sleeve Width at Top: $19^{\mathfrak{v}}(20^{\mathfrak{v}},27^{\mathfrak{v}})$
Moss Stitch - (over an even # of sts)
Rows #1 and #2: $^{\star}\mathsf{K}\mathsf{1}$ , $\mathsf{P}\mathsf{1}^{\star}$ ,repeat $\star_{-}\star$ to end of rd. Rows #3 and #4: \*P1, $\mathsf{K}1^{\star}$ , repeat \*\* to end of rd. Repeat Rows 1-4.
Back:
With smaller needles, cast on 108 (120, 132) sts. Work in Moss Stitch for $\ge~1/4^{"}$ , ending so that next row worked will have RS facing. Next row: Knit across, increasing 28 sts evenly spaced. You will have 136 (148, 160) sts total. Next row (ws): Switch to larger needles and purl 1 row. Establish patterns as follows: Next row (RS): K2, work [Chart A over next 12 sts] 11 (12, 13) times, end K2. Next row (WS): P2, work [Chart A over next 12 sts] 11 (12, 13) times, end P2. Continue in pattern, as established until back measures $14\%^{\ast}$ (15", 151/2"), ending so that next row worked wil have RS facing. Begin armhole shaping as follows: BO 6 sts at the beginning of the next 2 rows. Note: You will eliminate 1 cable on each side, but you will still have 2 plain edge sts at each side. You will have 124 (136, 148) sts total. Continue in pattern until back measures 23" (24", 25"), ending so that next row worked will have RS facing. Next row: Slip 39 (45, 51) sts to holder for right shoulder, slip 46 sts to holder for back neck, slip 39 (45, 51) sts to holder for left shoulder.
Front:
work same as tor back until plece measures $201/2^{"}$ (2112", 221/2"), ending so that next row worked will have RS facing. Begin neck shaping as follows: Next row: Work 47 (53, 59) sts in pattern, slip 30 sts to holder for front neck, slip 47 (53, 59) sts to holder and set aside. You will be working on left shoulder sts only, as follows: Turn and, keeping in pattern, BO 2 sts at the beginning of the next 3 WS rows. Then, BO 1 st at the beginning of the next 2 WS rows. You will have 39 (45, 51) sts remaining. Continue even until front measures 23" (24", 25") ending so that next row worked would have RS facing. Slip all sts to holder. Put right shoulder sts back on needle and work as follows: Work 1 RS row in pattern, as established. BO 2 sts at the beginning of the next 3 RS rows. Then, BO 1 st at the beginning of the next 2 RS rows. You will have 39 (45, 51) sts remaining. Continue even until front measures 23" (24", 25") ending so that next row worked would have RS facing. Slip all sts to holder.
Knit together and bind off shoulder seams on wS, as follows:
Slip one set of front shoulder sts onto one needle. Slip one set of the back shoulder sts onto another needle. Hold these two needles so that the RS are together and you're looking at the WS. Using a $3^{\mathsf{r d}}$ needle, knit together and bind off as follows: Insert needle through 1 st on the front needle and 1 st on the back needle, and knit these 2 sts together. Repeat for the next st on the front and back needle, then lift the first st on the right needle over the $2^{\mathsf{n d}}$ st to bind off as you would in ordinary knitting. Continue working in this manner to the end of the row. Braidy Cat (page two)
Collar:
With Size 4, 16" circular needle, work sts from back holder as follows: work [K2tog, K4] 7 times, then work K2tog, K2. Next, PU and knit 18 sts from left neck edge. Work sts from front holder as follows: work [K2tog, K4] 5 times. Next, PU and knit 18 sts from right neck edge. You will have 99 sts total. Join and knit around for $z\,\,{^1\!/}\mathrm{\Sigma}^{"}$ Next round: BO all sts loosely.
Sleeves:
With smaller needles, cast on 48 sts. $1\,^{1}/4^{\,"}$ worked will have RS facing. Next row: Knit across, increasing 16 sts evenly spaced (knit into front and back of every $3^{\mathsf{r d}}$ st). You will have 64 sts total. Next row: Switch to larger needles and P2, PM, purl to last 2 sts, PM, P2. Establish pattern as follows: Next row (RS): K2, work [Chart A over next 12 sts] 5 times, K2. Next row (WS): P2, work [Chart A over next 12 sts] 5 times, P2. Continue in pattern and, at the same time, increase 1 st at the beginning and end of every $4^{\mathrm{th}}$ row until you have a total of 106 (112, 118) sts. Note: All increase stitches should be worked in stockinette. Continue even until sleeve measures 18" (18%2", 19"), ending so that next row will have RS facing. Next row: BO all sts. Note: Do not twist cables on your BO row! Note: Sleeve length is highly individual and is affected by the fit of the body.. I strongly recommend that you complete the shoulder seams, so that the body can be tried on. With outstretched arm, measure the distance from wristbone to edge of shoulder seam.
Finishing:
Block pieces by laying them flat between 2 damp towels, overnight. Weave in loose ends. Sew side seams. Sew sleeve seams. Sew sleeves onto body. Shoulder seams will have a tendency to stretch out over time, due to the weight of the sleeves. This also makes the sleeves longer. To prevent this, l recommend reinforcing the shoulder seams with bias tape - just hand stitch it in.
Abbreviations:
$\mathsf{K}=\mathsf{K}\mathsf{n i t}$ $\mathsf{P=P}\mathsf{u r l}$ $\mathsf{P M}=$ place marker $\mathsf{K}2\mathsf{t o g}=$ knit 2 together Stockinette $=\mathsf{K}$ on RS and P on WS ${\sf R S}=$ Right side ${\sf W S}=$ Wrongside $\mathsf{B O}=$ Bind off $\mathsf{C O}=$ Caston $\mathsf{C N}=$ CableNeedle $=$ Twist 6 Right: slip 3 sts to CN and hold at back, K3, K3 from CN
$=$ Twist 6 Left: slip 3 sts to CN and hold at front, K3, K3 from CN