Book Buddy by Knitti Politi
Yarn/notions
Yarn
100% cotton dk. Most double knitting yarns will do for this design. You will need approx 50-75 g (up to 150 metres/165 yards)
Needles
4 mm (US size 6) needles.
Gauge
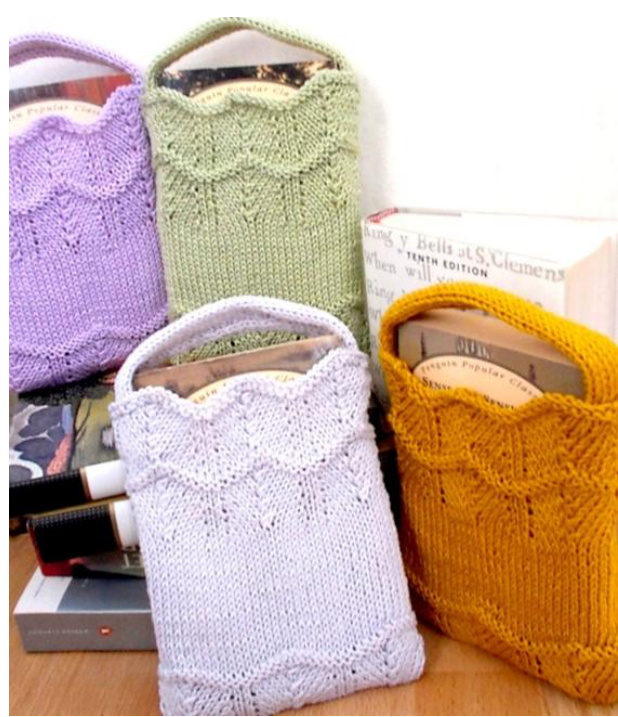
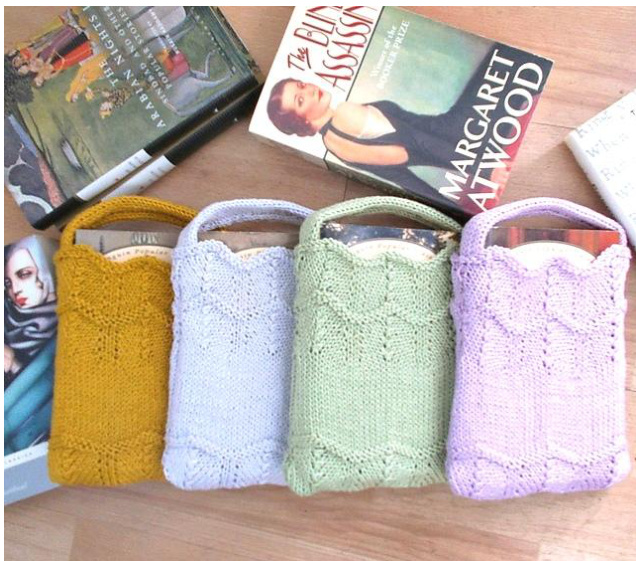
26 rows and 22 stitches over 10 x 10 cm (4 x 4 inches) in stockinette using 4 mm needles. This design was inspired by a friend who is never seen without her latest read. It's a cute little bag just the right size to fit most paperbacks (it will stretch to fit bigger ones. Makes a great gift bag and a nice little extra gift if you're giving somebody a book! Approximately 18cm wide, 23cm high: the bag will stretch out bigger than this to be able to fit most paperback books.

Abbreviations
k: knit p: purl k2tog: knit two together sl: slip a stitch psso: pass slipped stitch over yo: yarn over
Instructions
Special Instructions
To make this design as pictured in the pattern photos I made my yarn overs backwards to make a tiny eyelet increase rather than a large one. To do this: bring the yarn up from the back of the work and over the needle first to bring the yarn to the front, then bring to the back again under the needle before knitting next stitch.
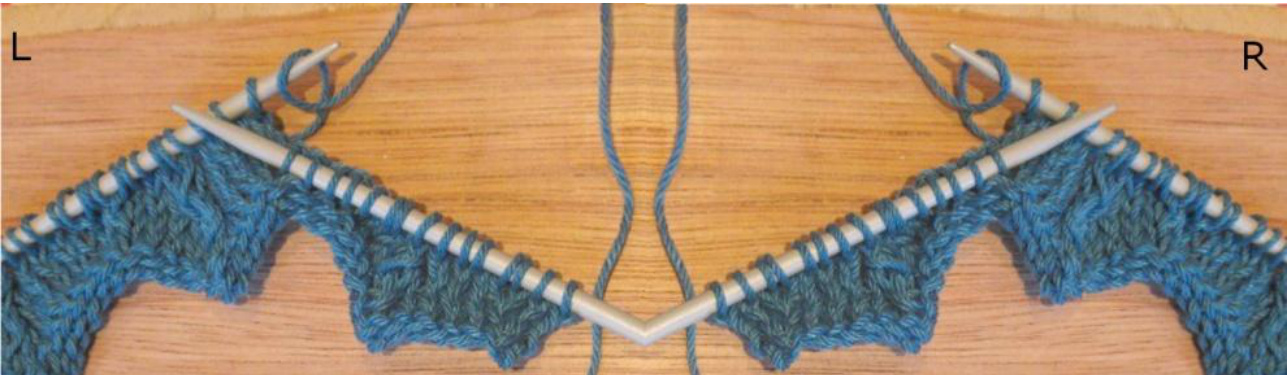
Pictures show how the yarn over loop is made using this method. R= right-handed knitting. L = left-handed knitting. Regular yarn overs will make a big eyelet so the bag will be much more lacey, but still pretty!
Bag Body (make two alike)
Cast on 41 stitches Knit one row, and then follow the pattern rows below Patternrows Row 1 : k2, \*yo, k4, sl1, k2tog, psso, k4, yo, k2, repeat from \* to end of row Rows 2, 4, 6, 8, 10: purl Rows 3, 5, 7, 9: repeat row 1 Row 11: purl Row 12: knit Repeat pattern rows 1-10 Knit the next row, purl the following row. These two rows form stocking stitch (stockinette) Continue in stocking stitch for the next 16 rows, finishing with a purl (wrong side) row With the right side facing, purl the next row and knit the following row (finishing with a wrong side row) Repeat pattern rows 1-10 Copyright @ Ellen Kapusniak 2012 For pattern support email: ellen@knittipoliti.com
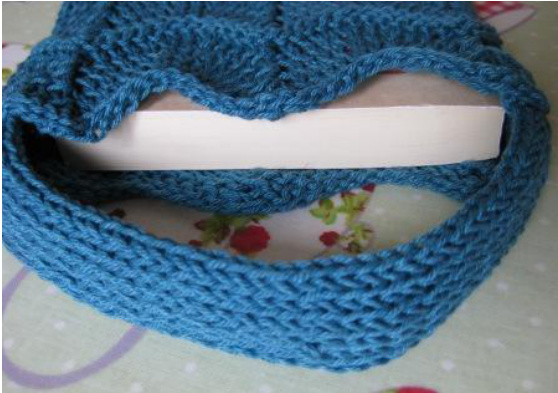
Handle
Cast on 15 stitches Knit the first row Purl the second row These two rows from stocking stitch, continue in stocking stitch until the handle is the same length as the longest part of the bag body. Bind off all stitches
Making up
Body
Place front and back together, with right sides facing each other, lining up the pattern and pin together. Sew the side and base seams of the bag together using a small back stitch. Turn the bag body right-side out.
Handle
Pressing the handle under a slightly damp cloth before sewing up will flatten out the edges, which helps when sewing it together. With the wrong side of the handle facing you, turn the two long edges of the piece inwards towards the centre so that they meet in the middle of the width of the handle and sew together using mattress stitch. Sew each end of the handle to the bag body (use a doubled over length of yarn for extra strength). Press bag lightly under a damp cloth if required Pop in a book and let the buddy take care of it!
Copyright @ Ellen Kapusniak 2012 For pattern support email: ellen@knittipoliti.com


